Table of Contents
Advertisement
Quick Links
Advertisement
Table of Contents

Related Manuals for Electrolux EKG613A1OX


Summary of Contents for Electrolux EKG613A1OX
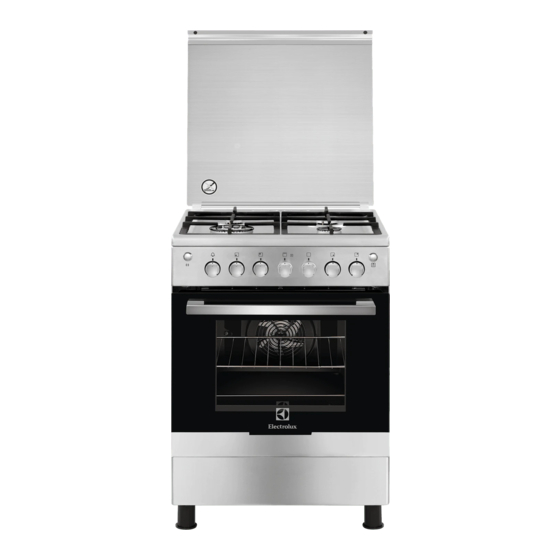
- Page 1 EKG613A1OX Cooker User Manual...
-
Page 2: Table Of Contents
14. INSTALLATION....................21 WE’RE THINKING OF YOU Thank you for purchasing an Electrolux appliance. You’ve chosen a product that brings with it decades of professional experience and innovation. Ingenious and stylish, it has been designed with you in mind. So whenever you use it, you can be safe in the knowledge that you’ll get great results every time. -
Page 3: Safety Information
ENGLISH SAFETY INFORMATION Before the installation and use of the appliance, carefully read the supplied instructions. The manufacturer is not responsible for any injuries or damages that are the result of incorrect installation or usage. Always keep the instructions in a safe and accessible location for future reference. - Page 4 Do not install the appliance on a platform. • Do not operate the appliance by means of an external • timer or separate remote-control system. WARNING: Unattended cooking on a hob with fat or • oil can be dangerous and may result in fire.
-
Page 5: Safety Instructions
ENGLISH Service Centre or similarly qualified persons to avoid an electrical hazard. To remove the shelf supports first pull the front of the • shelf support and then the rear end away from the side walls. Install the shelf supports in the opposite sequence. - Page 6 • Do not let the appliance stay installation. unattended during operation. • If the mains socket is loose, do not • Deactivate the appliance after each connect the mains plug. use. • Do not pull the mains cable to •...
- Page 7 ENGLISH • Use a deep pan for moist cakes. Fruit • Be careful when you remove the door juices cause stains that can be from the appliance. The door is permanent. heavy! • Do not keep hot cookware on the •...
-
Page 8: Product Description
2.8 Gas Grill • Contact your municipal authority for information on how to discard the WARNING! appliance correctly. Risk of fire, explosion and • Disconnect the appliance from the burns. mains supply. • Cut off the mains electrical cable •... -
Page 9: Before First Use
ENGLISH 3.2 Cooking surface layout Auxiliary burner Steam outlet - number and position depend on the model Semi-rapid burner Semi-rapid burner Rapid burner 3.3 Accessories compartment, lift the lower front door then pull it down. • Wire shelf WARNING! For cookware, cake tins, roasts. The storage compartment •... -
Page 10: Hob - Daily Use
5. HOB - DAILY USE WARNING! WARNING! Refer to Safety chapters. Do not keep the knob pushed for more than 15 seconds. If the burner does 5.1 Ignition of the hob burner not light after 15 seconds, release the knob, turn it into... -
Page 11: Hob - Hints And Tips
ENGLISH WARNING! Always turn the flame down or switch it off before you remove the pans from the burner. 6. HOB - HINTS AND TIPS 6.2 Diameters of cookware WARNING! Refer to Safety chapters. WARNING! Use cookware with 6.1 Cookware diameters applicable to the size of burners. -
Page 12: Oven - Daily Use
2. The enamel coating occasionally can before you put them back on. have rough edges, so be careful when you wash the pan supports by 7.3 Cleaning the spark plug hand and dry them. If necessary,... - Page 13 ENGLISH 8.2 Ignition of the oven gas counterclockwise to the maximum gas flow position. burner 4. When the flame comes on, keep the knob for the oven functions pushed CAUTION! on the maximum gas flow position for When turning on the oven 15 seconds or less to let the burner the oven door must thermocouple warm up.
-
Page 14: Oven - Clock Functions
3. Hold the knob for the grill pushed for CAUTION! approximately 15 seconds. Do not put the meat on the 4. Release the oven control knob. highest shelf level. There is If the grill does not come on or if it a risk of fire. - Page 15 ENGLISH 1. Open the oven door. 2. Put the turnspit handle into the spit. 3. Put the baking tray on the lowest shelf level. 4. Snap out one end of the support hook from the oven ceiling A and let it hang on the other end.
-
Page 16: Oven - Hints And Tips
Carefully remove the turnspit and the roasting pan from the oven. 11. OVEN - HINTS AND TIPS such as temperature, cooking time WARNING! and shelf position to the values in the Refer to Safety chapters. tables. • Use the lower temperature the first The temperature and baking time. -
Page 17: Oven - Care And Cleaning
ENGLISH 12. OVEN - CARE AND CLEANING WARNING! Refer to Safety chapters. 12.1 Notes on cleaning • Clean the front of the appliance with a soft cloth with warm water and a cleaning agent. 2. Pull the rear end of the shelf support •... - Page 18 To support the self-cleaning procedure, heat the empty oven on a regular basis. 1. Clean the oven floor with warm water and washing up liquid, then dry it. 2. Set the oven temperature to 250 °C and let the oven operate for 1 hour.
-
Page 19: Troubleshooting
ENGLISH 12.6 Replacing the lamp 6. Use a spatula made of wood or plastic or equivalent to open the inner Put a cloth on the bottom of the interior door. Hold the outer door, and push of the appliance. It prevents damage to the inner door against the top edge of the lamp glass cover and the cavity. - Page 20 13.1 What to do if... Problem Possible cause Remedy There is no spark when The hob is not connected Check if the hob is correct‐ you try to activate the to an electrical supply or it ly connected to the electri‐...
-
Page 21: Installation
ENGLISH 13.2 Service data plate is on the front frame of the appliance cavity. Do not remove the If you cannot find a solution to the rating plate from the appliance cavity. problem yourself, contact your dealer or an Authorised Service Centre. The necessary data for the service centre is on the rating plate. - Page 22 Natural Gas: G20 (2H) 20 mbar 14.4 Bypass diameters BURNER Ø BYPASS 1/100 mm Auxiliary 29 / 30 Semi-rapid Rapid Oven Grill 14.5 Gas burners for NATURAL GAS G20 20 mbar BURNER NORMAL POW‐ REDUCED POWER kW INJECTOR MARK...
- Page 23 ENGLISH The gas supply ramp is on the rear side of the control panel. WARNING! Before you connect the gas, disconnect the appliance from the electricity supply or switch off the fuse in the fuse box. Close the primary valve of the gas supply. 14.9 Adjustment to different types of gas WARNING!
- Page 24 B. Natural Gas pipe holder The model determines the position of C. LPG pipe holder the bypass screw A. 14.10 Hob injectors replacement Replace the injectors when you change the gas type. 1. Remove the pan supports. 2. Remove the caps and crowns of the burner.
- Page 25 ENGLISH 2. Carefully remove from the burner the Assemble the burner in a revers thermocouple A. Next remove the sequence. spark plug B. Replace the gas type sticker near the gas supply ramp with the one related to the new gas type. 14.13 Adjusting the minimum gas level on the oven burner 1.
- Page 26 2. Put the knob back. 3. Connect the appliance to the electricity. Changing from liquid gas to natural gas 1. Unscrew approximately one turn the bypass screw position A. 2. Put the knob for the oven functions back. 3. Connect the appliance to the 2.
- Page 27 ENGLISH To install all the accessories, do the first step in an opposite sequence. 14.16 Electrical installation 3. Put the appliance on the sidewall on WARNING! a clean and smooth surface. Place The manufacturer is not each foot into a separate hole, in the responsible if you do not plinth, and rotate it clockwise.
- Page 28 www.electrolux.com/shop...
Need help?
Do you have a question about the EKG613A1OX and is the answer not in the manual?
Questions and answers