Advertisement
Table of Contents
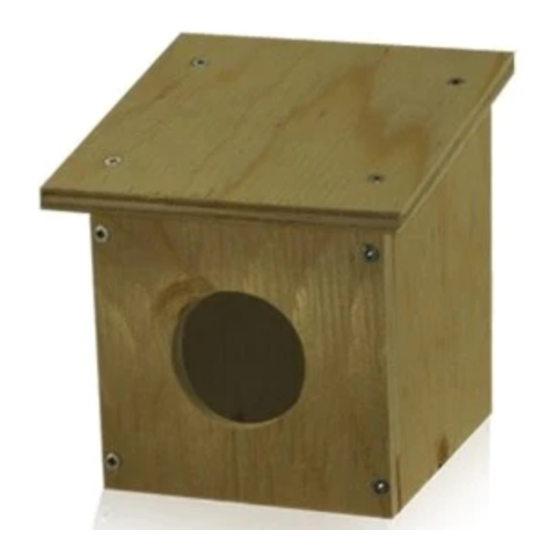
Assembly Instructions for the DXBHUF imitation birdhouse.
The DXBHUF is made from very durable and stable natural plywood.
Any real wood product will be unique with minor imperfections and flaws.
The birdhouse may be left unfinished to weather to a natural grey finish
or it may be stained or painted as desired. The birdhouse is pre-drilled for
ease of assembly and countersunk for a professional finished look.
Assembly
Locate the sides and front using the diagram A as a guide.
* Please use only a hand screwdriver to carefully install each screw.
Verify that the grooves to accept the back board are positioned on the inside before assembling. To extend the life
and strength of the finished product a common exterior wood glue may be used along with the screws.
Once the front is attached to the sides, slide the back into place along the grooves situated near the back of the sides.
Now the roof may be attached using 4 screws
being careful to keep the box square and aligning
the pre-drilled holes. The front of the roof may be
easily identified by it's front angle as shown in
diagram A1.
Advertisement
Table of Contents

Subscribe to Our Youtube Channel
Related Manuals for Optex DXBHUF


Summary of Contents for Optex DXBHUF
- Page 1 Assembly Instructions for the DXBHUF imitation birdhouse. The DXBHUF is made from very durable and stable natural plywood. Any real wood product will be unique with minor imperfections and flaws. The birdhouse may be left unfinished to weather to a natural grey finish or it may be stained or painted as desired.
- Page 2 Mounting the driveway alarm sensor Using diagram B locate the 2 screw holes to be used with the sensor that you have purchased. Screw the sensor to the back using the screws and directions supplied with your driveway alarm. The driveway alarm screws may extend beyond the back of the birdhouse allowing you to use them to also attach the birdhouse to your post.
Need help?
Do you have a question about the DXBHUF and is the answer not in the manual?
Questions and answers