
Subscribe to Our Youtube Channel
Related Manuals for ProLights DisplayCob TRWDFC


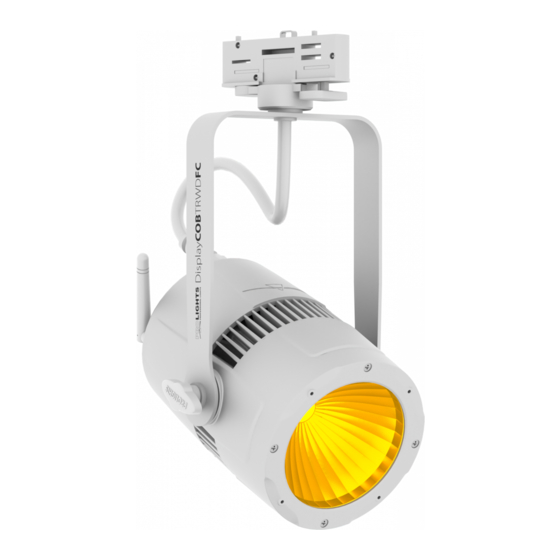
Summary of Contents for ProLights DisplayCob TRWDFC
- Page 1 DisplayCob TRWDFC 60W RGB / FC track mounted and W-DMX / DMX spotlight USER MANUAL English version REV.03-09/21...
- Page 2 PROLIGHTS product are trademarks OWNED or licensed by Music & Lights S.r.l., its affiliates, and subsidiaries. PROLIGHTS is a registered trademark by Music & Lights S.r.l. All right reserved. Music & Lights – Via A. Olivetti, snc - 04026 - Minturno (LT) ITALY.
-
Page 3: Table Of Contents
FILTER FRAME (CODE DISPLAYCOBTPGWH - OPTIONAL) .......... 16 OPTICS (CODE DISPLAYCOBL15 / 30 - OPTIONAL) ............. 17 12 - MAINTENANCE MAINTENANCE AND CLEANING THE PRODUCT............18 REPLACING THE FUSE ....................18 VISUAL CHECK OF PRODUCT HOUSING ..............18 TROUBLESHOOTING ..................... 19 PROLIGHTS - DisplayCob TRWDFC... -
Page 4: Safety Information
• Do not reapply power until repairs have been completed. • Refer any service operation not described in this manual to PROLIGHTS Service team or an authorized PROLIGHTS service center. Installation •... - Page 5 • Warning! Disconnect the fixture from AC mains power and allow to cool for at least 10 minutes before handling. • Only technicians who are authorized by PROLIGHTS or Authorised service partners are permitted to open the fixture. • Users may carry out external cleaning, following the warnings and instructions pro- vided, but any service operation not described in this manual must be referred to a qualified service technician.
- Page 6 • 2011/65/EU - Restriction of the use of certain hazardous substances (RoHS). • 2014/53/EU - Radio Equipment Directive (RED). Other approvals • The product meets the safety requirements of the certification procedures of the market in which it is placed and sold. PROLIGHTS - DisplayCob TRWDFC...
-
Page 7: Packaging
• DISPLAYCOBBDWH: barn door with 4 directional flaps to adjust the light beam, for DISPLAYCOB, WH. • WDBBOX: WDMX battery transmitter, mini 5p DMX and WIFI IN, 2.4 GHz, 0.4 kg. 2 - TECHNICAL DRAWING Fig. 01 Weight: 1.85 kg - 4.07 lbs PROLIGHTS - DisplayCob TRWDFC... -
Page 8: Installation
Warning! When clamping the fixture to a truss or other structure at any angle, use clamps of half-cou- pler type. Do not use any type of clamp that does not completely encircle the structure when fastened. RSR0630A/B C6002 Steel security cable clamp Track system 132 mm Fig. 02 [5.2 in] PROLIGHTS - DisplayCob TRWDFC... -
Page 9: Connection To The Mains Supply
• Connect the power connector into the Mains input socket (100-240 VAC-50/60 Hz). • The product is then ready for its operations and can be controlled through the available input sig- nals on board. • To disconnect power from the product, disconnect the Mains from the socket. PROLIGHTS - DisplayCob TRWDFC... -
Page 10: Product Overview
9. MAIN FUSE HOLDER: replace a burnt-out fuse by one of the same type only (T1A 250V); 10. DMX IN (5-p XLR): 1 = GND, 2 = sign-, 3 = sign+, 4 N/C, 5 N/C; 11. ANTENNA of Wireless DMX Receiver internal module. Fig. 03 PROLIGHTS - DisplayCob TRWDFC... -
Page 11: Dmx Connection
... . DMX IN DMX OUT DMX IN DMX OUT DMX IN DMX OUT DMX IN DMX OUT DMX512 Controller Fig. 05 - Example 8 DMX channels configuration PROLIGHTS - DisplayCob TRWDFC... -
Page 12: Construction Of The Dmx Termination
4. To reset the unit and link to transmitter press the MENU button until the display shows Wireless Reset, then press the ENTER button. 5. Use the UP/DOWN button until the display shows Yes, and then press the ENTER button. 6. Press the MENU button to go back. PROLIGHTS - DisplayCob TRWDFC... -
Page 13: Control Panel
• UP: browse upwards through the menu list and increases the numeric value displayed; • DOWN: browse downwards through the menu list and decreases the numeric value displayed; • ENTER: used to confirm the current menu or confirm the current function value or option within a menu. PROLIGHTS - DisplayCob TRWDFC... -
Page 14: Menu Structure
Back Light <On> Allows you to select the timing after that display will switch automatically <10S> off when unactive. <20S> <30S> Information Auto Test To view infromation about the unit. Fixture Hours <9999H> Version <V1.0> PROLIGHTS - DisplayCob TRWDFC... - Page 15 Receive Setting: used to turn on/off wireless functionality. <Off> Receive Reset: used to link fixture to transmitter. Receive Reset <No> Wireless To DMX: send received WDMX signal through DMX cable. <Yes> < No > Wireless To DMX < Yes > PROLIGHTS - DisplayCob TRWDFC...
-
Page 16: Dmx Charts
000 ÷ 051 Dimmer speed mode off 052 ÷ 101 Dimmer speed mode 1 (fast speed) 102 ÷ 152 Dimmer speed mode 2 (middle speed) 153 ÷ 203 Dimmer speed mode 3 (slow speed) 204 ÷ 255 PROLIGHTS - DisplayCob TRWDFC... -
Page 17: Accessories Installation
Push the pin (A) and open upward the frame lock gel (B). Insert the barn doors (C) into from above by inserting the linking holders into the guides (DETAIL) of the previously mounted holder. Then close the frame lock gel. Fig. 08 PROLIGHTS - DisplayCob TRWDFC... -
Page 18: Filter Frame (Code Displaycobtpgwh - Optional)
FILTER FRAME (CODE DISPLAYCOBTPGWH - OPTIONAL) DETAIL Push the pin (A) and open upward the frame lock gel (B). Insert the filter frame (C) into the guides (DETAIL) and close the frame lock gel. Fig. 09 PROLIGHTS - DisplayCob TRWDFC... -
Page 19: Optics (Code Displaycobl15 / 30 - Optional)
Remove the screws (A), front cover (B), filter (C) and the lens (D). Insert the filter (B) inside the front cover (A), and insert the new optic (C) on it. Then reassemble the parts following the reverse procedure (1). Fig. 10 PROLIGHTS - DisplayCob TRWDFC... -
Page 20: Maintenance
WARNING: the use of alcohol or any other detergent could damage the lenses. • All other service operations on the product must be carried out by PROLIGHTS, its approved service agents or trained and qualified personnel. -
Page 21: Troubleshooting
• Check if the Fuse is intact and eventually replace it if fault. necessary. • Contact the PROLIGHTS Service or authorized service partner. Do not remove parts and/or covers, or carry out any repairs or service that are not described in... - Page 22 Note...
- Page 24 PROLIGHTS is a trademark of prolights.it Via A.Olivetti snc MUSIC & LIGHTS S.r.l. support@prolights.it 04026 - Minturno (LT) ITALY musiclights.it Tel: +39 0771 72190...
Need help?
Do you have a question about the DisplayCob TRWDFC and is the answer not in the manual?
Questions and answers