Table of Contents
Advertisement
Quick Links
AV SURROUND RECEIVER
RÉCEPTEUR AUDIO-VIDÉO
AVR-2802/982
OPERATING INSTRUCTIONS
MODE D'EMPLOI
B
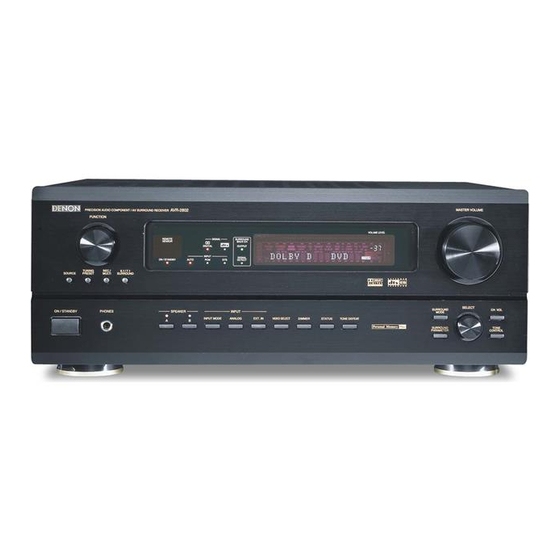
PRECISION AUDIO COMPONENT / AV SURROUND RECEIVER
FUNCTION
TUNING
REC /
6.1 / 7.1
SOURCE
PRESET
MULTI
SURROUND
ON/STANDBY
PHONES
FOR ENGLISH READERS
POUR LES LECTEURS FRANCAIS
We greatly appreciate your purchase of the AVR-2802/982.
2
To be sure you take maximum advantage of all the features the AVR-2802/982 has to offer, read these instructions
2
carefully and use the set properly. Be sure to keep this manual for future reference should any questions or
problems arise.
Nous vous remercions de l'achat de l'AVR-2802/982.
2
Pour être sûr de profiter au maximum de toutes les caractéristiques qu'a à offrir l'AVR-2802/982, lire avec soin ces
2
instructions et bien utiliser l'appareil. Toujours conserver ce mode d'emploi pour s'y référer ultérieurement en cas
de question ou de problème.
AVR- 2802
REMOTE
SIGNAL
SURROUND
SENSOR
BACK CH
DIGITAL
OUTPUT
INPUT
SIGNAL
STAND BY
AUTO
PCM
DTS
DETECT
SPEAKER
INPUT
INPUT MODE
ANALOG
EXT. IN
VIDEO SELECT
DIMMER
STATUS
A
B
PAGE
02 ~
PAGE 065
PAGE
2, 66 ~
PAGE 127
MASTER VOLUME
VOLUME LEVEL
SURROUND
SELECT
CH VOL
MODE
TONE DEFEAT
SURROUND
TONE
PARAMETER
CONTROL
RC-903
START
LEARNED/TX
SYSTEM CALL
POWER
SET
CALL
OFF
ON / SOURCE
DVD
VDP
TUNER
SHIFT
1
2
3
TV/DBS
V.AUX
PHONO
4
5
6
VCR-1
CD
CDR / TAPE
CHANNEL
7
8
9
VCR-2/V.AUX
TV/VCR
+10
0
A / B
VOLUME
DISC SKIP+
DOLBY / DTS
SURR.SP
SURROUND
DIRECT
DSP SIMULATION 5CH / 6CH STEREO
STEREO
MASTER VOL.
INPUT MODE
ANALOG
EXT.IN
TAPE
CDR/MD
AUDIO
CD
MULTI
MUTING
AVR/AVC
VIDEO
DVD
TV
VDP VCR
SYSTEM
SURROUND
TUNING
SETUP
PARAMETER
TITLE
MENU/GUIDE
BAND
CH SELECT
ENTER
MODE
SELECT
MEMORY
STATUS
ON SCREEN
DISPLAY
RETURN
USE/LEARN T.TONE
MULTI
OUTPUT
SET UP
Advertisement
Table of Contents

Related Manuals for Denon AVR-2802/982


Summary of Contents for Denon AVR-2802/982
-
Page 1: Operating Instructions
We greatly appreciate your purchase of the AVR-2802/982. To be sure you take maximum advantage of all the features the AVR-2802/982 has to offer, read these instructions carefully and use the set properly. Be sure to keep this manual for future reference should any questions or problems arise. -
Page 2: R6P/Aa Batteries
ENGLISH FRANCAIS SAFETY PRECAUTIONS • FOR CANADA MODEL ONLY CAUTION WARNING: TO PREVENT FIRE OR SHOCK HAZARD, DO NOT EXPOSE TO PREVENT ELECTRIC SHOCK, MATCH WIDE BLADE OF PLUG THIS APPLIANCE TO RAIN OR MOISTURE. TO WIDE SLOT, FULLY INSERT. •... - Page 3 SAFETY INSTRUCTIONS Read Instructions – All the safety and operating instructions Power-Cord Protection – Power-supply cords should be should be read before the appliance is operated. routed so that they are not likely to be walked on or pinched by items placed upon or against them, paying particular Retain Instructions –...
-
Page 4: Table Of Contents
INTRODUCTION Thank you for choosing the DENON AVR-2802/982 Digital Surround A / V receiver. This remarkable component has been engineered to provide superb surround sound listening with AV theater sources such as DVD, as well as providing outstanding high fidelity reproduction of your favorite music sources. -
Page 5: Cautions On Handling
Dolby Pro Logic II is a new format for playing multichannel audio new multi-channel format developed by Digital Theater Systems Inc. The AVR-2802/982 is also compatible with DTS Neo:6, a surround signals that offers improvements over conventional Dolby Pro mode allowing 6.1-channel playback of regular stereo sources. -
Page 6: Connections
ENGLISH 5 CONNECTIONS • Do not plug in the AC cord until all connections have been • Note that binding pin plug cords together with AC cords or placing completed. them near a power transformer will result in generating hum or •... - Page 7 ENGLIS Connecting video components • To connect the video signal, connect using a 75 Ω/ohms video signal cable cord. Using an improper cable can result in a drop in video quality. • When making connections, also refer to the operating instructions of the other components. Connecting a TV/DBS tuner TV or DBS tuner TV/DBS...
- Page 8 ENGLISH Connecting a video component equipped with S-Video jacks • When making connections, also refer to the operating instructions of the other components. • A note on the S input jacks The input selectors for the S inputs and pin jack inputs work in conjunction with each other. •...
- Page 9 In addition, the video signals input to the VIDEO input (yellow) and S-Video input jacks are not output to the color difference (component) video jacks. • The AVR-2802/982’s on-screen display signals are not output from the color difference (component) video output jacks (MONITOR OUT). • Some video sources with component video outputs are labeled Y, C , or Y, Pb, Pr, or Y, R-Y, B-Y.
- Page 10 ENGLISH Connecting the antenna terminals AM LOOP DIRECTION OF ANTENNA BROADCASTING (Supplied) STATION FM ANTENNA 75 Ω/ohms COAXIAL CABLE AM OUTDOOR ANTENNA FM INDOOR ANTENNA (Supplied) GROUND • An F-type FM antenna cable plug can be connected directly. AM loop antenna assembly Connection of AM antennas Connect to the AM antenna terminals.
- Page 11 ENGLIS Connecting the external input (EXT. IN) jacks • These jacks are for inputting multi-channel audio signals from an outboard decoder, or a component with a different type of multi-channel decoder, such as a DVD Audio player, or a multi-channel SACD player, or other future multi-channel sound format decoder. •...
- Page 12 If the protection circuit is activated again even though there are no problems with the wiring or the ventilation around the unit, switch off the power and contact a DENON service center. Note on speaker impedance •...
- Page 13 ENGLIS Connections • When making connections, also refer to the operating instructions of the other components. SURROUND BACK SPEAKER SYSTEMS SURROUND BACK SPEAKER SYSTEM NOTE: When using two surround back speakers, connect the integrated Connection jack pre-main amplifier to the pre-out subwoofer with built-in jacks (SBL and SBR).
-
Page 14: Part Names And Functions
ENGLISH 6 PART NAMES AND FUNCTIONS Front Panel • For details on the functions of these parts, refer to the pages given in parentheses ( ). AVR-2802 PRECISION AUDIO COMPONENT / AV SURROUND RECEIVER MASTER VOLUME FUNCTION VOLUME LEVEL REMOTE SIGNAL SURROUND SENSOR... - Page 15 SYSTEM SETUP button ....(17, 26) STATUS button ........(39) Multi source button ......(40) NOTE • The shaded buttons do not function with the AVR-2802/982. (Nothing happens when they are pressed.) The button indicated , however, can be used with the learning function.
-
Page 16: Setting Up The System
• The on-screen display signals are output with priority to the S-VIDEO MONITOR OUT jack during playback of a video component. For example, if the TV monitor is connected to both the AVR-2802/982’s S-Video and video monitor output jacks and signals are input to the AVR-2802/982 from a video source (VDP, etc.) connected to both the S-Video and video input jacks, the on-screen display signals are output with priority to... - Page 17 ENGLIS • Speaker system layout Basic system layout • The following is an example of the basic layout for a system consisting of seven speaker systems and a television monitor: Subwoofer Center speaker system Surround back speaker systems Front speaker systems Set these at the sides of the TV or screen with their front surfaces as flush with the front of the Surround speaker systems...
- Page 18 ENGLISH Set whether or not speakers are connected and, if so, their size parameters. • To select the speaker • To select the parameter Center Sp. Front Sp. Subwoofer Surround Sp. Surround back Sp. Press the ENTER button to finalize the setting. ENTER NOTE: •...
- Page 19 ENGLIS Setting the Crossover Frequency and Subwoofer mode This screen is not displayed when not using a subwoofer. • Set the crossover frequency and subwoofer mode according to the speaker system being used. Select the “Crossover Frequency” mode. Select the frequency. Select the “Subwoofer Mode”.
- Page 20 ENGLISH Setting the SB CH Auto Flag Detect Set the operation for the digital signals when playing in the 6.1 SURROUND and DTS-ES surround modes. At the System Setup Menu select “SB CH Auto Flag ENTER Detect” and press the ENTER button. Select the desired setting.
- Page 21 ENGLIS Setting the delay time • Input the distance between the listening position and the different speakers to set the delay time for the surround mode. • The delay time can be set separately for surround speakers A and B. Preparations: Center Measure the distances between the listening position and the speakers (L1 to L5 on the diagram at...
- Page 22 ENTER The System Setup Menu reappears. The AVR-2802/982 automatically sets the optimum surround delay time for the listening room. NOTE: • If the distance unit is changed after the delay time is set, the settings are reset to the factory default values (see page 16).
- Page 23 ENGLIS Select the mode. Select “Auto” or “Manual”. • Auto: Adjust the level while listening to the test tones produced automatically from the different speakers. • Manual: Select the speaker from which you want to produce the test tone to adjust the level.
- Page 24 MD recorder or other digital recorder. Use this for digital recording between a digital audio source (stereo - 2 channel) and a digital audio recorder. • Do not connect the output of the component connected to the OPTICAL 3 OUT jack on the AVR-2802/982’s rear panel to any jack other than the OPTICAL 3 IN jack.
- Page 25 ENGLIS Setting the on-screen display (OSD) • Use this to turn the on-screen display (messages other than the menu screens) on or off. At the System Setup Menu select “On Screen Display”. Switch to the On Screen Display screen. ENTER Select “ON”...
- Page 26 SYSTEM SETUP The changed settings are entered and the on-screen display turns off. TITLE • On-screen display signals Signals input to the AVR-2802/982 On-screen display signal output VIDEO MONITOR OUT video S-video MONITOR OUT video VIDEO signal input jack (yellow)
-
Page 27: Remote Control Unit
8 REMOTE CONTROL UNIT • The included remote control unit (RC-903) can be used to operate not only the AVR-2802/982 but other remote control compatible DENON components as well. Furthermore, it is equipped with a function for learning the control signals of remote control units of other manufacturers, so it can also be used to operate non-DENON remote control compatible video components. - Page 28 ENGLISH Operating DENON audio components • Turn on the power of the different components before operating them. Set mode switch 1 to “AUDIO (AVR/AVC)”. AUDIO RC-903 START LEARNED/TX SYSTEM CALL POWER CALL ON / SOURCE TUNER SHIFT AVR/AVC VIDEO TV/DBS...
- Page 29 Preset memory (Video component) • DENON and other makes of components can be operated by setting the preset memory for your make of video component. Operation is not possible for some models, however. In this case use the learning function (see page 32) to store the remote control signals.
- Page 30 DIRECT STEREO EXT.IN DIRECT STEREO EXT.IN (DIRECT) (STEREO) (EXT. IN) (DIRECT) (STEREO) (EXT. IN) q (DVD) q (DVD) DENON A DENON B — DENON A DENON B DENON C w (VDP) w (VDP) — — — — — — e (TUNER) e (TUNER) —...
- Page 31 ENGLIS Operating a video component stored in the preset memory Set the slide switch to “VIDEO”. AUDIO RC-903 START LEARNED/TX SYSTEM CALL POWER CALL ON / SOURCE TUNER SHIFT AVR/AVC VIDEO TV/DBS PHONO VCR-1 CDR/TAPE CHANNEL Set the slide switch to the component to be registered (DVD, VCR-2/V.AUX TV/VCR A / B...
- Page 32 ENGLISH Learning function • If your AV component is not a DENON product or it cannot be operated with the preset memory codesets, you can “teach” the AVR-2802/982’s remote control to “learn” the codes from the component’s original remote control.
- Page 33 ENGLIS System call function • The included remote control unit is equipped with a system call function for transmitting multiple remote control signals when a single button is pressed (this is often referred to as a “macro” function). This function can be used to turn on the amplifier’s power, select the input source, turn on the monitor TV’s power, turn on a source component’s power and start playback, etc., all at the touch of a button.
- Page 34 ENGLISH (3) Storing signals (4) Clearing system call settings RC-903 RC-903 START LEARNED/TX START LEARNED/TX SYSTEM CALL POWER SYSTEM CALL POWER CALL ON / SOURCE CALL ON / SOURCE TUNER SHIFT TUNER SHIFT TV/DBS PHONO TV/DBS PHONO VCR-1 CDR / TAPE CHANNEL VCR-1 CDR / TAPE...
-
Page 35: Operation
ENGLIS Clearing “learned” remote control signals To clear “learned” remote control signals, set the slide switch RC-903 START LEARNED/TX SYSTEM CALL POWER CALL ON / SOURCE to the position at which the signals were “learned”. TUNER SHIFT TV/DBS PHONO VCR-1 CDR / TAPE CHANNEL AUDIO... - Page 36 In this mode, the types of signals being input to the digital and analog input jacks for the selected input source are detected and the program in the AVR-2802/982’s surround decoder is selected automatically upon playback. This mode can be selected for all...
- Page 37 ENGLIS Input mode display Select the play mode. One of these lights, depending on the Press the SURROUND MODE button, then turn the SELECT input signal. • In the AUTO mode knob. INPUT AUTO Example: Stereo DIGITAL ANALOG SURROUND SELECT MODE STEREO •...
- Page 38 ENGLISH Playback using the external input (EXT. IN) jacks Set the external input (EXT. EXT.IN IN) mode. EXT.IN Press the EXT. IN to switch VOLUME LEVEL REMOTE SIGNAL SENSOR LOCK DIGITAL INPUT the external input. STAND BY AUTO DIGITAL (Main unit) (Remote control unit) Once this is selected, the input signals connected to the FL (front left), FR (front right) and C (center) channels of the EXT.
- Page 39 ENGLIS [2] Listening over headphones Connect the headphones to the NOTE: PHONES PHONES jack of the front panel. To prevent hearing loss, do not raise the volume level excessively when using headphones. VOLUME LEVEL REMOTE SIGNAL SENSOR LOCK DIGITAL INPUT STAND BY AUTO DIGITAL...
- Page 40 TUNING SETUP PARAMETER (Main unit) TITLE MENU/GUIDE BAND CH SELECT ENTER MODE • When the AVR-2802/982 is the REC SELECT MEMORY STATUS ON SCREEN OUT mode, the source cannot be MULTI DISPLAY RETURN output using the MULTI button on the USE/LEARN T.TONE...
- Page 41 • When a sold separately room-to-room remote control unit (DENON RC-616, 617 or 618) is wired and connected between the main room and another room, the remote-controllable devices in the main room can be controlled from another room using the remote control unit.
-
Page 42: Surround
ENGLISH 10 SURROUND Before playing with the surround function • Before playing with the surround function, be sure to use the test tones to adjust the playback level from the different speakers. This adjustment can be performed with the system setup (see page 22) or from the remote control unit, as described below. •... - Page 43 ENGLIS Fader function • This function makes it possible to lower the volume of the front channels (FL, C and FR) or the rear channels (SL and SR) together. Use it for example to adjust the balance of the sound from the different positions when playing multi-channel music sources. Select “FADER”.
- Page 44 • There are four Dolby Surround Pro Logic modes (NORMAL, or towards the rear. PHANTOM, WIDE and 3 STEREO). The AVR-2802/982 sets the The control can be set in 7 steps from o to 6. mode automatically according to the types of speakers set Center Width Control: during the system setup process (page 17).
- Page 45 ENGLIS Dolby Digital mode (only with digital input) and DTS Surround mode (only with digital input) Select the input source. Playback with a digital input q Select an input source set to digital (COAXIAL/OPTICAL). (see page 24). FUNCTION VOLUME LEVEL (Main unit) (Remote control unit) w Set the input mode to “AUTO”...
- Page 46 ENGLISH Display the SURROUND SURROUND PARAMETER surround parameter PARAMETER menu. MENU/GUIDE (Main unit) (Remote control unit) NOTE: The display on the screen differs depending on whether you are performing the operation from the main unit or the remote control unit. Select the various parameters.
-
Page 47: Dsp Surround Simulation
11 DSP SURROUND SIMULATION • The AVR-2802/982 is equipped with a high performance DSP (Digital Signal Processor) which uses digital signal processing to synthetically recreate the sound field. One of six preset surround modes can be selected according to the program source and the parameters can be adjusted according to the conditions in the listening room to achieve a more realistic, powerful sound. - Page 48 ENGLISH DSP surround simulation • To operate the surround mode and surround parameters from the remote control unit. Select the surround mode for the input channel. VCR-2/V.AUX TV/VCR A / B DOLBY / DTS SURROUND DIRECT VOLUME DISC SKIP+ DOLBY / DTS DSP SIMULATION 5CH / 6CH STEREO STEREO SPEAKER...
- Page 49 ENGLIS • Operating the surround mode and surround parameters from the main unit‘s panel. Turn the SELECT knob to select the surround mode. VOLUME LEVEL REMOTE SIGNAL SENSOR LOCK DIGITAL INPUT STAND BY AUTO DIGITAL SELECT (Main unit) • When turned clockwise DIRECT STEREO DOLBY PRO LOGIC...
- Page 50 ENGLISH Tone control setting • Use the tone control setting to adjust the bass and treble as desired. • To operate the tone control from the remote control unit. Display the surround parameter SURROUND screen on the monitor. PARAMETER RC-903 START LEARNED/TX SYSTEM CALL...
- Page 51 ENGLIS Surround parameters e MODE: (DTS NEO:6) • Cinema This mode is optimum for playing movies. Decoding is performed with emphasis on separation performance to achieve the same atmosphere with 2-channel sources as with 6.1-channel sources. This mode is effective for playing sources recorded in conventional surround formats as well, because the in-phase component is assigned mainly to the center channel (C) and the reversed phase component to the surround (SL, SR and SB channels).
- Page 52 ENGLISH Surround modes and parameters Channel output When When When When playing playing playing playing Dolby ANALOG Digital signals signals signals SURROUND SUB- SURROUND signals Mode FRONT L/R CENTER WOOFER BACK L/R DIRECT STEREO EXTERNAL INPUT * Only for 2 ch contents. DOLBY PRO LOGIC DTS NEO:6 DOLBY DIGITAL (6.1 SURROUND)
-
Page 53: Listening To The Radio
ENGLIS 12 LISTENING TO THE RADIO Auto tuning Set the input function to “TUNER”. FUNCTION TUNER VOLUME LEVEL REMOTE SIGNAL SENSOR LOCK DIGITAL INPUT STAND BY AUTO DIGITAL (Main unit) (Remote control unit) Watching the display, press the BAND button to select the desired band (AM or FM). - Page 54 ENGLISH Preset memory Use the “Auto tuning” or “Manual tuning” operation to tune in the station to be preset in the memory. Press the MEMORY button. RC-903 START LEARNED/TX SYSTEM CALL POWER CALL ON / SOURCE TUNER SHIFT MEMORY TV/DBS PHONO VCR-1 CDR / TAPE...
-
Page 55: Last Function Memory
ENGLIS Recalling preset stations • To call out out preset stations from the remote control unit. RC-903 START LEARNED/TX SYSTEM CALL POWER Watching the display, press the CALL ON / SOURCE TUNER SHIFT SHIFT button to select the preset SHIFT TV/DBS PHONO memory block. -
Page 56: Troubleshooting
ENGLISH 15 TROUBLESHOOTING If a problem should arise,first check the following. 1. Are the connections correct ? 2. Have you operated the receiver according to the Operating Instructions ? 3. Are the speakers, turntable and other components operating property ? If this unit is not operating properly, check the items listed in the table below. -
Page 57: Additional Information
ENGLIS 16 ADDITIONAL INFORMATION Optimum surround sound for different sources There are currently various types of multi-channel signals (signals or formats with more than two channels). Types of multi-channel signals Dolby Digital, Dolby Pro Logic, DTS, high definition 3-1 signals (Japan MUSE Hi-Vision audio), DVD-Audio, SACD (Super Audio CD), MPEG multi- channel audio, etc. - Page 58 With this set, speaker(s) for 1 or 2 channels are required to achieve a 6.1-channel system (DTS-ES, etc.). Adding these speakers, however, increases the surround effect not only with sources recorded in 6.1 channels but also with conventional 2- to 5.1-channel sources. All the Denon original surround modes (see page 47) are compatible with 7.1-channel playback, so you can enjoy 6.1-channel sound with any signal source.
- Page 59 ENGLIS Speaker setting examples Here we describe a number of speaker settings for different purposes. Use these examples as guides to set up your system according to the type of speakers used and the main usage purpose. 1. DTS-ES compatible system (using surround back speakers) (1) Basic setting for primarily watching movies •...
- Page 60 ENGLISH Surround The AVR-2802/982 is equipped with a digital signal processing circuit that lets you play program sources in the surround mode to achieve the same sense of presence as in a movie theater. Dolby Surround (1) Dolby Digital (Dolby Surround AC-3) Dolby Digital is the multi-channel digital signal format developed by Dolby Laboratories.
- Page 61 AVR-2802/982, or may only produce noise. Before playing DTS signals for the first time, turn down the master volume to a low level, start playing the DTS disc, then check whether the DTS indicator on the AVR-2802/982 (see page 45) lights before turning up the master volume.
- Page 62 ENGLISH DTS-ES Extended Surround DTS-ES Extended Surround is a new multi-channel digital signal format developed by Digital Theater Systems Inc. While offering high compatibility with the conventional DTS Digital Surround format, DTS-ES Extended Surround greatly improves the 360-degree surround impression and space expression thanks to further expanded surround signals.
- Page 63 ENGLIS System setup items and default values (set upon shipment from the factory) System setup Default settings Input the combination of speakers in your system and their Front Sp. Center Sp. Sub Woofer Surround Sp. Surround Back Sp. Speaker corresponding sizes (SMALL for regular speakers, LARGE for full- Configuration size, full-range) to automatically set the composition of the signals Large...
- Page 64 ENGLISH Surround modes and parameters Channel output When When When When playing playing playing playing Dolby ANALOG Digital signals signals signals SURROUND SUB- SURROUND signals Mode FRONT L/R CENTER WOOFER BACK L/R DIRECT STEREO EXTERNAL INPUT * Only for 2 ch contents. DOLBY PRO LOGIC DTS NEO:6 DOLBY DIGITAL (6.1 SURROUND)
-
Page 65: Specifications
ENGLIS 17 SPECIFICATIONS Audio section • Power amplifier (8 Ω/ohms, 20 Hz ~ 20 kHz with 0.05% T.H.D.) Rated output: Front: 90 W + 90 W 135 W + 135 W (6 Ω/ohms, 1 kHz with 0.7% T.H.D.) (8 Ω/ohms, 20 Hz ~ 20 kHz with 0.05% T.H.D.) Center: 90 W (6 Ω/ohms, 1 kHz with 0.7% T.H.D.) - Page 66 14-14, AKASAKA 4-CHOME, MINATO-KU, TOKYO 107-8011, JAPAN Telephone: (03) 3584-8111 Printed in Japan 511 3799 009...
- Page 70 AVR-2802 System Setup Guide & Recommendations Be sure all components are properly connected, and that the Speakers are placed and wired correctly to the AVR-2802 (and amplifier if setup for Surround EX/dts ES) before starting the System Setup. (Speaker and Amplifier Hook-up diagrams are attached at the end of this document) Be sure the AVR-2802’s Monitor 1 Video Output (S-video or composite) is connected to the appropriate video input on the TV/Monitor/PTV.
- Page 71 (80 Hz and down) at any volume level. • Should there be a subwoofer in the system, Denon recommends that no matter what the physical size of the loudspeakers are, select ‘Small’ for the Fronts, Center, and Surrounds.
- Page 72 DELAY TIME This menu allows you to easily configure the delay times for all the speakers, including the subwoofer, in the system. We suggest you use a tape measure to help you be as accurate as possible. This is a performance advantage over other receivers that allow only center channel (front and/or rear) delay time adjustment.
- Page 73 Use the “Up/Down” arrows to raise/lower the level from each channel, and use the “Left/Right” arrows to select the channel to adjust. Take your time! • We recommend that once you have completed adjusting the levels, to write down and secure, the levels for every channel. This will help you to reset the system quickly to reference if someone changes the levels, which you know will happen.
Need help?
Do you have a question about the AVR-2802/982 and is the answer not in the manual?
Questions and answers