Table of Contents
Advertisement
Quick Links
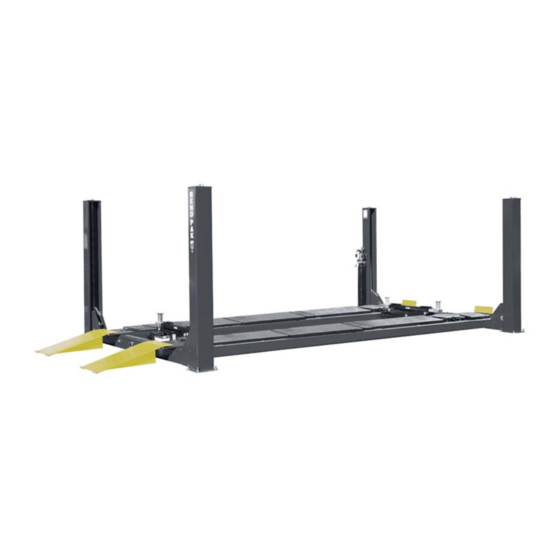
Heavy-Duty, Four-Post Alignment Lift
Installation and Operation Manual
Manual P/N 5900970 — Manual Revision C1 — February 2019
Model:
• HDS-18EA
Designed and engineered by BendPak Inc. in Southern California, USA. Made in China.
⚠
DANGER
entire
Read the
contents of this manual
product. Failure to follow the instructions and safety precautions in
this manual can result in serious injury or death. Make sure all other
operators also read this manual. Keep the manual near the product
for future reference. By proceeding with installation and operation,
you agree that you fully understand the contents of this manual.
1645 Lemonwood Dr.
Santa Paula, CA 93060 USA
Toll Free: (800) 253-2363
Tel: (805) 933-9970
bendpak.com
before
using this
Advertisement
Table of Contents

Related Manuals for BendPak HDS-18EA


Summary of Contents for BendPak HDS-18EA
- Page 1 Heavy-Duty, Four-Post Alignment Lift Installation and Operation Manual Manual P/N 5900970 — Manual Revision C1 — February 2019 Model: • HDS-18EA Designed and engineered by BendPak Inc. in Southern California, USA. Made in China. ⚠ entire before Read the contents of this manual using this product.
- Page 2 Copyright. Copyright © 2019 by BendPak Inc. All rights reserved. You may make copies of this document if you agree that: you will give full attribution to BendPak Inc., you will not make changes to the content, you do not gain any rights to this content, and you will not use the copies for commercial purposes.
-
Page 3: Table Of Contents
This manual describes the HDS-18EA Alignment Lift, which is a heavy-duty, four-post alignment/service Lift that can raise vehicles up to 18,000 pounds (8,165 kg). This manual is mandatory reading for all users of the HDS-18EA, including anyone who installs, uses, maintains, repairs, or wants to know more about it. -
Page 4: Shipping Information
Keep this manual on or near the product for future reference. Read and follow the warnings and instructions on the labels on the product. Contact BendPak at (800) 253-2363 or if you need replacement labels or a techsupport@bendpak.com... -
Page 5: Additional Products
There are additional products you can use with your Lift: • Aligner. An Aligner is a hardware/software product that lets you perform wheel alignments. If you already have an Alignment Lift, like the HDS-18EA, simply purchase the Aligner and you can start performing wheel alignments. Refer to the Aligner page on the BendPak website for more information. -
Page 6: Components
Rolling Bridge Jacks. An optional, separate product that raises wheels of the vehicle on the Lift off the Runway, making it easier to perform brake jobs and suspension work while the vehicle is still on the Lift. Refer to the Rolling Bridge Jack page on the BendPak website for more information. - Page 7 Drawing not necessarily to scale. Some components not shown. Aligner is a separate product; it is not opposite included with the Lift. The Front of the Lift is the end the Ramps. HDS-18EA Alignment Lift P/N 5900970 — Rev. C1 — Feb. 2019...
-
Page 8: Faqs
The HDS-18EA can also be used as a Service Lift or a Parking Lift. A Service Lift gives access to the underside of a vehicle for maintenance tasks. A Parking Lift lets you park one vehicle on the Runways and a second vehicle under the Runways. -
Page 9: Specifications
Specifications Side View Top View HDS-18EA Alignment Lift P/N 5900970 — Rev. C1 — Feb. 2019... - Page 10 135" is 50 percent of the Lift’s rated capacity (9,000 lbs when the rated capacity is 18,000 lbs). Special voltages available on request. Specifications subject to change without notice. HDS-18EA Alignment Lift P/N 5900970 — Rev. C1 — Feb. 2019...
-
Page 11: Installation Checklist
29. Lubricate the Lift. ☐ 30. Bleed the Hydraulic Cylinder. ☐ 31. Perform an Operational Test. ☐ 32. Review the Final Checklist. ☐ 33. Leave the manual for the owner/operator. HDS-18EA Alignment Lift P/N 5900970 — Rev. C1 — Feb. 2019... -
Page 12: Installation
Medium crescent wrench, torque wrench, pipe wrench • Chalk line • Medium-sized flat screwdriver and needle-nose pliers • Tape measure (25 feet or above) • Two sawhorses • Forklift or Shop Crane • 12-foot ladder HDS-18EA Alignment Lift P/N 5900970 — Rev. C1 — Feb. 2019... - Page 13 NOTICE Because your Lift is an Alignment Lift, you want to You can level your Lift in two ways: first, by shimming the Posts and second by HDS-18EA Alignment Lift P/N 5900970 — Rev. C1 — Feb. 2019...
- Page 14 Do not shim a Post more than half an inch using the provided Shims and Anchor Bolts. A maximum shim of 2 inches is possible by ordering optional Shim Plates. Contact BendPak at (800) 253-2363, extension 191 to order. Please have the model and serial number of your Lift available.
- Page 15 Total Length value; this includes the Ramps, which are not taken into consideration for creating Chalk Line Guides. Drawing not necessarily to scale. Some components not shown. HDS-18EA Alignment Lift P/N 5900970 — Rev. C1 — Feb. 2019...
- Page 16 Do not use Shims and/or Anchor Bolts to Shim more than half an inch per Post. You can order Shim plates 2 inch for extreme cases. 4. Do not anchor the Posts at this point. HDS-18EA Alignment Lift P/N 5900970 — Rev. C1 — Feb. 2019...
- Page 17 The following drawing shows both Crosstubes and additional components. Drawing not necessarily to scale. Some components not shown. Crosstubes have a Crosstube Gusset on both ends, for a total of four Crosstube Gussets per Lift. HDS-18EA Alignment Lift P/N 5900970 — Rev. C1 — Feb. 2019...
- Page 18 Posts that it goes between, lower it to just over the top of the Post, orient the Slide Blocks over the openings in the Posts, then slide the Crosstube down. 4. Perform Steps 2 and 3 for the second Crosstube. HDS-18EA Alignment Lift P/N 5900970 — Rev. C1 — Feb. 2019...
- Page 19 Slack Safeties away from the Ladder so that the Slack Safeties cannot engage. However, if a Cable were to break (which very rarely happens), the Slack Safety for the broken Cable immediately engages, preventing the Runways from falling. HDS-18EA Alignment Lift P/N 5900970 — Rev. C1 — Feb. 2019...
- Page 20 Make sure to install the Ladders correctly. If they are not installed correctly, the Safety Locks on your Lift may not hold the weight of a vehicle, putting anyone under the Lift in danger. HDS-18EA Alignment Lift P/N 5900970 — Rev. C1 — Feb. 2019...
- Page 21 The other hole in the Top Cap is for the Cable that is routed to the top of the Post, which Note: is done later in the installation. 6. Install the other three Top Caps the same way. HDS-18EA Alignment Lift P/N 5900970 — Rev. C1 — Feb. 2019...
- Page 22 (they are connected and will move together) back towards the Ladder and the back of the Post. 3. Once both Crosstubes are in position, all Primary Safeties are engaged, and the Slack Safeties have been disengaged, you can continue with the installation. HDS-18EA Alignment Lift P/N 5900970 — Rev. C1 — Feb. 2019...
- Page 23 Stop Nut will be used later to make sure the Lift is level. They can be securely tightened after you do the final leveling of the Lift; refer to Final Leveling for additional information. HDS-18EA Alignment Lift P/N 5900970 — Rev. C1 — Feb. 2019...
- Page 24 Powerside Runway, and it is next to the Power Post. The following drawing shows the correct orientation of the Runways. HDS-18EA Alignment Lift P/N 5900970 — Rev. C1 — Feb. 2019...
- Page 25 Do not continue with the installation until you have visually confirmed that all four Safety Locks are engaged. If they are not engaged, the Runways could move or fall, possibly causing personal injury or product damage. HDS-18EA Alignment Lift P/N 5900970 — Rev. C1 — Feb. 2019...
- Page 26 3. On the inside of the Powerside Runway, screw the Plastic Nut back onto the Threads of the Flex Tube and tighten it. 4. Let the other end of the Flex Tube hang in place until the Flex Tube Bracket Plate is installed. HDS-18EA Alignment Lift P/N 5900970 — Rev. C1 — Feb. 2019...
- Page 27 The Ferrule goes around the Rod and under the Threads. The Nut goes onto the Threads. 6. Tighten the Nut. Remember that the Ferrule can only be used once; do not tighten the Nut until everything is ready. HDS-18EA Alignment Lift P/N 5900970 — Rev. C1 — Feb. 2019...
- Page 28 Return Line and the Air Lines do completely different things and must be kept separate from each other. The following drawing shows where the Return Line connects on the Lift. HDS-18EA Alignment Lift P/N 5900970 — Rev. C1 — Feb. 2019...
- Page 29 8. Leave the Power Unit end of the Return Line hanging out of the Flex Tube for now. It will be connected to an Elbow Compression Fitting and to the Power Unit later in the installation. HDS-18EA Alignment Lift P/N 5900970 — Rev. C1 — Feb. 2019...
- Page 30 The Air Line Elbow Connectors on the Crosstube Gussets come installed from the factory. Drawing not to scale. Some components not shown. Air Lines shown outside Steel Tubes for clarity. HDS-18EA Alignment Lift P/N 5900970 — Rev. C1 — Feb. 2019...
- Page 31 5. Leave the Power Unit end of the Air Line hanging out of the Flex Tube for now. It will be connected to the Pushbutton Air Valve later in the installation process. HDS-18EA Alignment Lift P/N 5900970 — Rev. C1 — Feb. 2019...
- Page 32 Line and the ORB end to the Power Unit. The following drawing shows where the Hydraulic Line goes on the Lift. Drawing not to scale. Not all components shown. HDS-18EA Alignment Lift P/N 5900970 — Rev. C1 — Feb. 2019...
- Page 33 6. Leave the Straight end of the Hydraulic Line coming out of the Flex Tube; do not connect it to the Power Unit at this point. The ORB connector of the JIC-to-ORB Fitting will be connected to the Power Unit later in the Note: installation. HDS-18EA Alignment Lift P/N 5900970 — Rev. C1 — Feb. 2019...
- Page 34 Before routing the Cables on your Lift, you need to know the following: • BendPak strongly recommends using gloves when working with the Cables. • The Lift has four Cables. All four are different lengths; they can only be used to make one connection.
- Page 35 The order in which the Cables and Sheaves are put into place is based on the order the Cable Sheaves must be replaced. By coincidence, the Cables for the HDS-18EA are installed shortest to longest; this is true of some, but not all, BendPak Lifts.
- Page 36 Not to scale. Not all components shown. View is from the Front of the Lift looking towards the Rear, which is different from many of the other orientation drawings. HDS-18EA Alignment Lift P/N 5900970 — Rev. C1 — Feb. 2019...
- Page 37 Post. When you start routing the Cable up, it must be between the Gusset Sheave and the Slack Safety Sheave, as shown in the drawing below. HDS-18EA Alignment Lift P/N 5900970 — Rev. C1 — Feb. 2019...
- Page 38 Piston on the Hydraulic Cylinder may not have been pulled out far enough. 10. Reinstall the Cable Lock Pin near the bottom of the Crosstube Gusset. Cable A is now correctly routed to its Post. HDS-18EA Alignment Lift P/N 5900970 — Rev. C1 — Feb. 2019...
- Page 39 Cable. 7. Reinstall the Cable Lock Pin near the bottom of the Crosstube Gusset. Cable B is now correctly routed to the Rear Offside Post. HDS-18EA Alignment Lift P/N 5900970 — Rev. C1 — Feb. 2019...
- Page 40 Piston on the Hydraulic Cylinder was probably not pulled out far enough. 10. Reinstall the Cable Lock Pin near the bottom of the Crosstube Gusset. Cable C is now correctly routed to the Power Post. HDS-18EA Alignment Lift P/N 5900970 — Rev. C1 — Feb. 2019...
- Page 41 Cable. 10. Reinstall the Cable Lock Pin near the bottom of the Crosstube Gusset. Cable D is now correctly routed to the Front Offside Post. HDS-18EA Alignment Lift P/N 5900970 — Rev. C1 — Feb. 2019...
- Page 42 4. Check all four Cable Lock Pins (at the bottom of each Crosstube Gusset) to make sure they are above securely in place with the Cables them. 5. Cable routing is now complete. HDS-18EA Alignment Lift P/N 5900970 — Rev. C1 — Feb. 2019...
- Page 43 There are multiple locations on the Back Plate of the Power Unit that you can use to attach to the Mounting Bracket. Choose the ones that best center the Power Unit on the Mounting Bracket. HDS-18EA Alignment Lift P/N 5900970 — Rev. C1 — Feb. 2019...
- Page 44 The Power Unit is heavy. BendPak recommends having one person hold the Power Unit while another person bolts it into place. 3. Arrange the four components in the desired order. The following drawing shows a popular way to arrange the four components.
- Page 45 Includes the hole to which the Flex Tube connects. BendPak recommends orienting the Flex Tube so that the lines coming out of it are near where they connect on the Power Unit and to the Pushbutton Air Valve.
- Page 46 Use the two holes on the Pushbutton Air Valve from the actual pushbutton. If you use the holes next to the pushbutton, the Zero Angle Bracket interferes with the pushbutton when you try to use it. HDS-18EA Alignment Lift P/N 5900970 — Rev. C1 — Feb. 2019...
- Page 47 . Double check to make sure you are attaching the Air Line to the Pushbutton Air Valve. For the customer-supplied air pressure, a minimum of 30 PSI / 3 CFM is required. HDS-18EA Alignment Lift P/N 5900970 — Rev. C1 — Feb. 2019...
- Page 48 2. Connect and securely tighten the ORB Connector on the JCI-to-ORB Fitting to the Hydraulic Out connector you want to use. 3. Connect and securely tighten the Hydraulic Line coming out of the Flex Tube to the JIC Connector of the JCI-to-ORB Fitting. HDS-18EA Alignment Lift P/N 5900970 — Rev. C1 — Feb. 2019...
- Page 49 Power Unit • a Power Disconnect Switch • a Thermal Disconnect Switch Refer to Wiring Diagrams for additional wiring information. Additional information is supplied in the sections describing these tasks. HDS-18EA Alignment Lift P/N 5900970 — Rev. C1 — Feb. 2019...
- Page 50 Protect each circuit with a time-del ay fuse or circuit breaker. For a 220 VAC, single phase circuit, use a 25 amp or greater fuse. The following drawing shows the Power Unit. HDS-18EA Alignment Lift P/N 5900970 — Rev. C1 — Feb. 2019...
- Page 51 (NEC) requirement. They are designed to interrupt electrical power in the event of an electrical circuit fault, emergency situation, or when equipment is undergoing service or maintenance. BendPak strongly recommends that you install a Power Disconnect Switch that is properly rated for the incoming power. ⚠...
- Page 52 Concrete or Anchor Bolts do not meet these specifications, it could lead to product damage, vehicle damage, personal injury, or even loss of life. BendPak Lifts are supplied with installation instructions and concrete fasteners meeting the criteria as prescribed by the American National Standard “Automotive Lifts – Safety Requirements for Construction, Testing, and Validation”...
- Page 53 ¾ inch diameter Anchor Bolt, for example, use a ¾ inch diameter drill bit. 3. Vacuum each hole clean. BendPak recommends using a vacuum to get the hole very clean. You can also use a wire brush, make sure to thoroughly clean each hole hand pump, or compressed air;...
- Page 54 Do not shim a Post more than half an inch using the provided Shims. A maximum of 2 inches is possible by ordering optional Shim Plates. Contact BendPak at (800) 253-2363, extension 191 to order. Please have the model and serial number of your Lift available.
- Page 55 • Tire Stops. Installed at the Front of the Lift. Hold the front Tires of the vehicle in position. BendPak recommends chocking the rear Tires, so that the vehicle stays in place. • Ramps. Installed at the Rear of the Lift. Allow vehicles to be easily driven onto the Runways.
- Page 56 Neither the Alignment Turn Plate nor the Filler Plates are bolted into place, making it easier to adjust them when necessary. 3. Repeat Step 2 for the other Alignment Turn Plate and Filler Plates. HDS-18EA Alignment Lift P/N 5900970 — Rev. C1 — Feb. 2019...
- Page 57 The Lift’s motor cannot run continuously; it is designed for regular use, but not continuous use. 2. Watch the Runways as you raise and lower them. When the Lift stops moving erratically or stops squeaking, you can stop the bleeding process. HDS-18EA Alignment Lift P/N 5900970 — Rev. C1 — Feb. 2019...
- Page 58 Troubleshooting Performing an Operational Test BendPak strongly recommends doing an Operational Test of your Lift with a typical vehicle before starting normal service (a typical vehicle is not required, but is recommended). During the Operational Test, watch the Lift and its components and check for proper installation and operation.
-
Page 59: Operation
Check the vehicle. Never exceed the Lift’s weight rating. Do not allow people inside a vehicle you are going to raise. Make sure the vehicle is not overbalanced on either end or either side. HDS-18EA Alignment Lift P/N 5900970 — Rev. C1 — Feb. 2019... - Page 60 Handle. Handle. 4. Runways stop going down 4. Drive vehicle off Runways. when engaged on Safety Locks; release Lowering Handle when they stop. Do not press and hold Pushbutton. HDS-18EA Alignment Lift P/N 5900970 — Rev. C1 — Feb. 2019...
- Page 61 5. With the Runways engaged on a Safety Lock, check around the vehicle to make sure everything looks good. If you see anything wrong, fix it before anyone gets near the Runways or goes under them. HDS-18EA Alignment Lift P/N 5900970 — Rev. C1 — Feb. 2019...
-
Page 62: Maintenance
⚠ WARNING: Do not operate your Lift if you find maintenance issues; instead, take the Lift out of service, then contact your dealer, visit bendpak.com/support, email techsupport@bendpak.com, or call (800) 253-2363. HDS-18EA Alignment Lift P/N 5900970 — Rev. C1 — Feb. 2019... - Page 63 With an awl, probe between wires and strands and raise any wires that appear loose. Evidence of internal broken wires may require a more extensive rope examination. HDS-18EA Alignment Lift P/N 5900970 — Rev. C1 — Feb. 2019...
-
Page 64: Troubleshooting
Crosstubes using white lithium grease. If the Lift is new, a break-in period may be needed; run the Lift several times each day. If the noises persist, contact BendPak Support. If you continue to have issues with your Lift, take it out of service, then contact your dealer, go to bendpak.com/support, email... -
Page 65: Wiring Diagram
Wiring Diagram HDS-18EA Alignment Lift P/N 5900970 — Rev. C1 — Feb. 2019... -
Page 66: Labels
Labels HDS-18EA Alignment Lift P/N 5900970 — Rev. C1 — Feb. 2019... - Page 67 HDS-18EA Alignment Lift P/N 5900970 — Rev. C1 — Feb. 2019...
- Page 68 HDS-18EA Alignment Lift P/N 5900970 — Rev. C1 — Feb. 2019...
-
Page 69: Parts Drawings
Parts Drawings HDS-18EA Alignment Lift P/N 5900970 — Rev. C1 — Feb. 2019... - Page 70 HDS-18EA Alignment Lift P/N 5900970 — Rev. C1 — Feb. 2019...
- Page 71 HDS-18EA Alignment Lift P/N 5900970 — Rev. C1 — Feb. 2019...
- Page 72 HDS-18EA Alignment Lift P/N 5900970 — Rev. C1 — Feb. 2019...
- Page 73 HDS-18EA Alignment Lift P/N 5900970 — Rev. C1 — Feb. 2019...
-
Page 74: Maintenance Log
Maintenance Log HDS-18EA Alignment Lift P/N 5900970 — Rev. C1 — Feb. 2019... - Page 75 Maintenance Log HDS-18EA Alignment Lift P/N 5900970 — Rev. C1 — Feb. 2019...
- Page 76 1645 Lemonwood Drive Santa Paula, CA, 93060 USA Copyright © 2019 by BendPak Inc. All rights reserved. bendpak.com...
Need help?
Do you have a question about the HDS-18EA and is the answer not in the manual?
Questions and answers