Table of Contents
Advertisement
Quick Links
Advertisement
Table of Contents

Subscribe to Our Youtube Channel
Related Manuals for Sherwood Scuba Gemini


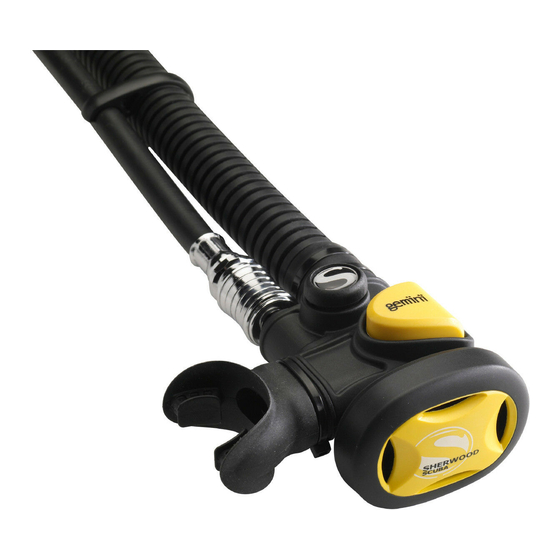
Summary of Contents for Sherwood Scuba Gemini
- Page 1 All manuals and user guides at all-guides.com Breathable Inflator Repair Program...
- Page 2 All manuals and user guides at all-guides.com...
- Page 3 Regulator/ Reduce Diver’s Profile Power Inflator and Underwater Inflator Back-Up 2nd Stage Permits Diver to Single Ergonomic Gemini Case Suits Handedly: Power Inflate, Divers Hand Body Deflate, Orally Inflate and Naturally Purge Without Difficulty Low Work Offers Diver Ease of...
- Page 4 All manuals and user guides at all-guides.com Disassembly Procedures...
- Page 5 All manuals and user guides at all-guides.com ITEM PART# DESCRIPTION GEMINI BREATHABLE INFLATOR 9000-1 Housing 9000-2 Power Inflator Button Assembly 9000-52 Power Inflator Spring 006-B O-ring 9000-22 Power Inflator Retainer 016B O-ring 9000-21 Power Inflator Poppet 9000-7 Power Inflator Valve Cap...
- Page 6 All manuals and user guides at all-guides.com USE WIRE PLIERS...
- Page 7 All manuals and user guides at all-guides.com Repair Program USE NEEDLE NOSE PLIERS...
- Page 8 All manuals and user guides at all-guides.com...
- Page 9 All manuals and user guides at all-guides.com Disassembly Procedures POWER INFLATOR ASSEMBLY...
- Page 10 All manuals and user guides at all-guides.com Repair Program USE NEEDLE NOSE PLIERS...
- Page 11 All manuals and user guides at all-guides.com “SQUEEZE OR PINCH METHOD” WITH PLASTIC PICK...
- Page 12 All manuals and user guides at all-guides.com CAUTION Power Inflator Button is Spring Loaded Place Hand Over Button when Removing Poppet...
- Page 13 All manuals and user guides at all-guides.com USE SMALL FLAT BLADE SCREWDRIVER REMOVE POPPET...
- Page 14 All manuals and user guides at all-guides.com DISCARD O-RINGS...
- Page 15 All manuals and user guides at all-guides.com USE NEEDLE NOSE PLIERS TO REMOVE RETAINER...
- Page 16 All manuals and user guides at all-guides.com USE O-RING TOOL SET (P/N 11-090-500) PLASTIC PICK...
- Page 17 All manuals and user guides at all-guides.com Disassembly Procedures ORAL INFLATOR ASSEMBLY...
- Page 18 All manuals and user guides at all-guides.com...
- Page 19 All manuals and user guides at all-guides.com IF MINERAL DEPOSITS PRESENT, GENTLY REMOVE WITH PLIERS...
- Page 20 All manuals and user guides at all-guides.com REMOVE EXHAUST VALVE ASSEMBLY...
- Page 21 All manuals and user guides at all-guides.com REMOVE DISCARD 1/4-INCH LOCK NUT...
- Page 22 All manuals and user guides at all-guides.com REMOVE WASHER...
- Page 23 All manuals and user guides at all-guides.com REMOVE BUTTON ASSEMBLY...
- Page 24 All manuals and user guides at all-guides.com...
- Page 25 All manuals and user guides at all-guides.com REMOVE ORAL INFLATOR SEAL...
- Page 26 All manuals and user guides at all-guides.com DISCARD OLD O-RINGS...
- Page 27 All manuals and user guides at all-guides.com Disassembly Procedures DEMAND REGULATOR ASSEMBLY...
- Page 28 All manuals and user guides at all-guides.com LOCATE NOTCH IN COVER USE SMALL FLAT BLADE SCREWDRIVER...
- Page 29 All manuals and user guides at all-guides.com BLADE 90˚ SLIDE AS SHOWN...
- Page 30 All manuals and user guides at all-guides.com Repair Program GENTLY PRY...
- Page 31 All manuals and user guides at all-guides.com REMOVE DIAPHRAGM RETAINER...
- Page 32 All manuals and user guides at all-guides.com...
- Page 33 All manuals and user guides at all-guides.com USE SMALL FLAT BLADE SCREWDRIVER REMOVE RETAINING RING COVER...
- Page 34 All manuals and user guides at all-guides.com REMOVE RETAINING RING...
- Page 35 All manuals and user guides at all-guides.com PUSH OUT REGULATOR VALVE BODY...
- Page 36 All manuals and user guides at all-guides.com...
- Page 37 All manuals and user guides at all-guides.com UNSCREW LEVER ASSEMBLY TO SEPARATE FROM BODY...
- Page 38 All manuals and user guides at all-guides.com REMOVE O-RING...
- Page 39 All manuals and user guides at all-guides.com REMOVE SEAT CROWN FROM REGULATOR BODY...
- Page 40 All manuals and user guides at all-guides.com IF NECESSARY USE 3/16-INCH HEX KEY WRENCH TO REMOVE SEAT CROWN...
- Page 41 All manuals and user guides at all-guides.com...
- Page 42 All manuals and user guides at all-guides.com CAUTION Parts are Spring Loaded Place Finger Over Open End of Lever Support...
- Page 43 All manuals and user guides at all-guides.com USE A 1/4-INCH NUT DRIVER TO DISASSEMBLE...
- Page 44 All manuals and user guides at all-guides.com...
- Page 45 All manuals and user guides at all-guides.com REMOVE AND DISCARD L.P. SEAT...
- Page 46 All manuals and user guides at all-guides.com USE WIRE PLIERS...
- Page 47 All manuals and user guides at all-guides.com USE WIRE PLIERS...
- Page 48 All manuals and user guides at all-guides.com Disassembly Procedures HOSE ASSEMBLY...
- Page 49 All manuals and user guides at all-guides.com USE 11/16-INCH 13/16-INCH OPEN END WRENCH USE WIRE PLIERS...
- Page 50 All manuals and user guides at all-guides.com...
- Page 51 All manuals and user guides at all-guides.com...
- Page 52 All manuals and user guides at all-guides.com CLEANING PROCEDURES Degrease: Warm water (100˚ to 120˚ F). 1 quart mixed 3-4 tablespoons household dish soap. Scrub: Nylon brush (toothbrush works well). Rinse: Fresh tap water. Ultra Sonic Clean: Acid bath 1. Vinegar/water 50/50 2.
- Page 53 All manuals and user guides at all-guides.com INSPECTION PROCEDURES Check For: Magnifier: Scratches O-ring Grooves Dings Threads Nicks Sealing Surfaces Damaged Plating Burrs Fillings Corrosion Replace if Needed...
- Page 54 All manuals and user guides at all-guides.com...
- Page 55 All manuals and user guides at all-guides.com SERVICE KIT 9000-PK Part Number Includes: 006B 2 O-Rings 008B 1 O-Ring 016B 2 O-Rings 9000-14 L.P. Seat 9000-47 2 Lock Nuts PP-18 3 Cable Ties...
- Page 56 All manuals and user guides at all-guides.com Reassembly Procedures ORAL INFLATOR ASSEMBLY...
- Page 57 All manuals and user guides at all-guides.com INSTALL NEW O-RING...
- Page 58 All manuals and user guides at all-guides.com...
- Page 59 All manuals and user guides at all-guides.com INSTALL WASHER...
- Page 60 All manuals and user guides at all-guides.com...
- Page 61 All manuals and user guides at all-guides.com...
- Page 62 All manuals and user guides at all-guides.com CONICAL SIDE DOWN...
- Page 63 All manuals and user guides at all-guides.com...
- Page 64 All manuals and user guides at all-guides.com INSTALL NEW LOCK NUT...
- Page 65 All manuals and user guides at all-guides.com USE 1/4-INCH NUT DRIVER CAUTION HAND TIGHTEN ONLY...
- Page 66 All manuals and user guides at all-guides.com...
- Page 67 All manuals and user guides at all-guides.com FINGER TIGHT...
- Page 68 All manuals and user guides at all-guides.com Reassembly Procedures POWER INFLATOR ASSEMBLY...
- Page 69 All manuals and user guides at all-guides.com...
- Page 70 All manuals and user guides at all-guides.com...
- Page 71 All manuals and user guides at all-guides.com USE NEEDLE NOSE PLIERS...
- Page 72 All manuals and user guides at all-guides.com INSTALL NEW O-RING...
- Page 73 All manuals and user guides at all-guides.com...
- Page 74 All manuals and user guides at all-guides.com...
- Page 75 All manuals and user guides at all-guides.com WIDE SPACE UNDER “S” LOGO...
- Page 76 All manuals and user guides at all-guides.com INSTALL NEW O-RING...
- Page 77 All manuals and user guides at all-guides.com...
- Page 78 All manuals and user guides at all-guides.com USE SMALL FLAT BLADE SCREWDRIVER HANDTIGHT...
- Page 79 All manuals and user guides at all-guides.com...
- Page 80 All manuals and user guides at all-guides.com...
- Page 81 All manuals and user guides at all-guides.com USE NEEDLE NOSE PLIERS HANDTIGHT...
- Page 82 All manuals and user guides at all-guides.com Reassembly Procedures DEMAND VALVE ASSEMBLY...
- Page 83 All manuals and user guides at all-guides.com NEW L.P. SEAT...
- Page 84 All manuals and user guides at all-guides.com...
- Page 85 All manuals and user guides at all-guides.com...
- Page 86 All manuals and user guides at all-guides.com USE Q.D. END OF REGULATOR VALVE BODY...
- Page 87 All manuals and user guides at all-guides.com COMPRESS SPRING EXPOSE POPPET THREADS...
- Page 88 All manuals and user guides at all-guides.com...
- Page 89 All manuals and user guides at all-guides.com CATCH TREADS OF NEW LOCK NUT ON POPPET...
- Page 90 All manuals and user guides at all-guides.com INSTALL LEVER CURVED END TOWARDS LEVER SUPPORT INDEX INDEX FEATURE...
- Page 91 All manuals and user guides at all-guides.com...
- Page 92 All manuals and user guides at all-guides.com USE 1/4-INCH NUT DRIVER THREAD LOCKNUT UNTIL POPPET FLUSH WITH END OF NUT...
- Page 93 All manuals and user guides at all-guides.com INSTALL NEW O-RING...
- Page 94 All manuals and user guides at all-guides.com...
- Page 95 All manuals and user guides at all-guides.com...
- Page 96 All manuals and user guides at all-guides.com...
- Page 97 All manuals and user guides at all-guides.com...
- Page 98 All manuals and user guides at all-guides.com INSTALL “GENTLY” WITH PLIERS...
- Page 99 All manuals and user guides at all-guides.com...
- Page 100 All manuals and user guides at all-guides.com USE SMALL FLAT BLADE SCREWDRIVER...
- Page 101 All manuals and user guides at all-guides.com...
- Page 102 All manuals and user guides at all-guides.com...
- Page 103 All manuals and user guides at all-guides.com...
- Page 104 All manuals and user guides at all-guides.com USE 11/13 AND 13/16-INCH OPEN END WRENCHES HAND TIGHT ONLY...
- Page 105 All manuals and user guides at all-guides.com CONNECT QD HOSE TO A PROPERLY ADJUSTED FIRST- STAGE REGULATOR USING A 9/16-INCH OPEN END WRENCH...
- Page 106 All manuals and user guides at all-guides.com...
- Page 107 All manuals and user guides at all-guides.com Regulator Adjustment and Testing Procedures...
- Page 108 All manuals and user guides at all-guides.com ADJUST LOCKNUT USE 1/4-INCH NUT DRIVER...
- Page 109 All manuals and user guides at all-guides.com LEVER HEIGHT ADJUSTMENT EVEN WITH EDGE OF HOUSING USE TL123 SPECIALTY TOOL...
- Page 110 All manuals and user guides at all-guides.com REGULATOR TEST APPLY AIR PRESSURE TO REGULATOR FIRST-STAGE (2700 to 3500PSI) CHECK FOR LEAKS FROM DEMAND VALVE NO LEAKS LEAKS PROCEED TO FINAL CHECK LEVER HEIGHT Reassembly and Final Adjust Locknut if Required Bench Testing Procedures (1/4-inch nut drive) ADJUST SEAT CROWN IF REQUIRED...
- Page 111 All manuals and user guides at all-guides.com...
- Page 112 All manuals and user guides at all-guides.com TURN CROWN “IN” 1/4 TURN USING 3/16-INCH HEX KEY IF STILL LEAKS NO MORE THEN ONE MORE 1/4 TURN (CLOCKWISE) IF AFTER ADJUSTMENT IT STILL LEAKS DISASSEMBLE AND INSPECT FOR PROBLEM...
- Page 113 All manuals and user guides at all-guides.com Final Reassembly and Bench Test Procedures...
- Page 114 All manuals and user guides at all-guides.com...
- Page 115 All manuals and user guides at all-guides.com...
- Page 116 All manuals and user guides at all-guides.com ALIGN NOTCH WITH BACK OF REGULATOR HOUSING...
- Page 117 All manuals and user guides at all-guides.com SECOND STAGE INTERMEDIATE OPENING EFFORT PRESSURE RANGE 1.4-2.4 INCHES OF 125-155 PSI WATER...
- Page 118 All manuals and user guides at all-guides.com...
- Page 119 All manuals and user guides at all-guides.com...
- Page 120 All manuals and user guides at all-guides.com...
- Page 121 All manuals and user guides at all-guides.com...
- Page 122 All manuals and user guides at all-guides.com...
- Page 123 All manuals and user guides at all-guides.com...
- Page 124 All manuals and user guides at all-guides.com...
- Page 125 All manuals and user guides at all-guides.com...
- Page 126 All manuals and user guides at all-guides.com...
- Page 127 All manuals and user guides at all-guides.com THE END...
Need help?
Do you have a question about the Gemini and is the answer not in the manual?
Questions and answers