Table of Contents
Advertisement
Quick Links
Advertisement
Table of Contents

Subscribe to Our Youtube Channel
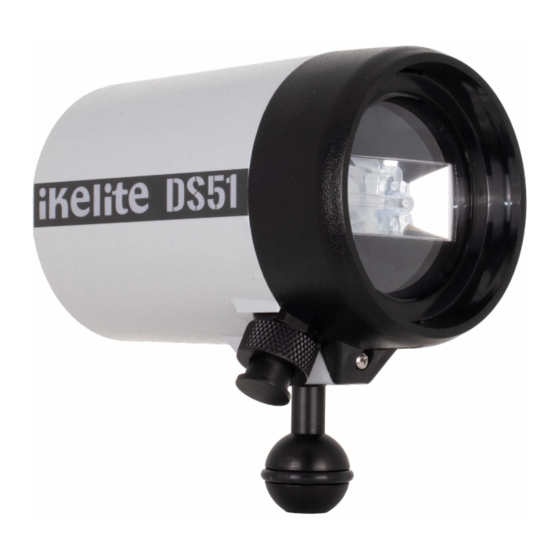
Summary of Contents for Ikelite DS51 II
-
Page 1: Product Registration
DS51 II 50ws TTL Strobe Product Number 40051 Product Registration Please register your product at ikelite.com within 15 days of purchase. Our product registration database is the best way for us to contact you in the event of a product update. -
Page 2: About This Product
About this Product Thank you for your purchase of Ikelite equipment. Please read this instruction manual completely before attempting to operate or dive with this product. Please visit ikelite.com to register your product to receive information on any updates or notices pertaining to your equipment. -
Page 3: Specifications
Specifications Weight ............0.6kg (1.3 lbs) with batteries Energy Rating ........50 watt-seconds Coverage Angle ........70° (80° with diffuser) Guide Number (ISO 100) feet ....56 surface Guide Number (ISO 100) meters ..17 surface Firing Modes ..........TTL, Full, -0.5, -1, -1.5, -2, -2.5 Color Temperature .........5700K Power Source ........4 AA Flashes ..........200 full power... -
Page 4: Important Notices
The strobe is factory sealed; do not disassemble. Disassembly » will void your Ikelite DS51 limited warranty. Do not continuously fire the strobe more than 15 times above » water in rapid succession. If this does happen, allow the strobe to cool down for at least 10 minutes. -
Page 5: Table Of Contents
Product Registration About this Product Included in the Box Specifications Important Notices Getting to Know Your Strobe Mounting the Strobe Ikelite Arm/Mounting System Attaching a Sync Connector Battery Compartment Installing Batteries Strobe Ready Light Power/Exposure Dial OFF position TTL/Auto Exposure Position... - Page 6 Compartment Flooding Limited Warranty Service and Repairs Contact Us...
-
Page 7: Getting To Know Your Strobe
Getting to Know Your Strobe Flashtube Mount Knob Power/Exposure Dial Battery Door Bulkhead Connector Waterproof Bulkhead Strobe Ready Light... -
Page 8: Mounting The Strobe
Ikelite Arm/Mounting System A 1-inch diameter ball mount is included which will allow attachment to 1-inch diameter ball arms from Ikelite, TLC, Ultralight, Nauticam, and others. The ball mount may be removed for attachment of the optional Flex Arm (sold separately). For more information, visit ikelite.com. -
Page 9: Attaching A Sync Connector
1. Remove the bulkhead cap. 2. Lightly lubricate the connector O-ring. We recommend using only Ikelite silicone lubricant to eliminate the possibility of swelling due to incompatible compounds. 3. Line up the pins and receptacles and insert the Sync Cord Plug into the bulkhead. -
Page 10: Battery Compartment
Battery Compartment Installing Batteries 1. Rotate the strobe switch to the OFF position. 2. To access the battery compartment, rotate the knob counter- clockwise several times and gently pull the door off. 3. Install four AA-cell batteries (alkaline, NiCad, or NiMH). Refer to the “+”... -
Page 11: Strobe Ready Light
15 seconds or longer after a flash. Strobe Ready Light The Ikelite DS51 Strobe features a ready light at the rear of the strobe that glows red when the DS51 has recycled and is ready to fire its flash again. -
Page 12: Ttl/Auto Exposure Position
TTL/Auto Exposure Position This position should only be used when the strobe is attached to a compatible TTL system. When taking pictures with the mode switch in this position, the camera automatically signals the strobe to turn off when the exposure is correct. Manual Exposure Position The DS51 features six manual exposure settings in half f/stop »... -
Page 13: Strobe Diffuser
Strobe Diffuser Using the Diffuser The white diffuser can be secured to the front of the DS51 strobe when softer lighting or a coverage angle of up to 80° is desired. The diffuser reduces the DS51 light intensity by one full f-stop. Diffuser Installation and Removal Push and Lift to Remove... -
Page 14: Maintenance
9. To remove the diffuser, bend one tab out towards the edge while lifting simultaneously. A lanyard or string can be attached to the diffuser by threading » it through the two circular openings near its edge. Attach the other end to the strobe arm to prevent accidental loss. Maintenance Post-Dive 1. -
Page 15: Troubleshooting
5. Remove the batteries prior to storage. 6. Loosen the thumbscrew on the battery compartment door if storing the strobe for long periods of time. 7. Store in a cool, dry place. Troubleshooting Photos are over-exposed (too light) • Adjust strobe exposure setting. •... -
Page 16: Strobe Will Not Fire When Using Sync Cord
• Check the camera settings. • Check cable connections. • Refer to troubleshooting at www.ikelite.com/blogs/faq Strobe will not fire when using sync cord • Make sure the strobe is turned on. • Try a different sync cord. • Restore camera to factory default settings and then re-configure according to the housing instructions. - Page 17 This Ikelite product is warranted against any manufacturing defects for a period of two (2) years from the original date of purchase. Defective products should be returned to Ikelite postage paid. Ikelite will, at its sole discretion, repair or replace such products, and will return to customer postage paid.
- Page 18 Service and Repairs Ikelite is most interested in performing any service to ensure that all products perform as intended. Evidence of purchase date must be provided to obtain warranty service. No prior authorization is required. You may return directly to us or through your dealer. Please include a brief description of the problem, any relevant email correspondence, and/or description of the service request.


Need help?
Do you have a question about the DS51 II and is the answer not in the manual?
Questions and answers