Table of Contents
Advertisement
Available languages
Available languages
Quick Links
®
Installation and Operating Instructions
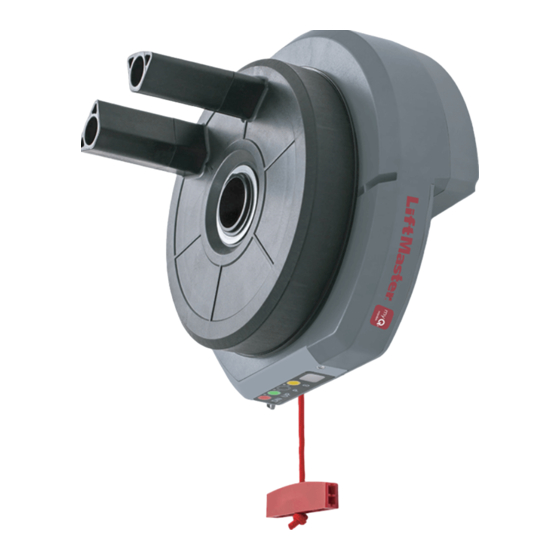
Rolling Garage Door Opener
LM555EVGBSA
Engineered and designed in Australia
تعليمات تركيب وتشغيل ﺟﮭﺎز فتح باب لار ُّ ول للجرجا
LM555EVGBSA طراز
(، الواليات المتحدة األمريكيةChamberlain Group, Inc) ھندسة وتصميم مجموعة تشامبرلين
Chamberlain Australia Pty Ltd
Keep these instructions
PO BOX 1446
for future reference
Lane Cove NSW 1595
احتفظ بھذه التعليمات للرجوع إليھا
AUSTRALIA
في المستقبل
www.liftmaster-me.com
Advertisement
Table of Contents

Subscribe to Our Youtube Channel
Related Manuals for Chamberlain WeatherDrive LM555EVGBSA


Summary of Contents for Chamberlain WeatherDrive LM555EVGBSA
- Page 1 LM555EVGBSA Engineered and designed in Australia تعليمات تركيب وتشغيل ﺟﮭﺎز فتح باب لار ُّ ول للجرجا LM555EVGBSA طراز (، الواليات المتحدة األمريكيةChamberlain Group, Inc) ھندسة وتصميم مجموعة تشامبرلين Chamberlain Australia Pty Ltd Keep these instructions PO BOX 1446 for future reference Lane Cove NSW 1595 احتفظ...
- Page 2 IP Rating Chart Protection of persons and protection of equipment indicated by the IP code. Protection provided by enclosures for electrical equipment is indicated by the IP codes two: CHARACTERISTIC NUMERALS The first numeral indicates protection of persons against The second numeral indicates access to hazardous parts, and protection of equipment against harmful ingress of water.
-
Page 3: Table Of Contents
START BY READING THESE IMPORTANT SAFETY INSTRUCTIONS WARNING - Important safety instructions. It is important for the safety of persons to follow all instructions. Save these instructions. • Failure to comply with the following instructions may result in serious personal injury or property damage. •... -
Page 4: Carton Inventory
TOOLS REQUIRED CARTON INVENTORY 1. Ladder 1. Release handle, cord, keys and risk of entrapment card 2. Adjustable wrench for U-bolts already installed 2. Opener on the door 3. Manual (this document) 3. 8 mm socket, 10 mm socket and 13 mm extended 4. -
Page 5: Prepare & Test The Door
TESTING THE DOOR Complete the following test to ensure your door is well balanced, and not sticking or binding: • Disable all locks and remove any ropes connected to the garage door. • Lift the door to about halfway and then release it. The door should remain spring balanced. -
Page 6: Control Panel
CONTROL PANEL 1. Terminal Block: used for external accessories (see chart below). Colour Polarity Comment No Function Push button Dry contact input for push button wired wall controls: White Common Common terminal for push button, IR Beams & accessory power: IR Beam Input: (pulsing type only) not active in sleeping mode Grey IR Beams... -
Page 7: Manual Release Key
THE RELEASE HANDLE & CORD DO NOT DISENGAGE THE OPENER TO MANUAL OPERATION WITH CHILDREN , PERSONS OR OTHER OBJECTS INCLUDING MOTOR VEHICLES WITHIN THE DOORWAY : (The door is under significant tension and if the door has developed a fault or incorrect tension, it may be unsafe and may fall rapidly.) The manual release mechanism enables the door to be manually operated during power outages or in an emergency. -
Page 8: Pinning The Door
PINNING THE DOOR Note: A ballooning door may delay the safety reversal response and can compromise garage door security. Free curtain Ballooning Add fasteners here • To remedy any ballooning place self tapping metal screws or rivets where the curtain leaves the roll. Secure these through the curtain into the drum wheel at each end of the roll. -
Page 9: Installation Procedure
INSTALLATION PROCEDURE Do not allow people to walk under or around the door during the installation process as serious injury can occur. NOTE: The opener can be installed on either side of the door. The following instructions are for Rope RIGHT HAND INSTALLATIONS (as illustrated i.e. -
Page 10: Adjustment & Testing
Courtesy light: during the programming sequence, the courtesy light will flash at half strength. NOTE: The WeatherDrive LM555EVGBSA opener is factory configured for right hand installation. The opener will operate during this procedure. Make sure the door is clear of obstruction. - Page 11 TESTING THE SAFETY REVERSE SYSTEM The safety reverse system test is important. The garage door must reverse on contact with a 40 mm obstacle laid flat on the floor. Failure to properly adjust the opener may result in serious personal injury from a closing garage door.
-
Page 12: System
SAFETY FIRST! Whilst Chamberlain have engineered safety features into your garage door opener, we urge you to consider fitting IR Beams to your new garage door opener. In many countries these devices are compulsory to assist in preventing serious injury or property damage. For your own peace of mind and the safety of others please install this inexpensive safety device. -
Page 13: Travel Speed
If adding a new wall control, program into the opener before mounting the unit as detailed in the “Wireless Programming” section. TRAVEL SPEED (OPTIONAL) There are two travel speeds available for this opener. (Regular and Slow speed) The WeatherDrive LM555EVGBSA has been factory set for regular speed. Setting the SLOW SPEED: SLOW Flash... -
Page 14: Audible Beep
To turn the audible beep back ON, simple repeat the above process. CONTROL PANEL E-LOCK (OPTIONAL) The WeatherDrive LM555EVGBSA has been factory set with the Control Panel buttons UNLOCKED. After all the Installation and programming processes are complete, the Control Panel buttons can be locked, and all the coded transmitters will remain active. -
Page 15: Partial Opening
PARTIAL OPENING FEATURE (PET) This is an adjustable, second stop position suitable for ventilation, pedestrian or pet access, programmed to the Remote Control. NOTE: Wireless Wall buttons will not operate this feature. fig.1 Door Fully Closed To Activate this feature: 1.Start with the door fully CLOSED (figure 1). -
Page 16: Wireless Programming
WIRELESS PROGRAMMING (OPTIONAL ACCESSORIES) Activate the opener only when door is in full view, free of obstruction and properly adjusted. No one should enter or leave garage while door is in motion. Do not allow children to operate push button(s) or remote(s). Do not allow children to play near the door. NOTE: The transmitter(s) supplied with your opener are preprogrammed by the factory. -
Page 17: Operating Your Opener
OPERATION OF YOUR OPENER CARE OF YOUR OPENER When properly installed, your opener will operate with Your opener can be activated by any of the following minimal maintenance. The opener does not require devices: additional lubrication. Limit and Force Settings: These settings must be •... -
Page 18: Accessories & Wiring
NOTE: Only genuine accessories are approved for use with this opener. Generic compatible accessories are NOT approved for use with this opener TYPICAL WIRING DIAGRAM WEATHERDRIVE LM555EVGBSA Information for Service Personnel NOTE: The terminal block is weather protected by a rubber grommet. -
Page 19: Troubleshooting
TROUBLESHOOTING 9. The opener strains to operate door: • The door may be out of balance or the springs may 1. The opener will not operate from either the be broken. Close the door and use the manual UP/DOWN ACTIVATION button or the transmitters : release to disconnect the door. -
Page 20: Diagnostic Chart
DIAGNOSTIC CHART Your garage door opener is programmed with self-diagnostic capabilities. The indicator LEDʼs 1 & 3 on the control panel will flash a number of times to indicate a fault code exists. DIAGNOSTIC CODE SYMPTOM POSSIBLE RESOLUTION LED 1 LED 3 The garage door opener will not Safety sensors are not installed correctly or wires may be cut. - Page 21 مالحظة ھامة ، ولكن لضمان أفضل تشغيل لجھاز فتح الباب، يجب أن IP34 بمعيار Liftmaster * تم تقييم ھذه الوحدة من .أنه محم ي ٌ من العوامل الطبيعية. يجب عدم تعريضه للماء أو المطر على قدر اإلمكان يضمن القائم بالتركيب .يجب...
- Page 22 مخطط تقييم الحماية الدولي حماية األشخاص والمعدات كما و ض ﱠحه قانون IP . الحماية التي توفرھا الھياكل الخارجية للمعدات ھو موضح بقانون الكھربائية كما أرقام الخصائص يشير الرقم األول إلى حماية األشخاص يشير الرقم الثاني إلى حماية المعدات ضد ،من...
- Page 23 التالية ابدأ بقراءة تعليمات السالمة الھامة تحذير .قد ينتج عن عدم اتباع التعليمات التالية إصابات شخصية بالغة أو تلف في المنتج • .اقرأ جميع التعليمات واتبعھا بحرص • الموجودة في ھذا تم تصميم واختبار جھاز فتح باب الجراج لتقديم خدمة آمنة بشرط أن يتم تركيبه وتشغيله بالتوافق الدقيق مع التعليمات •...
- Page 24 األدوات المطلوبة قائمة محتويات الكرتونة سلم 1. قمبلا ضتحرير وسلك وملافاتحي وﺑطﺎﻗﺔ ﺧطر المثبتة بالفعل مفتاح قابل للضبط للبراغي التي على شكل حرف االنحشار 2. ﺟﮭﺎز فتلا حباب في الباب )ِ يتعلمياھ) تذه لاوثقية 3. كتلا 4. ﺑطﺎﻗﺔ لاتحذير وﺑطﺎﻗﺔ ﺧطر االنحشار مم،...
- Page 25 اختبار الباب :بابك متوازن وغير عالق أو محشور أكمل االختبار التالي للتأكد من أن .قم بتعطيل كافة األقفال وإزالة أي حبال متصلة بباب الجراج • ارفع الباب إلى منتصف المسافة تقري ب ًا ثم حرِّ ره. يجب أن تبقى زنبركات الباب •...
- Page 26 لوحة التحكم .(تستخدم للملحقات الخارجية )انظر المخطط أدناه واصلة الطرف الصندوقي اللون التعليقات القطبية الوظيفة الرقم أحمر موجب زر الدفع :الجدارية السلكية لزر الدفع واجھة االتصال الجافة ألجھزة التحكم أبيض سالب مشترك :والتيار اإلضافي تحت الحمراء نھايات مشتركة لزر الدفع وأشعة رمادي...
- Page 27 مقبض وحبل التحرير ال تفك تعشيق جھاز فتح الباب لغرض التشغيل اليدوي عندما يتواجد أطفال أو الباب: )يقع الباب تحت طريق في أشخاص أو أشياء أخرى بما فيھا السيارات الباب أو توتر خاطئ، فقد يكون غير توتر كبير وفي حالة حدوث أي خطأ في .(آمن...
- Page 28 تدبيس الباب مالحظة: قد يتسبب الباب المنتفخ في تأخير استجابة نظام انعكاس االتجاه لألمان أضف مثبتات ھنا انتفاخ ستارة حرة .وقد يقلل من أمان الباب أضف مثبتات ھنا .انتفاخ .ستارة حرة لعالج أي انتفاخ، ضع براغي معدنية ذاتية اللولبة أو مسامير البرشام في المنطقة •...
- Page 29 إجراءات التركيب أثناء عملية ال تسمح لألشخاص بالمشيء تحت أو حول الباب .التركيب فقد تحدث إصابات خطيرة يمكن تركيب جھاز فتح الباب على أي من جانبي الباب. التعليمات :مالحظة اليمنى )كما تم التوضيح، بمعنى من داخل الجھة على التالية ھي للتركيبات اليسرى،...
- Page 30 الجھة اليمنى أو اليسرى على لتشغيل ل إعداد الحدود والعزم ت ُ ع ي ِّن حدود أشواط الباب مدى ارتفاع الباب إلى أعلى ونزوله إلى أسفل. يجب أن يتم تكوين جھاز فتح الباب أي ض ًا بشكل صحيح ألجل التركيب في الجھة .اليمنى...
- Page 31 اختبار النظام العكسي لألمان يعتبر اختبار نظام انعكاس االتجاه لألمان مھ م ً ا. يجب أن يرتد مم موضو ع ً ا على باب الجراج عند مالمسة عائق ارتفاعه .األرضية قد ينتج عن الفشل في ضبط جھاز فتح الباب بشكل صحيح إصابات .بالغة...
- Page 32 ! ً األمان أوال لجھاز فتح باب ( صممت مزايا السالمة في جھاز فتح باب الجراج، ندعوكم إلى النظر في تركيب أشعة Chamberlain ) في حين أن تشامبرلين ،وسالمة اآلخرين الجراج الجديد. ھذه األجھزة ھي إلزامية في العديد من البلدان للمساعدة في الحد من اإلصابة الخطيرة أو تلف الممتلكات. ولراحة بالك...
- Page 33 تركيب زر الحائط الالسلكي (ملحق اختياري )غير متوفر مع المنتج التيار عن جھاز فتح الباب أثناء تركيب ھذا الملحق لمنع التنشيط افصل م كحد أدنى من األرضية العرضي للباب. حدِّ د :للتركيب .بعناية شديدة وح د ِّ د موقع برغيي التثبيت افتح...
- Page 34 (صفير مسموع )اختياري في رالى إصدع عمصنلاWeatherDrive LM555EV ﺿﺑط مت ."صفير" مسموع .يمكن إيقاف الصفير المسموع باستخدام الطريقة التالية .بالكامل مغلق ابدأ في وضع الباب • " لمدة "" و " اضغط مع االستمرار على األزرار • .ثوان ومضتان صفير...
- Page 35 ) ميزة الفتح الجزئي للتھوية أو المشاة على األقدام أو ھذه بمثابة محطة إيقاف ثانية قابلة للتعديل ومناسبة .الحيوانات األليفة، مبرمجة للعمل من خالل جھاز التحكم عن بعد .مالحظة: لن تشغ ِّ ل أزرار الجدار الالسلكية ھذه الميزة شكل :لتنشيط ھذه الميزة .الباب...
- Page 36 ( ة اختياري )ملحقات الالسلكي برمجة ش غ ِّ ل جھاز فتح الباب فقط عندما يكون الباب مرئ ي ً ا بشكل كامل وخال ٍ من العوائق وتم ضبطه ٌ بشكل صحيح. يجب أال يدخل أو يغادر أح د الجراج عندما يكون الباب في وضع الحركة. ال تسمح لألطفال بالضغط على زر/أزرار التشغيل أو جھاز التحكم عن بعد. ال تسمح لألطفال .باللعب...
- Page 37 فتح الباب تشغيل جھاز العناية بجھاز فتح الباب عندما يتم تثبيته، سوف يوفر لك جھاز فتح الباب أدنى حد من الصيانة. ال يحتاج :تستطيع تشغيل جھاز فتح الباب بأي من الطرق التالية .جھاز فتح الباب إلى تشحيم إضافي "لوحة تح ك ُّ م جھاز فتح الباب: أزرار "أعلى" و"أسفل •...
- Page 38 ملحقات اختيارية زر جداري السلكي ثنائي القنوات طراز التحرير الخارجي السريع 1702 طراز جھاز إرسال رباعي القنوات TX4UNI . طراز IR أشعةEV771 6. طراز نظام الدخول بدون مفتاح . طراز ﺿﻐط ﺳﻠكEV75 7. طراز مفتاح التبديل الخارجي طراز معتمدة...
- Page 39 حل المشكالت :جھاز فتح الباب يبذل مجھودً ا لتشغيل الباب قد يكون الباب غير متوازن أو قد تكون زنبركات الباب مكسورة. أغلق • جھاز فتح الباب ال يعمل من خالل أي من أزرار التنشيط أعلى/أسفل أو الباب واستخدم التحرير اليدوي لفصل الباب. افتح وأغلق الباب يدو ي ًا. إن :أجھزة...
- Page 40 المخطط التشخيصي الموجودة على لوحة التحكم عد د ً ا من المرات مشير ة ً إلى 2 و أرقام تمت برمجة جھاز فتح باب جراجك مع إمكانيات التشخيص الذاتي. ستومض مؤشرات .وجود رمز خاطئ الحل الممكن األعراض الرمز التشخيصي LED 3 LED 1 لم...
Need help?
Do you have a question about the WeatherDrive LM555EVGBSA and is the answer not in the manual?
Questions and answers