
Related Manuals for DAS company P50


Summary of Contents for DAS company P50
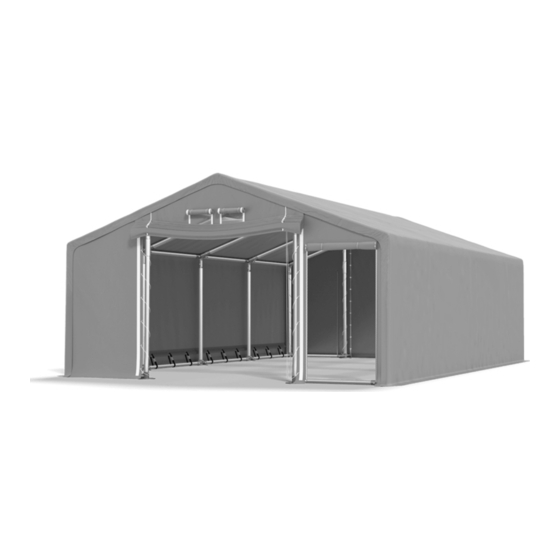
- Page 1 Tent 8m type P50 Instrukcja montażu namiotu PL/EN Instrukcja montażu - Namiotu www.dascompany.com biuro@dascompany.com...
- Page 2 7. Elementy poszycia mogą różnić się odcieniem koloru, nie stanowi to wady, a co za tym idzie nie podlega wymianie na podstawie gwarancji. 8. Jeżeli wada towaru polegać będzie na tym, że towar nie będzie posiadać właściwości o których Das Company zapewniał, lub jeżeli towar lub jego element będą...
- Page 3 1 825 000 PLN (hereinafter referred as “Das Company”) grants for sold goods the warranty under the conditions described below. 2. The warranty for goods sold by Das Company is given for a period of one year from the date of purchase of the goods by the purchaser and is only valid on the territory of Poland.
- Page 4 17. Składając zamówienie kupujący zgodnie z Rozporządzeniem Min. Finansów z dn. 17 grudnia 2010 r., Dz.U. Nr 249, Poz. 1661, akceptuje wysyłane drogą elektroniczną faktury za towary zakupione w Das Company sp. z o.o., z siedzibą w Krakowie, na adres podany przez kupującego w zamówieniu.
- Page 5 21. Namioty z konstrukcją S38 (summer) i SP38 (summer plus) nadają się jedynie do użytku w okresie letnim. 22. Namioty z plandeką PE nadają się jedynie do użytku w okresie letnim. 23. Namioty z konstrukcją P50 (winter), PP50 (winter plus), polar i polar plus mogą być użytkowane również w okresie zimowym. www.dascompany.com...
- Page 6 Tent 8m type P50 Instrukcja montażu namiotu E xt ra E xt ra 8 x 8 Obrazek Nazwa Rura Φ50 (1890mm) Pipe Φ50 (1890mm) Rura Φ38 (1920mm) Pipe Φ38 (1920mm) Rura Φ38 (930mm) Pipe Φ38 (930mm) Łącznik potrójny dachowy Φ54 Triple roof connector Φ54...
- Page 7 Tent 8m type P50 Tent installation instructions E xt ra E xt ra 8 x 8 Obrazek Nazwa Triple corner connector Φ54 (110 0 ) Łącznik potrójny narożny Φ54 (110 0 ) Quad corner connector Φ54 (110 0 ) Łącznik potrójny narożny Φ54 (110 0 ) Quad side connector Φ54 (110...
- Page 8 P50 Instrukcja montażu namiotu Lista elementów dodatkowych Nazwa Podniesienie o 0,5m Increase of 0,5m Podniesienie o 1m Increase of 1m Wzmocnienie Reinforcement Naciągi boczne wysokość 2m Pulls side height 2m Naciągi boczne wysokość 2,5m Pulls side height 2,5m Naciągi boczne wysokość 3m Pulls side height 3m Naciągi boczne wysokość...
- Page 9 Tent 8m type P50 Instrukcja montażu namiotu KROK 1 Namiot powinien być rozłożony na równej powierzchni. D l a n a m i o t ó w o p a r z y s t e j d ł u g o ś c i b o k u np.: 8m, 10m, 12m, 20m, 30m, …...
- Page 10 Tent 8m type P50 Instrukcja montażu namiotu KROK 2/a KROK i (nr.A4 Połącz dachowe łącznik ) oraz (n r.A 5 ) z poziomymi wspornikami (n r.1 0 ) śrubami M6x35 A4/A5 Połącz po dwa poziome wsporniki (n r.8 4 ) z A4/A5 poziomymi wspornikami (n r.8 3 ) za pomocą...
- Page 11 KROK Tabela elementów dla wysokości Tabela elementów dla wysokości Elementy Elementy Wysokość Wysokość nr.1 3,5m nr.1 + nr.20 + nr.19 (Rysunek nr.1) (Rysunek nr.3) 2,5m nr.1 + nr.19 nr.1 + nr.20 + nr.20 (Rysunek nr.2) (Rysunek nr.3) nr.1 + nr.20 (Rysunek nr.2) Unieś...
- Page 12 KROK 4 Do konstrukcji namiotu zamontuj stopy narożne (nr.6) po linii przekątnej oraz stopy (nr.7) również po linii przekątnej. Na bokach namiotu zamontuj stopy (nr.8) i połącz je z rurami (nr.2) dla namiotów o nieparzystej długości np:. 9m, 11m, 13m, itd.. w trzeciej sekcji zamontuj rurę przedłużającą...
- Page 13 Opcja dla namiotów powyżej 2m (Polar plus) (Polar) Dla namiotów powyżej 2m w wersji Polar Plus montujemy poziome wsporniki (nr.87) na wjazdach. Wsporniki przymocuj do kielicha rury poziomej podnoszącej namiot. Opcja dla namiotów ze wzmocnieniami pojedynczymi (Polar) Połącz wzmocnienie (nr.21) z rurą pionową (nr.1), oraz rurą dachową (nr.81) Opcja dla namiotów ze wzmocnieniami podwójnymi (Polar plus) (Polar) Połącz po dwa wzmocnienia (nr.21) z rurą...
- Page 14 Opcja dla namiotów ze wzmocnieniami pojedynczymi (Polar) Zamocuj wsporniki boczne (nr.21) do rury (nr.1) i rury (nr.2). Wsporniki powinny być zamocowane od wewnętrznej strony namiotu. Opcja dla namiotów ze wzmocnieniami podwójnymi (Polar plus) Zamocuj wsporniki boczne (nr.21) do rury (nr.1) i rury (nr.2). Wsporniki powinny być...
- Page 15 Tent 8m type P50 Tent installation instructions STEP 1 The tent should be put on a flat surface. F o r t e n t s w i t h e v e n l e n g t h o f t h e s i d e e . g . : 8 m , 1 0 m , 1 2 m , 2 0 m , 3 0 m …...
- Page 16 Tent 8m type P50 Tent installation instructions STEP 2/a KROK Connect the roof connectors (n o .A 4 ) and (n o .A 5 ) with horizontal cantilevers (n o .1 0 ) using M6x35 A4/A5 screws. Connect the horizontal cantilevers (no.84) zwith A4/A5 phorizontal cantilevers (no.83) using M6x35...
- Page 17 STEP Table of elements for height Table of elements for height Elements Elements Height Height nr.1 3,5m nr.1 + nr.20 + nr.19 (Picture no.1) (Picture no.3) 2,5m nr.1 + nr.19 nr.1 + nr.20 + nr.20 (Picture no.2) (Picture no.3) nr.1 + nr.20 (Picture no.2) Gently raise the tent on its one side and mount pipes (no.1) .
- Page 18 STEP 4 Add corner foot to the construction of the tent (No.6) diagonally and the feet (No.7) also diagonally. On the sides of the tent put feet (No.8) and connect them with pipes (No.2) for tents with uneven length for example: 9m, 11m, 13m, etc. in the third section, install the pipe extending by 1m (No.3).
- Page 19 Option for tents higher than 2m (Polar plus) (Polar) For tent higher than 2m polar plus install horizontal brackets (no.87) on entrances. Brackets attach to the chalise of horizontal, lifting pipe. Option for tents with single reinforcements (Polar) Attach the side cantilevers (no.21) with vertical pipe (no.1), and roof pipe (no.81) Option for tents with double reinforcements (Polar plus) (Polar) Connect the two reinforcements (no.21) with a vertical pipe (no.1), and the roof pipe (no.81)
- Page 20 Option for tents with single reinforcements (Polar) Attach the side cantilevers (no.21) to the pipe (No.1) and the pipe (No.2). Cantilevers should be install the inside of the tent. Option for tents with double reinforcements (Polar plus) Attach the side cantilevers (no.21) to the pipe (No.1) and the pipe (No.2). Cantilevers should be install on both side of pipe (no.1) and pipe(no.2).
Need help?
Do you have a question about the P50 and is the answer not in the manual?
Questions and answers