Asko HI9ETA04 Instructions For Use Manual
Hide thumbs
Also See for HI9ETA04:
- Instructions for use manual (68 pages) ,
- Instructions for use manual (68 pages)

Related Manuals for Asko HI9ETA04


Summary of Contents for Asko HI9ETA04
- Page 1 Instructions for use Induction hob HI1995G / HI9ETA04 HI1975G / SIVK9DTA HI1655G / SIVK6ETA HI1655M / SIVK6ETA HI1355G / HI3DTA03...
- Page 2 ZH 3 - ZH 33 Manual EN 3 - EN 33 Pictograms used Important information...
- Page 6 Ø...
- Page 12 ▷ ▷ ▷...
- Page 17 ▷ ▷ ▷...
- Page 23 Ø Ø Ø Ø Ø Ø Ø Ø Ø Ø Ø Ø Ø Ø Ø Ø Ø Ø Ø Ø...
- Page 24 Ø Ø Ø Ø...
- Page 25 Ø Ø Ø Ø...
- Page 26 Ø Ø...
-
Page 35: Table Of Contents
CONTENTS Your induction hob Introduction Control panel Description Safety instructions Temperature safety Cooking-time limiter Using the touch controls Induction cooking How does induction work Induction noises Pans Operation Switching on the hob and setting the power Residual heat indicator Boost Two cooking zones behind each other How to bridge the Vario induction zones Switching off... -
Page 36: Your Induction Hob
YOUR INDUCTION HOB Introduction This hob has been designed for the real lover of cooking. Cooking on an induction hob has a number of advantages. It is easy, because the hob reacts quickly and can also be set to a very low power level. -
Page 37: Control Panel
YOUR INDUCTION HOB Control panel 12 13 14 15 1. Pause button 2. Pause indicator 3. Childproof lock/Eco stand-by button 4. Childproof lock indicator/Eco stand-by indicator 5. Level indicator in cubes 6. On/off button 7. Reduce the power quickly 8. Reduce the power 9. -
Page 38: Description
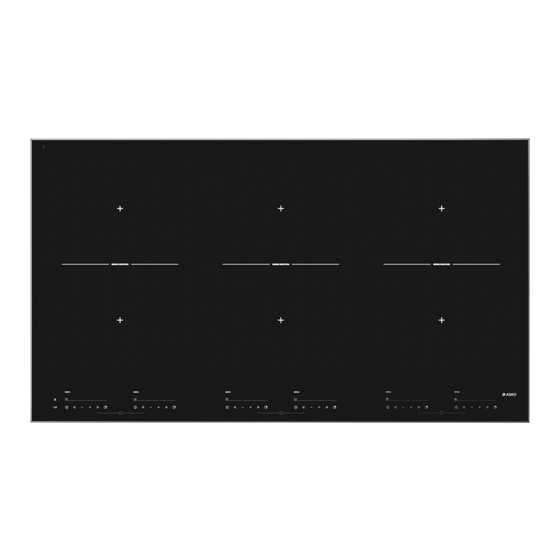
YOUR INDUCTION HOB Description HI1355G HI1655G/HI1655M HI1975G HI1995G 1. Adaptive zone 180 x 220 mm 3,7kW (zones that can be connected) 2. Cooking zone Ø 260 5,5 kW (double ring) EN 6... -
Page 39: Temperature Safety
SAFETY Before use, read the separate safety instructions first! Temperature safety • A sensor continuously measures the temperature of certain parts of the hob. Every cooking zone is equipped with a sensor that measures the temperature of the bottom of the pan to avoid any risk of overheating when a pan boils dry. In case of temperatures rising too high, the power is reduced automatically or the hob switches off automatically. -
Page 40: Use
Using the touch controls The touch controls may take some getting used to if you are used to other (rotary) controls. Place the tip of your finger flat on the control to achieve the best results. You do not have to apply any pressure. The touch sensors only react to the light pressure of a fingertip. -
Page 41: How Does Induction Work
How does induction work A magnetic field is generated in the appliance. By placing a pan with an iron base on a cooking zone, a current is induced in the pan base. This induced current generates heat in the base of the pan. Easy The electronic controls are accurate and easy to set. -
Page 42: Pans
A pan is suitable if the base of the pan is attracted by the magnet. Suitable Unsuitable Special stainless steel pans Earthenware Class Induction Stainless steel Hard-wearing enamelled pans Porcelain Enamelled cast-iron pans Copper Plastic Aluminium One is advised to use the pans recommended by ASKO for the automatic cooking programs. Attention EN 10... - Page 43 Be careful with enamelled sheet-steel pans: • the enamel may chip (the enamel comes loose from the steel), if you switch the hob on at a high setting when the pan is (too) dry; • the base of the pan may warp - due, for example, to overheating or to the use of too high a power level.
-
Page 44: Operation
OPERATION Switching on the hob and setting the power The cooking zones have 12 levels. Beside it there is a level ‘boost’. 1. Place a pan in the middle of a cooking zone. 2. Press the child lock button. You will hear a single beep. 3. -
Page 45: Boost
OPERATION Boost You can use the ‘boost’ function to cook at the highest power level during a short period of time (max.10 minutes). After the maximum boost time the power will be reduced to setting 12. Switching on ‘boost’ 1. Put a pan on a cooking zone. 2. -
Page 46: How To Bridge The Vario Induction Zones
OPERATION How to bridge the Vario induction zones The Vario induction zones can be bridged (linked) to each other. This creates 1 large zone that can be used for example for a large fish pan or one large cooking pan. •... -
Page 47: Switching Off
OPERATION Switching off all cooking zones Press the child lock button to switch off all the cooking zones at the same time. You will hear a beep. The red childproof lock indicator next to the child lock button will blink very slowly. •... -
Page 48: Child Lock
OPERATION From the eco stand-by mode you can’t immediately start cooking. To be able to, the hob first needs to be switched to the stand-by mode. Did you know that After 30 minutes in the stand-by mode the hob will automatically switch to the eco stand-by mode to prevent unnecessary energy consumption. -
Page 49: Pause
OPERATION Pause With this pause function, you can set the entire hob to ‘pause’ for 5 minutes during cooking. In this way you can leave or clean the hob in a safe way during a short period of time, without losing settings. Switching the hob to the pause mode •... -
Page 50: Timer / Kitchen Timer
OPERATION Timer / Kitchen timer The timer/alarmclock button of each cooking zone has two functions: The timer function The kitchen timer function This function can be recognized This function can be recognized by the red small arrow pointing by the red small arrow pointing down. - Page 51 OPERATION 1. Press the timer/alarmclock button of the cooking zone once. 2. Press the + or - button to switch from the timer function to the kitchen timer function. After that you can set the desired cooking time with the + button. Then you can change the set time with the - button.
-
Page 52: Switching On And Off The Beep
OPERATION You can press and hold the + or - button to set the desired cooking time quicker. Switching on and off the beep 1. Press the on/off button on the far left twice. 2. Press and hold the << button and the + button simultaneously until you hear a beep. -
Page 53: Automatic Cooking Programs
OPERATION Automatic cooking programs Your hob is fitted with 6 automatic cooking programs. You can set any end time of an automatic cooking program with the aid of the kitchen timer function (refer to page 18). The cooking programs are based on regular quantities. - Page 54 OPERATION This function can only be switched on if the hob is not being used. To switch on this function, all zones first need to be switched off. With the far left-hand menu button, the function can be selected by releasing the menu button when the chef indicator (24) lights up.
- Page 55 3,5 l only water 1) After the beep the rice or pasta can be added. This function works best with pans recommended by ASKO. ** These menu functions work best if they are started at the beginning of the cooking process.
- Page 56 Dish Number Quantity +/- Zone of people 2000 g High pan (Ø 200) Ø 210 / Vario All dishes 4000 g Large pan (Ø 240) Ø 260 double This function works best with pans recommended by ASKO. EN 24...
- Page 57 5 - 6 500 - 600 g Frying pan Ø 260 double This function works best with pans recommended by ASKO. ** These menu functions work best if they are started at the beginning of the cooking process. EN 25...
-
Page 58: Healthy Cooking
Healthy cooking Burning point of different types of oil To ensure your food is fried as healthily as possible, Asko recommends choosing the type of oil according to the frying temperature. Each oil has a different burning point at which toxic gasses are released. The below table shows the burning points for various types of oil. -
Page 59: Cooking Settings
OPERATION Cooking settings Because the settings depend on the quantity and composition of the contents of the pan, the table below is intended as a guideline only. Use setting ‘boost’ and setting 11 and 12 to: • bring the food or liquid to the boil quickly; •... - Page 60 OPERATION Use settings 1-3 to: • simmer bouillon; • stew meats; • simmer vegetables; • melt chocolate; • poach; • keep warm; • melt cheese. EN 28...
-
Page 61: Maintenance
MAINTENANCE Cleaning Set the child lock before you start cleaning the hob. Daily cleaning • Although food spills cannot burn into the glass, we nevertheless recommend you to clean the hob immediately after use. • Best for daily cleaning is a damp cloth with a mild cleaning agent. •... -
Page 62: General
TROUBLESHOOTING General If you notice a crack in the glass top (however small), switch the hob off immediately, unplug the hob, turn off the (automatic) fuse switch(es) in the meter cupboard or, in the event of a permanent connection, set the switch in the power supply lead to zero.) Contact the service department. - Page 63 TROUBLESHOOTING Symptom Possible cause Solution The hob is not working There is no power supply Check the fuses or the and nothing appears in the due to a defective cable or a electric switch (if there is no display. faulty connection. plug).
-
Page 64: Environmental Aspects
ENVIRONMENTAL ASPECTS Disposal of packaging and appliance In the manufacturing of this appliance durable materials were used. Make sure to dispose of this equipment responsibly at the end of its lifecycle. Ask the authorities for more information regarding this. The appliance packaging is recyclable. The following may have been used: •... -
Page 65: Information According Regulation (Eu) 66/2014
ENVIRONMENTAL ASPECTS Information according regulation (EU) 66/2014 Measurements according EN 60350-2 HI1655G Model identification HI1355G HI1975G HI1995G HI1655M Induction hob Type of hob Number of cooking zones and/or area Induction cooking zones and cooking areas Heating technology For circular cooking zones: diameter of useful surface area per electric heated cooking zone 2 = 26.0 in cm... - Page 66 EN 34...
- Page 67 EN 35...
- Page 68 535058 399 (02-16) 535058...
Need help?
Do you have a question about the HI9ETA04 and is the answer not in the manual?
Questions and answers