Table of Contents
Advertisement
Available languages
Available languages
Quick Links
MODEL / MODELO / MODÈLE :
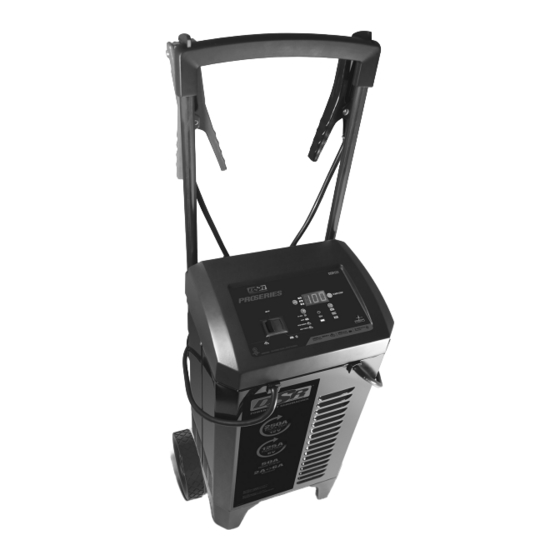
DSR131
Battery Charger & Engine Starter
Cargador de baterías y arrancador
Chargeur de batterie et aide de démarrage
OWNERS MANUAL / MANUAL DEL USUARIO / MANUEL D'UTILISATION
PLEASE SAVE THIS OWNERS MANUAL AND READ BEFORE EACH USE.
This manual will explain how to use the battery charger safely and effectively.
Please read and follow these instructions and precautions carefully.
POR FAVOR CONSERVE ESTE MANUAL DEL USUARIO Y LEALO ANTES
DE CADA USO. En este manual le explica cómo utilizar el cargador de batería
de manera segura y confiable. Por favor, lea y siga las siguientes instrucciones
y precauciones.
GARDER LE MANUEL D'INSTRUCTION ET LISEZ LE AVANT CHAQUE
UTILISATION. Ce manuel explique comment utiliser le chargeur de batterie
d'une façon securitaire et efficace. S'il vous plaît lisez et suivez ces instructions
et precautions.
0099001986-00
Advertisement
Table of Contents

Subscribe to Our Youtube Channel
Related Manuals for DSR DSR131


Summary of Contents for DSR DSR131
- Page 1 MODEL / MODELO / MODÈLE : DSR131 Battery Charger & Engine Starter Cargador de baterías y arrancador Chargeur de batterie et aide de démarrage OWNERS MANUAL / MANUAL DEL USUARIO / MANUEL D’UTILISATION PLEASE SAVE THIS OWNERS MANUAL AND READ BEFORE EACH USE.
-
Page 2: Important Safety Instructions
1. IMPORTANT SAFETY INSTRUCTIONS SAVE THESE INSTRUCTIONS. 1.1 SAVE THESE INSTRUCTIONS – 1.8 Do not operate charger if it has received This manual contains important safety a sharp blow, been dropped, or otherwise and operating instructions. damaged in any way; take it to a qualified serviceman. -
Page 3: Preparing To Charge
3. PREPARING TO CHARGE 3.1 If necessary to remove battery from battery without removable cell caps, such vehicle to charge, always remove as valve regulated lead acid batteries, grounded terminal from battery first. Make carefully follow manufacturer’s recharging sure all accessories in the vehicle are off, instructions. -
Page 4: Follow These Steps When Battery Is Outside Vehicle
7. FOLLOW THESE STEPS WHEN BATTERY IS OUTSIDE VEHICLE WARNING: A SPARK NEAR THE 7.4 Position yourself and free end of cable as BATTERY MAY CAUSE A BATTERY far away from battery as possible – then EXPLOSION. TO REDUCE THE RISK OF connect NEGATIVE (BLACK) charger clip A SPARK NEAR THE BATTERY: to free end of cable. - Page 5 Boost mode: – The Digital Display shows the Voltage > OFF > Amperage… battery voltage. Charge/Maintain mode: Charge/Maintain – The charger is in Voltage > OFF > Battery Percentage > 6<>2A Charge/Maintain mode. Amperage… Boost – The charger is in 50A Boost Engine Start mode: mode.
- Page 6 11. OPERATING INSTRUCTIONS CHARGING THE BATTERY 8. Press the START button. Keep in mind: when charging a battery, • If the unit automatically switches to the more a battery is discharged, the the Boost, but the 6<>2A Charge/ faster it absorbs charge from the charger. Maintain rate is preferred, press the In other words, it takes longer for the Rate Selection...
- Page 7 MAINTAINING A BATTERY and the battery to cool down for 180 The DSR131 charges and maintains seconds. If the engine fails to start, use 6V and 12 volt batteries, keeping them at the 50A Boost mode to put energy into full charge.
-
Page 8: Maintenance And Care
12. MAINTENANCE AND CARE A minimal amount of care can keep your • Coil the input and output cords neatly battery charger working properly for years. when storing the charger. This will help prevent accidental damage to the cords • Clean the clamps each time you are and charger. -
Page 9: Before Returning For Repairs
PROBLEM POSSIBLE CAUSE SOLUTION Engine start does Drawing more than the Crank time varies with the amount of not work. Engine Start rate. current drawn. If cranking draws more than the Engine Start rate, crank time may be less than 5 seconds. Failure to wait 3 minutes (180 When the Engine Start LED blinks,... -
Page 10: Limited Warranty
16. LIMITED WARRANTY WARRANTY NOT VALID IN MEXICO. SCHUMACHER ELECTRIC CORPORATION, 801 BUSINESS CENTER DRIVE, MOUNT PROSPECT, IL 60056-2179, MAKES THIS LIMITED WARRANTY TO THE ORIGINAL RETAIL PURCHASER OF THIS PRODUCT. THIS LIMITED WARRANTY IS NOT TRANSFERABLE OR ASSIGNABLE. Schumacher Electric Corporation (the “Manufacturer”) warrants this battery charger for two (2) years from the date of purchase at retail against defective material or workmanship that may occur under normal use and care. -
Page 11: Instrucciones Importantes De Seguridad
1. INSTRUCCIONES IMPORTANTES DE SEGURIDAD GUARDE ESTAS INSTRUCCIONES. 1.1 GUARDE ESTAS INSTRUCCIONES – 1.8 No utilice el cargador si el mismo recibió Este manual contiene instrucciones un golpe fuerte, si se cayó o si sufrió operativas y de seguridad de importancia. daños de cualquier otra forma;... -
Page 12: Preparación Para La Carga
como para soldar un anillo o provocar cargador de batería para cargar baterías efectos similares sobre el metal, de pila seca que por lo general se utilizan causando una quemadura de gravedad. con artefactos domésticos. Estas baterías podrían explotar y provocar lesiones a 2.8 Utilice este cargador solamente para personas o daño a la propiedad. -
Page 13: Conexiones A Tierra Y Energía De Ca
6.3 Verifique la polaridad de los bornes de cuerpos metálicos. Conecte a una pieza la batería. El borne POSITIVO (POS, metálica de calibre grueso del marco o P, +) de la batería generalmente posee del bloque motor. un diámetro mayor al borne NEGATIVO 6.6 En un vehículo con descarga a tierra (NEG, N, -). -
Page 14: Instrucciones De Montaje
8.3 USO DE UN CABLE DE EXTENSIÓN • El tamaño del cable debe ser lo El uso de una extensión no se suficientemente extenso para el calibre recomienda. Si debe usar una extensión, de amperios del cargador de CA, como siga estas pautas: se especifica a continuación: •... - Page 15 BOTÓN DE SELECCIÓN BOTÓN DE BATTERY TYPE DE VELOCIDAD (TIPO DE BATERÍA) Cuando se encuentre en el modo de Utilice este botón para seleccionar el tipo Impulsar o Carga/Mantenimiento, utilice de batería. este botón para seleccionar una de las – Este tipo de batería generalmente siguientes potencias: se utiliza en automóviles, camiones y 50A Impulsar –...
-
Page 16: Instrucciones De Operación
11. INSTRUCCIONES DE OPERACIÓN CARGA DE LA BATERÍA conectada correctamente, el LED Tenga en cuenta que cuando carga una se encenderá sin parpadear y se batería, mientras más descargada esté, iniciará el proceso de incremento. absorberá de forma más rápida la carga El modo de Impulsar permanecerá... - Page 17 NOTA: Si el motor gira, pero no enciende, de 50 A para darle energía a la batería no existe un problema con el sistema de durante algunos minutos más, antes de arranque, sino en cualquier otra parte intentar arrancar el motor de nuevo. del vehículo.
-
Page 18: Mantenimiento Y Cuidado
MANTENIENDO UNA BATERÍA condiciones que surgan, podrías causar El DSR131 carga y mantiene las baterías absorsión de corriente excesiva. De modo de 6 y 12 voltios, manteniéndolas a carga que, ocasionalmente seguimiento de su completa. batería y el proceso de carga se requiere. -
Page 19: Antes De Devolver A Reparaciones
Localización y Solución de Problemas PROBLEMA CAUSA POSIBLE SOLUCIÓN El cargador no se Tomacorriente de CA fuera de Controle la posible presencia de enciende incluso al funcionamiento. fusibles abiertos o disyuntores que estar bien conectado. suministren energía al tomacorriente de CA. Conexión eléctrica deficiente. -
Page 20: Especificaciones
15. ESPECIFICACIONES Entrada ..........120V AC @ 60Hz, 11A continuo, 50A intermitente Salida ......... 6/12V CC, 6A; 50A int, 60 seg. max en, 180 seg. min off 6/12V CC, 125/250A int., 5 seg. max. en, 180 seg. min. off Entrada ..........120V AC @ 60Hz, 11A continuo, 50A intermitente Salida ......... -
Page 21: Consignes De Sécurité Importantes
1. CONSIGNES DE SÉCURITÉ IMPORTANTES CONSERVER CES INSTRUCTIONS. 1.1 CONSERVER CES INSTRUCTIONS – 1.8 Ne pas faire fonctionner le chargeur s’il a Ce manuel contient des instructions reçu un choc violent, est tombé par terre importantes concernant la sécurité et le ou a été... -
Page 22: Préparation Pour Le Chargement
recommandé de 12Ah (6V) et 22-59Ah 2.9 NE JAMAIS charger une batterie gelée. (12V). Il n’est pas conçu pour alimenter un 2.10 AVERTISSEMENT : Ce produit contient système électrique à basse tension autre un ou plusieurs produits chimiques que dans une application d’un démarreur. reconnus par l’État de Californie pour Ne pas utiliser ce chargeur de batterie causer cancer, des malformations... -
Page 23: Étapes À Suivre Quand La Batterie Est Installée Hors Du Véhicule
l’étape 6.5. Si la borne positive est N, –) non mise à la masse de la batterie. raccordée au châssis, voir l’étape 6.6. Raccorder la pince POSITIVE (ROUGE) au châssis du véhicule ou au moteur, 6.5 Si la borne négative est mise à la masse, loin de la batterie. -
Page 24: Directives D'assemblage
9. DIRECTIVES D’ASSEMBLAGE 9.1 Enlever tous les cordons dérouler sur 9.2 Tirez la poignée vers le haut pour les câbles avant d’utiliser le chargeur de l’étendre jusqu’à ce qu’elle se ferme. batterie. (Si nécessaire, appuyez sur les petits boutons argentés vers l’intérieur.) 10. -
Page 25: Consignes D'utilisation
– Le chargeur a détecté qu’une – La construction de Glass Mat batterie est branchée et effectue absorbée permet à l’électrolyte à être l’opération sélectionnée. suspendu à proximité de matière active de Chargé / Maintien – la plaque. En théorie, cela améliore à la La batterie est complètement chargée fois la charge et l’efficacité... - Page 26 enfoncée ou que l’interrupteur principal REMARQUE : Par temps extrêmement MARCHE/ARRÊT soit réglé sur froid, ou si la batterie se trouve en-dessous ARRÊT. L’appareil ne changera pas de deux volts, commencez par amplifier la automatiquement en débit Charge / batterie en mode Boost 50 A pendant au Maintenir pour terminer la charge.
-
Page 27: Maintenance Et Entretien
MODE DE DÉSULFATATION MAINTENIR UNE BATTERIE L’écran affichera « SUL » lorsqu’une Le DSR131 charge et maintient batteries batterie sulfatée est détectée, puis le de 6 et 12 volts, de les maintenir à pleine chargeur passera au mode désulfatation. -
Page 28: Dépannage
13. TABLEAU DE DÉPANNAGE ET CODES D’ÉCHEC Codes d’échec CODE DESCRIPTION RAISON / SOLUTION La tension de batterie est toujours en La batterie pourrait être mauvaise; faites-la vérifier ou dessous de 10 V (pour une batterie remplacer. de 12V) or 5V (pour une batterie de 6V) après 2 heures de chargement. -
Page 29: Avant De Retourner Pour Les Réparations
PROBLÈME CAUSE POSSIBLE SOLUTION L’écran affiche La tension de batterie est La batterie pourrait être mauvaise. « bAD / bAt / F01 ». toujours en dessous de 10 Assurez-vous qu’il n’y a pas de charges V (pour une batterie de 12V) sur la batterie. -
Page 30: Garantie Limitée
16. GARANTIE LIMITÉE GARANTIE N’EST PAS VALIDE AU MEXIQUE. SCHUMACHER ELECTRIC CORPORATION, 801 BUSINESS CENTER DRIVE, MOUNT PROSPECT, IL 60056-2179, DONNE CETTE GARANTIE LIMITÉE POUR PREMIER ACHETEUR DE CE PRODUIT. CETTE GARANTIE LIMITÉE N’EST PAS TRANSFÉRABLES NI CESSIBLES. Schumacher Electric Corporation (le « Fabricant ») garantit ce unité pour deux (2) ans à... -
Page 31: Warranty Card / Tarjeta De Garantía
WARRANTY CARD / TARJETA DE GARANTÍA SAVE ON POSTAGE! ACTIVATE YOUR WARRANTY ONLINE – THE QUICK AND EASY WAY! Go to www.batterychargers.com to register your product online. (No internet access? Send in the completed warranty card.) 2 YEAR LIMITED WARRANTY PROGRAM REGISTRATION MODEL: _____________________ DESCRIPTION: ________________________ This is the only express limited warranty, and the manufacturer neither assumes... -
Page 32: Carte De Garantie
CARTE DE GARANTIE PAS BESOIN DE VOIE POSTAL ! ACTIVEZ VOTRE GARANTIE SUR INTERNET – LA VOIE PLUS RAPIDE ET FACILE! Aller sur www.batterychargers.com pour enregistrer votre produit en ligne. (Pas d’accès internet? Envoyer la carte de garantie par poste.) INSCRIPTION AU PROGRAMME DE GARANTIE LIMITÉE DE DEUX ANS...
Need help?
Do you have a question about the DSR131 and is the answer not in the manual?
Questions and answers