Advertisement
Available languages
Available languages
Quick Links
THIS INSTRUCTION BOOKLET CONTAINS IMPORTANT SAFETY INFORMATION.
Manufactured By:
BDDMI
1321 Tyler St NE, Minneapolis, MN 55413
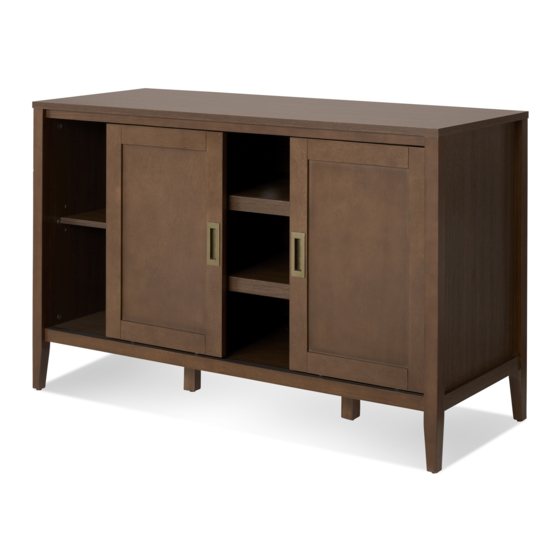
FILLMORE CREDENZA
Assembly Instructions
PLEASE READ AND KEEP FOR FUTURE REFERENCE.
Customer Service:
1.877.436.7290
customersupport@tenspringstreet.com
walnut
model# BH47-021-099-23
java
model# BH47-021-099-24
Lot#_________Date________
1
Advertisement

Subscribe to Our Youtube Channel
Related Manuals for Better Homes and Gardens FILLMORE CREDENZA


Summary of Contents for Better Homes and Gardens FILLMORE CREDENZA
- Page 1 FILLMORE CREDENZA Assembly Instructions walnut model# BH47-021-099-23 java model# BH47-021-099-24 THIS INSTRUCTION BOOKLET CONTAINS IMPORTANT SAFETY INFORMATION. PLEASE READ AND KEEP FOR FUTURE REFERENCE. Manufactured By: Customer Service: BDDMI 1.877.436.7290 Lot#_________Date________ 1321 Tyler St NE, Minneapolis, MN 55413 customersupport@tenspringstreet.com...
-
Page 2: Tools Needed
TOOLS NEEDED Hammer Flat Head Screwdriver Phillips Head Screwdriver PARTS LIST T O P P A N E L C E N T E R A D J U S TA B L E S H E L F [ X 2 ] L E F T S I D E A S S E M B L Y L E F T D O O R R I G H T S I D E A S S E M B L Y... -
Page 3: Hardware List
HARDWARE LIST 1 . W o o d D o w e l x 1 6 2 . C a m B o l t x 1 6 3 . C a m x 1 6 4 . S h o r t P a n H e a d S c r e w x 1 9 5 . - Page 4 HARDWARE LIST 7 . W a s h e r 8 . W a l l A n c h o r 9 . W a l l S c r e w 1 0 . W a l l S t r a p CAUTION: 1.
-
Page 5: How To Use The Cam Lock System
HOW TO USE THE CAM LOCK SYSTEM 180º... - Page 6 STEP 1 1 . W o o d 2 . C a m B o l t 3 . C a m D o w e l NOT TO SCALE. REFER TO PAGE 3 FOR ACTUAL SIZE HARDWARE. 1. Carefully tap small wooden dowels into place. Leave 1/2” of the dowels sticking out. 2.
- Page 7 STEP 2 1 . W o o d 2 . C a m B o l t 3 . C a m D o w e l NOT TO SCALE. REFER TO PAGE 3 FOR ACTUAL SIZE HARDWARE. 1. Carefully tap small wooden dowels into place. Leave 1/2” of the dowels sticking out. 2.
- Page 8 STEP 3 1 . W o o d 2 . C a m B o l t 3 . C a m D o w e l NOT TO SCALE. REFER TO PAGE 3 FOR ACTUAL SIZE HARDWARE. 1. Carefully tap small wooden dowels into place. Leave 1/2” of the dowels sticking out. 2.
- Page 9 STEP 4 1 . W o o d 2 . C a m B o l t 3 . C a m D o w e l NOT TO SCALE. REFER TO PAGE 3 FOR ACTUAL SIZE HARDWARE. 1. Carefully tap small wooden dowels into place. Leave 1/2” of the dowels sticking out. 2.
- Page 10 STEP 5 x 1 9 4 . S h o r t P a n H e a d S c r e w Begin by installing all of the screws along one edge of the back panel. Next, using a square or tape measure, make sure that the case is square.
- Page 11 STEP 6 x 1 6 5 . S h e l f P i n finished edge NOT TO SCALE. REFER TO PAGE 3 FOR ACTUAL SIZE HARDWARE. 1. Insert shelf supports into desired holes. Different holes accommodate different shelf heights. 2.
- Page 12 STEP 7...
- Page 13 STEP 8...
- Page 14 STEP 9 8 . W a l l 9 . W a l l S c r e w 6 . L o n g P a n 1 0 . W a l l A n c h o r H e a d S c r e w S t r a p 7 .
- Page 15 WARNING WARNING Serious or fatal crushing injuries can occur from furniture tip-over. To help prevent tip-over: For use with televisions weighing 50 pounds (22.7 kg) or less. Use with • Install tip-over restraint provided. heavier televisions may result in • Place heaviest items in the lowest drawers. instability causing tip over resulting •...
- Page 16 TRINCHADOR FILLMORE Instrucciones de Ensamble nuez model# BH47-021-099-23 café model# BH47-021-099-24 ESTE MANUAL DE INSTRUCCIONES CONTIENE INFORMACIÓN IMPORTANTE DE SEGURIDAD. POR FAVOR LEA Y GUARDE PARA REFERENCIA FUTURA. Fabricado Por : Servicio al Cliente: BDDMI 1.877.436.7290 Lot#_________Fecha_______ 1321 Tyler St NE, Minneapolis, MN 55413 customersupport@tenspringstreet.com...
-
Page 17: Herramientas Necesarias
HERRAMIENTAS NECESARIAS Martillo Destornillador de Cabeza Plana Destornillador Phillips LISTA DE PARTES PA N E L S U P E R I O R R E P I S A A D J U S TA B L E C E N T R A L [ X 2 ] E N S A M B L E D E L L A D O I Z Q U I E R D O P U E R TA I Z Q U I E R D A E N S A M B L E D E L L A D O D E R E C H O... - Page 18 LISTA DE ARTÍCULOS DE FERRETERÍA 1 . C l a v i j a d e M a d e r a x 1 6 2 . To r n i l l o d e L e v a x 1 6 3 .
- Page 19 LISTA DE ARTÍCULOS DE FERRETERÍA 7. A r a n d e l a 8. Ta q u e t e d e P a r e d 9. To r n i l l o d e P a r e d 1 0 .
- Page 20 COMO USAR EL SISTEMA FIJADOR DE LEVA 180º...
- Page 21 PASO 1 1 . C l a v i j a d e 2 . To r n i l l o 3 . L e v a M a d e r a d e L e v a NO ESTÁ...
- Page 22 PASO 2 1 . C l a v i j a d e 2 . To r n i l l o 3 . L e v a M a d e r a d e L e v a NO ESTÁ...
- Page 23 PASO 3 1 . C l a v i j a d e 2 . To r n i l l o 3 . L e v a M a d e r a d e L e v a NO ESTÁ...
- Page 24 PASO 4 1 . C l a v i j a d e 2 . To r n i l l o 3 . L e v a M a d e r a d e L e v a NO ESTÁ...
- Page 25 PASO 5 x 1 9 4 . To r n i l l o C o r t o d e C a b e z a d e N o r i a Empiece instalando todos los tornillos a lo largo de la orilla del panel posterior.
- Page 26 PASO 6 x 1 6 5 . P a s a d o r P a r a R e p i s a borde acabado NO ESTÁ A ESCALA. CONSULTE LA PÁGINA 3 FOR HARDWARE DE TAMAÑO REAL. 1. Introduzca los soportes de repisa dentro del agujero deseado. Diferentes agujeros acomodan direrentes alturas de las repisas. 2.
- Page 27 PASO 7...
- Page 28 PASO 8...
- Page 29 PASO 9 8 . Ta q u e t e 9 . To r n i l l o 6 . To r n i l l o 1 0 . C i n c h a d e P a r e d d e P a r e d L a r g o d e d e P a r e d...
- Page 30 ADVERTENCIA ADVERTENCIA Lesiones por aplastamiento graves o fatales pueden ocurrir debido a la caida el mueble. Para ser usado con televisiones que Para prevenir la caida: pesen 22.7 kg (50 libras) o menos. El uso con televisores más pesados - Instalar los sujetadores contra caídas proporcionada. pueden provocar inestabilidad - Coloque los artículos más pesados en las repisas.
Need help?
Do you have a question about the FILLMORE CREDENZA and is the answer not in the manual?
Questions and answers