
Related Manuals for Hoshizaki DBF-40SAC


Summary of Contents for Hoshizaki DBF-40SAC
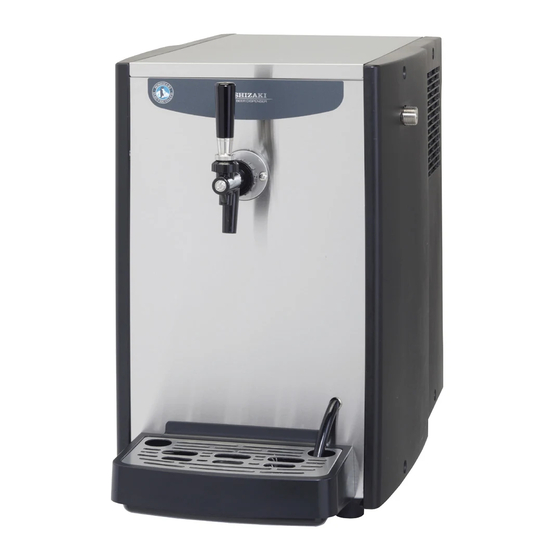
- Page 1 B074-931 ISSUED: FEB. 7, 2014 REVISED: HOSHIZAKI DRAFT BEER DISPENSER DBF-40SAC MODEL (Australia) SERVICE MANUAL...
-
Page 2: Table Of Contents
CONTENTS GENERAL INFORMATION 1. SAFETY INSTRUCTIONS ---------------------------------------------------------------------------- 1, 2 2. CONSTRUCTION BEER CIRCUIT -------------------------------------------------------------------------------------------------------------- 3 3. DIMENSIONS/SPECIFICATIONS --------------------------------------------------------------------------------- 4 TECHNICAL INFORMATION 4. CONTROL (1) GENERAL OPERATION ------------------------------------------------------------------------------------------ 5 - 6 (2) INPUT/OUTPUT ----------------------------------------------------------------------------------------------------- 7, 8 (3) WIRING DIAGRAM ---------------------------------------------------------------------------------------------------- 9 5. -
Page 3: General Information
GENERAL INFORMATION 1. SAFETY INSTRUCTIONS The following instructions contain important safety precautions and should be strictly observed. The terms used here are defined as follows: WARNING: There is a possibility of death or serious injury to the service person and a third party or the user due to improper service operations or defects in serviced products. - Page 4 (7) Before servicing, check the surface temperature of the refrigeration circuit to prevent a burn. 5. Keep the following in mind when making electrical connections: (1) Check for proper grounding connections, and repair if necessary to prevent electric shocks. (2) Always use service parts intended for the applicable model for replacement of defective parts.
-
Page 5: Construction
2. CONSTRUCTION BEER CIRCUIT Agitator Beer coil motor Heat exchange Cooling Evaporator water Condenser fan Beer Foam Keg coupler Regulator Lever (Pressure adjustment) Beer tap Condenser CO2 gas cylinder Compressor Beer keg Beer dispensing system 1) Beer is delivered from the keg to the unit by CO2 gas pressure. 2) Beer is chilled by going through the beer coil. -
Page 6: Dimensions/Specifications
3. DIMENSIONS/SPECIFICATIONS... -
Page 7: Technical Information
TECHNICAL INFORMATION 4. CONTROL (1) GENERAL OPERATION a. Normal operation When the power supply is turned on, the compressor, fan motor and agitator motor start. • When the ice making sensor (electrode) detects sufficient ice storage, the compressor and fan motor stop. •... - Page 8 [Supercooling of cooling water and slush ice] < No ice is stored in the water tank > < Ice is stored in the water tank > 32°F (0°C) 26 - 30°F (-1 to -3°C) Ice normally freezes at 32°F (0°C) and ice nucleus is necessary for solidification. By agitating cooling water slowly, ice nucleus will not form easily and temperature of the water will be lowered below its freezing point without becoming ice.
-
Page 9: Input/Output
(2) INPUT/OUTPUT INPUT/OUTPUT LAYOUT Thermistor/electrode detection setting XA connector (9P) Not in use Status display LED Electrode XA connector (3P) Normally flashing Transformer XA connector (5P) Display XA connector (4P) Not in use Compressor relay AC 100V input VH connector (7P) Fuse (5A) Grounding VH connector (2P) LED1... - Page 10 INPUT/OUTPUT CIRCUIT 240V AC Transformer Fan Motor Compressor Short electrode Long electrode Electrode (Ice storage detector)
-
Page 11: Wiring Diagram
(3) WIRING DIAGRAM... -
Page 12: Refrigeration Circuit
5. REFRIGERATION CIRCUIT Heat exchange Compressor Capillary tube Condenser fan motor Agitator motor Drier Condenser Evaporator... -
Page 13: Service Information
SERVICE INFORMATION 6. SERVICE DIAGNOSIS Beer (1-a) Beer is not cold - No ice is stored and no cooling water is available (1-b) Beer is not cold - Cooling water is available, but no ice is stored (1-c) Beer is not cold - Insufficient ice is stored (1-d) Beer is not cold - Sufficient ice is stored, but beer is not cold (2) No beer is dispensed (3) Beer will not stop... - Page 14 Beer (1-a) Beer is not cold - No ice is stored and no cooling water is available Possible Cause Remedy 1. Refrigeration circuit will not start. 1-1 Power supply off. 1-1 Check that unit is plugged in and main power supply leakage circuit breaker (if provided) is not off.
- Page 15 Beer (1-b) Beer is not cold - Cooling water is available, but no ice is stored Possible Cause Remedy 1. Dispensing operation exceeds unit’s 1. Instruct user to operate unit within its specified capacity. capacity. 2. Unit was not properly conditioned 2.
- Page 16 Beer (2) No beer is dispensed Possible Cause Remedy 1. Beer circuit clogged with foreign matter. 1-1 Beer tap clogged with foreign matter. 1-1 Disassemble and clean beer tap. 1-2 Beer circuit clogged with foreign matter. 1-2 Flush from beer tap to unclog beer circuit. 2.
- Page 17 Beer (4) Beer tap keeps dripping beer Possible Cause Remedy 1. Damaged or deformed rubber seal in beer tap 1. Replace rubber seal. (See page 32) valve shaft. 2. Damaged beer tap valve seat. 2. Replace valve body. 3. Loosened rubber seal in valve shaft. 3.
- Page 18 Beer (6) Overfoaming Possible Cause Remedy 1. Beer has not been led to tap. 1. Lead beer to tap before dispensing beer. 2. Beer keg temperature too high. 2-1 Refrigerate keg below 86°F (30°C). 2-2 Check that keg is free from exhausted heat from refrigerator.
- Page 19 Beer (7) Large bubbles Possible Cause Remedy 1. Beer circuit and beer tap not washed 1. Rinse thoroughly with tap water. thoroughly. 2. Little gas dissolved in beer. 2. Adjust CO2 gas pressure to proper level. The chart below is a general example. Adjust to gas pressure specified by beer manufacturers.
- Page 20 CO2 cylinder (9) Cylinder runs out of gas easily Reference: Approx. 900L of beer is available with a 22lb (10kg) CO2 at 43PSIG (0.3MPa). Possible Cause Remedy 1. CO2 gas leak. 1-1 Gasket out of position and tightening 1-1 If gasket is damaged, replace. Securely tighten nut loosened at pressure reducing tightening nut using spanner and apply soapy water to valve and cylinder connection.
-
Page 21: Condenser Fan Motor Is Running, But Beer Is Not Cold
Electrical (13) Abnormal noise - Unplug the unit immediately Possible Cause Remedy 1. Blocked condenser fan. 1. Unblock. 2. Agitator motor and condenser fan 2. Tighten mounting screws of agitator motor and condenser motor resonating. fan motor to prevent resonance. Fix resonating parts. 3. - Page 22 (17) Instructions for handling controller board * Instructions for service engineer a. Notes If receiving a service call, ask the user to turn off the power to the unit and turn it again after 30 seconds. This will reset the controller, and in some cases normal operation will resume.
-
Page 23: Parts Description And Replacement
7. PARTS DESCRIPTION AND REPLACEMENT * Notes: (1) When replacing parts, be sure to unplug the unit or disconnect the main power supply. (2) Do not pinch wiring when installing parts. (3) When rebinding wiring, keep wiring away from the fan and piping. (4) Do not damage piping to avoid CO2 gas leak from the refrigerant pipe connections. - Page 24 2) Unit without cabinet Top Cover (Fixed with two screws) Water Tank Compressor (Fixed with two bolts) Base Drain Outlet Control Box (Fixed with two screws) Agitator Motor (Fixed with four screws) Fan Motor Ice Guard Drier Beer Coil...
- Page 25 Sectional side view Agitator Motor Ice Guard Electrode Fan Motor Wire Condenser Evaporator Holder Beer Coil Evaporator Compressor...
- Page 26 Sectional front view Agitator Motor Ice Guard Evaporator Evaporator Holder Water Tank Beer Coil Side Panel...
- Page 27 Top cover removal To service or replace parts, follow the instructions below to remove the top cover. 1) Remove the two upper screws each securing the left and right side panels. 2) Remove the two screws securing the top cover. 3) Lift up and remove the top cover by opening the side panels to both sides.
- Page 28 6) Electrode positioning Electrode Assy Bracket Evaporator Electrode 41±1mm When attaching electrode, check the distance from the tank inner wall to the end of the longer electrode. Make sure the bracket is straight.
- Page 29 7) Beer coil Beer Tap Lami-tite (thread Truss Head Screw (Black) forming) Screw Joint Nut Tap Nut Beer Coil Ice Guard Tap Base Taper Gasket Recommended screw tightening torque Screw type (part number) Recommended torque Joint Nut (467878-01) 4.9N•m (50kgf•cm) Tap Nut (458286-01) 7N•m (71kgf•cm) Truss Head Screw (FST0410F1)
- Page 30 After removing the ice guard, fix it back to the beer coil using ties at two positions. The top of ice guard must be positioned 60 mm above the top of evaporator holder. 60mm Ice Guard Evaporator Holder 8) Fan motor Screw Fan Motor Assy Attachment side (stamping on...
- Page 31 9) Agitator motor Stamping (14.5) on fan must be facing down. Nut (Left) Stamping (14.5) 10) Fuse 1) Use a phillips head screwdriver to remove the fuse holder cap and take out the fuse. 2) Install the new fuse in the reverse order of the removal procedure. 11) Fuse holder 1) Disconnect the tab terminal and remove the nut securing the fuse holder.
- Page 32 Disconnect the two brazed parts of pipes at the top of wire condenser and replace with a new wire condenser. Then, eliminate the flux residue by using Scotch Brite or sandpaper and apply black coating (DAI NIPPON TORYO, ACLOSE SUPER ECO, 80% gloss, HOSHIZAKI BLACK) to prevent corrosion.
- Page 33 13) Beer tap Slider Beer tap (2 nozzle type) Gasket (foam) Gasket (liquid) Air vent Valve shaft Spring (add foam) Air vent Foam-dispensing Beer-dispensing nozzle nozzle Beer Tap Cross Section Flow of beer and foam <When dispensing beer> <When dispensing foam> Small hole When dispensing foam, beer goes through the small hole...
- Page 34 <When dispensing beer> To dispense beer, move the lever toward you. The valve shaft slides backward to create a gap between the gasket (liquid) and the beer tap body. Then beer is dispensed from the nozzle. <When dispensing foam> To dispense foam, push the lever toward the unit. The spring shrinks to create a gap between the gasket (foam) and the slider.
-
Page 35: Disassembling And Cleaning Valve Shaft
8. DISASSEMBLING AND CLEANING VALVE SHAFT Disassemble valve shaft following the procedures below. 1. Tools 1) Screw driver x 1 2) Pliers x 1 3) Braided hose x 1 4) Precision screw (ID: 8mm) driver x 1 Wide Narrow (2 - 3mm) Short Approx. - Page 36 Disassembling valve shaft Replacing gasket 1. Cover cylinder A with braided hose. 1. Remove gasket. Use a precision screwdriver to remove To prevent damage during assembling, the gasket from the cylinder B as shown cover the thick part of cylinder A with a below.
-
Page 37: Making And Replacing Cooling Water
9. MAKING AND REPLACING COOLING WATER 1) How to make cooling water Electric conductivity (E.C.) of cooling water for water tank Do not use tap water. Fill the water tank with water having 100-300 μS/cm of E.C. Measure the electric conductivity with conductivity meter. *E.C.
Need help?
Do you have a question about the DBF-40SAC and is the answer not in the manual?
Questions and answers