Table of Contents
Advertisement
Quick Links
Advertisement
Table of Contents

Related Manuals for Ronix RH-9180


Summary of Contents for Ronix RH-9180
- Page 1 LASER DISTANCE METER RH-9180...
-
Page 2: Specification
SPECIFICATION Model RH-9180 Laser Measure Range 0.2 to 80M Accuracy ±1.5mm (±0.06 inch) Laser Class Protection Class IP54 (Dust/Water Proof) Auto Laser Switch Off Auto Unit Switch Off 180s Unit Dimensions (mm) 105×41×24 mm Power Source 2 x AAA Batteries... -
Page 3: Inside The Box
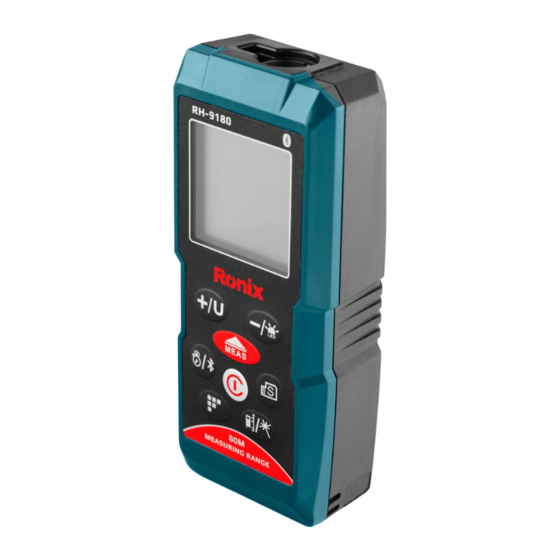
A) LCD B) Additional /Unit C) Measure Key D) Timer /Bluetooth E) Functions (Area, Volume, Indirect measure I.II.III, Stake out setup) F) Subtraction /backlight G) Measurement records H) Clear /Power I) Reference /Laser point J) Pin tail K) Laser receiving window L) Laser emitted window M) Tripod Thread N) Battery cap... - Page 4 650 nanometers. - The total continuous output of the beams never exceeds 1.0mW. - Product complies with EMC Test according to EN61000-6- 3:2001+A11:2004, EN61000-6-1:2001, EN61326-1:2013, IEC 61326:2012 and FCC Test according to PART 15. BLUETOOTH SAFETY This equipment has been tested and found to comply with the limits for a Class B digital device, pursuant to part 15 of the FCC Rules.
- Page 5 that may cause undesired operation of the device. Laser Radiation do not stare into beam. 650 mm / Power<1mW Class II laser product EN 60825 1:2007 OVERVIEW FOR SCREEN 1) Laser indicator 2) Indirect measuring 3) Measuring function 4) Measuring reference 5) Add and Subtract 6) Maximum display 7) Minimum display...
-
Page 6: Switch On/Off
SWITCH ON/OFF 1) Be sure to check battery status before start. 2) Click the to turn on the device. The device will process the initial procedure and get ready to measure by turn on the laser dot. 3) Tap and hold for 3 seconds to turn off. -
Page 7: Stake-Out Measurement
down. - To clear all stored measurements, press and hold again in lookup mode to clear all memory. GLOBAL UNITS CONVERTOR UNIT SETTING 1) There are 8 units inside the laser distance meter. 2) Click and hold to select preferred unit. 3) Unit Switch Reference. -
Page 8: Measuring Functions
3) Click to decrease your value. 4) Click to shift between numbers. 5) Click to save the value and exit the setup mode. 6) Click to restore zero. USE OF STAKE-OUT WITH PRESET DISTANCE 1) Enable “Continuous Mode” by tap and hold . 2) Forward and backward arrow will be showed next to the measurements. -
Page 9: Measurement Reference
tance meter will enter continuous measurement mode. 4) Move the device back and forward to proper distance. 5) Click to pause the measurement . 6) Click again to leave the continuously measurement mode. MEASUREMENT REFERENCE 1) There are four reference positions for measurement. They are back of the unit, front of the unit, tripod thread and the spike. -
Page 10: Error Code
PYTHAGOREAN) 1) Click thrice, four and five times to enable Indirectly Measurement. 2) Laser will be activated when entering indirectly measurement mode. 3) Follow the instructions on main screen to measure the LENGTH OF HYPOTENUSE(S) and BASE. 4) After finish all the instructions, the result [HEIGHT] will be showed on screen. - Page 11 - Clean the device with a damp, soft cloth. - Never immerse the device in water. - Never use aggressive cleaning agents or solvents. RECYCLING Batteries must not be disposed of with household waste. Care for the environment and take them to the collection points provided in accordance with national or local regulations.
Need help?
Do you have a question about the RH-9180 and is the answer not in the manual?
Questions and answers