Advertisement
Quick Links
TM
Weight Limit: 400 Lb / 181 Kg
225 Lb / 102 Kg Trundle
KT - 2018/1/5
© 2014 Dorel Home Products All Rights Reserved
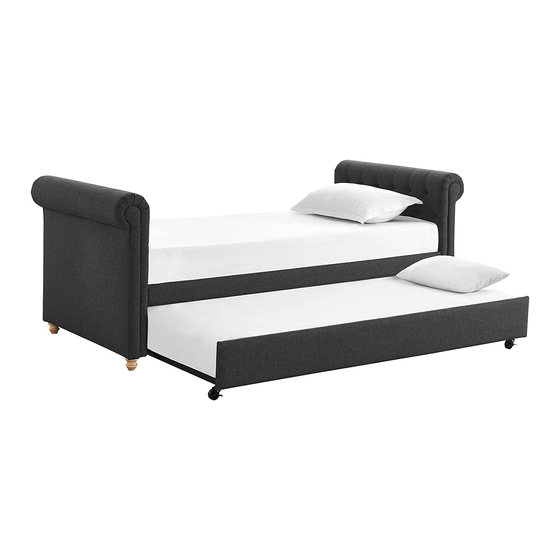
Daybed
Upholstered Daybed and Trundle
Thank you for purchasing from DHP!
DO NOT RETURN TO THE STORE !
If parts are missing or damaged, we will gladly ship your
replacement parts free of charge.
Visit www.dhpfurniture.com/eng/support-home
or call Toll-Free 1-800-267-1739
Date of Purchase
THIS INSTRUCTION BOOKLET CONTAINS IMPORTANT SAFETY
INFORMATION. PLEASE READ AND KEEP FOR FUTURE REFERENCE.
4032359
Tan Linen
Lot Number
B34403235903 - 10125-M
Twin
1
Advertisement

Subscribe to Our Youtube Channel
Related Manuals for DHP Sophia 4032359


Summary of Contents for DHP Sophia 4032359
- Page 1 Tan Linen Weight Limit: 400 Lb / 181 Kg Daybed Thank you for purchasing from DHP! 225 Lb / 102 Kg Trundle DO NOT RETURN TO THE STORE ! If parts are missing or damaged, we will gladly ship your replacement parts free of charge.
- Page 2 Warranty Information Read Before Beginning Assembly DHP warrants this product to be free from defects in material and workmanship and ● Call our toll free number if you need assistance. agrees to remedy any such defect. This warranty covers one year from the date of ●...
- Page 4 Parts For Daybed Replacement Parts, Visit www.dhpfurniture.com/eng/support-home This item is packed in 2 boxes! All parts listed on this page are in Box A. If Box B is missing please contact your Retailer. There are inner box(es) that include components required to complete this assembly.
- Page 5 Parts For Daybed Replacement Parts, Visit www.dhpfurniture.com/eng/support-home This item is packed in 2 boxes! All parts listed on this page are in Box B. If Box A is missing please contact your Retailer. There are inner box(es) that include components required to complete this assembly.
- Page 6 Parts For Trundle Replacement Parts, Visit www.dhpfurniture.com/eng/support-home This item is packed in 2 boxes! All parts listed on this page are in Box B. If Box A is missing please contact your Retailer. There are inner box(es) that include components required to complete this assembly.
- Page 7 Hardware Pack: Daybed Hardware Pack #: T4032359-00 1/4" X3/4" X 14 1/4" X 1 3/16" X 16 1/4" X 1 9/16" X 12 5/16" X 3 1/8" Please do not completely tighten all the hardware, until the entire assembly is complete, unless otherwise indicated in the step-by-step instructions.
- Page 8 Hardware Pack: Trundle Hardware Pack #: T4144719LS-01 1/4" 1/4" X3/4" 1/4" X 1 3/8" 1/4" X 1 9/16" Please do not completely tighten all the hardware, until the entire assembly is complete, unless otherwise indicated in the step-by-step Wrench instructions. The screw(s), bolt(s) to be used at each step are shown in actual size in the lower right corner of the page.
- Page 9 Step 1 NOTE: The following instructions will illustrate how to assemble the Daybed from Step 1 to Step 6. Please use the Daybed Hardware Pack: T4032359-00. ❹ Attach Z x 4 to C x 2 with To avoid fraying the fabric during the assembly, please lay the armrests(C) on a piece of cardboard.
- Page 10 Step 2 ❶ Attach T and S to B with NOTE: This step needs to be done twice for remaining parts B, S and T. Pay special attention that small holes on slots of S and T should be facing upward! X 12...
- Page 11 Step 3 ❸ Attach E to B with NOTE: This step needs to be done twice for remaining parts E and B. Please make sure narrow holes on part T, S and slat holes on part E are facing toward the same side. X 12...
- Page 12 Step 4 ❷ 4.1 Pre assemble in C; 4.2 Hang S and T located on part B onto ❷ pre-assembled , as illustrated below. Do not completely tighten the bolts in this step as you need to assemble the middle stretcher F in the next step.
- Page 13 Step 5 ❷ 5.1 Attach F to C with ❶ 5.2 Attach K to E with Completely tighten all bolts from step 4 in this step.
- Page 14 Step 6 Insert O into X; Press X into E, repeat the same procedure for the opposite side. 6.3 Insert ends of both slat O into Y, then press Y into F as illustrated. Repeat the same procedures going backwards for every row of slats.
- Page 15 Step 7 Caster holes on H towards upward. The following instructions will illustrate how to assemble the Trundle from Step 7 to Step 11. Please use the Trundle Hardware Pack: T4144719LS-01. 7.1 Lay H x 2 on the floor with holes towards upward as illustrated.
- Page 16 Step 8 ❷ ❺ Attach I x 2 & J to H x 2 with using ❹ ❻ using...
- Page 17 Step 9 ❶ Attach P x 2 & N x 2 to H x 2 with In order not to damage your product, please orient lever to the inside of the trundle as illustrated. Caster N should be assembled close to Part J.
- Page 18 Step 10 Turn over the frame assembled from STEP 9. ❸ Attach G to J with...
- Page 19 Step 11 11.1 Insert O into X; 11.2 Press X into J, repeat the same procedure for the opposite side to Press X into I; 11.3 Insert ends of both slats O into Y, then press Y into I as illustrated. Repeat the same procedures going backwards for every 11.2 11.1...
-
Page 20: Helpful Hints
Helpful Hints To use Trundle: How to unlock caster? How to lock caster? Pull out the trundle completely from underneath daybed. Once positioned, make sure casters are locked by pushing down the lever " " as illustrated "How to lock caster?". To store Trundle: Unlock the casters by pushing down the lever "... - Page 21 ● Move your new furniture carefully, with two people lifting and carrying the unit to its new location. ● Your DHP furniture can be disassembled and reassembled to move. ● Some parts have been pre-assembled for this item. They are illustrated on this page and available for replacement.
- Page 22 Garantía Gracias por su compra DHP! DHP garantiza que este producto está libre de defectos de material y de fabricación, comprometiéndose a corregirlos en caso de ser hallados. Esta garantía es valida por Registra tu producto y participa para ganar! un año a partir de la fecha de compra original.
- Page 23 Partes Lea antes de comenzar a ensamblar ● Llame a nuestro numero gratuito si necesita asistencia. Piezas de reemplazo, visite www.dhpfurniture.com/spa/support-home ● Trabaje en un área espaciosa y cerca de donde su producto será utilizado, preferiblemente sobre una alfombra o utilice el cartón del empaque para proteger su piso y su producto.
-
Page 24: Consejos Útiles
4.2 Cuelgue los S y T localizados en la parte B sobre los pernos pre-asamblados , como ● Sus muebles DHP se pueden desmontar y volver a ensamblar en caso de se ilustra. No ajuste completamente los pernos en este paso. -
Page 25: Garantie
Garantie Merci d'avoir acheté un produit de DHP ! DHP garantit que ce produit est exempt de tout vice de matériaux et de fabrication et Enregistrez votre produit et s'engage à remédier à un tel défaut. Cette garantie couvre un an à compter de la date d'achat originale. -
Page 26: Avant De Commencer L'assemblage
Avant de commencer l'assemblage Pièces ● Si vous avez besoin d'aide, appelez notre service à la clientèle sans frais. Pièces de rechange, visitez www.dhpfurniture/fre/support-home ● Travailler dans un endroit spacieux et près du lieu où l'unité sera utilisée, préférablement sur un tapis, ou sur un morceau de l'emballage pour protéger le plancher et le produit. -
Page 27: Conseils Utiles
Note: Cette étape doit être répétée deux fois pour les pièces restant Eet B. personnes pour soulever et transporter le mobilier vers son nouvel emplacement. Étape 4 ● Votre mobilier DHP peut être démonté et reassemblé pour faciliter les ❷ 4.1 Préfixer les dans C.
Need help?
Do you have a question about the Sophia 4032359 and is the answer not in the manual?
Questions and answers