
Related Manuals for Xomax XM-RSU249BT-R


Summary of Contents for Xomax XM-RSU249BT-R
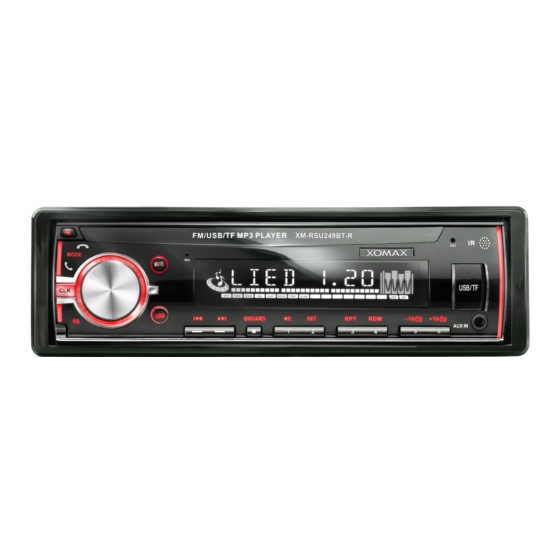
- Page 1 XOMAX Installation Manual Montageanleitung XM-RSU249BT-R Installation Manual ENGLISH Montageanleitung DEUTSCH...
- Page 2 DEUTSCH Montage- und Kurzanleitung XM-RSU249BT-R Vielen Dank für Ihr Vertrauen, das Sie uns mit dem Kauf eines XOMAX Autoradios erwiesen haben. Wir wünschen Ihnen viel Spaß mit Ihrem neuen Multimedia Autoradio. Bitte lesen Sie sich diese Montageanleitung sorgfältig durch, bevor Sie das Gerät installieren und in Betrieb nehmen.
-
Page 3: Table Of Contents
1 Werkzeug vorbereiten ....11 2 Fixiermutter lösen .......11 3 Ausziehschlüssel verwenden ..12 4 Autoradio lösen ......12 5 Autoradio entfernen ....13 6 Montagezubehör entfernen ...13 Anschlussschema Cinch Anschlüsse XOMAX X M - R S U 2 4 9 B T- R... -
Page 4: Sicherheitshinweise Und Vorsichtsmaßnahmen
Sie nicht, das Gerät bei auftretenden Problemen eigen- Betriebstemperatur mächtig zu reparieren. Bei einer Öffnung besteht die Gefahr eines Vergewissern Sie sich vor dem Stromschlages. Einschalten des Gerätes, dass die XOMAX X M - R S U 2 4 9 B T- R... -
Page 5: Reinigung Des Gerätes
Lack angreifen und beschädigen. Feuchtigkeit Um Feuergefahr und die Gefahr eines elektrischen Schlags zu vermeiden, setzen sie das Gerät weder Regen noch sonstiger Feuchtigkeit aus. XOMAX X M - R S U 2 4 9 B T- R... -
Page 6: Installationshinweise
Einbauhilfen oder Adapter für Ihren schauen Sie in die Bedienungsanlei- Anschluss benötigen. Diese sollten bei tungen beider Geräte, um die richtige Ihrem Fachhändler vorrätig sein. Funktion der Kabel herauszufinden. XOMAX X M - R S U 2 4 9 B T- R... - Page 7 Gefahr, dass die Batterie sich entlädt. » Führen Sie das gelbe Kabel nicht direkt in den Motorraum durch, um es an die Batterie anzuschließen. Dies XOMAX X M - R S U 2 4 9 B T- R...
-
Page 8: Einbauanleitung
Diskrepanzen führen kann, insbesondere bei den graphischen Darstellungen (z.B. bei der Art oder/und bei der Anwendung des Befestigungs- zubehörs). Eine ausführliche Bedienungsanleitung für Ihr Autoradio finden Sie auf unserer Internetseite unter: www.xomax.de/download 4. Autoradio 1 Einbaureihenfolge *Der Einbaurahmen befindet sich bei 1. Befestigungshilfen (optional): Lieferung bereits am Gerät. -
Page 9: Befestigung Des Fixierbleches
Lieferumfang enthalten) zunächst vom nach außen gebogen werden, um den Autoradio ab. Verwenden Sie dafür zwei Einbaurahmen im Schacht zu fixieren. Ausziehschlüssel ( Seite 11 ). Gegebe- XOMAX X M - R S U 2 4 9 B T- R... -
Page 10: Autoradio Anschließen
Dieser Vorgang bezieht sich auf den sein. Befestigen Sie nun das Autoradio Schritt 2 auf Seite 9 und kann gege- am Fixierblech mit einer Mutter. benenfalls übersprungen werden. XOMAX X M - R S U 2 4 9 B T- R... -
Page 11: Ausbauanleitung
Daher kann es sein, dass Ihr Als erstes sollte die Mutter mit Hilfe Autoradio nicht mit einem Fixierblech eines Schlüssels vom Fixierblech an der befestigt wurde. Geräterückseite gelöst werden. XOMAX X M - R S U 2 4 9 B T- R... -
Page 12: Ausziehschlüssel Verwenden
Schlüssel nicht entfernt werden, kann Sobald Sie die Ausziehschlüssel das Autoradio einfach herausgezogen einführen, werden die Seitenfixierungen werden. nach außen gedrückt und das Autoradio wird damit vom Einbaurahmen gelöst. XOMAX X M - R S U 2 4 9 B T- R... -
Page 13: Autoradio Entfernen
Radioschacht bzw. aus dem Einbau- rahmen heraus. 6 Montagezubehör entfernen Wenn Sie das Radio nicht wieder einbauen möchten, kann im letzten Schritt das Montagezubehör (Fixier- blech, Einbaurahmen) entfernt werden. XOMAX X M - R S U 2 4 9 B T- R... -
Page 14: Anschlussschema Cinch Anschlüsse
Thema: Anschlussschema Cinch Anschlüsse Anschlussschema Cinch Anschlüsse XOMAX X M - R S U 2 4 9 B T- R... -
Page 15: Anschlussschema Iso-Stecker
Thema: Anschlussschema ISO-Stecker Anschlussschema ISO-Stecker Phantomeinspeisung Radio-Antenne Aktiv Dauerstrom Zündung hinten rechts vorne rechts vorne links hinten links XOMAX X M - R S U 2 4 9 B T- R... -
Page 16: Iso-Buchsen-Belegung
Anschluss kann bei Nichtübereinstim- jedem Ausschalten des Radios verloren mung der Belegung zu schwerwie- gehen. In dem Fall können diese zwei genden Fehlern führen. Klemmen vertauscht werden. XOMAX X M - R S U 2 4 9 B T- R... -
Page 17: Iso-Kabel
» Einige Gerätemodelle haben eine ISO-Anschluss mit passender integrierte ISO-Buchse und benötigen Belegung. daher kein ISO-Kabel. Wir empfehlen, die Installation von einer fachkundigen Person oder einer Fachwerkstatt durch- führen zu lassen. XOMAX X M - R S U 2 4 9 B T- R... - Page 18 Allgemeine Problemlösung Diese Problemlösungsvorschläge sind allgemeingültig und beziehen sich auf verschiedene XOMAX Modelle mit ähnlichen Eigenschaften. Bitte beachten Sie, dass einige Punkte sich nicht auf Ihr Autoradiomodell beziehen könnten oder dass Funktionen beschrieben sind, welche Ihr Gerät eventuell nicht unterstützt.
- Page 19 Antenne ausgestattet, wird eine Phantomeinspeisung mit integriertem Diversity System benötigt. Hinweis: Eine Phantomeinspeisung ist nicht mit einem Anten- nenverstärker zu verwechseln. Ein einfacher Antennenverstärker bietet nur selten einen bedeutenden Effekt. XOMAX X M - R S U 2 4 9 B T- R...
- Page 20 Handhabung der Geräte am Ende ihrer Lebensdauer ergeben könnten. Genauere Information zur nächstgele- genen Sammelstelle oder Recyclinghof erhalten Sie bei Ihrer Gemeindeverwal- tung. XOMAX X M - R S U 2 4 9 B T- R...
- Page 21 Please save this manual in case you will need to clarify further possible questions regarding installation and usage of our product. We recommend you to let the technician install the unit in your vehicle. You can find the detailed manual for your XOMAX product on our homepage: www.xomax.de/download XOMAX...
- Page 22 3 Use the extraction keys ....31 4 Unloose the unit ......31 6 Remove the unit ......32 5 Remove the installation accessories .. Connection schedule – Cinch multicore XOMAX X M - R S U 2 4 9 B T- R...
-
Page 23: Safety Instructions And Precautions
Do not use the unit any further since not turn the unit on until the inside you detect any kind of technical temperature of the cabin descends. problems. XOMAX X M - R S U 2 4 9 B T- R... -
Page 24: Cleaning Of The Unit
To avoid the danger of fire or the electric shock do not put the unit in to the moist environment (e.g. adverse weather conditions, inappropriate wet cleaning etc.) XOMAX X M - R S U 2 4 9 B T- R... -
Page 25: Installation
» The connection cables may not be correctly please refer to the manuals of cutted or short-circuited. Otherwise the the both devices. warranty becomes invalid. » Please ensure that the negative XOMAX X M - R S U 2 4 9 B T- R... - Page 26 Otherwise the unit does not turn off automatically, causing the discharging of the vehicle battery. » To avoid a rogue and hazardous short circuit do not lay the yellow cable XOMAX X M - R S U 2 4 9 B T- R...
-
Page 27: Installation Instructions
Therefore it might cause from product to product some irrelevant discrepancies, especially regarding some depictions (e.g. installation accessories) You can find the detailed manual for your XOMAX product on our homepage: www.xomax.de/download 3. dual-ended bolt 1 Installation steps 4. -
Page 28: Fixture Of The Fixation Sheet
(if it's included in delivery) from the unit. Please use for that the extrac- tion keys ( see page 30 ). Possibly the faceplate should be removed as well. XOMAX X M - R S U 2 4 9 B T- R... -
Page 29: Connect The Unit
As earlier required ( see page 28 ), the dual-ended bolt of the unit should be pulled through one of the holes in XOMAX X M - R S U 2 4 9 B T- R... -
Page 30: Deinstallation Instructions
First of all please unloose the fixation sheet. nut on the rear side of the unit by spanner (wrench). XOMAX X M - R S U 2 4 9 B T- R... -
Page 31: Use The Extraction Keys
4 Unloose the unit When and as long as inserted, the extraction keys press the holding side-cogs outwards so that the unit is released from the installation frame and XOMAX X M - R S U 2 4 9 B T- R... -
Page 32: Remove The Unit
5 Remove the installation accessories Finally remove all the installation accessories such as fixation metal sheet and installation frame. XOMAX X M - R S U 2 4 9 B T- R... -
Page 33: Connection Schedule - Cinch Multicore
Topic: Connection schedule – Cinch multicore Connection schedule – Cinch multicore XOMAX X M - R S U 2 4 9 B T- R... -
Page 34: Connection Schedule - Iso Plug
Topic: Connection schedule – ISO plug Connection schedule – ISO plug phantom power radio aerial active permanent current ignition rear right front right front left rear left XOMAX X M - R S U 2 4 9 B T- R... -
Page 35: Iso Plug Configuration
If connection may lead to grievous errors. these problems appear the connections A4 and A7 should be interchanged. XOMAX X M - R S U 2 4 9 B T- R... -
Page 36: Iso Cable Connections
In this case an additional ISO cable becomes unnecessary. We recommend you to let a professional technician install the unit in your vehicle. XOMAX X M - R S U 2 4 9 B T- R... - Page 37 Common solutions Common solutions The following advices are generally valid and refer to diverse Xomax models with the similar characteristics. Please note that some articles may refer not to your model exactly and contain the describtion of features and functions that your model does not support.
- Page 38 Please interchange the cables for ignition plus and for will be lost. steady plus. Caution: If these wires have fuses the latter should be interch- anged as well. XOMAX X M - R S U 2 4 9 B T- R...
- Page 39 The proper disposal of these products contributes to environment protection. To find the nearest collection point or recycling yard please consult your municipal administration. XOMAX X M - R S U 2 4 9 B T- R...
Need help?
Do you have a question about the XM-RSU249BT-R and is the answer not in the manual?
Questions and answers