
Subscribe to Our Youtube Channel
Related Manuals for Samlexpower PST-3000-12


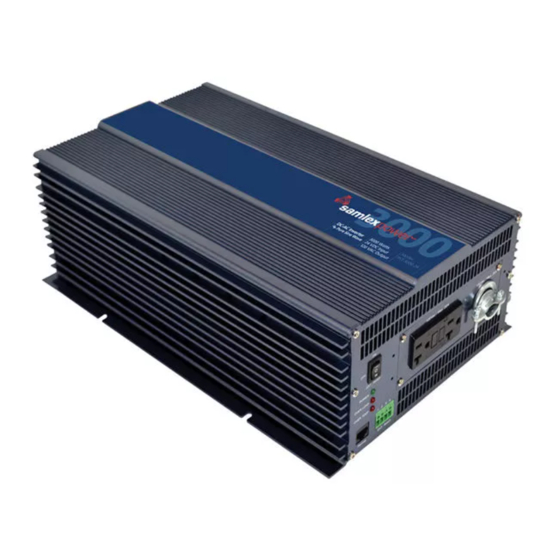
Summary of Contents for Samlexpower PST-3000-12
- Page 1 DC-AC Power Owner's Please read this manual BEFORE Manual Inverter installing your Pure Sine Wave inverter PST-3000-12 PST-3000-24...
- Page 2 OWNER'S MANUAL | Index SECTION 1 Safety Instructions ........3 SECTION 2 General Information ........7 SECTION 3 Limiting Electromagnetic Interference (EMI) ....... 14 SECTION 4 Powering Direct / Embedded Switch Mode Power Supplies (SMPS) ............15 SECTION 5 Principle of Operation ....... 17 SECTION 6 Layout ............
-
Page 3: Safety Instructions
1.1 IMPORTANT SAFETY INSTRUCTIONS AND SYMBOLS SAVE THESE INSTRUCTIONS. This manual contains important instructions for models PST-3000-12 and PST-3000-24 that shall be followed during installation, operation and maintenance. The following safety symbols will be used in this manual to highlight safety... -
Page 4: Installation Environment
SECTION 1 | Safety Instructions • Disassembly / repair should be carried out by qualified personnel only. • Disconnect all AC and DC side connections before working on any circuits associated with the unit. Turning the ON/OFF switch on the unit to OFF position may not entirely remove dangerous voltages. - Page 5 Please observe the following precautions: • Ensure that the maximum charging voltage of the external battery charger / alterna- tor / solar charge controller does not exceed 16.5 VDC for the PST-3000-12 or 33.0 VDC for PST-3000-24 • Do not use unregulated solar panels to charge the battery connected to this unit.
- Page 6 SECTION 1 | Safety Instructions ATTENTION! Des dommages causés par un inversement des polarités ne sont pas couverts par la garantie. Use of External Fuse in DC Input Circuit Use Class-T or equivalent fuse of appropriate capacity within 7" of the battery Positive ter- minal.
-
Page 7: General Information
SECTION 2 | General Information 2.1. DEFINITIONS The following definitions are used in this manual for explaining various electrical concepts, specifications and operations: Peak Value: It is the maximum value of electrical parameter like voltage / current. RMS (Root Mean Square) Value: It is a statistical average value of a quantity that varies in value with respect to time. - Page 8 SECTION 2 | General Information tance X to cause the current to lag the voltage by 90° and that of the capacitive reac- tance X to cause the current to lead the voltage by 90° are exactly opposite and the net effect is a tendency to cancel each other.
- Page 9 SECTION 2 | General Information • Electric Motors: At the moment when an electric motor is powered ON, the rotor is stationary (equivalent to being “Locked”), there is no “Back EMF” and the windings draw a very heavy surge of starting current (Amperes) called “Locked Rotor Am- peres”...
- Page 10 SECTION 2 | General Information Non-Linear Load: A load that does not draw a sinusoidal current when a sinusoidal volt- age is fed to it. For example, non-power factor corrected Switched Mode Power Supplies (SMPS) used in computers, audio video equipment, battery chargers, etc. Resistive Load: A device or appliance that consists of pure resistance (like filament lamps, cook tops, toaster, coffee maker etc.) and draws only Active Power (Watts) from the inverter.
- Page 11 SECTION 2 | General Information In a Sine Wave, the voltage rises and falls smoothly with a smoothly changing phase angle and also changes its polarity instantly when it crosses 0 Volts. In a Modified Sine Wave, the voltage rises and falls abruptly, the phase angle also changes abruptly and it sits at zero V for some time before changing its polarity.
- Page 12 SECTION 2 | General Information • Transformer-less capacitive input powered devices like (i) Razors, flashlights, night- lights, smoke detectors etc. (ii) Some re-chargers for battery packs used in hand power tools. These may get damaged. Please check with the manufacturer of these types of devices for suitability.
- Page 13 SECTION 2 | General Information Table 2.1 provides a list of some common AC appliances / devices that require high, short duration surge of power during start up. An “Inverter Sizing Factor” has been recom- mended against each which is a Multiplication Factor to be applied to the Maximum Continuous Running Power Rating (Active Power Rating in Watts) of the AC appliance / device to arrive at the Maximum Continuous Running Power Rating of the inverter (Multiply the Maximum Continuous Running Power Rating (Active Power Rating in...
-
Page 14: Limiting Electro-Magnetic Interference (Emi)
SECTION 3 | Limiting Electro-Magnetic Interference (EMI) 3.1 EMI AND FCC COMPLIANCE These inverters contain internal switching devices that generate conducted and radiated electromagnetic interference (EMI). The EMI is unintentional and cannot be entirely eliminated. The magnitude of EMI is, however, limited by circuit design to acceptable levels as per limits laid down in North American FCC Standard FCC Part 15(B), Class A. -
Page 15: Powering Direct / Embedded Switch Mode Power Supplies (Smps)
SECTION 4 | Powering Direct / Embedded Switch Mode Power Supplies (SMPS) 4.1 CHARACTERISTICS OF SWITCHED MODE POWER SUPPLIES (SMPS) Switch Mode Power Supplies (SMPS) are extensively used to convert the incoming AC power into various voltages like 3.3V, 5V, 12V, 24V etc. that are used to power vari- ous devices and circuits used in electronic equipment like battery chargers, computers, audio and video devices, radios etc. -
Page 16: Input Voltage
SECTION 4 | Powering Direct / Embedded Switch Mode Power Supplies (SMPS) NOTE: Voltage and current scales are di erent Input voltage Peak inrush current Rated steady state input RMS current Inrush current Fig 4.1: Inrush current in an SMPS NOTE: Voltage Peak Current and current scales... -
Page 17: Principle Of Operation
SECTION 5 | Principle of Operation 5.1 GENERAL These inverters convert DC battery voltage to AC voltage with an RMS (Root Mean Square) value of 120 VAC, 60 Hz RMS. 5.2 PURE SINE WAVE OUTPUT WAVEFORM The waveform of the AC voltage is a pure Sine Waveform that is same as the waveform of Grid / Utility power (Supplementary information on pure Sine Waveform and its advantages are discussed in Sections 2.2 to 2.4). - Page 18 SECTION 6 | Layout 1. Three Position Rocker Switch • – ON - Push top end to switch ON locally • 0 OFF – Centered to switch OFF locally • = EXT Switch - Push bottom end to enable switching ON and OFF by external switching control 2.
-
Page 19: General Information On Lead Acid Batteries
SECTION 7 | General Information on Lead Acid Batteries 7.1 GENERAL INFO For complete background information on Lead Acid Batteries and charging process, please visit www.samlexamerica.com > support > white papers > White Paper - Batteries, Chargers and Alternators. Lead-acid batteries can be categorized by the type of application: Automotive service - Starting/Lighting/Ignition (SLI, a.k.a. - Page 20 SECTION 7 | General Information on Lead Acid Batteries Reserve capacity is the time in minutes for which the battery can deliver 25 Amperes at 80ºF (26.7ºC) till the voltage drops to 1.75V / Cell i.e. 10.5V for 12V battery, 21V for 24V battery and 42V for 48V battery.
- Page 21 SECTION 7 | General Information on Lead Acid Batteries TABLE 7.2: DISCHARGE CURRENT RATES - “C-RATES” (continued from Previous page) "C-Rate" Discharge Current in Amps = Example of C-Rate Hours of discharge time “T” till ÷ Capacity "C" in Ah Discharge Time Discharge Currents the “End Point Voltage”...
- Page 22 SECTION 7 | General Information on Lead Acid Batteries 7.8 REDUCTION IN USABLE CAPACITY AT HIGHER DISCHARGE RATES – TYPICAL IN INVERTER APPLICATION As stated above, the rated capacity of the battery in Ah is normally applicable at a dis- charge rate of 20 Hours.
- Page 23 SECTION 7 | General Information on Lead Acid Batteries TABLE 7.4: STATE OF CHARGE VERSUS STANDING VOLTAGE Percentage of Standing Voltage Standing Voltage of Standing Voltage Full Charge of Individual Cells 12V Battery of 24V Battery 100% 2.105V 12.63V 25.26V 2.10V 12.6V 25.20V...
- Page 24 SECTION 7 | General Information on Lead Acid Batteries The discharge curves in Fig. 7.1 show the % State of Charge versus the terminal voltage of typical battery under different charge /discharge currents, i.e. “C-Rates” and fixed temperature of 80°F. (Please note that the X-Axis of the curves shows the % of State of Charge.
- Page 25 SECTION 7 | General Information on Lead Acid Batteries - 85% State of Discharge (15% State of Charge) at very high C-rate discharge current of C/3 Amps. - 100% State of Discharge (0 % State of Charge) at high C-Rate discharge current of C/5 Amps.
-
Page 26: Series Connection
SECTION 7 | General Information on Lead Acid Batteries 7.15 SERIES AND PARALLEL CONNECTION OF BATTERIES 7.15.1 Series Connection Cable “A” Battery 4 Battery 3 Battery 2 Battery 1 24V Inverter or 24V Charger Cable “B” Fig 7.2: Series Connection When two or more batteries are connected in series, their voltages add up but their Ah capacity remains the same. -
Page 27: Series - Parallel Connection
SECTION 7 | General Information on Lead Acid Batteries 7.15.3 Series – Parallel Connection 12V String 1 12V String 2 Battery 1 Battery 2 Battery 3 Battery 4 Cable “A” 12V Inverter or 12V Charger Cable “B” Fig. 7.4: Series-Parallel Connection Figure 7.4 shows a series –... - Page 28 SECTION 7 | General Information on Lead Acid Batteries ATTENTION! Lorsque deux ou plusieurs batteries / chaine de batteries sont connectés en parallèle et sont ensuite connectés à un onduleur ou un chargeur (voir les figures 7.3 et 7.4), l'attention devrait être accordée à la manière dont le chargeur / onduleur es connecté...
-
Page 29: Charging Batteries
SECTION 7 | General Information on Lead Acid Batteries the DC current in Amperes (A) from the AC watts as per Formula 2 above. An example of this calculation for a 12V inverter is given below: Let us say that the total AC Watts delivered by the inverter = 1000W. Then, using Formula 2 above, the approximate DC current to be delivered by the 12V batteries = 1000W ÷10 = 100 Amperes, or by 24V batteries = 1000W ÷... -
Page 30: Location Of Installation
SECTION 8 | Installation WARNING! 1. Before commencing installation, please read the safety instructions explained in Section 1 titled “Safety Instructions”. 2. It is recommended that the installation should be undertaken by a qualified, licensed / certified electrician. 3. Various recommendations made in this manual on installation will be superseded by the National / Local Electrical Codes related to the location of the unit and the specific application. -
Page 31: Overall Dimensions
SECTION 8 | Installation flammable Oxygen and Hydrogen gases produced when the batteries are charged. The cor- rosive fumes will corrode and damage the unit and if the gases are not ventilated but allowed to collect, they could ignite and cause an explosion. Accessibility: Do not block access to the front panel. - Page 32 SECTION 8 | Installation NOTE: Dimensions are in mm Fig. 8.1: PST-3000 Overall Dimensions & Mounting Slots 32 | SAMLEX AMERICA INC.
-
Page 33: Dc Side Connections
- Do not connect this unit to a battery system with a voltage higher than the rated bat- tery input voltage of the unit (e.g. do not connect PST-3000-12 to 24V or 48V Battery System) 8.4.2 Preventing Reverse Polarity on the DC Input Side... - Page 34 SECTION 8 | Installation 8.4.3 Connection from Batteries to the DC Input Side – Sizing of Cables and Fuses CAUTION! The input section of the inverter has large value capacitors connected across the input terminals. As soon as the DC input connection loop (Battery (+) terminal " External Fuse "...
- Page 35 SECTION 8 | Installation oil resistant, multi-stranded copper wire cables rated at 105ºC / 77°F minimum. Do not use aluminum cable as it has higher resistance per unit length. Cables can be bought at a marine / welding supply store. Effects of low voltage on common electrical loads are given below: •...
- Page 36 3.05M Current (See (Based on America (See Note 2) Column 2) Inverter Note 1) (See Installa- Note 3) tion Kit (See Note 5) PST-3000-12 360A 450A 400A AWG#4/0 AWG#4/0 DC-3500- AWG#2/0 PST-3000-24 180A 225A 200A AWG#2 AWG#2 AWG#1/0 DC-2000- NOTES FOR TABLE 8.2 1) Column 2 indicates the rated continuous DC input current drawn from the battery.
-
Page 37: Dc Input Connection
SECTION 8 | Installation (i) NEC Ampacity specified at Column 3, (ii) Copper conductor with temperature rating of 105˚C/221˚F and (iii) Ambient temperature of 30°C / 86°F b) b) Voltage drop across the length of cables limited to 2% of 12V / 24V. i) Voltage drop has been calculated by multiplying the Rated DC Input Current (Column 2) and the resistance of the total length of Copper conductor (the total length of conductor has been taken as 2 times the running distance... -
Page 38: Ac Side Connections
SECTION 8 | Installation 8.5 AC SIDE CONNECTIONS WARNING! Preventing Paralleling of the AC Output 1. The AC output of the inverter cannot be synchronized with another AC source and hence, it is not suitable for paralleling. The AC output of the inverter should never be connected directly to an electrical Panelboard / Load Center which is also fed from the utility power/ generator. - Page 39 SECTION 8 | Installation The GFCI is provided with the following buttons: - Reset Button: In case the GFCI is tripped, it can be reset by pressing the “Reset Button”. NOTE: For the Reset Button to operate, the inverter has to be in ON condition and should be outputting AC power to the internal Line Side of the GFCI (no Fault / shut- down condition).
- Page 40 SECTION 8 | Installation AC Ground Terminal (12, Fig 6.1b) • Stud: #6 (UNC, 32 Threads Per Inch) Neutral to Chassis Ground Bonding • Neutral “N” is bonded to the metal chassis of the inverter through a loop of wire con- necting the “N”...
- Page 41 Column 3) at Column 3 Column 2) (Ampacity based on conductor tem- perature of 90°C) PST-3000-12 31.25 AWG#12 & 24 NOTES FOR TABLE 8.4 1) Column 2 indicates the rated continuous AC output current 2) Column 3 indicates NEC Ampacity based on which cable conductor size (Column 5) is determined.
- Page 42 SECTION 8 | Installation When using the inverter in a mobile RV, connect a 10 mm or AWG #8 insulated stranded copper wire from the above Chassis Grounding Lug to the Main Grounding Bus Bar of the RV (bonded to the vehicle chassis). The connections must be tight against bare metal. Use star washers to penetrate paint and corrosion.
- Page 43 SECTION 8 | Installation Block (10, Fig 6.1a) are shorted. The inverter will switch OFF when the relay contact / switch is opened and short is removed across terminals 1 and 2 of the Terminal Block (10, Fig 6.1a) • 2-Wire ON/OFF Control Using Switched DC Voltage (10-33VDC), Fig 8.2(b): CAUTION! 1.
-
Page 44: Operation
SECTION 8 | Installation Terminal Block Terminal Block Terminal Block (10, Fig 6.1a) (10, Fig 6.1a) (10, Fig 6.1a) – Relay Contact 1A Fuse – Toggle Switch Relay Contact Relay Contact DC Power Source Toggle Switch Toggle Switch 1A Fuse (10-33VDC) NOTE: Wiring Size: AWG #22 +12V/24V battery voltage... - Page 45 SECTION 9 | Operation ATTENTION! Veuillez noter que l'interrupteur ON/OFF ne gère pas le circuit d'entrée de batterie à haute puissance. Certaines parties du circuit de côté CC seraient encores actives même si l'onduleur a été fermé. Alors, il faut déconnecter tous les côtés CC et CA avant de travailler sur n'importe quel circuit connecté...
- Page 46 SECTION 9 | Operation 9.5 NO LOAD DRAW (IDLE CURRENT) When the unit is switched ON, all the circuitry inside the inverter becomes alive and the AC output is made available. In this condition, even when no load is being supplied (or, if a load is connected but has been switched OFF), the inverter draws a small amount of current from the batteries to keep the circuitry alive and ready to deliver the required power on demand.
- Page 47 SECTION 10 | Protections 10. PROTECTIONS The inverter has been provided with protections detailed below: 10.1 POWER SURGE / OVERLOAD / SHORT CIRCUIT SHUT DOWN INFO Please refer to definitions of Active Power (Watts), Apparent Power (VA) and Power Factor (PF) at Section 2.1. In the explanation below, the values of Power are expressed in Apparent Power in VA.
-
Page 48: Over-Temperature Shut Down
PST-3000-12 or to 23V ± 0.5V or higher for PST-3000-24. 10.4 HIGH DC INPUT VOLTAGE SHUTDOWN If the voltage at the DC input terminals rises to 16.5V or higher for PST-3000-12 or, to 33V or higher for PST-3000-24, the AC output voltage will be shut down temporarily. Buzzer alarm will be sounded. - Page 49 SECTION 10 | Protections 10.6 GROUND FAULT / LEAKAGE PROTECTION FOR AC OUTPUT THROUGH NEMA5-20R GFCI DUPLEX RECEPTACLE AC output is supplied through hardwiring connections (11, Fig 6.1b) or through NEMA5-20R GFCI Duplex Receptacle (6, Fig 6.1a). The GFCI will trip if there is 5 to 6 mA leakage / Ground fault on the load side, or if Neutral and Ground are bonded on the load side.
- Page 50 The following DC side fuses have been provided for internal protection of the DC input side. The fuses are 32V, Automotive Type Blade Fuses, Type "ATO" by Littel Fuse or equivalent: PST-3000-12: 12 pieces of 30A in parallel = 360A total PST-3000-24: 12 pieces of 15A in parallel = 180A total NOTE: Fuses are soldered to the PCB.
-
Page 51: Troubleshooting Guide
± 0.2V or lower for PST- circuit. 3000-24 • The AC output voltage will switch ON auto- matically when the DC input voltage rises to 11.5V ± 0.1V or higher for PST-3000-12 or 23V ± 0.2V or higher for PST-3000-24. SAMLEX AMERICA INC. | 51... - Page 52 22V for 12V Panels or 42V for 24V Panels. Ensure that a charge controller is used between the solar panel and the battery. • Automatic Reset when voltage drops to < 16.5V for PST-3000-12 or < 33V for PST-3000-24 AC output shuts down Permanent shut-down of •...
-
Page 53: Specifications
SECTION 12 | Specifications MODEL NO. PST-3000-12 PST-3000-24 OUTPUT OUTPUT VOLTAGE 120 VAC ± 3% 120 VAC ± 3% MAXIMUM OUTPUT CURRENT OUTPUT FREQUENCY 60 Hz ± 1% 60 Hz ± 1% TYPE OF OUTPUT WAVEFORM Pure Sine Wave Pure Sine Wave TOTAL HARMONIC DISTORTION <... - Page 54 This can be determined by making sure that the fuse in the vehicle, which protects the outlet, is rated higher than 360 Amperes for PST-3000-12 (12V battery), or higher than 180 Amperes for PST-3000-24 (24V battery). Information on the vehicle fuse ratings is typically found in the vehicle operator's manual.
-
Page 55: Year Limited Warranty
Warranty 3 YEAR LIMITED WARRANTY The PST-3000-12 and PST-3000-24 are manufactured by Samlex America, Inc. (the “War- rantor“) is warranted to be free from defects in workmanship and materials under normal use and service. The warranty period is 3 years for the United States and Canada, and is in effect from the date of purchase by the user (the “Purchaser“). - Page 56 Contact Information Toll Free Numbers Ph: 1 800 561 5885 Fax: 1 888 814 5210 Local Numbers Ph: 604 525 3836 Fax: 604 525 5221 Website www.samlexamerica.com USA Shipping Warehouses Kent, WA Plymouth, MI Canadian Shipping Warehouse Delta, BC Email purchase orders to orders@samlexamerica.com...
- Page 57 APPENDIX A Onduleur de SECTION 8 Veuillez lire les instructions Installation Puissance trouvées dans CC-CA ce manuel avant d’installer Onde votre onduleur. Sinusoïdale Pure PST-3000-12 PST-3000-24...
-
Page 58: Lieu D'installation
SECTION 8 | Installation APPENDIX A MISE EN GARDE! Avant de commencer l'installation, veuillez lire les instructions de sécurité expliquées dans la section 1 intitulée " Instructions de sécurité ". On recommande que l'installation soit faite par un(e) électricien(ne) certifié(e). Il y a plusieurs consignes trouvées dans ce guide qui ne sont pas toujours appliquables si une norme nationale ou locale en prend place, concernant par example l'endroit d'installation ou à... - Page 59 SECTION 8 | Installation APPENDIX A part à l'exposition de vapeurs acides corrosives ou, de gaz inflammable (l'Oxygène et l'Hydrogène sont produits lorsque des batteries sont rechargées). Ces vapeurs pourront corroder et endommager l'unité et les gaz, s'il sont pas ventilés vont accumuler, et pour- raient s'enflammer ou s'exploser.
-
Page 60: Dimensions Générales
SECTION 8 | Installation APPENDIX A 8.2 DIMENSIONS GÉNÉRALES Les dimensions et la localisation des rainures de montage sont montrées dans la Figure 8.1. NOTE: Dimensions en mm La Fig. 8,1: Dimensions Générales et Rainures de Montage de PST-3000 60 | SAMLEX AMERICA INC. - Page 61 SECTION 8 | Installation APPENDIX A 8.3 ORIENTATION DE MONTAGE L'unité est équipée avec des admissions d'air et des échappement pour le ventilateur de refroidissement. Il faut que ça soit monté dans une manière apropriée afin d'assurer que des objects ne puissent pas tomber dans ces ouvertures, provoquant des dégats électr- iques/mécaniques.
- Page 62 SECTION 8 | Installation APPENDIX A rant à une charge externe. Pendant le chargement de la batterie, le rapport cyclique à diversion augmentera. Dés que la batterie est complètement chargée, toute l'énergie de la source serait renvoyée vers la charge de diversion s'il n'y a plus d'autres charges. Le contrôleur de charge va déconnecter la charge de diversion si le courant nominale du contrôleur de charge est excedé.
- Page 63 SECTION 8 | Installation APPENDIX A conducteurs plus épais que l'AWG # 4 / 0 sont dimensionnés en MCM / kcmil . Tableau 8.1 ci-dessous donne Résistance en Ohm ( Ω ) par pied à 25 ° C / 77 ° F pour le dimen- sionnement de fil recommandé...
- Page 64 Samlex (voir (voir note 1) note 2) sur la Amérique (voir note 5) colonne (voir note 3) 2x AWG # Trousse CC- PST-3000-12 360A 450A 400A #4/0 #4/0 2 / 0 3500 AWG # Trousse CC- PST-3000-24 180A 225A 200A...
- Page 65 SECTION 8 | Installation APPENDIX A NOTES POUR LA TABLE 8,2 1) La colonne 2 indique le courant d'entrée nominale continue CC tirée de la batterie. 2) La colonne 3 indique minimum pour le dimensionnement de l'intensité admissible NEC de conducteurs. NEC Ampacity is not less than 125% of the rated continuous DC input current (Column 2) - Refer to NEC-2014 (National Electrical Code) - Section 215.2(A)(1)(a) for Feeder Circuits.
- Page 66 SECTION 8 | Installation APPENDIX A Fusible dans le circuit de batterie est requis principalement pour la protection contre les courts-circuits dans le câble de batterie s'exécuter. La taille de ce fusible doit être égale ou supérieure à la taille maximale Courant CC en entrée de l'inverseur à la colonne (2).
- Page 67 SECTION 8 | Installation APPENDIX A 8.5.1 De neutre à la masse du châssis Bond Les fentes de position neutre de la NEMA5-20R Le GFCI Récipients Duplex (6, fig 6.1a) et la borne neutre pour hardwiring (13, fig 6.1a) sont intérieurement collée au châssis métallique de l'onduleur.
- Page 68 SECTION 8 | Installation APPENDIX A 2. Ne dirigez pas la sortie du réceptacle DDR à un tableau électrique lorsque le Neutre est lié à la terre. Ça va déclencher le DDR. S'il y un besoin d'alimenter la sortie CA à un tableau électrique, utilisez des connexions à câblage (veuillez voir les informations présentées à...
- Page 69 3 (Am- la colonne 2 ) pacité basée sur la température du conducteur de 90 ° C ) PST-3000-12 31.25 AWG#12 & 24 NOTES POUR LA TABLE 8,4 1) La colonne 2 indique le courant de sortie en CA continu 2) La colonne 3 indique NEC Ampacité...
- Page 70 SECTION 8 | Installation APPENDIX A 3) La colonne 5 indique la taille du conducteur pour la ligne et les conducteurs neutre et fondée sur les directrices dans NEC 2014 Tableau 310,5 (B) (16) pour des conducteurs en cours d'exécution dans le conduit / chemin de roulement. (a) NEC Ampacité...
- Page 71 SECTION 8 | Installation APPENDIX A Une Commande à Distance Relié par Fils, Modèle RC-300 (avec 25 ft / 5.2 mètres de câble) est disponible pour diriger la commutation des états EN MARCHE et ARRÊT et la surveillance. Elle est équipée avec affichage ACL qui affiche la tension de sortie CA, A, Hz, W, VA, et Fac- teur de Puissance.
- Page 72 SECTION 8 | Installation APPENDIX A L'onduleur commute ON lorsque le contact de relais / interrupteur externe est fermé [ tension continue externe ( 10-33VCC ) est alimenté aux bornes 3 et 4 du bornier ( 10 , figure 6.1a ) ] . Le convertisseur est arrêté...
- Page 73 NOTES: SAMLEX AMERICA INC. | 73...
- Page 74 NOTES: 74 | SAMLEX AMERICA INC.
- Page 75 NOTES: SAMLEX AMERICA INC. | 75...
- Page 76 Ph: 1 800 561 5885 Fax: 1 888 814 5210 Local Numbers Ph: 604 525 3836 Fax: 604 525 5221 Website www.samlexamerica.com USA Shipping Warehouses Kent, WA Plymouth, MI Canadian Shipping Warehouse Delta, BC Email purchase orders to orders@samlexamerica.com 11001-PST-3000-12-24-1119...
Need help?
Do you have a question about the PST-3000-12 and is the answer not in the manual?
Questions and answers