
Subscribe to Our Youtube Channel
Related Manuals for Samlexpower PST-300S-12E


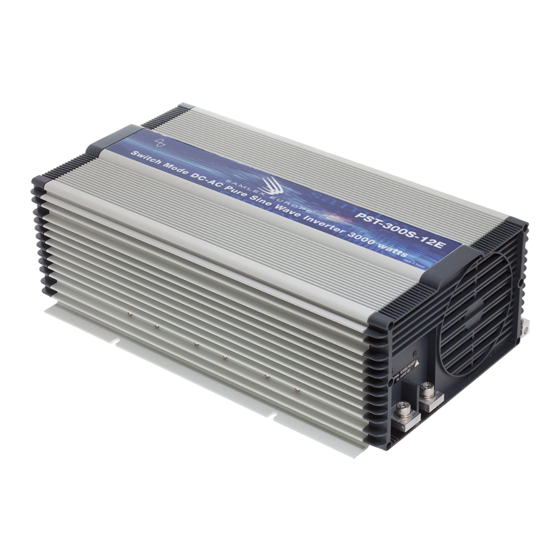
Summary of Contents for Samlexpower PST-300S-12E
- Page 1 DC-AC Power owner's Please read this manual bEforE Manual Inverter installing your Pure Sine Wave inverter PST-300S-12E PST-300S-24E...
-
Page 2: Table Of Contents
Owner's MAnuAl | Index Section 1 Safety Instructions ........3 Section 2 General Information ........6 Section 3 EMC (EMI/EMS) Compliance ..........13 Section 4 Powering Direct / Embedded Switch Mode Power Supplies (SMPS) ............14 Section 5 Principle of Operation ....... 16 Section 6 Layout ............ -
Page 3: Safety Instructions
1.1 iMPoRtAnt SAFetY inStRUctionS AnD SYMBoLS SAVE THESE INSTrUCTIoNS. This manual contains important instructions for models PST-300S-12E and PST-300S-24E that shall be followed during installation, operation and maintenance. The following safety symbols will be used in this manual to highlight safety... -
Page 4: Installation Environment
seCtIOn 1 | safety Instructions installation environment • The inverter should be installed indoor only in a well ventilated, cool, dry environment. • Do not expose to moisture, rain, snow or liquids of any type. • To reduce the risk of overheating and fire, do not obstruct the suction and discharge openings of the cooling fan. • To ensure proper ventilation, do not install in a low clearance compartment. Preventing fire and explosion hazards • Working with the unit may produce arcs or sparks. Thus, the unit should not be used in areas where there are flammable materials or gases requiring ignition protected equipment. These areas may include spaces containing gasoline-powered machinery, fuel tanks, and battery compartments. Precautions when working with batteries • Batteries contain very corrosive diluted Sulphuric Acid as electrolyte. Precautions should be taken to prevent contact with skin, eyes or clothing. - Page 5 To prevent possibility of paralleling and severe damage to the unit, never use a simple jumper cable with a male plug on both ends to connect the AC output of the unit to a handy wall receptacle in the home / RV / motorhome / caravan. Preventing Dc input over Voltage It is to be ensured that the DC input voltage of this unit does not exceed 16.5 VDC for the PST-300S-12E or 33.0 VDC for the PST-300S-24E to prevent permanent damage to the unit. Please observe the following precautions: • Ensure that the maximum charging voltage of the external battery charger / alterna- tor / solar charge controller does not exceed 16.5 VDC for the PST-300S-12E or 33.0 VDC for PST-300S-24E. • Do not use unregulated solar panels to charge the battery connected to this unit.
-
Page 6: General Information
seCtIOn 1 | safety Instructions Use of external Fuse in Dc input circuit Use UL Class T (As per UL Standard UL 248-15 / Type "HRC" as per BS88-2 or as per IEC 60269-2) or equivalent fuse of appropriate capacity within 7" of the battery Positive ter- minal. This fuse is required to protect DC input cable run from damage due to short circuit along the length of the cable. Please read instructions under Section 8.4.5 - Installation. Hard Wiring of Ac output to Ac Panelboards in RVs / Motor Homes / trailers /campers WARninG! RiSK oF eLectRic SHocK W hen this unit is installed in RV / Motor Homes / Trailers / Campers and hard-... - Page 7 seCtIOn 2 | General Information Phase Angle, (φ): It is denoted by “φ” and specifies the angle in degrees by which the current vector leads or lags the voltage vector in a sinusoidal voltage. In a purely induc- tive load, the current vector lags the voltage vector by Phase Angle (φ) = 90°. In a purely capacitive load, the current vector leads the voltage vector by Phase Angle, (φ) = 90°. In a purely resistive load, the current vector is in phase with the voltage vector and hence, the Phase Angle, (φ) = 0°. In a load consisting of a combination of resistances, induct- ances and capacitances, the Phase Angle (φ) of the net current vector will be > 0° < 90°...
- Page 8 seCtIOn 2 | General Information Apparent (S) Power, VA: This power, denoted by "S", is the vectorial sum of the Active Power in Watts and the reactive Power in “VAr”. In magnitude, it is equal to the rMS value of voltage “V” X the rMS value of current “A”. The Unit is VA. Please note that Apparent Power VA is more than the Active Power in Watts.
- Page 9 seCtIOn 2 | General Information • A c to Dc Switched Mode Power Supplies (SMPS): This type of power supply is used as stand-alone power supply or as front end in all electronic devices powered from Util- ity / Grid e.g. in audio/video/ computing devices and battery chargers (Please see Sec- tion 4 for more details on SMPS). When this power supply is switched ON, its internal input side capacitors start charging resulting in very high surge of Inrush Current for a few millisecs (Please see fig 4.1). This surge of inrush current / power may reach up to...
- Page 10 seCtIOn 2 | General Information 2.2 oUtPUt VoLtAGe WAVeFoRMS = 325.22V PEAK = 280 to 320V PEAK = 230 VAC Sine Wave Modi ed Sine Modi ed Sine Wave Wave sits at ZERO for some time and then rises or falls Pure Sine Wave crosses Zero Volt instantaneously...
- Page 11 seCtIOn 2 | General Information 2.3 ADVAntAGeS oF PURe Sine WAVe inVeRteRS • The output waveform is a Sine Wave with very low harmonic distortion and cleaner power like Utility / Grid supplied electricity. • Inductive loads like microwaves, motors, transformers etc. run faster, quieter and cooler. • More suitable for powering fluorescent lighting fixtures containing Power factor Improvement Capacitors and single phase motors containing Start and run Capacitors • Reduces audible and electrical noise in fans, fluorescent lights, audio amplifiers, TV, fax and answering machines, etc. • Does not contribute to the possibility of crashes in computers, weird print outs and glitches in monitors. 2.4 SoMe eXAMPLeS oF DeViceS tHAt MAY not WoRK PRoPeRLY WitH MoDiFieD Sine WAVe AnD MAY ALSo Get DAMAGeD ARe GiVen BeLoW: • Laser printers, photocopiers, and magneto-optical hard drives.
- Page 12 seCtIOn 2 | General Information The power rating of inverters is specified as follows: • Maximum Continuous Running Power Rating • S urge Power Rating to accommodate high, short duration surge of power required during start up of certain AC appliances and devices. Please read details of the above two types of power ratings in Section 2.1 under “DeFinitionS”...
-
Page 13: Emc (Emi/Ems) Compliance
seCtIOn 2 | General Information noteS FoR tABLe 2.1 1. M ultiply the Maximum Continuous Running Power Rating (Active Power Rating in Watts) of the appliance / device by the recommended Sizing factor to arrive at the Maximum Continuous Running Power Rating of the inverter. 2. f or photographic strobe / flash unit, the Surge Power Rating of the inverter should be > 4 times the Watt Sec rating of photographic strobe / flash unit. seCtIOn 3 | eMC (eMI / eMs) Compliance 3.1 eMc (eMi / eMS) coMPLiAnce These inverters contain internal switching devices that generate conducted and radiated electromagnetic interference (EMI). The EMI is unintentional and cannot be entirely eliminated. -
Page 14: Powering Direct / Embedded Switch Mode Power Supplies (Smps)
seCtIOn 4 | Powering Direct / embedded switch Mode Power supplies (sMPs) 4.1 cHARActeRiSticS oF SWitcHeD MoDe PoWeR SUPPLieS (SMPS) Switch Mode Power Supplies (SMPS) are extensively used to convert the incoming AC power into various voltages like 3.3V, 5V, 12V, 24V etc. that are used to power vari- ous devices and circuits used in electronic equipment like battery chargers, computers, audio and video devices, radios etc. SMPS use large capacitors in their input section for filtration. When the power supply is first turned on, there is a very large inrush cur- rent drawn by the power supply as the input capacitors are charged (The capacitors act almost like a short circuit at the instant the power is turned on). The inrush current at turn-on is several to tens of times larger than the rated rMS input current and lasts for... -
Page 15: Input Voltage
seCtIOn 4 | Powering Direct / embedded switch Mode Power supplies (sMPs) NOTE: Voltage and current scales are di erent Input voltage Peak inrush current Rated steady state input RMS current Inrush current Fig 4.1: Inrush current in an SMPS NOTE: Voltage Peak Current and current scales... -
Page 16: Principle Of Operation
seCtIOn 5 | Principle of Operation 5.1 GeneRAL These inverters convert DC battery voltage to AC voltage with an RMS (Root Mean Square) value of 230 VAC, 60 Hz. 5.2 PURe Sine WAVe oUtPUt WAVeFoRM The waveform of the AC voltage is a pure Sine Waveform that is same as the waveform of Grid / Utility power (Supplementary information on pure Sine Waveform and its advantages are discussed in Sections 2.2 to 2.4). -
Page 17: Layout
seCtIOn 6 | layout 1. Three Position Rocker Switch • – ON - Push top end to switch ON locally • 0 OFF – Centered to switch OFF locally • = E XT Switch - Push bottom end to enable switching ON and OFF by external switching control 2. Green LED marked “POWER” 3. Red LED marked “OVER LOAD” 4. RED LED marked “OVER TEMP” 5. -
Page 18: General Information On Lead-Acid Batteries
seCtIOn 7 | General Information on lead Acid Batteries 7.1 GeneRAL inFo f or complete background information on Lead Acid Batteries and charging process, please visit www.samlexamerica.com > support > white papers > White Paper - batteries, Chargers and Alternators. Lead-acid batteries can be categorized by the type of application: Automotive service - Starting/Lighting/Ignition (SLI, a.k.a. cranking), and Deep cycle service. Deep Cycle Lead Acid Batteries of appropriate capacity are recommended for powering of inverters. 7.2 DeeP cYcLe LeAD AciD BAtteRieS Deep cycle batteries are designed with thick-plate electrodes to serve as primary power sources, to have a constant discharge rate, to have the capability to be deeply dis- charged up to 80 % capacity and to repeatedly accept recharging. They are marketed for use in recreation vehicles (RV), boats and electric golf carts – so they may be referred to as RV batteries, marine batteries or golf cart batteries. Use Deep Cycle batteries for... - Page 19 seCtIOn 7 | General Information on lead Acid Batteries reserve capacity is the time in minutes for which the battery can deliver 25 Amperes at 80ºf (26.7ºC) till the voltage drops to 1.75V / Cell i.e. 10.5V for 12V battery, 21V for 24V battery and 42V for 48V battery. Approximate relationship between the two units is: capacity “c” in Ah = Reserve capacity in Rc minutes x 0.6 7.5 tYPicAL BAtteRY SiZeS The Table 7.1 below shows details of some popular battery sizes: tABLe 7.1: PoPULAR BAtteRY SiZeS...
- Page 20 seCtIOn 7 | General Information on lead Acid Batteries tABLe 7.2: DiScHARGe cURRent RAteS - “c-RAteS” (continued from Previous page) "c-Rate" Discharge current in Amps = example of c-Rate Hours of discharge time “t” till ÷ capacity "c" in Ah Discharge time Discharge currents the “end Point Voltage”...
- Page 21 seCtIOn 7 | General Information on lead Acid Batteries 7.8 ReDUction in USABLe cAPAcitY At HiGHeR DiScHARGe RAteS – tYPicAL in inVeRteR APPLicAtion As stated above, the rated capacity of the battery in Ah is normally applicable at a dis- charge rate of 20 Hours.
- Page 22 seCtIOn 7 | General Information on lead Acid Batteries tABLe 7.4: StAte oF cHARGe VeRSUS StAnDinG VoLtAGe Percentage of Standing Voltage Standing Voltage of Standing Voltage Full charge of individual cells 12V Battery of 24V Battery 100% 2.105V 12.63V 25.26V 2.10V 12.6V 25.20V...
- Page 23 seCtIOn 7 | General Information on lead Acid Batteries The discharge curves in fig. 7.1 show the % State of Charge versus the terminal voltage of typical battery under different charge /discharge currents, i.e. “C-Rates” and fixed temperature of 80°f. note: T he X-Axis of the curves shown in fig 7.1 indicates the percentage State of Charge. % State of Discharge should be converted to % State of Charge using the formula given below: • % State of Charge = 100% - % State of Discharge 7.11 LoW Dc inPUt VoLtAGe ALARM in inVeRteRS As stated earlier, the buzzer alarm is triggered when the voltage at the DC input termi- nals of the inverter has dropped to around 10.5V for a 12V battery (21V for 24V battery) at C-Rate discharge current of C/5 Amps. Please note that the terminal voltage relative to a particular of State Discharge decreases with the rise in the value of the discharge current. for example, terminal voltages for a State of Discharge of 80% (State of Charge of 20%) for various discharge currents will be as given at Table 7.5 (Refer to fig 7.1 for parameters and values shown in Table 7.5): tABLe 7.5 teRMinAL VoLtAGe AnD Soc oF LoADeD BAtteRY Discharge current: terminal Voltage at 80% State terminal Voltage When completely...
- Page 24 seCtIOn 7 | General Information on lead Acid Batteries Inverters are normally provided with a protection to shut down the output of the inverter if the DC voltage at the input terminals of the inverter drops below a threshold of around 10V for a 12V battery (20V for 24V battery). Referring to the Discharge Curves given in fig 7.1, the State of Discharge for various C-Rate discharge currents for battery voltage of 10V / 20V is as follows: (Please note that the X-Axis of the curves shows the % of State of Charge. The % State od Discharge has to be converted to the % State of Charge using the formula: % State of Charge = 100% - % State of Discharge): - 85% State of Discharge (15% State of Charge) at very high C-rate discharge current of C/3 Amps. - 100% State of Discharge (0 % State of Charge) at high C-Rate discharge current of C/5 Amps. - 100% discharged (0% State of charge) at lower C-rate Discharge current of C/10 Amps. It is seen that at DC input voltage of 10V / 20V, the battery is completely discharged for C-rate discharge current of C/5 and lower. In view of the above, it may be seen that a fixed Low DC Input Voltage Alarm is not useful.
-
Page 25: Series Connection
seCtIOn 7 | General Information on lead Acid Batteries 7.14 DePtH oF DiScHARGe oF BAtteRY AnD BAtteRY LiFe The more deeply a battery is discharged on each cycle, the shorter the battery life. Using more batteries than the minimum required will result in longer life for the battery bank. A typical cycle life chart is given in the Table 7.6: tABLe 7.6: tYPicAL cYcLe LiFe cHARt Depth of Discharge cycle Life of Group cycle Life of Group... -
Page 26: Parallel Connection
seCtIOn 7 | General Information on lead Acid Batteries 7.15.2 Parallel connection Cable “A” Battery 1 Battery 2 Battery 3 Battery 4 12V Inverter or 12V Charger Cable “B” Fig 7.3: Parallel Connection When two or more batteries are connected in parallel, their voltage remains the same but their Ah capacities add up. fig. 7.3 shows 4 pieces of 12V, 100 Ah batteries connect- ed in parallel to form a battery bank of 12V with a capacity of 400 Ah. The four Positive terminals of Batteries 1 to 4 are paralleled (connected together) and this common Posi-... - Page 27 seCtIOn 7 | General Information on lead Acid Batteries cAUtion! W hen 2 or more batteries / battery strings are connected in parallel and are then connected to an inverter or charger (See figs 7.3 and 7.4), attention should be paid to the manner in which the charger / inverter is connected to the battery bank. Please ensure that if the Positive output cable of the battery charger / inverter (Cable “A”) is connected to the Positive battery post of the first battery (Battery 1 in fig 7.3) or to the Positive battery post of the first battery string (Battery 1 of String 1 in fig. 7.4), then the Negative output cable of the battery charger / inverter (Cable “B”) should be connected to the Negative battery post of the last battery (Battery 4 as in fig. 7.3) or to the Negative Post of the last battery string (Battery 4 of Battery String 2 as in fig. 7.4). This connection ensures the following: - The resistances of the interconnecting cables will be balanced. - All the individual batteries / battery strings will see the same series resistance. - A ll the individual batteries will charge / discharge at the same charging current and thus, will be charged to the same state at the same time. - None of the batteries will see an overcharge condition.
- Page 28 seCtIOn 7 | General Information on lead Acid Batteries Let us say that the total Ac Watts delivered by the inverter = 1000W. Then, using formula 2 above, the approximate DC current to be delivered by the 12V batteries = 1000W ÷10 = 100 Amperes, or by 24V batteries = 1000W ÷ 20 = 50A. next, the energy required by the load in Ampere Hours (Ah) is determined. for example, if the load is to operate for 3 hours then as per formula 3 above, the energy to be delivered by the 12V batteries = 100 Amperes × 3 Hours = 300 Ampere Hours (Ah), or by the 24V batteries = 50A x 3 Hrs = 150 Ah.
-
Page 29: Installation
seCtIOn 8 | Installation WARNING! 1. before commencing installation, please read the safety instructions explained in Section 1 titled “Safety Instructions”. 2. I t is recommended that the installation should be undertaken by a qualified, licensed / certified electrician. 3. Various recommendations made in this manual on installation will be superseded by the National / Local Electrical Codes related to the location of the unit and the specific application. 8.1 LocAtion oF inStALLAtion Please ensure that the following requirements are met: Working environment: Indoor use. - Page 30 seCtIOn 8 | Installation flammable Oxygen and Hydrogen gases produced when the batteries are charged. The cor- rosive fumes will corrode and damage the unit and if the gases are not ventilated but allowed to collect, they could ignite and cause an explosion. Accessibility: Do not block access to the front panel. Also, allow enough room to access the AC receptacles and DC wiring terminals and connections, as they will need to be checked and tightened periodically. Preventing electro Magnetic interference (eMi): The unit uses high power switching circuits that generate RfI. This RfI is limited to the required standards. Locate any elec- tronic equipment susceptible to radio frequency and electromagnetic interference as far away from the inverter as possible.
- Page 31 seCtIOn 8 | Installation note: Dimensions are in mm Fig. 8.1: PST-300S Overall Dimensions & Mounting Slots SAMLEX AMERICA INC. | 31...
- Page 32 8 | Installation 8.4 Dc SiDe connectionS 8.4.1 Preventing Dc input over Voltage It is to be ensured that the DC input voltage of this unit does not exceed 16.5 VDC for PST-300S-12E and 33.0 VDC for PST-300S-24E to prevent permanent damage to the unit. Please observe the following precautions: - Ensure that the maximum charging voltage of the external battery charger / alterna- tor / solar charge controller does not exceed 16.5 VDC for PST-300S-12E and 33.0 VDC for PST-300S-24E - Do not use unregulated solar panels to charge the battery connected to this unit. Under open circuit conditions and in cold ambient temperatures, the output of the solar panel may be > 22 VDC for 12V nominal panel and > 44V for 24V nominal panel. Always use a...
- Page 33 seCtIOn 8 | Installation 8.4.3 connection from Batteries to the Dc input Side – Sizing of cables and Fuses cAUtion! The input section of the inverter has large value capacitors connected across the input terminals. As soon as the DC input connection loop (Battery (+) terminal " External fuse " Positive input terminal " Negative input terminal " battery (–) terminal) is completed, these capacitors will start charging and the unit will momentarily draw very heavy current to charge these capacitors that will produce sparking on the last contact in the input loop even when the unit is in Off condi-...
- Page 34 seCtIOn 8 | Installation oil resistant, multi-stranded copper wire cables rated at 90ºC / 194°f minimum. Do not use aluminum cable as it has higher resistance per unit length. Cables can be bought at a marine / welding supply store. Effects of low voltage on common electrical loads are given below: • Lighting circuits - incandescent and Quartz Halogen: A 5% voltage drop causes an approximate 10% loss in light output. This is because the bulb not only receives less power, but the cooler filament drops from white-hot towards red-hot, emitting much less visible light. •...
- Page 35 (cable Routing in Free Air) Up to 5 ft. Up to 10 ft. (column 1) (column 2) (column 3) (column 5) (column 6) 120 mm *185 mm PST-300S-12E 420A 450A AWG #4/0 MCM 350 50 mm 50 mm PST-300S-24E 240A 250A...
-
Page 36: Ac Output Receptacle
seCtIOn 8 | Installation b) Closest Standard Ampere rating of fuse has been used c) Type of fuse: fast-acting, Current Limiting, UL Class – Type "Class T" as per UL Standard 248-15 or Type "HRC" as per BS 88-2 / IEC60269-2 8.4.6 Dc input connection The DC input terminals for battery connection (14 & 16 in fig. 6.1c) have nut and bolt con- nection - bolt size is 5/16" (18 Threads per Inch). Use ring tongue type of terminals on the wire ends to fit 5/16" bolt size. 8.4.7 Reducing RF interference Please comply with recommendations given in Section 3 - "EMC (EMI / EMS) Compliance". 8.5 Ac SiDe connectionS WARninG! Preventing Paralleling of the Ac output 1. - Page 37 PST-600 & PST-1000-12-24: Layout seCtIOn 8 | Installation [See 6, fig 6.1(a)] 2.1(b) 2.1(a) Front View european "Schuko" Plug, type cee 7/7 european "Schuko" Receptacle, type cee 7/3 1.1: Non-polarized male pins for current 2.1(a): Live/Hot socket "L1" - internally connected carrying conductors to L1 (Brown wire) 1.2: Grounding Contact Strips 2.1(b): Live/Hot socket "L2" - internally connected 1.3: G rounding Socket (Not provided in to L2 (Blue wire)
- Page 38 seCtIOn 8 | Installation to the metal chassis Ground). Hence, even when the ON/Off Switch / Breaker on the load has been switched off, the higher voltage current carrying conduc- tor (130 VAC ± 10%) may still remain connected to the internal downstream sections of the load and will be a shock hazard! 8.5.2 Ac output connections for Hardwiring for connecting the AC output of the inverter to an AC Panelboard / Load Center, sepa- rate connections are available for hard wiring. Compartment [11, fig 6.1(b)] contains terminals for AC output. The compartment is covered by Cover Plate [8, fig 6.1(a)] with the help of 4 screws. The AC wiring enters through the metal Strain Relief Clamp [7, fig 6.1(a)]. After the connections have been made, tighten the clamp. AC output connec- tions are as follows: terminal Block (13, Fig 6.1b) with Line "L1" and Line “L2” terminals. Please note that Line terminal “L1” of the AC Terminal Block [13, fig 6.1(b)] and the socket L1 of the Schuko Receptacle [2.1(a), fig 8.2.2] are internally connected together at the PCB. Similarly, Line terminal L2 on the AC Terminal Block [13, fig 6.1(b)] and the...
- Page 39 Ac output Breaker Ampacity at column 3 (Based on column 2) (Ampacity based on conductor temperature of 70°c / 158°F) PST-300S-12E 13.04A 2.5 mm / AWG #14 PST 300S-24E noteS FoR tABLe 8.3 1) Column 2 indicates the rated continuous AC output current 2) C olumn (3) indicates the maximum size of external AC breaker based on the next higher standard breaker size based on Column 2.
- Page 40 seCtIOn 8 | Installation When using the inverter in a building, connect a 10 mm or AWG #8 insulated stranded copper wire from the above Chassis Grounding Terminal to the Earth Ground connection ( a connection that connects to the Ground rod or to buried metallic water pipe or to another connection that is solidly bonded to the Earth Ground ). The connections must be tight against bare metal. Use star washers to penetrate paint and corrosion. When using the inverter in RVs / Motor Home / Trailers / Campers / Caravans, connect a 10 mm or AWG #8 insulated stranded copper wire from the above Chassis Grounding...
- Page 41 seCtIOn 8 | Installation • 2-Wire on/oFF control from Remote Location Using Switch/Relay contact, Fig 8.3(a): In this arrangement, external voltage source is NOT required. The inverter will switch ON when the relay contact / switch is closed and terminals 1 and 2 of the Terminal Block (10, fig 6.1a) are shorted. The inverter will switch Off when the relay contact / switch is opened and short is removed across terminals 1 and 2 of the Terminal Block (10, fig 6.1a) • 2-Wire on/oFF control Using Switched Dc Voltage (10-33VDc), Fig 8.3(b): cAUtion! 1 . P lease ensure correct polarity of wiring connection. Positive (+) of the external DC source should be connected to Terminal 3 of the Terminal Block (10, fig 6.1a) and Negative (-) to Terminal 4. In case the polarity is reversed, the ON/Off control will not operate. the input to these terminals is protected against reverse polarity 2. Use 1A fuse as shown as close to the DC source as possible inFo The 10-30VDC external control signal on terminals 3 and 4 of the Terminal Block...
-
Page 42: Operation
seCtIOn 8 | Installation Terminal Block Terminal Block Terminal Block (10, Fig 6.1a) (10, Fig 6.1a) (10, Fig 6.1a) – Relay Contact 1A Fuse – Toggle Switch Relay Contact Relay Contact DC Power Source Toggle Switch Toggle Switch 1A Fuse (10-33VDC) NOTE: Wiring Size: AWG #22 +12V/24V battery voltage... - Page 43 seCtIOn 9 | Operation cAUtion! Please note that the ON/Off switch is not switching the high power battery input circuit. Parts of the DC side circuit will still be alive even when the switch is in the off position. Hence, disconnect the DC and AC sides before working on any circuits connected to the inverter. When the inverter is switched oN, the Green LED marked "POWER" (2, fig 6.1a) will be lighted. This LED indicates that the input section of the inverter is operating normally. Under normal operating conditions, AC output voltage will now be available at the Schuko Recepta- cle (6, fig 6.1a) and at the AC output terminals for hardwiring (13, fig 6.1b). S witch on the AC load(s). The Green LED marked "POWER" (2, fig 6.1a) should remain lighted for normal operation of the load.
-
Page 44: Protections
seCtIOn 9 | Operation cAUtion! When the inverter is switched Off using the optional external Remote Control rC-300, there will be a very minor current drain of up to 3mA for the 12V version of the inverter and up to 5mA for the 24V version of the inverter. There will be no drain from the battery when the inverter is switched off as follows: a) W hen not using external 1-Wire or 2-Wire on/oFF control: by switching Off the 3-Position Rocker Switch (1, fig 6.1a) to center position marked... - Page 45 Section 8.4.3 “Connection from Batteries to the DC Input Side-Sizing of Cables and Fuses”). If the voltage at the DC input terminals drops to 10.7V ± 0.1V or lower for PST-300S-12E or, to 21.4V ± 0.2V or lower for PST-300S-24E, a buzzer alarm will be sounded. The Green LED marked "POWER" (2, fig 6.1a) will continue to be lighted and the AC output voltage would continue to be available. This warning buzzer alarm indicates that the battery is running low and that the inverter will be shut down after sometime if the voltage at the inverter terminals further drops to 10V ± 0.1V or lower...
- Page 46 10.6 inteRnAL Dc SiDe FUSeS The following DC side fuses have been provided for internal protection of the DC input side. The fuses are 32V, Automotive Type Blade fuses, Type "ATO" by Littel fuse or equivalent: PST-300S-12E: 12 pieces of 35A in parallel = 420A total PST-300S-24E: 12 pieces of 20A in parallel = 240A total note: fuses are soldered to the PCb. 10.7 ReVeRSe PoLARitY At tHe Dc inPUt teRMinALS...
- Page 47 seCtIOn 10 | Protections inFo R everse polarity connection is likely to damage the DC input circuitry. The internal fuse(s) should be replaced with the same size of fuse(s) used in the unit. If the unit does not work after replacing the fuse(s), it has been perma- nently damaged and will require repair / replacement (Please read Section 11 - “Troubleshooting Guide” for more details). cAUtion! D amage caused by reverse polarity is not covered by warranty! When making battery connections on the input side, make sure that the polarity of battery connections is correct (Connect the Positive of the battery to the Positive termi- nal of the unit and the Negative of the battery to the Negative terminal of the unit). If the input is connected in reverse polarity, DC fuse(s) inside the inverter / external fuse will blow and may also cause permanent damage to the inverter.
-
Page 48: Troubleshooting Guide
± 0.2V or lower for PST- circuit. 300S-24E • The AC output voltage will switch ON auto- matically when the DC input voltage rises to 11.5V ± 0.1V or higher for PST-300S-12E or 23V ± 0.2V or higher for PST-300E-24E. 48 | SAMLEX AMERICA INC. - Page 49 22V for 12V Panels or 42V for 24V Panels. Ensure that a charge controller is used between the solar panel and the battery. • Automatic Reset when voltage drops to < 16.5V for PST-300S-12E or < 33V for PST-300S-24E AC output shuts down Permanent shut-down of • Reduce the load / remove the short circuit...
-
Page 50: Specifications
12 | specifications MoDeL no. PSt-300S-12e PSt-300S-24e oUtPUt OUTPUT VOLTAGE 230 VAC ± 3% 230 VAC ± 3% MAXIMUM oUTPUT CUrrENT 13.04A 13.04A OUTPUT fREQUENCY 50/60 Hz ± 1% : Switch Selectable (Default 50 Hz) TYPE Of OUTPUT WAVEfORM Pure Sine Wave Pure Sine Wave TOTAL HARMONIC DISTORTION < 3% < 3% of oUTPUT WAVEforM CoNTINUoUS oUTPUT PoWEr 3000 Watts 3000 Watts (At Power factor = 1) SUrGE oUTPUT PoWEr 6000 Watts (< 8 ms) - Page 51 RiSK oF FiRe D o not replace any vehicle fuse with a rating higher than recommended by the vehicle manufacturer. PST-300S-12E is rated to draw 420 Amperes from 12V vehicle outlet and PST-300S-24E is rated to draw 240 Amperes from 24V battery vehicle outlet. Ensure that the electrical system in your vehicle can supply this unit without causing the vehicle fusing to open.
-
Page 52: Warranty
13 | warranty 2 YeAR LiMiteD WARRAntY The PST-300S-12E and PST-300S-24E are manufactured by Samlex America, Inc. (the “Warrantor“) is warranted to be free from defects in workmanship and materials under normal use and service. The warranty period is 2 years for the United States and Canada, and is in effect from the date of purchase by the user (the “Purchaser“). Warranty outside of the United States and Canada is limited to 6 months. for a warranty claim, the Purchaser should contact the place of purchase to obtain a return Authoriza- tion Number. - Page 53 nOtes: SAMLEX AMERICA INC. | 53...
- Page 54 nOtes: 54 | SAMLEX AMERICA INC.
- Page 55 nOtes: SAMLEX AMERICA INC. | 55...
- Page 56 Ph: 1 800 561 5885 Fax: 1 888 814 5210 Local Numbers Ph: 604 525 3836 Fax: 604 525 5221 Website www.samlexamerica.com USA Shipping Warehouses Kent, WA Plymouth, MI Canadian Shipping Warehouse Delta, BC Email purchase orders to orders@samlexamerica.com 11001-PST-300S-12E-24E-0317...
Need help?
Do you have a question about the PST-300S-12E and is the answer not in the manual?
Questions and answers