Advertisement
Advertisement
Table of Contents

Subscribe to Our Youtube Channel
Related Manuals for Gama Sonic GS-126W


Summary of Contents for Gama Sonic GS-126W
- Page 2 TRIPLE-TIER SOLAR LAMP Instruction Manual Model: GS-126...
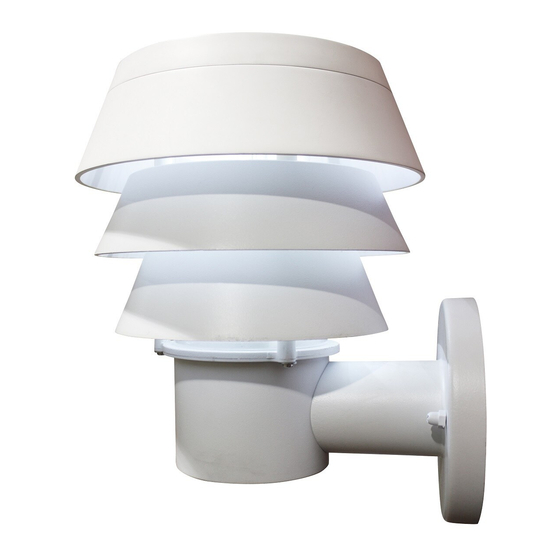
- Page 3 What’s Inside Open your package and remove the contents. Check to make sure all pieces are present and accounted for. GS-126 PARTS Fixture Wall Mount...
- Page 4 Operation Instructions Remove the top (A) from the fixture (B) by removing the 2 screws as shown in Fig. 1. Turn the operation switch (Fig. 2) to the ON position, and the solar lamp will automatically operate from dusk to dawn. Reattach the top (A) to the fixture (B) and secure with the 2 screws.
-
Page 5: Installation Instructions
Installation Instructions Use a drill to make two holes in the wall, place appropriate hardware into holes. Place the wall bracket in line with the holes and secure bracket to wall with the screws provided (Fig. 3). Note: For best results, position your lamp so it is facing south. FIG. -
Page 6: Replacing The Batteries
Replacing the Batteries After several years of use, the battery may need replacing. Remove the 2 screws from the top of the lamp and remove the top from the fixture (Fig. 4). Remove the screw from the battery compartment on the underside of the top (Fig. -
Page 7: Maintenance
Maintenance Clean the solar panels regularly with a damp towel to guarantee optimum performance. Do not use any type of solvent for cleaning and be careful not to put too much pressure on the solar panels while cleaning. Troubleshooting If your solar charged light does not come on at dusk despite observance of all the instructions, please try the following steps: Make sure that the solar lamp is not being affected by any other light source.
Need help?
Do you have a question about the GS-126W and is the answer not in the manual?
Questions and answers