Advertisement
MINI SOLAR PLANTER
US Patent # 7172307
Instruction Manual
Model: GS-111PL
Introduction
Thank you for your purchase.
® solar charged accent lighting
GAMA SONIC
eliminates the problems associated with most solar lighting available today.
® solar charged lights are brighter and last all night with a typical
GAMA SONIC
solar charge. Unique design, superior light output and numerous installation
options confirm the outstanding value of our product.
® has been recognized as a worldwide leader in the lighting
GAMA SONIC
industry for over 20 years. The company also offers unique multi-purpose
rechargeable products that range from party lights to emergency lighting
products.
For technical assistance and more information call our Toll Free number:
800-835-4113 (only within the US) or visit our website at:
www.gamasonic.com.
Visit our website or download the latest version of your instruction manual:
www.gamasonic.com
or
www.gamasonic.com/user-guides
1
Advertisement
Table of Contents

Subscribe to Our Youtube Channel
Related Manuals for Gama Sonic GS-111PL


Summary of Contents for Gama Sonic GS-111PL
- Page 1 MINI SOLAR PLANTER US Patent # 7172307 Instruction Manual Model: GS-111PL Introduction Thank you for your purchase. ® solar charged accent lighting GAMA SONIC eliminates the problems associated with most solar lighting available today. ® solar charged lights are brighter and last all night with a typical GAMA SONIC solar charge.
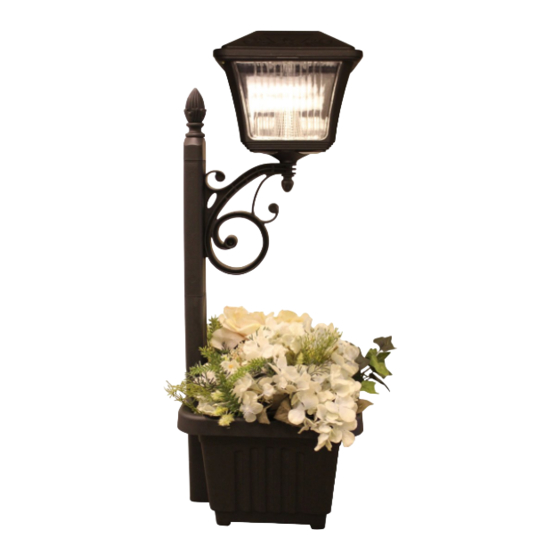
- Page 2 Please read the instruction manual carefully to obtain the best results from your purchase. Fig. 1...
- Page 3 Fig. 2 Fig. 3 Solar Lamp Location For optimum light duration throughout the night, it is very important to place your solar lamp in a spot where it will receive the maximum amount of direct sunlight throughout the day. NOTE: For best results, the solar lamp must be charged for two sunny days in the “ON”...
- Page 4 Replacing the Batteries (After several years of use, the battery may need replacing). 1. Unscrew the two nuts caps and detach the cap from the frame. Make sure the ON/OFF switch is in the OFF position. 2. Unscrew the battery compartment (Fig. 2) screw located on the silver reflector and remove the compartment door.
Need help?
Do you have a question about the GS-111PL and is the answer not in the manual?
Questions and answers