Advertisement
Advertisement

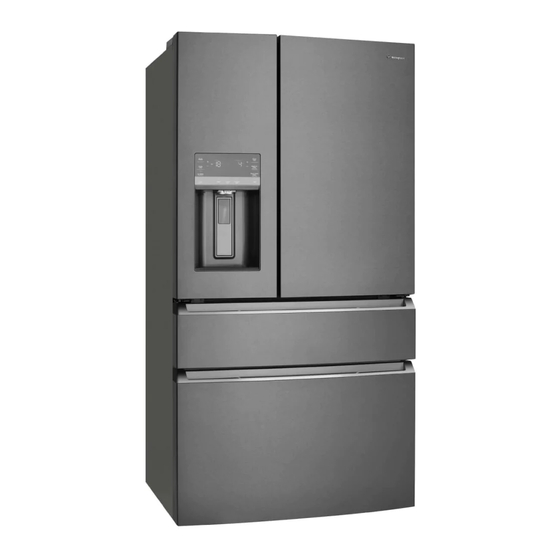
Related Manuals for Westinghouse WHE6170


Summary of Contents for Westinghouse WHE6170
- Page 1 USER MANUAL WHE6170, WHE6270 REFRIGERATOR...
-
Page 2: Table Of Contents
8. TROUBLESHOOTING ..........................21 WE’RE THINKING OF YOU Thank you for choosing Westinghouse. We have designed this product to make your life simpler and deliver impeccable performance for many years. Please spend a few minutes reading this document to get the best from your new Electrolux appliance. -
Page 3: Safety Information
SAFETY INFORMATION Note: You must read these warnings carefully WARNING before installing or using the refrigerator. If R600a refrigerant warning you need assistance, contact your customer care centre. The manufacturer will not accept This appliance contains flammable liability, should these instructions or any R600a refrigerant. - Page 4 • When transporting and installing the Side View refrigerator, care should be taken to ensure that no parts of the refrigerating circuit are damaged. • Keep ventilation openings in the Stabilising foot appliance enclosure or in the built-in wound down structure clear of obstruction.
-
Page 5: Description Of The Appliance
2. DESCRIPTION OF THE APPLIANCE The details of the refrigerator feature: Ice Maker Adjustable Door 1/3 bin Air distributor - Multiflow Adjustable Door 2/3 bin Air filter Adjustable Expandable bin Water filter Bottle storage bin Flip up glass shelf Adjustable left hinge Slide/fold glass shelf Adjustable right hinge Left Glass shelf... -
Page 6: About The User Interface
3. ABOUT THE USER INTERFACE 3.1 External user interface BUTTON/ DESCRIPTION PRIMARY FUNCTION ICON Quick Freeze Activates a faster rate for freezing food in the freezer. (on/off) Deactivates after 12 hours. Drinks Chill Quickly chills a drink inside the freezer compartment. - Page 7 BUTTON/ DESCRIPTION PRIMARY FUNCTION ICON Replace Air Filter Display illuminates every 6 months or when filter needs replacing. Press and hold ‘Reset Air Filter’ for 3 seconds to reset. Water Press the “water” key to select water. An indicator light will be illuminated above the active feature.
- Page 8 Door Open Setting cooling temperatures If a door has been left open for 5 minutes or Note: The recommended settings for a more, an alarm will sound and the door open product installed in a kitchen is 3˚C for the indicator will illuminate on the display.
-
Page 9: Installing Your New Appliance
4. INSTALLING YOUR NEW APPLIANCE Unpacking When positioned in a corner area, spacing of right side at least 260 mm and left ENVIRONMENT side at least 355 mm on the hinge side will Most of the packing materials are allow the doors to open enough to enable recyclable. - Page 10 Door opening Your refrigerator should be positioned to allow easy access to a counter when removing food. For best use of refrigerator drawers and freezer baskets, the refrigerator should be in a position where both can be Door fully opened.
- Page 11 Flipper Mullion Before Installing the Water Supply Line, You Will Need: Adjust Flipper Mullion for proper connection • Basic Tools: adjustable wrench, flat- with the mullion guide by ensuring the blade screwdriver, and PhillipsTM flipper mullion is folded and perpendicular screwdriver to the fresh food door.
- Page 12 To Connect Water Supply Line to Ice Maker primed. See “Priming the water supply Inlet Valve system “in the “AUTOMATIC ICE & WATER Installation kit supplied with Refrigerator: DISPENSER” section. Remove the cap from the inlet tube Plastic ¼ inch...
-
Page 13: Using Your Refrigerator
5. USING YOUR REFRIGERATOR AUTOMATIC ICE & WATER DISPENSER WARNING Flushing system about 2 minutes after Using the ice maker after installation period of non-use exceeding 30 days Before making ice for the first time, be sure Ice maker operation & care to prime the water supply system. - Page 14 Remove and empty the ice bin if: ice maker during each cycle. Remember, if it • An extended power failure (one hour or has been six months or longer since you last...
- Page 15 To adjust the slide-under/flip shelf: 1. Pull front half shelf forward until its back drops down, then gently push front half shelf back and under back half shelf. Auger Adjusting the Ice Bin Auger Slide-Under/Flip Shelf STORAGE FEATURES 2. With front half fully below back half, lift CAUTION front of shelf to flip it upwards toward the To avoid personal injury or property...
- Page 16 Doors Storage bins Auto The doors to your fresh food compartment Humidity Membrane use a system of modular storage bins. All of these bins are removable for easy cleaning. Bins can be adjusted to your needs. Crisper Door bins are ideal for storing jars, bottles, cans, and large drink containers.
- Page 17 Freezer Features (varies by model) To remove lower freezer basket: 1. Open freezer compartment completely. 2. Lift the basket up and remove. Reverse the steps to reinstall drawer. Dividers Grab hand hold on lower divider and pull up slightly to slide to next position. (The divider cannot be removed.) Lower Basket Divider...
-
Page 18: Cleaning Your Refrigerator
6. CLEANING YOUR REFRIGERATOR WARNING CAUTION BEFORE CLEANING: Turn the To clean a crisper or freezer bin with refrigerator off at the power point and telescopic extension slides, simply unplug the cord to prevent any chance wipe with a damp cloth and warm of electrocuting yourself. - Page 19 Water Filter Replacing the Water Filter Your refrigerator is equipped with a water To Remove: Pull cover towards you and cover filtering system. The water filtering system will drop down and allow access to filter. filters all dispensed drinking water, as well To Reinstall: Push cover up towards liner as the water used to produce ice.
-
Page 20: Food Storage Guide
7. FOOD STORAGE GUIDE RECOMMENDED STORAGE TIMES FOR FRESH FOODS * CATEGORY PRODUCT STORAGE TIPS ULTRA REFRIGERATOR FREEZER CHILL MEAT Sausages and 1-2 Days 3-5 Days 2-3 Months Keep cold meat at the back Mince of the refrigerator where it is coldest. -
Page 21: Troubleshooting
8. TROUBLESHOOTING Concern Potential Cause Common Solution Automatic Ice Maker Ice maker is not • Ice maker is turned off. • Turn on ice maker. For the fresh food ice maker, press making any ice. • Refrigerator is not connected ice maker on-off button once. - Page 22 Concern Potential Cause Common Solution Water not cold enough. • As warmer tap water goes • Add ice to cup or container before dispensing water. through the filter and enters the water supply system, the chilled water is pushed through to the dispenser.
- Page 23 Concern Potential Cause Common Solution Water/Moisture/Frost Inside Refrigerator Water collects in • Washed vegetables and fruit • Dry items before putting them in the drawer. Water bottom of drawer. drain while in the drawer collecting in bottom of drawer is normal Water/Moisture/Frost Outside Refrigerator Moisture collects on •...
- Page 24 (c) ‘ASC’ means Electrolux’s authorised serviced centres; (vi) incomplete or improper installation; (d) ‘Westinghouse’ is the brand controlled by Electrolux Home Products (vii) incorrect, improper or inappropriate operation; Pty Ltd of 163 O’Riordan Street, Mascot NSW 2020, ABN 51 004 762 341 in respect of Appliances purchased in Australia and Electrolux (viii) insect or vermin infestation;...
- Page 25 Notes...
- Page 26 Notes...
- Page 27 Notes...
- Page 28 Top Service encompasses the after sales service provided by The Electrolux Group to consumers including delivery, home service and spare parts. and WESTINGHOUSE are trademarks of Westinghouse Electric Corporation. Used under license. All Rights Reserved. © 2017 Electrolux Home Products Pty Ltd.
Need help?
Do you have a question about the WHE6170 and is the answer not in the manual?
Questions and answers