Westinghouse WTB5400 User Manual
Hide thumbs
Also See for WTB5400:
- User manual (36 pages) ,
- Installation manual (16 pages) ,
- User manual (36 pages)
Table of Contents
Advertisement
USER MANUAL
REGISTER YOUR FRIDGE
WITH YOUR SMARTPHONE
1
Locate the label
on the inside of
your fridge
Easy register with your smartphone
1. Photograph the camera icon,
including the 4 dots( ).
2. Then text it to 0488 446 622
(Australia only)
2
Photograph the
camera icon, including
the 4 dots ( )
3
Text image to
(Australia only)
© 2017 Electrolux Home Products Pty Ltd. EST_PhotoRegister_Fridge_70x70_Dec17
00000000000
00000000000
00000000000
0488 446 622
00000000000
WTB4600, WTB4604, WTB5400, WTB5404, WBE4500, WBE4502,
WBE4504, WBE5300, WBE5304, WRB5004, WFB4204, WHE5204,
WHE5264, WQE6060, WQE6000, WHE6060, WHE6000
REFRIGERATION
Advertisement
Table of Contents
Troubleshooting

Related Manuals for Westinghouse WTB5400


Summary of Contents for Westinghouse WTB5400
- Page 1 4 dots ( ) 00000000000 Text image to 0488 446 622 (Australia only) © 2017 Electrolux Home Products Pty Ltd. EST_PhotoRegister_Fridge_70x70_Dec17 00000000000 WTB4600, WTB4604, WTB5400, WTB5404, WBE4500, WBE4502, WBE4504, WBE5300, WBE5304, WRB5004, WFB4204, WHE5204, WHE5264, WQE6060, WQE6000, WHE6060, WHE6000 REFRIGERATION...
-
Page 2: Table Of Contents
CONGRATULATIONS CONTENTS Dear customer, Important safety instructions ..............3 Congratulations and thank you for choosing our refrigerator. Refrigerator Features We are sure you will find your new refrigerator a pleasure to use. Before you use the refrigerator we recommend that you Top mount refrigerator features ............ -
Page 3: Important Safety Instructions
IMPORTANT SAFETY INSTRUCTIONS Note: You must read these warnings carefully before installing or using the refrigerator. If you need assistance, contact your WARNING customer care centre. The manufacturer will not accept liability, should these instructions or any other safety R600a refrigerant warning instructions incorporated in this book be ignored. -
Page 4: Top Mount Refrigerator Features
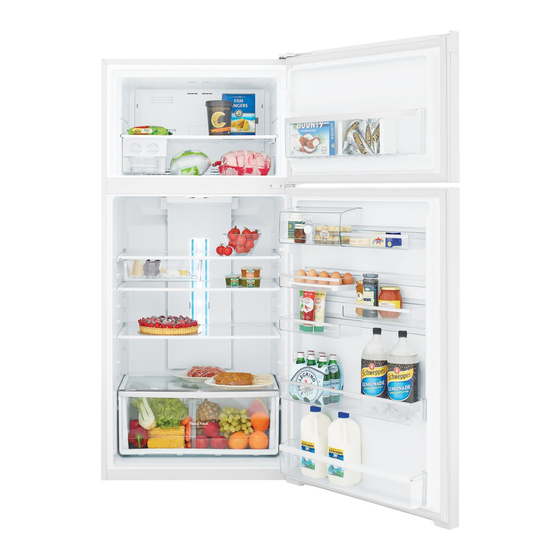
Use the crisper to store place. vegetables, fruit or small goods. Change the humidity by sliding WTB5400 illustrated the humidity control. Freezer control Refrigerator control panel This is a simple slide control to adjust the temperature From this panel you can control of your freezer compartment. -
Page 5: Bottom Mount Refrigerator Features
BOTTOM MOUNT REFRIGERATOR FEATURES FamilySafe lockable compartment This compartment can be used to store dairy and is also lockable for storing items like cosmetics and medicines. To operate the lock, turn FlexSpace Deodoriser the knob located on the front of the bin. -
Page 6: French Door Features
FRENCH DOOR REFRIGERATOR FEATURES FlexStor door bins Slide FlexStor bins to meet FamilySafe lockable different storage needs. To compartment remove, lift and tilt. This compartment can be used To replace, tilt the top and to store dairy and is also push down until locked in lockable for storing items like place. -
Page 7: French Door With Ice & Water Features
FRENCH DOOR ICE & WATER REFRIGERATOR FEATURES FamilySafe lockable compartment FlexStor door bins This compartment can be used Slide FlexStor bins to meet to store dairy and is also different storage needs. To lockable for storing items like remove, lift and tilt. cosmetics and medicines. - Page 8 FRENCH DOOR ICE & WATER REFRIGERATOR FEATURES FlexStor bins Water Filter FlexStor bins to meet different storage needs. To FamilySafe lockable remove, lift and tilt. To replace, compartment tilt the top and push down This compartment can be until locked in place. used to store dairy and is also lockable for storing items like cosmtices and medicines.
-
Page 9: Quattro French Door Refrigerator
QUATTRO FRENCH DOOR REFRIGERATOR FEATURES FamilySafe lockable FlexStor bins compartment This compartment can be FlexStor bins to meet used to store dairy and is also different storage needs. To lockable for storing items like remove, lift and tilt. To replace, cosmtices and medicines. -
Page 10: Quattro French Door With Ice & Water Refrigerator
QUATTRO FRENCH DOOR WITH ICE & WATER REFRIGERATOR FEATURES VIRONMENTAL TIPS Water Filter FamilySafe lockable FlexStor bins compartment This compartment can be FlexStor bins to meet used to store dairy and is also different storage needs. To lockable for storing items like remove, lift and tilt. -
Page 11: Single Door Refrigerator Features
SINGLE DOOR REFRIGERATOR FEATURES FamilySafe lockable compartment This compartment can be used to store dairy and is also lockable for storing items like cosmetics and medicines. To operate the lock, turn the knob located on the front of the bin. FlexStor bins Deli drawer Slide FlexStor bins to... -
Page 12: Single Door Freezer Features
SINGLE DOOR FREEZER FEATURES Twist & serve ice Refer to the section “Using your Refrigerator” for details on removing, relocating and using this feature. Storage bins Refer to the section “Using your Refrigerator” for details on removing, and using this feature. WFB4204 illustrated Freezer control From this panel you can control... -
Page 13: Installing Your New Refrigerator
INSTALLING YOUR NEW Adequate ventilation around your refrigerator WHE6000, WHE6060, WQE6000 and WQE6060 APPLIANCE The diagram below shows the recommended airspace to allow for ventilation of your refrigerator. Unpacking 50mm ENVIRONMENT Recommended minimum Most of the packing materials are recyclable. Please dispose airspace of those materials through your local recycling depot or by CABINET... -
Page 14: Fitting The Handles
INSTALLING YOUR NEW ICE AND WATER INSTALLATION APPLIANCE WARNING Check the alignment of the refrigerator to the surrounding cupboards to see if it is level. You can adjust Connect to potable water supply only. If using tank or bore the level as detailed in step 2 and 3. water it is recommended to also use an external filter (not supplied). - Page 15 Please read before beginning installation. Step 6. The water connection to your ice and water product can be Reconnect the power. self installed. However, it is recommended that you seek advice from a licensed plumber before commencing the installation. Step 7. Move the refrigerator back into place being careful not to kink or split the tubing.
-
Page 16: Replacing The Water Filter
ICE AND WATER INSTALLATION IMPORTANT • Always fit the filter as per manufacturer’s instructions. • If you need to replace water tube, only use approved water quality piping that meets the pressure requirements. • Make sure your refrigerator is level to avoid uneven ice cubes. •... -
Page 17: Using Your Refrigerator Removing Features
USING YOUR REFRIGERATOR REMOVING FEATURES Refrigerators work by transferring heat from the food inside Crisper Bin to the outside air. This operation makes the back and sides of Removal (standard Crisper Bins): the refrigerator feel warm or even hot particularly at start-up and on warm days –... -
Page 18: Drawers With Telescopic Slides
REMOVING FEATURES Twist and Serve Ice Drawers fitted with telescopic slides Mounting the twist & serve dispenser to the other side of the To remove the drawer for cleaning. freezer. Empty food from the drawer. NOTE: this is only possible on Top mount models. Remove the drawer by pulling it forward and lifting the Remove the ice bin and ice cube tray. -
Page 19: Temperature Control
TEMPERATURE CONTROL TOP MOUNT FREEZER TEMPERATURE ADJUSTMENT The factory default settings; Top mount Freezer temperature setting recommendation Refrigerator Mid Freezer Bottom mount & French door Summer (>35°c) Set to less cold Refrigerator 3°C Freezer -18°C All Refrigerator All Freezer -18°C Normal If you want to change the temperature, follow the instructions in the section about the user interface for your model. -
Page 20: About The User Interface
ABOUT THE USER INTERFACE Controls – Top mount and single door refrigerator models Quick chill on/ off icon Refrigerator temperature scale icons Temperature adjust/quick chill on/off button DESCRIPTION OPERATION / PRIMARY FUNCTION Refrigerator temperature scale icons • I ndicates the temperature setting of the refrigerator compartment. Quick Chill On/ Off icon •... -
Page 21: Bottom Mount/French Door Models
Controls – Bottom mount and French door Quick freeze on/off icon Quick freeze button Refrigerator Freezer temperature temperature scale icons scale icons Temperature adjust Refrigerator Freezer indication indication icon icon Compartment select button DESCRIPTION OPERATION / PRIMARY FUNCTION • Indicates the status of the Quick Freeze function. Quick Freeze on/ off icon Quick Freeze button Use the Quick Freeze function when you add a large amount of food to the freezer... -
Page 22: French Door Ice & Water
ABOUT THE USER INTERFACE Controls – French door ice & water models BUTTON / DESCRIPTION PRIMARY FUNCTION ICON Compartment Selector button Selects controllable compartment. Lock Icon Indicates if the user interface is locked. Compartment Icon Indicates controllable compartment. Indicates if the appliance is operating in its most energy efficient mode. ECO Icon Digital display Indicates temperature of selected compartment. - Page 23 FUNCTIONS OF THE USER INTERFACE French door ice & water models FUNCTION ICON OPERATION • Press button 1 until freezer is displayed on icon 3. Setting the freezer temperature • Press buttons 6 or 7 to adjust temperature up or down. •...
-
Page 24: Single Door Freezer Models
ABOUT THE USER INTERFACE Controls – Single door freezer models Quick Freeze on/off icons Quick Freeze/ drinks chill Drinks Chill on/off button on/off icons Temperature adjust button Freezer temperature scale icons DESCRIPTION OPERATION / PRIMARY FUNCTION Quick Freeze on/off icon •... -
Page 25: Error Codes
ERROR CODES & ALARMS Alarms ALARM ICON WHAT IT MEANS OPERATION Freezer Temperature Alarm • To deactivate the alarm for 50 minutes press any button. Activates if the freezer temperature is 10°c • To deactivate alarm for 12 hrs on the ice & over set temperature for a period of 50 water model press and hold Select Mode minutes (except during a defrost). -
Page 26: Cleaning The Refrigerator
CLEANING YOUR REFRIGERATOR Switching off your refrigerator WARNING If you switch off your refrigerator for an extended period, BEFORE CLEANING: Turn the refrigerator off at the power follow these steps to reduce the chances of mould: point and unplug the cord to prevent any chance of Remove all food. -
Page 27: Food Storage Guide
FOOD STORAGE GUIDE CATEGORY PRODUCT REFRIGERATOR FREEZER STORAGE TIPS MEAT Sausages and Mince 1-2 Days 2-3 Months Keep cold meat at the back of the refrigerator where it is coldest. Chops and Steak 3-4 Days 4-6 Months Plastic can cause meat to sweat if stored in Cold Meats 3-5 Days 4-6 Months... -
Page 28: Troubleshooting
Motor noise (compressor); These refrigerators are fitted with a variable speed compressor and fan. At start up and WTB4600, WTB4604, WTB5400, WTB5404, on warm days they run at a higher speed to provide additional cooling. When less WBE4500, WBE4504, WBE5300, WBE5304, cooling is required the compressor and fan will run at a lower speed. - Page 29 WTB4600, WTB4604, speeds to provide additional cooling. When less cooling is required the compressor and WTB5400, WTB5404, WBE4500, fan will run at a lower speed, but still may not switch o . This is normal. WBE4504, WBE5300, WBE5304,...
- Page 30 TROUBLESHOOTING Refrigerator operation CONCERN WHAT TO DO Alarms Sounding Check that all doors are fully closed. Ensure that the over temperature alarm is not being activated by hot food placed in the freezer. Check if the drinks timer has ended, refer control instructions. Check if the Filter Replacement alert is activated, refer control instructions.
-
Page 31: Ice & Water Troubleshooting
TROUBLESHOOTING Ice & Water system CONCERN WHAT TO DO Ice maker does not produce ice or not Ensure that the cord is plugged into a live power outlet and outlet is switched on. enough ice Ensure that water is connected and turned on and there are no kinks in the water line. The icemaker is designed to produce a tray of ice approximately every 3 hours, depending on the conditions. -
Page 32: Warranty
(c) ‘ASC’ means Electrolux’s authorised serviced centres; (vi) vi) incomplete or oper installation; (d) ‘Westinghouse’ is the brand controlled by Electrolux Home Products (vii) vii) i ect, improper or inappropriate operation; Pty Ltd of 163 O’Riordan Street, Mascot NSW 2020, ABN 51 004... - Page 33 NOTES ...............................................................................................................................................................................................................................................................................................................................................................................................................................................................................................................................................................................................................................................................................................................................................................................................................................................................................................................................................................................................................................................................................................................................................................................................................................................................................................
- Page 34 NOTES ...............................................................................................................................................................................................................................................................................................................................................................................................................................................................................................................................................................................................................................................................................................................................................................................................................................................................................................................................................................................................................................................................................................................................................................................................................................................................................................
- Page 35 NOTES ...............................................................................................................................................................................................................................................................................................................................................................................................................................................................................................................................................................................................................................................................................................................................................................................................................................................................................................................................................................................................................................................................................................................................................................................................................................................................................................
- Page 36 For more information on all Westinghouse appliances, or for dimension and installation information, call into your retailer, phone or email our customer care team or visit our website: AUSTRALIA phone: 1300 363 640 fax: 1800 350 067 email: customercare@electrolux.com.au web: westinghouse.com.au...
Need help?
Do you have a question about the WTB5400 and is the answer not in the manual?
Questions and answers