Table of Contents
Advertisement
Quick Links
Advertisement
Table of Contents

Related Manuals for BenQ GK100


Summary of Contents for BenQ GK100
- Page 1 Digital Projector User Manual Portable Series | GK100 V 1.03...
-
Page 2: Copyright And Disclaimer
BenQ warrants this product against any defects in material and workmanship, under normal usage and storage. Proof of purchase date will be required with any warranty claim. In the event this product is found to be defective within the warranty period, BenQ’s only obligation and your exclusive remedy shall be replacement of any defective parts (labor included). -
Page 3: Statement Regarding Hyperlinks And Third-Party Websites
Any third party content or service preinstalled in this product is provided “as is”. BenQ does not, by expression or by implication, make any warrant to the content or to the services provided by third parties. BenQ does not warrant or guarantee that the content or services provided by third parties are accurate, effective, most up-to-date, legal, or complete. -
Page 4: Product Support
Please visit the website for the latest version of this document and other product information. Available files vary by model. 1. Make sure your computer is connected to the Internet. 2. Visit the local website from Support.BenQ.com. The website layout and content may vary by region/country. 3. Search for your model’s user manual and related document. -
Page 5: Table Of Contents
Table of contents Copyright and disclaimer ...................................2 Copyright............................................2 Disclaimer...........................................2 Warranty ............................................2 Statement regarding hyperlinks and third-party websites..........................3 Product support ......................................4 Servicing............................................4 Package contents ....................................... 12 Standard accessories......................................12 Introduction ....................................... 14 Projector exterior view ....................................... 14 Front, top, and right side view..........................................14 Rear view................................................. - Page 6 Vertical Adjustment (Keystoning) ........................................33 Side Projection................................................. 33 BenQ Launcher ......................................34 The BenQ Launcher home screen ......................................... 34 Navigating the BenQ Launcher home screen ....................................35 Inputting text................................................36 Connections ........................................37 Wireless Connections ......................................39 Connecting the projector to a wireless network.................................... 39 Watching streaming content on your projector .....................................
- Page 7 Bluetooth Connections ....................................... 47 Pairing/Connecting to a Bluetooth speaker or headphones................................47 Using the Projector as a Bluetooth speaker ....................................49 Navigating the Settings menu ................................51 About the Settings menu ....................................51 Using the Settings menu....................................52 Wireless................................................. 53 Wired LAN ................................................54 Sound..................................................54 Bluetooth................................................
- Page 8 Extending LED life..............................................65 Troubleshooting ......................................66 Specifications .......................................69 Projector specifications ............................................69 Dimensions ................................................71 Timing chart................................................72 Supported file formats ............................................76 Channel settings for routers..........................................77 7/21/2021...
- Page 9 Important safety instructions Your projector is designed and tested to meet the latest standards for safety of information technology equipment. However, to ensure safe use of this product, it is important that you follow the instructions mentioned in this manual and marked on the product. 1.
- Page 10 8. Do not place liquids near or on the projector. Liquids spilled into the projector will void your warranty. If the projector does become wet, disconnect it from the power point and call BenQ to have the projector repaired. 5. Do not block the vents holes while the projector is on (even in power-saving mode).
- Page 11 Moisture condensation Under no circumstances should you ever undo or remove any other covers. Refer servicing only to suitably qualified professional Never operate the projector immediately after moving it from a cold service personnel. location to a hot location. When the projector is exposed to such a change in temperature, moisture may condense on the crucial internal parts.
-
Page 12: Package Contents
Carefully unpack and verify that you have the items below. Some of the items may not be available depending on your region of purchase. Please check with your place of purchase. Standard accessories Remote Control Wireless Dongle (WDR02U) GK100 Projector (with Two AA Batteries) Power Cord Adapter Quick Start Guide... - Page 13 Warranty Card Regulatory Statement (varies by region) • LED life results will vary depending on environmental conditions and usage. Actual product’s features and specifications are subject to change without notice. • Some of the accessories may vary from region to region. •...
-
Page 14: Introduction
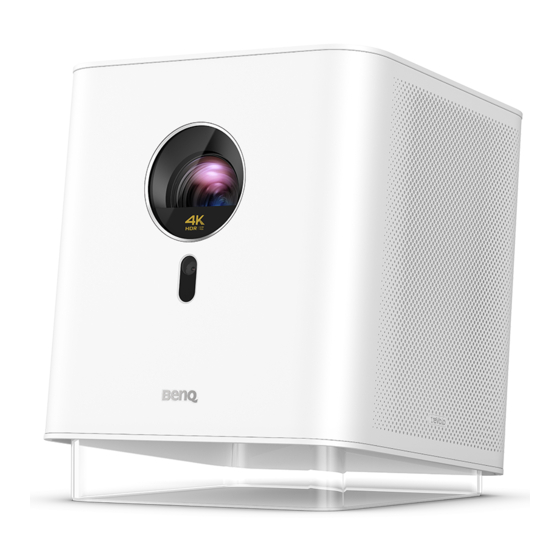
Introduction Projector exterior view Front, top, and right side view Bluetooth button and LED Activates Bluetooth speaker mode. See Using the Projector as a Bluetooth speaker on page 49 for more details. See LED indicators on page 18 for details on the LED behavior. -
Page 15: Rear View
Rear view Connections on page 37 for connection details. 7. IO cover (See Ports on page 16 for details.) Flip open from the recess on the left side (indicated on the cover by an arrow) to access the input/output ports. 8. -
Page 16: Ports
Ports 1. Wireless dongle port Insert the provided USB wireless dongle to enable wireless and Bluetooth connections. See Installing the wireless dongle on page 26 for details. The projector only supports wireless and/or Bluetooth connections when the wireless dongle is installed into this slot. - Page 17 8. 3.5” audio output jack Used to connect headphones, speakers, and other equipment to broadcast audio. 9. USB-C port Used to connect devices with DisplayPort functionality to project video from the device.
-
Page 18: Led Indicators
LED indicators There is a blue/white power LED (1) and a white Bluetooth LED (2) at the top of the projector. Refer to the table below for definitions of various LED behaviors. LED Behavior Scenario Status Power LED Bluetooth LED Standby mode (When powered off) Solid blue Powering on Projector Mode... - Page 19 LED Behavior Scenario Status Power LED Bluetooth LED Flashing red, green, pause, and then Android error repeat Flashing green, blue, pause, and TI temperature error then repeat Flashing blue, red, pause, and then Fan 1 error repeat Projector Error Flashing blue, green, pause, and Fan 2 error then repeat Flashing green, blue, pause, blue,...
-
Page 20: Remote Control
Increases the projector volume. Volume Down Decreases the projector volume. Focus Short press this key to start auto focus; long press to manually focus the projector. Source Launches the source menu. 9. OK Used to confirm selections in BenQ Launcher. - Page 21 Home Returns to the BenQ Launcher home menu. Menu Launches an app’s menu (only if the app supports this function). Settings Launches the projector’s settings menu. 13. App Hotkey Long press this key to set which App to be launched when pressing the hotkey. After the setup is completed, short press this key in the future to automatically launch the designated App.
-
Page 22: Installing/Replacing The Remote Control Batteries
Installing/Replacing the remote control batteries Before you can begin to use the remote control, you must install the supplied batteries into the remote control. 1. Flip open the battery cover from the latch on the right side. 2. Insert the batteries in the orientation shown below. 3. -
Page 23: Remote Control Effective Range
Remote control effective range The projector has an IR remote control sensors located at the front and rear of the projector with a range of 8 meters (~26 feet) at an angle of 30-degrees. The remote control can be used either by pointing it directly at the IR sensor or by reflecting the IR signal off of a wall/screen. Make sure that there are no obstacles between the remote control and the IR sensor on the projector. -
Page 24: Installation
Installation Choosing a location Before choosing an installation location for your projector, take the following factors into consideration: • Size and position of your screen • Electrical outlet location • Location and distance between the projector and the rest of your equipment •... - Page 25 Screen size Diagonal Projector distance (mm) H (mm) W (mm) Inch 1524 1328 1063 1778 1550 1240 2032 1771 1417 2286 1121 1992 1594 2413 1183 2103 1682 2540 1245 2214 1771 3048 1494 2657 2125 3302 1619 2878 2302 3556 1743 3099...
-
Page 26: Operations
Installing the wireless dongle 1. Remove the cap from the provided wireless dongle. 2. Open the IO port cover. 3. Orient the dongle so that the BenQ logo is facing up and then insert the dongle into the wireless dongle port. - Page 27 4. Re-install the IO port cover so that the arrow on the cover points to the left.
-
Page 28: Starting Up The Projector
Starting up the projector 1. Install the provided wireless dongle into the wireless dongle port at the rear of the projector. See Installing the wireless dongle on page 26 details. 2. Connect the power cord to the power adapter. 3. Connect the adapter to the power adapter port. 4. - Page 29 7. If this is the first time starting up the projector, the setup wizard will appear to guide you through the initial setup, including selecting the system language and connecting to a Wi-Fi network. Using your remote control, follow the on-screen instructions to finish the process. The Setup Wizard screenshot above is for reference only and may differ from the actual design.
-
Page 30: Shutting Down The Projector
Shutting down the projector 1. Press the power key on the projector or remote control. When the projector displays a shutdown confirmation message, press the power key again. 2. The power LED will turn blue (see LED indicators on page 18). -
Page 31: Adjusting The Projected Image
Adjusting the projected image Adjusting the projection angle The projector base allows you to adjust the image height and projection angle. To adjust the projection angle, pivot the head upwards or downwards until the image is positioned as desired. 8° •... -
Page 32: Fine-Tuning The Image Clarity
• Do not look into the lens while the lamp is on. The strong light from the lamp may cause damage to your eyes. • You may also allow the projector to automatically focus the image in BenQ Launcher. See More Settings on page 60 for more information. -
Page 33: Vertical Adjustment (Keystoning)
To configure vertical adjustment: 1. Navigate to the settings menus section on the home screen and select Settings. See The BenQ Launcher home screen on page 34 for details on navigating the home screen. -
Page 34: Benq Launcher
The BenQ Launcher home screen When the projector is not projecting an image from a connected source it will display BenQ Launcher by default. If the projector is projecting from a source, you can return to BenQ Launcher mode by pressing on your remote control. -
Page 35: Navigating The Benq Launcher Home Screen
The BenQ Launcher home screen features five main sections: • Status bar icons - Icons that display the date, time, wireless and Bluetooth status. • Wireless projection buttons - Provides further instructions on how to project wirelessly via iOS/Android devices or a laptop/PC. -
Page 36: Inputting Text
Inputting text Various menus within the BenQ Launcher may require that you input text. To input text in a text field: 1. Select the text field where you want to input text. 2. Press OK on your remote control, and a full alphanumeric keyboard will appear on screen. -
Page 37: Connections
Connections You can connect your device to the projector in various ways to project video content. Wireless Connection • Smartphone, tablet, laptop/PC Wired Connection (HDMI port) • A/V device. • Smartphone, tablet, laptop/PC • Speakers featuring ARC capabilities (HDMI 1 port only) Wired Connection (USB-A port) •... - Page 38 Devices with ‘ A/V Devices USB-C DisplayPort Wireless Connections Speakers DisplayPort Wireless AP Wireless Dongle Speaker with ARC The illustration above is for reference only.
-
Page 39: Wireless Connections
Installing the wireless dongle on page 26). 2. Power on the projector (see Starting up the projector on page 28). 3. On the home screen of the BenQ Launcher interface, select No Internet in the wireless projection buttons section. 4. Enable Wireless. -
Page 40: Watching Streaming Content On Your Projector
SSID from the projector’s memory. 7. Once you have successfully connected to the wireless AP, a wireless connection icon will appear at the top right corner of the BenQ Launcher interface. You can now connect your devices wirelessly to the projector to project videos. -
Page 41: Wireless Projection For Ios & Macos
To connect an iOS device or Mac to the projector and mirror your screen via AirPlay: 1. On the home screen of the BenQ Launcher interface, select Wireless Projection for iOS or Wireless Projection for Mac in the wireless projection buttons section. -
Page 42: Wireless Projection For Android™ Or Pcs
Wireless Projection for Android™ or PCs To connect an Android™ device or PC to the projector and project video: 1. On the home screen of the BenQ Launcher interface, select Wireless Projection for Android or Wireless Projection for PC in the wireless projection buttons section. - Page 43 4. Follow the on-screen instructions to project wirelessly. Once you have finished projecting, disable screencasting on your Android device to end the connection. • To check if your Android device supports wireless casting, check support.google.com. • Due to restrictions on subscription-based streaming platforms, mobile devices cannot mirror the content of some streaming services.
-
Page 44: Wired Connections
BenQ Launcher home screen. 4. If the device remains connected and you wish to project its video again, select the corresponding port in the source menu section of the BenQ Launcher home screen. -
Page 45: Connecting A Flash Drive
Connecting a speaker with ARC The HDMI port on the projector features Audio Return Channel (ARC) capabilities which allows it to output its audio to an ARC-compatible speaker connected via an HDMI cable. To connect an ARC-compatible speaker, you must first ensure that ARC is enabled in the Sound sub-menu of the settings menu. See Sound on page for details. -
Page 46: Local Mm Media Player
Local MM is the pre-installed app on the projector that allows you to project images, videos, and audio files stored on the projector or a USB-A flash drive. You can launch it from the app shortcuts section of the BenQ Launcher home screen. -
Page 47: Bluetooth Connections
Bluetooth Connections The projector allows the following types of Bluetooth connections: • Connect to a Bluetooth-enabled speaker or headphones to output audio directly for greater sound. • Connect a mobile device to the projector to broadcast audio through the projector’s speakers. Pairing/Connecting to a Bluetooth speaker or headphones Pairing is the process by which your projector creates a connection to a Bluetooth speaker or headphones for the first time. - Page 48 7. Select the speaker or headphones from the Available List in the Bluetooth setting menu. 8. When the projector and speaker or headphones have successfully connected, the device will be labelled as Connected in the Bluetooth setting menu. You can now output the audio from the projector to the speaker or headphone. Ending the Bluetooth connection In cases where you want to disconnect a speaker or headphones from the projector and connect to another speaker or headphones follow the steps below:...
-
Page 49: Using The Projector As A Bluetooth Speaker
Installing the wireless dongle on page 26). Once you have done so you can activate Bluetooth speaker mode using either the Bluetooth button on the projector or the BenQ Launcher interface. Activating the Bluetooth speaker via the Bluetooth button Press the Bluetooth button on the top side of the projector. - Page 50 Ending the Bluetooth connection In cases where you want to disconnect the mobile device from the projector, either: • Disconnect from the projector in the Bluetooth menu of your mobile device. • Press the power key on the projector or remote control to return the projector to projector mode.
-
Page 51: Navigating The Settings Menu
To let you make various adjustments or settings on the projector, its wireless connections, and the projected image, BenQ Launcher provides a Settings menu. To access the menu, either select Settings in the settings menus section of the BenQ Launcher home screen, or press the settings button on the remote control. -
Page 52: Using The Settings Menu
Use the home button to return to the BenQ Launcher home screen. If the projector is not of the latest version of firmware, a red dot will appear on the About icon. In such a circumstance, users can go to the About menu and then select Update >... -
Page 53: Wireless
Wireless The following table describes the items available in the Wireless menu: Item Options and descriptions Enables/Disables wireless connection for the projector. See Connecting the projector to a wireless network on page 39 Wireless details. Network Speed Tests the speed of the projector’s Internet connection. Diagnose Diagnoses the status of the projector’s Internet connection. -
Page 54: Wired Lan
Wired LAN The following table describes the items available in the Wired LAN menu: Item Options and descriptions Status Enables/Disables wired LAN connection for the projector. IP Address Displays the projector’s IP address. Wired LAN Displays the Media Access Control (MAC) address for the projector. Sub-menu that allows you to enable/disable Dynamic Host Configuration Protocol (DHCP), which when disabled allows you to Advanced further configure the IP Address, Subnet Mask, Gateway, and DNS settings. -
Page 55: Bluetooth
Bluetooth The following table describes the items available in the Bluetooth menu: Item Options and descriptions Bluetooth Enables/Disables Bluetooth for the projector, allowing the projector to output its audio to a Bluetooth speaker or headphones. Refreshes the Available List. Refresh This function is only available when Bluetooth is enabled. -
Page 56: Bluetooth Speaker Mode
Bluetooth Speaker Mode Select OK to enable Bluetooth speaker mode. See Using the Projector as a Bluetooth speaker on page 49 for more details. All Apps Select the All Apps menu to access all the apps that have been installed on the projector. •... -
Page 57: About
Privacy Allows you to agree to or disagree with the BenQ privacy announcement. A red dot at the top right of the About icon indicates that a newer version of the projector's firmware is available. In such circumstances, users can select Update to start the firmware update. -
Page 58: Picture
Picture The following table describes the items available in the Picture menu: Item Options and descriptions Selects a preset picture mode to suit your operating environment. The preset picture modes include: Living Room, Cinema, Picture Mode User, and Office. Adjust Displays the following values for the selected Picture Mode: Brightness, Contrast, Color, Tint, and Sharpness. -
Page 59: Hdr
The following table describes the items available in the 3D menu: Item Options and descriptions Allows you to choose the format used for 3D video. The options include: Auto, Frame Packing, Top-Bottom, 3D Mode Side-by-Side, and Off. 3D Sync Invert Allows you to correct an inversion of the 3D image’s depth. -
Page 60: More Settings
The following table describes the items available in the More Settings menu: Item Options and descriptions Allows you to change the name of the HDMI 1 and HDMI 2 ports as they appear in the source menu section of the BenQ Launcher home screen. Source Rename The source name must be 8 characters or under. -
Page 61: Home Screen
Sets the language for BenQ Launcher. Allows you to configure the following options for the projector’s date and time: Time Zone, Format, and Use 24-Hour Date & Time Format. Keyboard The menu allows you to select the type/language of Keyboard used in BenQ Launcher. -
Page 62: Installation
Installation The following table describes the items available in the Installation menu: Item Options and descriptions Displays the test pattern grid, which helps you adjust the image size and focus to check if the projected image is free of Test Pattern distortion. -
Page 63: Update
Over-the-Air (OTA) updates to install the update file wirelessly. When a new version is available on the BenQ OTA server, a message will pop up once the projector is connected to a wireless network. Follow the on-screen instructions to update the firmware. -
Page 64: Maintenance
Maintenance Care of the projector Your projector needs little maintenance. The only thing you have to do on a regular basis is keep the lens clean. Never remove any parts of the projector. Contact your dealer or local customer service center if the projector fails to operate as expected. Cleaning the lens Clean the lens whenever you notice dirt or dust on the surface. -
Page 65: Transporting The Projector
Transporting the projector It is recommended that you ship the projector with its original packing or equivalent. Extending LED life The LED headlight includes a bulb which features a light-source life far beyond traditional bulbs, yet it is still a consumable item. To keep the LED life as long as possible, you can change the following settings via the settings menu. -
Page 66: Troubleshooting
There is no power from the power cable. power outlet. If the power outlet has a switch, make sure that it is switched on. On the BenQ Launcher home screen, select the Aptoide, instead of Google Play, is No Google Play. - Page 67 Problem Cause Remedy The storage device is not connected to the Make sure your storage device is fully inserted into projector properly. one of the USB-A ports on the projector. The projector cannot play files in storage Supported file formats on page 76 for more devices via USB-A ports.
- Page 68 Problem Cause Remedy Adjust the focus of the lens using focus key on the The projection lens is not correctly focused. remote control. Picture is blurred. The projector and the screen are not Adjust the projection angle and direction as well as the aligned properly.
-
Page 69: Specifications
Specifications Projector specifications All specifications are subject to change without notice. Specifications Projection System DMD Type 0.47 Native Resolution 4K UHD (3840 x 2160 pixels) Brightness 1000 lm Contrast Ratio (FOFO) 100,000:1 Display Color 1.07 Billion Colors Aspect Ratio Native 16:9 Light Source 20,000 hours Light Source Life... - Page 70 • Wireless dongle port • : LED life results will vary depending on environmental conditions and usage. • : The wireless projection and Bluetooth features are supported by detachable BenQ Wireless Dongle, WDR02U. • : Maximum resolution: 4K UHD (3840 x 2160) 60Hz.
-
Page 71: Dimensions
Dimensions 195 (W) x 224 (H) x 195 (D) mm... -
Page 72: Timing Chart
Timing chart Supported timing for video input Timing Resolution H. Frequency (KHz) V. Frequency (KHz) Dot Clock Frequency (MHz) 480i 720 (1440) x 480 15.73 59.94 480p 720 x 480 31.47 59.94 576i 720 (1440) x 576 15.63 576p 720 x 576 31.25 720/50p 1280 x 720... - Page 73 Supported by HDMI 2.0 only. Supported timing for PC input Resolution Mode Refresh Rate (Hz) H. Frequency (KHz) Dot Clock Frequency (MHz) VGA_60 59.940 31.469 25.175 VGA_72 72.809 37.861 31.500 640 x 480 VGA_75 75.000 37.500 31.500 VGA_85 85.008 43.269 36.000 720 x 400 720 x 400_70...
- Page 74 Refresh Rate (Hz) H. Frequency (KHz) Dot Clock Frequency (MHz) 1152 x 864 1152 x 864_75 75.000 67.500 108.000 1024 x 576 BenQ Notebook Timing 60.000 35.820 46.996 1024 x 600 BenQ Notebook Timing 64.995 41.467 51.419 1280 x 720 1280 x 720_60 60.000...
- Page 75 74.038 154.000 (Reduce Blanking) 1920 x 1080_60 (Only available for 1920 x 1080 (VESA) 59.963 67.158 173.000 models with BenQ Media Center) 1920 x 1080_120 (Only available for 1920 x 1080@120 Hz 120.000 135.000 297.000 models with BenQ Media Center) 3840x2160_30 67.5...
-
Page 76: Supported File Formats
Supported file formats File type File extension Documents .txt Photos JPG(.jpg, .jpeg), PNG(.png), BMP(.bmp) Music MP3(.mp3), AAC(.aac) XVID(.avi) Video MPEG-4(3gp, mp4) H.263(3g2, .avi, .mkv, .webm, 3gp, mp4) Subtitles Bit rate range: If the peak bit rate of a video file is larger than 10MB, it might cause video playback lag. -
Page 77: Channel Settings For Routers
Channel settings for routers Country/Area 2.4G Band 1 Band 4 Canada, USA, China, Russia, Australia, New Zealand, India, South Korea, Saudi Arabia, Ch. 149, 153, 157, 161, 165 Ch. 1-11 Ch. 36, 40, 44, 48 Singapore, Taiwan EU, UK, Japan, UAE Indonesia Ch.
Need help?
Do you have a question about the GK100 and is the answer not in the manual?
Questions and answers