Subscribe to Our Youtube Channel
Summary of Contents for SereneLife SLBSKBG90
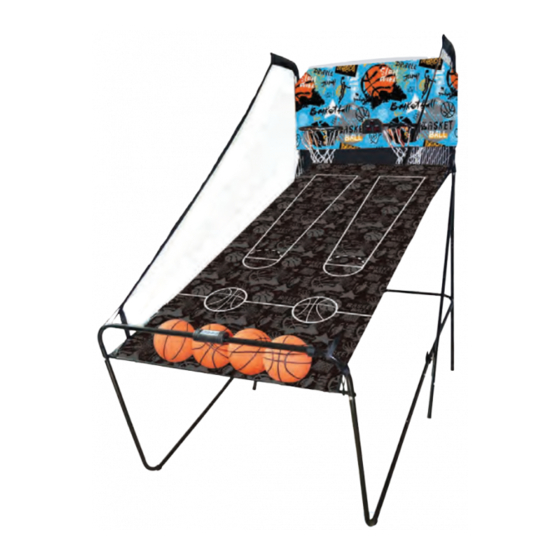
- Page 1 Dual Shot Basketball Arcade Game Indoor/Outdoor Two-Player Basketball System with One Audio Options, 8 Different Games and Large LED Scoreboard...
-
Page 2: Parts List
IMPORTANT! PLEASE READ THESE ASSEMBLY INSTRUCTIONS IN ENTIRETY BEFORE ASSEMBLING YOUR PRODUCT. CHOKE HAZARD: THIS TABLE CONTAINS SMALL BALLS AND PARTS NOT SUITABLE FOR CHILDREN UNDER 3 YEARS OF AGE. WARNING: 1. Require 3pcs AA Batteries (Not included). 2. Do not mix old and new batteries. 3. -
Page 3: Parts Identifier
PARTS IDENTIFIER M6 x 20mm Bolt M6 x 42mm Bolt Backboard M6 Washer M6 x 29mm Bolt 16pcs 4pcs 46pcs 6pcs TIME HOME VISITOR Electronic Scorer M6 x 50mm Bolt M6 Nut 3.5 x 10mm Bolt Basketball 7” Dia. Face Plate 4pcs 32pcs 4pcs... - Page 4 FIG. 1 FIG. 2 Spring Lock Spring Lock FIG. 3 5. Attach the Left L Tube (#5) and Right L Tube (#6) together using spring lock as shown in FIG.3 FIG. 3 Spring Lock www.SereneLifeHome.com...
- Page 5 FIG. 4 6. Attach the Left and Right L Tubes (#5 and #6) to Left and Right Tubes (#3 and #4) using Bolts(#26), Washers (#22) and Nuts (#27), and then attach the Left and Right L Tube (#5 and #6) to the Mounting Tube (#8) using Bolts (#26), Washers (#22) and Nuts (#27) as shown in FIG.
- Page 6 FIG. 6 & 7 9. Attach the Ramp Tubes (#9) to the Left and Right L Tubes (#5 and #6) using Bolts (#32), Washers (#22) and Nuts (#27) as shown in FIG 6. 10. Attach the Ramp L Tubes (#10) to Ramp U Tube (#11) using spring lock, and then place the Ramp L Tube (#10) to the Ramp Tube (#9) using spring lock as shown in FIG.7.
- Page 7 FIG. 8 & 9 11. Attach the Rim Assemblies (#17) and Rim Support Plates (#18) to the Backboard (#21) using the Bolts (#23), washers (#22) and Nuts (#27). And then attach the Switch Sensor (#15) to the Backboard (#21) using the Bolts (#23), washers (#22) and Nuts (#27).
- Page 8 FIG. 10 13. Slide elastic straps and sleeve of Ball Ramp with Side Netting (#13) onto Board Tubes as shown in FIG. 10A & 10B & 10C. 14. Slide the Horizontal Tube (#12) in front of the Ball Ramp with Side Netting (#13) and attach it to the Ramp U Tube (#11) using Bolts (#24), Washers (#22) and Nuts (#27) as shown in FIG.10D.
- Page 9 FIG. 11 15. With the help of another adult, Attach the Backboard (#21) to the Board Tubes (#1) using Bolts (#25), Washers (#22) and Nuts (#27) as shown in FIG.11 A. At each bottom hole of the backboard, attach the ramp tabs of Ball Return with Netting (#13) using Bolts (#25), Washers (#22) and Nuts (#27) as shown in FIG.11 B.
- Page 10 FIG. 13 18. Attach the Control Box (#36) to middle of the Ramp U Tube (#11) using two Bolts (#38) as shown in FIG.13 A. 19. Run the rest of the Control Wire (#37) through the loops on the Ball Return with Side Netting (#13) and plug it into the Control Box (#36).
- Page 11 FIG. 14 20. Folding position when not in use the basketball game and insert the Lock Pin (#33) as shown in FIG 14. Note: The lock pin (#33) needs to be removed from its original position when the game is being used before insertion to the new position when folded. FIG.
-
Page 12: Control Box Operation
ELECTRONIC SCORER OPERATION Installing Batteries: Using a screwdriver, unscrew lid and open the battery box. Insert 3 “AA” batteries (not included) in the order of polarity as shown on the inside cover. Close the cover and tighten screw. Turn the power ON using the ON/OFF switch. if the game will not be used for a long period of the time, we recommend that the batteries should be removed. - Page 13 CHOOSE FROM 8 DIFFERENT GAME OPTIONS 1. Beat the time Clock • Press "PLAY" to enter game 1. • Press "UP/Down" to select single/multiple players (P1/P2/P3/P4). • Press "PLAY" after the number of player is selected. • Press "UP/Down" to select playing time, 30/45/60 seconds. •...
- Page 14 4. Horse • Press "PLAY" to enter game. • Press "UP/Down" to select multiple players (P2/P3/P4) • Press "PLAY" after the number of player is selected • Player has to make a shot in 2 seconds. • First player is allowed to shoot at any hoop (Home or VISITOR). If first player scores in 2 seconds, no letter is given.
- Page 15 6. Around the World • Use tape to mark the shooting lines. • Press "PLAY" to enter game 6. • Press "UP/Down" to select single/multiple players (P1/P2/P3/P4). • Press "PLAY" after the number of player is selected. • Scoreboard "HOME" displays Player 1/2/3/4, "VISITOR" displays scored points. •...
- Page 16 Questions? Issues? We are here to help! Phone: (1) 718-535-1800 Email: support@pyleusa.com...


Need help?
Do you have a question about the SLBSKBG90 and is the answer not in the manual?
Questions and answers