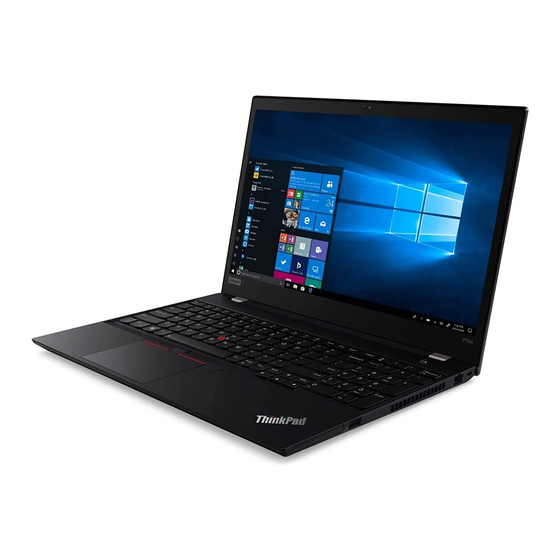
Lenovo ThinkPad P15s Gen 2 User Manual
Hide thumbs
Also See for ThinkPad P15s Gen 2:
- Manual (130 pages) ,
- User manual (128 pages) ,
- Hardware maintenance manual (113 pages)
Table of Contents
Advertisement
Advertisement
Table of Contents

Related Manuals for Lenovo ThinkPad P15s Gen 2


Summary of Contents for Lenovo ThinkPad P15s Gen 2
- Page 1 T14 Gen 2, T15 Gen 2, P14s Gen 2, and P15s Gen 2 User Guide...
- Page 2 Generic Safety and Compliance Notices First Edition (February 2021) © Copyright Lenovo 2021. LIMITED AND RESTRICTED RIGHTS NOTICE: If data or software is delivered pursuant to a General Services Administration “GSA” contract, use, reproduction, or disclosure is subject to restrictions set forth in Contract No. GS-...
-
Page 3: Table Of Contents
Accessories ....Call Lenovo ....Purchase options ... . - Page 4 T14 Gen 2, T15 Gen 2, P14s Gen 2, and P15s Gen 2 User Guide...
-
Page 5: About This Documentation
• Depending on the model, some optional accessories, features, software programs, and user interface instructions might not be applicable to your computer. • Documentation content is subject to change without notice. To get the latest documentation, go to https:// pcsupport.lenovo.com © Copyright Lenovo 2021... - Page 6 T14 Gen 2, T15 Gen 2, P14s Gen 2, and P15s Gen 2 User Guide...
-
Page 7: Chapter 1. Meet Your Computer
ThinkPad T14 Gen 2 and ThinkPad P14s Gen 2 might be shipped with different microprocessors, namely ® Intel and Advanced Micro Devices (AMD). ThinkPad T15 Gen 2 and ThinkPad P15s Gen 2 are shipped with Intel microprocessors. Hereby Intel models and AMD models are used to distinguish computer models with different microprocessors. - Page 8 Fingerprint reader* RFID label Trackpad Near field communication (NFC) label* Speaker TrackPoint buttons * for selected models for selected Intel models T15 Gen 2 and P15s Gen 2 T14 Gen 2, T15 Gen 2, P14s Gen 2, and P15s Gen 2 User Guide...
- Page 9 Microphone* IR camera* / Camera* Webcam privacy shutter* Touch screen* TrackPoint pointing stick Power button Fingerprint reader* Trackpad NFC label* TrackPoint buttons Speaker * for selected models Chapter 1 Meet your computer...
-
Page 10: Side View
Side view Intel models ® USB-C (Thunderbolt™ 4) power USB-C (Thunderbolt 4) connector connector USB 3.2 connector Gen 1 HDMI™ connector Audio connector microSD-card slot Always On USB 3.2 connector Gen 1 Smart-card slot* Security-lock slot Ethernet connector * for selected models T14 Gen 2, T15 Gen 2, P14s Gen 2, and P15s Gen 2 User Guide... - Page 11 AMD models USB-C (3.2 Gen 2) power connector USB-C (3.2 Gen 2) connector USB 3.2 connector Gen 1 HDMI connector Audio connector microSD-card slot Always On USB 3.2 connector Gen 1 Smart-card slot* Security-lock slot Ethernet connector * for selected models Chapter 1 Meet your computer...
-
Page 12: Bottom View
Bottom view T14 Gen 2 and P14s Gen 2 T15 Gen 2 and P15s Gen 2 Emergency-reset hole Keyboard drainage hole CAUTION: When the computer is operating, it should be placed on a hard and flat surface with its bottom area not in contact with user’s bare skin. -
Page 13: Rear View
– USB-C to DP: up to 5120 x 2880 pixels, 60 Hz • USB-C (3.2 Gen 2) connector • Connect to USB-C accessories to help expand your computer • USB-C (Thunderbolt 4) connector functionality. To purchase USB-C accessories, go to https:// www.lenovo.com/accessories Chapter 1 Meet your computer... - Page 14 Statement on USB transfer rate Depending on many factors such as the processing capability of the host and peripheral devices, file attributes, and other factors related to system configuration and operating environments, the actual transfer rate using the various USB connectors on this device will vary and will be slower than the data rate listed below for each corresponding device.
-
Page 15: Chapter 2. Get Started With Your Computer
Your computer helps you connect to the world through a wired or wireless network. Connect to Wi-Fi networks 1. Click the system menu arrow on the top right. A list of available wireless networks is displayed. © Copyright Lenovo 2021... -
Page 16: Airplane Mode
2. Select a network available for connection. Provide required information, if needed. Airplane mode When the Airplane mode is enabled, all wireless features are disabled. To enable or disable the Airplane mode: 1. Use the system menu drop down (top right) and choose Settings. 2. -
Page 17: Use The Trackpoint Pointing Device
Invoke the special function printed as an icon on each key or standard function of F1–F12 function keys. FnLock indicator on: standard function FnLock indicator off: special function Fn+Spacebar Toggle keyboard backlight Break operation Fn+B Fn+K Scroll contents Pause operation Fn+P Send system request Fn+S... -
Page 18: Use The Trackpad
Press to select or open an item. 3. Right-click button Press to display a shortcut menu. 4. Middle button Press and hold the dotted middle button while applying pressure to the pointing stick in the vertical or horizontal direction. Then, you can scroll through the document, Web site, or apps. Replace the pointing-stick nonslip cap Note: Ensure that the new cap has grooves Use the trackpad... -
Page 19: Use The Multi-Touch Screen (For Selected Models)
Two-finger scroll Put two fingers on the trackpad and move them in the vertical or horizontal direction. This action enables you to scroll through the document, Web site, or apps. Two-finger zoom out Put two fingers on the trackpad and move them closer together to zoom out. - Page 20 Tap once • From the Start menu: Open an app or item. • From the desktop: Select an app or item. • In an open app: Perform an action such as Copy, Save, and Delete, depending on the app. Tap twice quickly Open an app or item from the desktop.
-
Page 21: Connect To An External Display
Tips • Turn off the computer before cleaning the multi-touch screen. • Use a dry, soft, and lint-free cloth or a piece of absorbent cotton to remove fingerprints or dust from the multi-touch screen. Do not apply solvents to the cloth. •... - Page 22 T14 Gen 2, T15 Gen 2, P14s Gen 2, and P15s Gen 2 User Guide...
-
Page 23: Chapter 3. Explore Your Computer
• Press Fn+H to switch to performance mode. Use the P-to-P 2.0 charging function The USB-C connector on the computer features the Lenovo-unique P-to-P 2.0 charging function. When no ac power is available, this feature enables one computer to supply power to another computer through a USB-C to USB-C cable. -
Page 24: Set The Power Plan
Note: The actual charging speed using the Lenovo-unique P-to-P 2.0 charging function varies depending on many factors, such as the remaining battery power of the computers, the wattage of the ac power adapter, and whether you are using the computers. -
Page 25: Accessories
Purchase options Lenovo has a number of hardware accessories and upgrades to help expand the capabilities of your computer. Options include memory modules, storage devices, network cards, port replicators or docking stations, batteries, power adapters, keyboards, mice, and more. - Page 26 : You can remove the system lock from the system-lock slot. Note: The ThinkPad Basic Docking Station does not ship with a system lock installed. You can contact Lenovo sales to purchase a system lock with the option part number 4XE0Q56388. 2. Key lock indicator This indicator turns on when the system lock key is in the locked position.
- Page 27 Rear view Figure 1. ThinkPad Basic Docking Station Figure 2. ThinkPad Pro Docking Station Figure 3. ThinkPad Ultra Docking Station Connectors ThinkPad Basic Docking ThinkPad Pro Docking ThinkPad Ultra Docking Station Station Station 1. Audio connector √ √ √ 2. ac power connector √...
- Page 28 Note: The security-lock slot supports cable locks that conform to the Kensington MicroSaver lock standards (using T-bar locking technology) or MiniSaver lock standards (using Cleat locking technology). Attach a docking station Notes: • The ThinkPad Basic Docking Station does not ship with a system lock installed. If you do not purchase and install a system lock, skip step 4 and step 7 in the following instruction.
- Page 29 5. Check the docking status indicator. The docking status indicator turns on when the computer is successfully docked. Note: If the indicator is off, your computer is not attached to the docking station successfully. To solve the problem, detach and reattach the computer. 6.
- Page 30 2. Slide the latch in the direction as shown to release the computer, and then grasp both sides of the computer to remove it Connect multiple external displays You can connect multiple external displays to a supported docking station. To ensure that the multiple displays work correctly, observe the following guidelines and connect the external displays to the appropriate connectors.
-
Page 31: Chapter 4. Secure Your Computer And Information
You are responsible for evaluating, selecting, and implementing the locking device and security feature. Lenovo makes no comments, judgments, or warranties about the function, quality, or performance of the locking device and security feature. Cable locks for your product are available from Lenovo at https://www.lenovoquickpick.com/... -
Page 32: Use Privacy Protection (For Selected Models)
Depending on the model, your computer might support the PrivacyGuard feature which keeps you secure without compromising your viewing experience. https://support.lenovo.com/solutions/featurevideo Use the PrivacyGuard feature When the feature is enabled, it darkens screen and reduces visibility from side angles to protect screen content against visual hacking. - Page 33 Supervisor password The supervisor password protects the system information stored in UEFI BIOS. When entering the UEFI BIOS menu, enter the correct supervisor password in the window prompted. You also can press Enter to skip the password prompt. However, you cannot change most of the system configuration options in UEFI BIOS.
-
Page 34: Set, Change, And Remove A Password
5. In the Changes have been saved window, press Enter. 6. Press F10 to save changes and exit the UEFI BIOS menu. • If you have not set a supervisor password, contact a Lenovo authorized service provider to have the power-on password removed. -
Page 35: Use Power Loss Protection Function (For Selected Models)
6. Press F10 to save changes and exit the UEFI BIOS menu. • If you have not set a supervisor password, contact a Lenovo authorized service provider to have the system management password removed. Use Power Loss Protection function (for selected models) For models shipped with an NVMe (Non-Volatile Memory express) M.2 solid-state drive, the M.2 solid-state... - Page 36 T14 Gen 2, T15 Gen 2, P14s Gen 2, and P15s Gen 2 User Guide...
-
Page 37: Chapter 5. Configure Advanced Settings
Note: No bootable device is displayed if the computer cannot start from any devices or the operating system cannot be found. 3. Set the startup sequence as desired. 4. Press F10 to save the changes and exit. To change the startup sequence temporarily: © Copyright Lenovo 2021... -
Page 38: Set The System Date And Time
Download and install the latest UEFI BIOS update package by one of the following methods: • Use the fwupdmgr or software utility to check LVFS for firmware updates. • Go to https://pcsupport.lenovo.com and select the entry for your computer. Then, follow the on-screen instructions to download and install the latest UEFI BIOS update package. -
Page 39: Chapter 6. Cru Replacement
If you intend on installing a CRU, Lenovo will ship the CRU to you. CRU information and replacement instructions are shipped with your product and are available from Lenovo at any time upon request. You might be required to return the defective part that is replaced by the CRU. -
Page 40: Replace A Cru
1. Restart your computer. When the logo screen is displayed, immediately press F1 to enter the UEFI BIOS menu. 2. Select Config ➙ Power. The Power submenu is displayed. 3. Select Disable Built-in Battery and press Enter. 4. Select Yes in the Setup Confirmation window. The built-in battery is disabled and the computer turns off automatically. - Page 41 Installation procedure Troubleshooting If the computer does not start up after you reinstall the base cover assembly, disconnect the ac power adapter and then reconnect it to the computer. Chapter 6 CRU replacement...
-
Page 42: Base Cover Assembly (T15 Gen 2 And P15S Gen 2)
Base cover assembly (T15 Gen 2 and P15s Gen 2) Prerequisite Before you start, read and print the following instructions. Generic Safety and Compliance Notices Note: Do not remove the base cover assembly when your computer is connected to ac power. Otherwise, there might be a risk of short circuits. -
Page 43: Memory Module (For Selected Models)
Installation procedure Troubleshooting If the computer does not start up after you reinstall the base cover assembly, disconnect the ac power adapter and then reconnect it to the computer. Memory module (for selected models) Prerequisite Before you start, read and print the following instructions. Generic Safety and Compliance Notices Attention: Do not touch the contact edge of the memory module. -
Page 44: M.2 Solid-State Drive
4. Remove the base cover assembly. See “Base cover assembly (T14 Gen 2 and P14s Gen 2)” on page 34 or “Base cover assembly (T15 Gen 2 and P15s Gen 2)” on page 36. Removal procedure Installation procedure M.2 solid-state drive Prerequisite Before you start, read and print the following instructions. - Page 45 • Do not touch the contact edge or circuit board of the M.2 solid-state drive. Otherwise the M.2 solid-state drive might get damaged. • Do not make the M.2 solid-state drive subject to physical shocks or vibration. Put the M.2 solid-state drive on a soft material, such as cloth, to absorb physical shocks.
-
Page 46: Coin-Cell Battery
Coin-cell battery Prerequisite Before you start, read and print the following instructions. Generic Safety and Compliance Notices For access, do the following: 1. Disable the built-in battery. See “Disable the built-in battery” on page 33. 2. Turn off the computer and disconnect the computer from ac power and all connected cables. Then, close the computer display 3. -
Page 47: Wireless Wan Card (For Selected Models)
The following information is only for the computer with user-installable modules. Ensure that you use only a Lenovo-authorized wireless module specifically tested for this computer model. Otherwise, the computer will generate an error-code beep sequence when you turn on the computer. -
Page 48: Speaker Assembly
Note: After installation, ensure that you connect the orange cable to the connector labeled Orange on the card, the blue cable to the connector labeled Blue, the white and grey cable to the M1 connector, and the black and grey cable to the M2 connector. Speaker assembly Prerequisite Before you start, read... -
Page 49: Always On Usb 3.2 Connector Gen 1 Board And Bracket
Always On USB 3.2 connector Gen 1 board and bracket Prerequisite Before you start, read Generic Safety and Compliance Notices and print the following instructions. For access, do the following: 1. Disable the built-in battery. See “Disable the built-in battery” on page 33. 2. -
Page 50: Keyboard
Keyboard Prerequisite Before you start, read and print the following instructions. Generic Safety and Compliance Notices For access, do the following: 1. Disable the built-in battery. See “Disable the built-in battery” on page 33. 2. Turn off the computer and disconnect the computer from ac power and all connected cables. Notes: •... - Page 51 2. Take the tool out of the new keyboard packaging. Insert the tabs into the slot between the TrackPoint buttons and the trackpad . Slightly pivot the tool downward to release the left and right TrackPoint buttons. Then, remove the two Trackpoint buttons 3.
- Page 52 4. Insert the tabs into the two dents near the two screw heads as shown. 5. Pivot the tool in the direction as shown to release the keyboard . Push the keyboard in the direction as shown by arrows to release the latches from the keyboard bezel. 6.
- Page 53 7. Put the keyboard on the palm rest as shown and detach the connectors. Then, remove the keyboard. Installation procedure 1. Attach the connectors and turn over the keyboard as shown. Chapter 6 CRU replacement...
- Page 54 2. Insert the keyboard into the keyboard bezel as shown. Ensure that the top edge of the keyboard (the edge that is close to the display) is under the keyboard bezel. 3. Slide the keyboard in the direction as shown by the arrows. Ensure that the latches are secured under the keyboard frame.
- Page 55 4. Tighten the screws to secure the keyboard. 5. Take the new TrackPoint buttons out of the new keyboard packaging. Install the TrackPoint buttons as shown. Chapter 6 CRU replacement...
- Page 56 6. For T15 Gen 2 and P15s Gen 2, tighten the screw that secures the keyboard. 7. Connect the ac power adapter and all disconnected cables to the computer. T14 Gen 2, T15 Gen 2, P14s Gen 2, and P15s Gen 2 User Guide...
-
Page 57: Chapter 7. Help And Support
2. In the Touchpad section, turn off the Touchpad control. Use the Software application to check for updates. It should notify when new Where can I get the latest device firmware is available on LVFS ( https://fwupd.org/ drivers and UEFI BIOS? © Copyright Lenovo 2021... -
Page 58: Error Messages
Error messages If you see a message that is not included in the following table, record the error message first, then shut down the computer and call Lenovo for help. See “Lenovo Customer Support Center” on page 56. Message Solution The computer turned off because the battery power is low. -
Page 59: Beep Errors
Beep errors Lenovo SmartBeep technology enables you to decode beep errors with your smartphone when a black screen occurs with beeps from your computer. To decode the beep error with Lenovo SmartBeep technology: 1. Go to or scan the following QR Code. -
Page 60: Self-Help Resources
The LLW also is preinstalled on the computer. To access the LLW, go to /opt/Lenovo If you cannot view the LLW either from the Web site or from your computer, contact your local Lenovo office or reseller to obtain a printed version of the LLW. -
Page 61: Call Lenovo
General Public License and/or the Lesser General Public License (or any other license requiring us to make a written offer to provide corresponding source code to you) from Lenovo for a period of three years without charge except for the cost of media, shipping, and handling, upon written request to Lenovo. This offer is valid to anyone in receipt of this Device. -
Page 62: Lenovo Customer Support Center
Lenovo Customer Support Center During the warranty period, you can call Lenovo Customer Support Center for help. Telephone numbers For a list of the Lenovo Support phone numbers for your country or region, go to https:// pcsupport.lenovo.com/supportphonelist for the latest phone numbers. -
Page 63: Purchase Additional Services
• Lenovo hardware repair - If the problem is determined to be caused by Lenovo hardware under warranty, trained service personnel are available to provide the applicable level of service. - Page 64 T14 Gen 2, T15 Gen 2, P14s Gen 2, and P15s Gen 2 User Guide...
-
Page 65: Appendix A. Ergonomic Information
It might not be possible to observe the best ergonomic practices when you are using your computer while on the move or in a casual setting. Regardless of the setting, try to observe as many of the tips as possible. © Copyright Lenovo 2021... - Page 66 Many product solutions are available to help you modify and expand your computer to best suit your needs. You can find some of these options at https://www.lenovo.com/accessories Explore your options for docking solutions and external products that provide the adjustability and features that you want.
-
Page 67: Appendix B. Compliance Information
• ThinkPad T15 Gen 2 • TP00104E1 • ThinkPad T15 Gen 2: 20W4 and 20W5 • ThinkPad T15 Gen 2 LTE1 • TP00104E2 • ThinkPad P15s Gen 2: 20W6 and 20W7 • ThinkPad P15s Gen 2 • TP00104E3 • TP00104E4 for mainland China only... - Page 68 20W4 and 20W5 20VX, 20VY, 21A0, and 21A1 ThinkPad P14s Gen 2 ThinkPad P15s Gen 2 20W6 and 20W7 This equipment has been tested and found to comply with the limits for a Class B digital device, pursuant to Part 15 of the FCC Rules. These limits are designed to provide reasonable protection against harmful...
- Page 69 • Connect the equipment into an outlet on a circuit different from that to which the receiver is connected. • Consult an authorized dealer or service representative for help. Lenovo is not responsible for any radio or television interference caused by using other than recommended cables and connectors or by unauthorized changes or modifications to this equipment. Unauthorized changes or modifications could void the user’s authority to operate the equipment.
- Page 70 Operating environment Maximum altitude (without pressurization) 3048 m (10 000 ft) Temperature • Operating: 5°C to 35°C (41°F to 95°F) • Storage and transportation in original shipping packaging: -20°C to 60°C (-4°F to 140°F) • Storage without packaging: 5°C to 43°C (41°F to 109°F) Note: When you charge the battery, its temperature must be no lower than 10°C (50°F).
-
Page 71: Appendix C. Notices And Trademarks
Lenovo representative for information on the products and services currently available in your area. Any reference to a Lenovo product, program, or service is not intended to state or imply that only that Lenovo product, program, or service may be used. Any functionally equivalent product, program, or service that does not infringe any Lenovo intellectual property right may be used instead. - Page 72 Actual results may vary. Users of this document should verify the applicable data for their specific environment. This document is copyrighted by Lenovo and is not covered by any open source license, including any Linux agreement(s) which may accompany software included with this product. Lenovo may update this document at any time without notice.
Need help?
Do you have a question about the ThinkPad P15s Gen 2 and is the answer not in the manual?
Questions and answers