Advertisement
Quick Links
Advertisement

Related Manuals for Kogan SMARTERHOME KASM12DGFYA


Summary of Contents for Kogan SMARTERHOME KASM12DGFYA
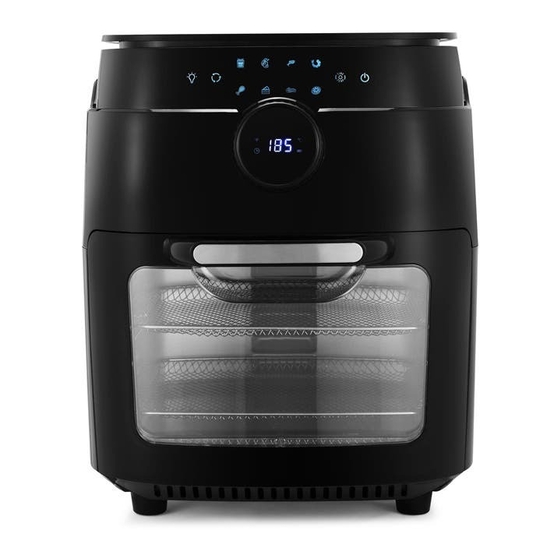
- Page 1 KOGAN SMARTERHOME™ 12L DIGITAL AIR FRYER OVEN (1800W) KASM12DGFYA...
-
Page 3: Safety And Warnings
Do not use this unit if the plug, the power cord, or the appliance itself are damaged in any way. • Do not place the unit on the oven top surfaces. • If the power cord is damaged, it must be replaced by Kogan.com in order to avoid a hazard. -
Page 4: Automatic Shut-Off
• Keep the appliance and its power cord out of the reach of children when it is in operation or in the “cooling down” process. • Keep the power cord away from hot surfaces. Do not plug in the power cord or operate the unit controls with wet hands. - Page 5 OVERVIEW Main unit Adjustable skewers racks Rotating basket Skewers Rotisserie forks Oil tray Rotisserie shaft Dehydrating rack Fetching tool...
- Page 6 2. Rotating mesh basket Intended for cooking fries, roasting nuts, and other snacks. Use fetching tool to place the basket into the unit. 3 & 4. Rotisserie shaft, forks and set screws Used for roasts and whole chickens. Force the shaft lengthwise through the meat and centre.
- Page 7 1. LED digital display The digital numeric display will switch between temperature and time remaining during the cooking process. 2. Indicator lights These lights will blink in sequence while cooking is in progress and continue blinking up to 20 seconds once you shut the unit down. 3.
- Page 8 5. Rotation button Select this button when cooking anything using the rotisserie mode to start rotation. The function can be used with any preset, and the icon will blink while in use. 6. Time and Temperature buttons • The Time buttons enable you to select an exact cooking time from 1 to 60 minutes in all modes except when dehydrating, which uses 1-hour intervals and an operating time from 0 to 24 hours.
- Page 9 Install App Download the “Kogan SmarterHome” app from the Play Store (Android) or App Store (iOS). Register If you do not have a Kogan SmarterHome™ account, register or sign in with a verification code sent by SMS. To register: Tap to enter registration page.
- Page 10 Set device in pairing mode When the device is first turned on, it may automatically enter pairing mode (the Temperature icon may be flashing rapidly). If not automatically in pairing mode when powered on, you can manually set the device in pairing mode by pressing and holding the “Time &...
- Page 11 Upon successfully confirming pairing mode, enter your Wi-Fi details. It is important that your SmarterHome™ device and the app are connected to the same Wi-Fi network during setup. The device will commence the pairing process and connect to the app. Ensure your Wi-Fi router, mobile phone, and the SmarterHome™...
- Page 12 ASSEMBLY Insert drip tray into bottom of the unit. Place air flow rocks into the unit by sliding them through the side grooves (shown in Fig. A) and onto the back lip. Place the air flow racks closer to the top heating element for faster cooking and added crisp.
- Page 13 Rotisserie shaft & skewer racks Place the two skewer racks at each end of the rotisserie shaft. Make sure the set screws are on the outer side of the rotisserie shaft. Slightly tighten the set screws. Do not overtighten as you may need to adjust the tightness after you insert the skewers.
- Page 14 Inserting rotisserie spit or rotating mesh basket Insert the left side of the assembled spit or basket into the rotisserie shaft socket. Be sure the rotisserie shaft is in place to engage rotation (Fig. E). Place the right side onto the hanger (Fig. F). Fig.
-
Page 15: Operation
OPERATION WARNING: Never use a cooking vessel filled with cooking oil or any other liquid with this unit. Fire hazard or personal injury could result. Before first use Read all material and warning stickers and labels. Remove all packing materials, labels, and stickers. Wash all parts and accessories used in the cooking process with warm soapy water. - Page 16 Cooking with the rotisserie air fryer Place the ingredients on airflow rack, one of the rotisserie accessories or in the rotating mesh basket. Put the airflow rack, rotating mesh basket or rotisserie spit, into the unit and shut the air fryer door. Plug the power cord into a dedicated 220V outlet. When rotating mesh basket or rotisserie and food is in place, press the power button once (Page 8) Select a Preset function as shown on page 8 or manually set the Temperature and...
- Page 17 WARNING: • During the cooking process, the rotating mesh basket and other accessories will become very hot. When you remove it to check on the progress, make sure you have a trivet or a heat resistant surface nearly to set it down on. Never place the rotating mesh basket directly on a countertop or table.
- Page 18 Tip: Set the timer to 1/2 the time needed for the recipe and the timer bell will alert you when it is time to flip your food. When you hear the timer bell, the pre-set preparation time has elapsed. The table above will help you choose the basic settings for the ingredients selected. Note: Keep in mind that these settings are indications.
- Page 19 Preset choices Choose from the eight cooking presets shown (as detailed under “Preset buttons” above):...
- Page 20 Recipes More recipes than those shown can be selected; images are for reference only. Choose this icon:...
- Page 21 Choose this icon: Cooking will then begin.
- Page 22 Timer A delay timer can be set from the menu of any recipe. Note: the timer function may have an error of approximately 30 seconds. Choose this icon to set a timer:...
-
Page 23: Rotation Button
Internal Light Pressing this icon will help you check cooking progress while the unit is in operation. Note: Opening the door during the cooking process will pause the unit. The internal light will illuminate if doors open. Rotation Button Select this icon when cooking anything using the Rotisserie Mode. Function can be used with any preset. - Page 24 Timer With this feature, you can prepare food in advance by setting a delay time before cooking begins. The food will be prepared by the set time and temperature.
- Page 25 Custom You can add or decrease cooking temperature control range: 65°C - 200°C and time control range: 1-60min. Once you choose the custom icon, the default time will be 15min and the temperature 185°C.
- Page 26 10. Edit You can edit the model name as desired and find more information for this app.
- Page 27 From the home page of the Google Home app, select the “+” icon to access the ‘Add and manage’ page. Select ‘Set up device’, then under the Works with Google banner, select ‘Have something already set up?’ Select the search bar and type ‘Smarter Home’ to locate the Kogan SmarterHome™ service.
- Page 28 Tap ‘Authorise’ to grant Google permission to access the SmarterHome™ app and your devices. From here, you will be prompted to sign into your SmarterHome™ account using either your email or mobile phone number, depending on which method you used to register your account.
- Page 29 Tap on any of the devices to view a list of available commands. Note: Please note that Google Home can only control the base/core functions of any compatible SmarterHome™ devices. To make full use of this product’s smart functionality, please use the Kogan SmarterHome™ app.
- Page 30 AMAZON ALEXA CONTROL Note: You will need to have set up an Alexa account prior to linking your Kogan SmarterHome™ device. Adding “SmarterHome” to the Alexa app From the home page of the Alexa app, select the “ ” icon in the top-right and select Skills &...
- Page 31 Tap ‘Enable to Use’ to add the Kogan SmarterHome™ skill to Alexa. From here, you will be prompted to sign into your SmarterHome™ account using either your email or mobile phone number, depending on which method you used to register your account.
- Page 32 SmarterHome™ account. When your devices have successfully connected to the Alexa app, you will be able to control your Kogan SmarterHome™ devices via Alexa’s voice commands. Note: Please note that Alexa can only control the base/core functions of any compatible SmarterHome™...
-
Page 33: Cleaning And Care
CLEANING & CARE Cleaning Clean the rotisserie air fryer after each use. The rotating mesh basket and other accessories are made of durable stainless steel and are dishwasher safe. Never use abrasive cleaning materials or utensils on these surfaces. Caked-on food should be soaked for easy removal in warm soapy water. -
Page 34: Troubleshooting
TROUBLESHOOTING Problem Possible Cause Solution Plug the power cord into a wall The appliance is not plugged in. socket. The rotisserie air fryer With the basket in place, set You have not turned the unit on by does not work the Temperature and Time. - Page 35 NOTES...
- Page 36 Need more information? We hope that this user guide has given you the assistance needed for a simple set-up. For the most up-to-date guide for your product, as well as any additional assistance you may require, head online to help.kogan.com...
Need help?
Do you have a question about the SMARTERHOME KASM12DGFYA and is the answer not in the manual?
Questions and answers