Advertisement
Quick Links
Advertisement

Subscribe to Our Youtube Channel
Related Manuals for Kogan SMARTERHOME KASM65DGFYA


Summary of Contents for Kogan SMARTERHOME KASM65DGFYA
- Page 1 KOGAN SMARTERHOME™ 6.5L STAINLESS STEEL DIGITAL AIR FRYER OVEN KASM65DGFYA...
-
Page 3: Safety And Warnings
• Do not operate any appliance with a damaged cord or plug, or after the appliance malfunctions or has been damaged in any manner. Contact Kogan.com for further assistance. • The use of accessory attachments not recommended by Kogan.com may cause injuries. - Page 4 • Do not cover the air inlet or the air outlet when the appliance is working. • Filling the pan with oil may cause a fire hazard. • Do not touch the inside of the appliance while it is operating. •...
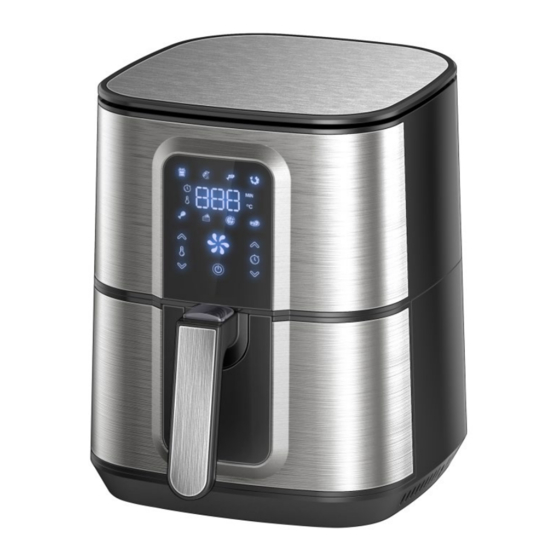
- Page 5 OVERVIEW 1 Pan 8 Timer control (0-30min.) 2 Basket 9 Temperature control (80-200°C) 3 Basket release button 10 Air inlet 4 Basket handle 11 Air outlet openings 5 Power button 12 Power cord 6 Touch screen panel 13 Cord storage 7 Menu...
- Page 6 Unpack the device and remove allstickers and packaging materials. Put the plug into the wall socket. Install the “Kogan SmarterHome” app on your smartphone (see next page). Press on the power button to turn on the air fryer. Press and hold the "French Fries" menu icon for 5 seconds, and the Time icon will appear on the display.
- Page 7 Install App Download the “Kogan SmarterHome” app from the Play Store (Android) or App Store (iOS). Register If you do not have a Kogan SmarterHome™ account, register or sign in with a verification code sent by SMS. To register: Tap to enter registration page.
- Page 8 Set device in pairing mode When the device is first turned on, it may automatically enter pairing mode (the Time icon may be flashing rapidly). If not automatically in pairing mode when powered on, you can manually set the device in pairing mode by pressing and holding the “French Fries”...
- Page 9 Upon successfully confirming pairing mode, enter your Wi-Fi details. It is important that your SmarterHome™ device and the app are connected to the same Wi-Fi network during setup. The device will commence the pairing process and connect to the app. Ensure your Wi-Fi router, mobile phone, and the SmarterHome™...
- Page 10 From the home page of the Google Home app, select the “+” icon to access the ‘Add and manage’ page. Select ‘Set up device’, then under the Works with Google banner, select ‘Have something already set up?’ Select the search bar and type ‘Smarter Home’ to locate the Kogan SmarterHome™ service.
- Page 11 Tap ‘Authorise’ to grant Google permission to access the SmarterHome™ app and your devices. From here, you will be prompted to sign into your SmarterHome™ account using either your email or mobile phone number, depending on which method you used to register your account.
- Page 12 Tap on any of the devices to view a list of available commands. Note: Please note that Google Home can only control the base/core functions of any compatible SmarterHome™ devices. To make full use of this product’s smart functionality, please use the Kogan SmarterHome™ app.
- Page 13 AMAZON ALEXA CONTROL Note: You will need to have set up an Alexa account prior to linking your Kogan SmarterHome™ device. Adding “SmarterHome” to the Alexa app From the home page of the Alexa app, select the “ ” icon in the top-right and select Skills &...
- Page 14 Tap ‘Enable to Use’ to add the Kogan SmarterHome™ skill to Alexa. From here, you will be prompted to sign into your SmarterHome™ account using either your email or mobile phone number, depending on which method you used to register your account.
- Page 15 SmarterHome™ account. When your devices have successfully connected to the Alexa app, you will be able to control your Kogan SmarterHome™ devices via Alexa’s voice commands. Note: Please note that Alexa can only control the base/core functions of any compatible SmarterHome™...
-
Page 16: Operation
OPERATION Place the appliance on a stable, horizontal, and even surface. Do not place the appliance on a surface that is not heat-resistant. Remove the basket and pan from the machine. (Fig.4) Press the release button on basket handle and take the basket out of the pan. (Fig.9) - Page 17 CAUTION: • Before pressing the release button, ensure the pan is resting on a stable, heat-resistant surface. Do not press the release button using only one hand, as the pan will drop down from the basket once the button is pressed. (Fig.10) •...
- Page 18 During the hot air frying process, the LED lamp will be illuminated. If paused, the LED lamp will be blinking. (Fig. 6) Oil from the ingredients will gather at the bottom of the pan. Some ingredients may require shaking halfway through the preparation time. When required, pull the pan out of the appliance by the handle and shake it.
- Page 19 Note: You can remove the basket of the pan and shake the basket only to reduce the weight. Pull the pan out of the appliance as above, place it on a heat-resistant surface and press the button of the handle to release the basket. 10.
- Page 20 Note: Do not turn the pan over, as the oil collected on the bottom of the pan will leak onto the ingredients. 13. Empty the basket into a bowl or onto a plate. (Fig.11) Tip: To remove large or fragile ingredients, use a pair of tongs to lift them out of the basket. 14.
-
Page 21: Control Panel
Control panel • 8 preset functions are included: French Fries, Roast, Fish, Shrimp, Chicken, Cake, Pizza and Steak (as outlined on the table below). • Repeatedly press the “Menu” button to cycle through the cooking functions, and the illuminated icon will change accordingly. •... - Page 22 Settings Min/max Time Temperature Extra Shake quantity (Min) (°C) information Potatoes & fries Thin frozen fries 300-700 9- 16 Thin frozen fries 300-700 11-20 Home-made fries 300-800 16-10 Add 1/2 tbs of oil Home-made potato Add 1/2 tbs of oil 300-800 18-22 wedges...
- Page 23 Tips: • Smaller ingredients usually require a slightly shorter preparation time than larger ingredients. • Shaking smaller ingredients halfway during the preparation time to optimise the result and can help to prevent unevenly fried ingredients. • Add some oil to fresh potatoes for a crispy result. Fry your ingredients in the air fryer within a few minutes of adding the oil.
-
Page 24: Cleaning And Care
CLEANING & CARE • Clean the appliance after every use. • Do not clean the pan, basket, and the inside of the appliance with metal kitchen utensils or abrasive cleaning materials, as this may damage the non-stick coating. Remove the mains plug from the wall socket and make the appliance cool down. Note: Remove the pan to let the air fryer cool down more quickly. -
Page 25: Troubleshooting
TROUBLESHOOTING Problem Possible cause Solution The air fryer does The appliance is not Put the mains plug in an earthed wall not work plugged in. socket. The amount of Use smaller batches of ingredients in ingredients in the basket the basket for more even frying. Ingredients are is too big. - Page 26 NOTES...
- Page 28 Need more information? We hope that this user guide has given you the assistance needed for a simple set-up. For the most up-to-date guide for your product, as well as any additional assistance you may require, head online to help.kogan.com...
Need help?
Do you have a question about the SMARTERHOME KASM65DGFYA and is the answer not in the manual?
Questions and answers