Advertisement
Available languages
Available languages
Quick Links
THIS INSTRUCTION BOOKLET CONTAINS IMPORTANT SAFETY INFORMATION.
Manufactured By:
BDDMI
1321 Tyler St NE, Minneapolis, MN 55413
DOVER
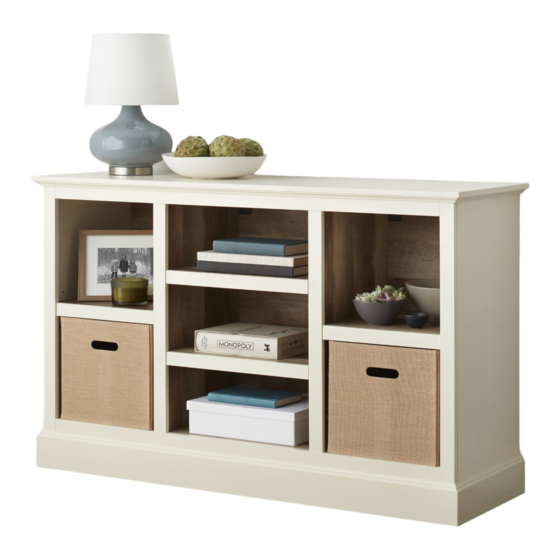
CONSOLE / BOOKCASE
Assembly Instructions
PLEASE READ AND KEEP FOR FUTURE REFERENCE.
Customer Service:
1.877.436.7290
customersupport@tenspringstreet.com
gray
model# BH17-084-098-26
ivory
model# BH17-084-098-25
Lot#_________Date________
1
Advertisement

Related Manuals for Better Homes and Gardens DOVER BH17-084-098-26


Summary of Contents for Better Homes and Gardens DOVER BH17-084-098-26
- Page 1 DOVER CONSOLE / BOOKCASE Assembly Instructions gray model# BH17-084-098-26 ivory model# BH17-084-098-25 THIS INSTRUCTION BOOKLET CONTAINS IMPORTANT SAFETY INFORMATION. PLEASE READ AND KEEP FOR FUTURE REFERENCE. Manufactured By: Customer Service: BDDMI 1.877.436.7290 Lot#_________Date________ 1321 Tyler St NE, Minneapolis, MN 55413 customersupport@tenspringstreet.com...
-
Page 2: Tools Needed
TOOLS NEEDED Hammer Flat Head Screwdriver Phillips Head Screwdriver PARTS LIST T O P PA N E L B O T T O M F R O N T PA N E L L E F T S I D E F R A M E F R O N T R A I L R I G H T S I D E F R A M E R E A R R A I L... -
Page 3: Hardware List
HARDWARE LIST 1 . W o o d D o w e l x 3 4 2 . C a m B o l t x 3 6 3 . C a m x 3 6 4 . 1 5 m m P a n H e a d S c r e w x 2 3 5 . - Page 4 HARDWARE LIST 7 . W a s h e r 8 . A l l e n W r e n c h 9 . S h e l f S u p p o r t x 1 6 1 0 .
- Page 5 HARDWARE LIST 1 3 . W a l l A n c h o r 1 4 . 2 0 m m W o o d D o w e l 1 5 . C a m C o v e r x 2 5 CAUTION: 1.
-
Page 6: How To Use The Cam Lock System
HOW TO USE THE CAM LOCK SYSTEM 180º... - Page 7 STEP 1 1 . W o o d 2 . C a m B o l t 3 . C a m D o w e l NOT TO SCALE. REFER TO PAGE 3 FOR ACTUAL SIZE HARDWARE. 1. Carefully tap small wooden dowels into place. Leave 1/2” of the dowels sticking out. 2.
- Page 8 STEP 2 1 . W o o d 2 . C a m B o l t 3 . C a m D o w e l NOT TO SCALE. REFER TO PAGE 3 FOR ACTUAL SIZE HARDWARE. 1. Carefully tap small wooden dowels into place. Leave 1/2” of the dowels sticking out. 2.
- Page 9 STEP 3 1 . W o o d 2 . C a m B o l t 3 . C a m D o w e l NOT TO SCALE. REFER TO PAGE 3 FOR ACTUAL SIZE HARDWARE. 1. Carefully tap small wooden dowels into place. Leave 1/2” of the dowels sticking out. 2.
- Page 10 STEP 4 1 . W o o d 2 . C a m B o l t 3 . C a m D o w e l NOT TO SCALE. REFER TO PAGE 3 FOR ACTUAL SIZE HARDWARE. 1. Carefully tap small wooden dowels into place. Leave 1/2” of the dowels sticking out. 2.
- Page 11 STEP 5 5 . B o l t 6 . L o c k 7 . W a s h e r W a s h e r 1 4 . 2 0 m m 8 . A l l e n W o o d D o w e l W r e n c h NOT TO SCALE.
- Page 12 STEP 6 x 1 2 x 1 4 x 1 4 1 . W o o d 2 . C a m B o l t 3 . C a m D o w e l NOT TO SCALE. REFER TO PAGE 3 FOR ACTUAL SIZE HARDWARE. 1.
- Page 13 STEP 7 x 2 3 4 . 1 5 m m P a n H e a d S c r e w Begin by installing all of the screws along one edge of the back panel. Next, using a square or tape measure, make sure that the case is square.
- Page 14 STEP 8 x 1 6 9 . S h e l f P i n NOT TO SCALE. REFER TO PAGE 3 FOR ACTUAL SIZE HARDWARE. 1. Insert shelf supports into desired holes. Different holes accommodate different shelf heights. 2. Angle shelves to fit between the rails and set on top of shelf supports. 14 14...
- Page 15 STEP 9 1 3 . W a l l 1 0 . W a l l 1 1 . 1 9 m m 1 2 . W a l l A n c h o r S c r e w P a n H e a d S t r a p S c r e w...
- Page 16 STEP 10 x 2 5 1 5 . C a m C o v e r NOT TO SCALE. REFER TO PAGE 3 FOR ACTUAL SIZE HARDWARE. 1. Place cam covers over visible holes.
- Page 17 WARNING Serious or fatal crushing injuries can occur from furniture tip-over. To help prevent tip-over: • Install tip-over restraint provided. • Place heaviest items in the lowest drawers. • Do not set TV’s or other heavy objects on top of this product, unless the product is specifically designed to accommodate them.
- Page 18 CONSOLA / LIBRERO DOVER Instrucciones de Ensamble gris model# BH17-084-098-26 marfil model# BH17-084-098-25 ESTE MANUAL DE INSTRUCCIONES CONTIENE INFORMACIÓN IMPORTANTE DE SEGURIDAD. POR FAVOR LEA Y GUARDE PARA REFERENCIA FUTURA. Fabricado Por : Servicio al Cliente: BDDMI 1.877.436.7290 Lot#_________Fecha_______ 1321 Tyler St NE, Minneapolis, MN 55413 customersupport@tenspringstreet.com...
-
Page 19: Herramientas Necesarias
HERRAMIENTAS NECESARIAS Martillo Destornillador de Cabeza Plana Destornillador Phillips LISTA DE PARTES PA N E L S U P E R I O R PA N E L F R O N TA L I N F E R I O R E N S A M B L E D E L L A D O I Z Q U I E R D O R I E L F R O N TA L E N S A M B L E D E L L A D O D E R E C H O... - Page 20 LISTA DE ARTÍCULOS DE FERRETERÍA 1 . C l a v i j a d e M a d e r a x 3 4 2 . To r n i l l o d e L e v a x 3 6 3 .
- Page 21 LISTA DE ARTÍCULOS DE FERRETERÍA 7. A r a n d e l a 8. L l a v a A l l e n 9 . P a s a d o r P a r a R e p i s a x 1 6 1 0 .
- Page 22 LISTA DE ARTÍCULOS DE FERRETERÍA 1 3 . Ta q u e t e d e P a r e d 1 4 . 2 0 m m C l a v i j a d e M a d e r a 1 5 .
- Page 23 COMO USAR EL SISTEMA FIJADOR DE LEVA 180º...
- Page 24 PASO 1 1 . C l a v i j a d e 2 . To r n i l l o 3 . L e v a M a d e r a d e L e v a NO ESTÁ...
- Page 25 PASO 2 1 . C l a v i j a d e 2 . To r n i l l o 3 . L e v a M a d e r a d e L e v a NO ESTÁ...
- Page 26 PASO 3 1 . C l a v i j a d e 2 . To r n i l l o 3 . L e v a M a d e r a d e L e v a NO ESTÁ...
- Page 27 PASO 4 1 . C l a v i j a d e 2 . To r n i l l o 3 . L e v a M a d e r a d e L e v a NO ESTÁ...
- Page 28 PASO 5 5 . P e r n o 6 . A r a n d e l a 7 . A r a n d e l a F i j o d o r a 1 4 . 2 0 m m 8 .
- Page 29 PASO 6 x 1 2 x 1 4 x 1 4 1 . C l a v i j a d e 2 . To r n i l l o 3 . L e v a M a d e r a d e L e v a NO ESTÁ...
- Page 30 PASO 7 x 2 3 4 . 1 5 m m To r n i l l o d e C a b e z a d e N o r i a Empiece instalando todos los tornillos a lo largo de la orilla del panel posterior.
- Page 31 PASO 8 x 1 6 9 . P a s a d o r P a r a R e p i s a NO ESTÁ A ESCALA. CONSULTE LA PÁGINA 3 FOR HARDWARE DE TAMAÑO REAL. 1. Introduzca los soportes de repisa dentro del agujero deseado. Diferentes agujeros acomodan direrentes alturas de las repisas. 2.
- Page 32 PASO 9 1 3 . Ta q u e t e 1 0 . To r n i l l o 1 1 . 1 9 m m 1 2 . C i n c h a d e P a r e d d e P a r e d To r n i l l o d e d e P a r e d...
- Page 33 PASO 10 x 2 5 1 5 . C u b i e r t a d e l To r n i l l o NO ESTÁ A ESCALA. CONSULTE LA PÁGINA 3 FOR HARDWARE DE TAMAÑO REAL. 1. Ponga las cubiertas de los tornillos sobre los tornillos visibles.
- Page 34 ADVERTENCIA Lesiones por aplastamiento graves o fatales pueden ocurrir debido a la caida el mueble. Para prevenir la caida: - Instalar los sujetadores contra caídas proporcionada. - Coloque los artículos más pesados en las repisas. inferiores o cajones inferiores y lo más atrás posible. - A menos de que esté...
Need help?
Do you have a question about the DOVER BH17-084-098-26 and is the answer not in the manual?
Questions and answers