
Related Manuals for King Industrial KC-203C


Summary of Contents for King Industrial KC-203C
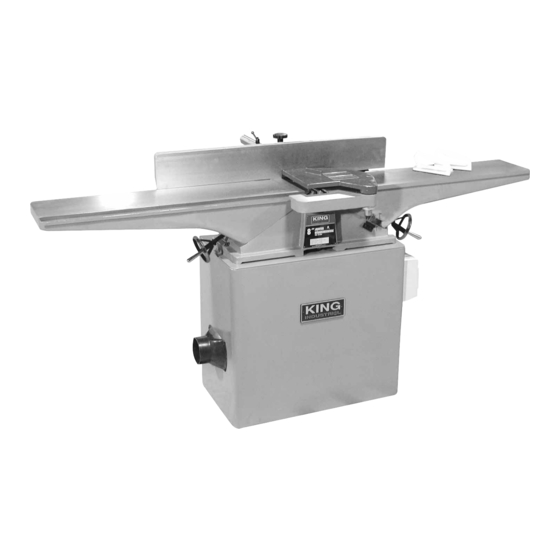
- Page 1 8˝ JOINTER MODEL: KC-203C INSTRUCTION MANUAL COPYRIGHT © 2002 ALL RIGHTS RESERVED BY KING CANADA TOOLS INC.
-
Page 2: Proof Of Purchase
IMPORTANT INFORMATION 2-YEAR KING CANADA TOOLS LIMITED WARRANTY OFFERS A 2-YEAR LIMITED WARRANTY FOR THIS 8” JOINTER FOR INDUSTRIAL USE. PROOF OF PURCHASE Please keep your dated proof of purchase for warranty and servicing purposes. REPLACEMENT PARTS Replacement parts for this tool are available at our authorized KING CANADA service centers across Canada. For servicing, contact or return to the retailer where you purchased your product along with your proof of purchase. - Page 3 GENERAL SAFETY INSTRUCTIONS FOR POWER TOOLS 1. KNOW YOUR TOOL 12. ALWAYS WEAR SAFETY GLASSES. Read and understand the owners manual and labels affixed to Always wear safety glasses (ANSI Z87.1). Everyday eyeglasses the tool. Learn its application and limitations as well as its only have impact resistant lenses, they are NOT safety glasses.
- Page 4 ADDITIONAL SAFETY INSTRUCTIONS FOR YOUR JOINTER READ AND UNDERSTAND INSTRUCTION MANUAL 7. CLEARING THE TABLE OF ALL OBJETS. BEFORE OPERATING JOINTER Never turn your jointer on before clearing the table of all 1. DO NOT ALTER OR MISUSE THE TOOL. objects (tools, scraps of wood...) except for the workpiece and These tools are precision built.
- Page 5 8” JOINTER ASSEMBLY ASSEMBLY INSTRUCTIONS WARNING: FOR YOUR OWN SAFETY, DO NOT CONNECT THE JOINTER TO THE POWER SOURCE UNTIL THE JOINTER IS COMPLETELY ASSEMBLED AND YOU HAVE READ AND UNDERSTOOD THE ENTIRE OWNER’S MANUAL. ASSEMBLING JOINTER TO STAND 1. The outfeed end of the jointer will be located at the side of the stand with the dust chute (B) Fig.
-
Page 6: Adjusting Belt Tension
8” JOINTER ASSEMBLY ASSEMBLING MOTOR PULLEY Assemble motor pulley (A) Fig. 4, on the motor shaft (B) with the hub of the pulley in the outer position as shown. Make certain key (C) is inserted in the keyway of the motor pulley and shaft. Tighten set screw (which is located on the pulley hub) against the motor shaft (B). - Page 7 8” JOINTER ASSEMBLY ASSEMBLING CUTTERHEAD PULLEY GUARD / CARRIAGE MOUNTING BRACKET 1. Align two pins (A) Fig. 7, in mounting bracket (C) with two holes (B) at the rear of jointer (D). 2. Using the supplied hex. key (E), fasten mounting bracket (C) Fig. 8, to the jointer with four M8 x 55mm long hex socket head screws, lock washers, and flat washers (F), three of which are shown.
-
Page 8: Assembling Fence
8” JOINTER ASSEMBLY ASSEMBLING FENCE 1. Align two threaded holes (G) Fig. 11, in fence (A) with two holes (C) in fence carriage (B) and fasten fence to carriage assembly with two socket hex. screws, lock washers, and flat washers (D). 2. - Page 9 8” JOINTER ASSEMBLY ASSEMBLING CUTTERHEAD GUARD 1. Remove set screw (not shown) from post (A) Fig. 14, of cutterhead guard (B). 2. Insert post (A) Fig. 14, through hole (C) in the infeed table. NOTE: A spring is supplied in knob assembly (D) Fig. 14, that returns the guard (B) over the cutterhead after a cut has been made.
-
Page 10: Changing Voltage
ELECTRICAL REQUIREMENTS 8” JOINTER WARNING! ALL ELECTRICAL CONNECTIONS MUST BE DONE BY A QUALIFIED ELECTRICIAN. FAILURE TO COMPLY MAY RESULT IN SERIOUS INJURY! ALL ADJUSTMENTS OR REPAIRS MUST BE DONE WITH THE JOINTER DISCONNECTED FROM THE POWER SOURCE. FAILURE TO COMPLY MAY RESULT IN SERIOUS INJURY! POWER SUPPLY WARNING: YOUR JOINTER MUST BE CONNECTED TO A PROPERLY GROUNDED OUTLET... - Page 11 OPERATING CONTROLS AND ADJUSTMENTS 8” JOINTER INFEED TABLE ADJUSTMENTS 1. To raise or lower the infeed table, loosen table lock handle (A) Fig. 18, which is located at the rear of the infeed table and loosen locking handle (B) Fig. 19, which is located at the front of the infeed table. FIGURE 18 2.
- Page 12 OPERATING CONTROLS AND ADJUSTMENTS 8” JOINTER OUTFEED TABLE ADJUSTMENTS In order to perform accurate jointing operations, the outfeed table must be exactly level with the knives at their highest point of revolution. This means that the knives must be parallel to the outfeed table and project equally from the cutterhead.
-
Page 13: Adjusting Table Gibs
OPERATING CONTROLS AND ADJUSTMENTS 8” JOINTER 8. If the knives are set too low, the result will be as shown in Fig. 27, and the surface will be curved. Work Outfeed Infeed table table Cutter Knives set too low FIGURE 27 Work 9. -
Page 14: Fence Operation
OPERATING CONTROLS AND ADJUSTMENTS 8” JOINTER 2. To adjust the out feed table, loosen locking lever (H) Fig. 33. Loosen two lock nuts (E) and tighten or loosen two adjustment screws (G) as necessary. NOTE: Adjust the lower adjustment screw first and as you proceed to the upper adjustment screw, gently raise the outboard edge of the table. - Page 15 OPERATING CONTROLS AND ADJUSTMENTS 8” JOINTER ADJUSTING FENCE POSITIVE STOPS The fence has been equipped with positive stops that allow you to rapidly tilt the fence to the 90 and 45 angles, inward or outward, to the table. To check and adjust the positive stops, proceed as follows: 1.
- Page 16 OPERATING CONTROLS AND ADJUSTMENTS 8” JOINTER 5. Fig. 41 illustrates the knife (C) and knife locking bar (D) removed from the cutterhead. Remove the remaining two knives and locking bars, in the same manner. 6. Using wrench supplied, lower the two knife adjustment blocks by turning screws (F) counterclockwise in all three slots of the cutterhead.
Need help?
Do you have a question about the KC-203C and is the answer not in the manual?
Questions and answers