
Subscribe to Our Youtube Channel
Related Manuals for INVENTOR MFC3-100EDL


Summary of Contents for INVENTOR MFC3-100EDL
- Page 1 FREEZER CHEST FREEZER • USER’S MANUAL • ΕΓΧΕΙΡΙΔΙΟ ΧΡΗΣΗΣ • MANUAL UTILIZATORULUI MODELS: MFC3-100EDL MFC3-145EDL MFC3-200EDL MFC3-380EDL ENGLISH | ΕΛΛΗΝΙΚΑ |ROMANIAN...
-
Page 3: Table Of Contents
CONTENTS 1.Safety Warnings ..............4 General Safety ..............5 Care and Cleaning ..............9 Installation ................9 Service ................10 Energy Saving ..............10 Environmental Protection .............11 2. Names of Components ............ 13 3. Installation ................ 14 Install Door External Handle ..........14 Space Requirement ............ -
Page 4: Safety Warnings
1. Safety Warnings In the interest of your safety and to ensure the correct use, before installing and first using the appliance, read this user manual carefully, including its hints and warnings. To avoid unnecessary mistakes and accidents, it is important to ensure that all people using the appliance are thoroughly familiar with its operation and safety features. -
Page 5: General Safety
1. Safety Warnings • If you are discarding the appliance pull the plug out of the socket, cut the connection cable (as close to the appliance as you can) and remove the door to avoid accidents from minors or even possible electric shock. •... - Page 6 1. Safety Warnings WARNING! WARNING! When positioning the appliance, ensure the supply cord is not trapped or damaged. WAR NI NG ! WAR NI NG ! Do not locate multiple portable socket- outlets or portable power suppliers at the rear of the appliance.
- Page 7 1. Safety Warnings WARNING! WARNING! Any electrical components (plug, power cord, compressor and etc.) must be replaced by a certified service agent or qualified service personnel. WA R N I N G ! WA R N I N G ! The light bulb supplied with this appliance is a “special use lamp bulb”...
- Page 8 1. Safety Warnings • Frozen food must not be re-frozen once it has been thawed out. • Store pre-packed frozen food in accordance with the frozen food manufacture s instructions. • Appliances manufactures storage recommendations should be strictly adhered to. Refer to relevant instructions.
-
Page 9: Care And Cleaning
1. Safety Warnings • One-, two-and three-star compartments (if they are presented in the appliance) are not suitable for the freezing of fresh food. • If the appliance is left empty for long periods, switch off, defrost, clean, dry and leave the door open to prevent mount developing within the appliance. -
Page 10: Service
1. Safety Warnings • It is advisable to wait at least four hours before connecting the appliance to allow the fluids to flow back in the compressor. • Adequate air circulation should be surrounding the appliance, lacking may lead to overheating. To achieve sufficient ventilation follow the instructions relevantto installation. -
Page 11: Environmental Protection
1. Safety Warnings • If electricity goes off, don’t open the door; • Don’t open the door frequently; • Don’t keep the door open for too long time; • Don’t set the thermostat on exceeding cold temperatures; • Some accessories, such as drawers, can be removed to get larger storage volume and lower energy consumption. - Page 12 1. Safety Warnings which could otherwise be caused by inappropriate waste handling of this product. For more detailed information about recycling of this product, please contact your local council, your household waste disposal service or the shop where you purchased the product. Packaging materials The materials with the symbol are recyclable.
-
Page 13: Names Of Components
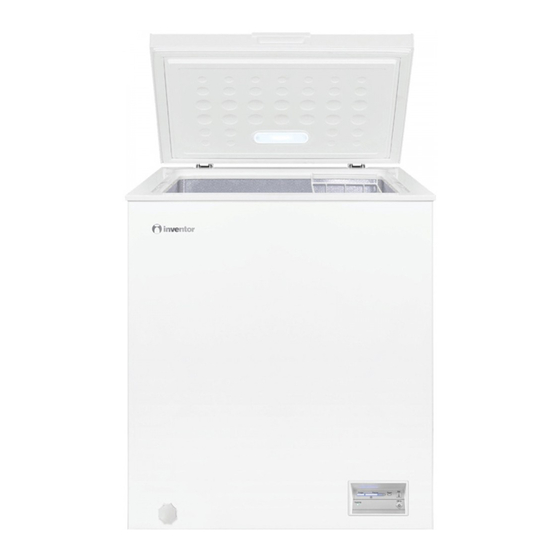
2. Name of Components Thermostat control panel LED Light Note: All photos included in this User’s Manual, are for explanatory purposes only, and may differ from the actual product. -
Page 14: Installation
3. Installation Step1 Step1 Step2 Step3 Step3 Note... -
Page 15: Space Requirement
3. Installation recommended... -
Page 16: Daily Use
4. Daily Use GETTING TO KNOW YOUR FREEZER Power On & Power Off - If the appliance is working, press “OFF” for 3 seconds to turn off. - If the appliance is off, the appliance will be turned on by direct electrical connection. When the appliance is plugged in, all LED indicator lights will flash once. -
Page 17: Indicator Lights
4. Daily Use Indicator Lights Temperature Range Indicators (blue color): - Fridge range (1,2 level) ; - Freezer range (3,4,5,6,7 level). Super Freezing Indicator (blue color): - In SUPER freezing mode, indicator lights on; - Exited SUPER freezing mode, indicator lights off. Running Indicator (green color): - Compressor running, indicator lights on;... -
Page 18: Tips On Freezing
4. Daily Use... -
Page 19: Hints For Frozen Food Storage
4. Daily Use Hints for Frozen Food Storage... -
Page 20: Trouble Shooting
5. Trouble shooting Caution! Before troubleshooting, disconnect the power supply. Only a qualified electrician of competent person must do the troubleshooting that is not in this manual. Important! There are some sounds during normal use (compressor, refrigerant circulation). Problem Possible cause Solution Mains plug is not plugged in or Insert mains plug. - Page 21 All the pictures in the manual are for explanatory purposes only. The actual shape of the unit you purchased may be slightly different, but the operations and functions are the same. The company may not be held responsible for any misprinted information. The design and the specifications of the product for reasons, such as product improvement, are subject to change without any prior notice.
- Page 22 Additional Details Additional Details STEP 5 Inventor warranty is now valid! Subscribe to Inventor's Newsletter to Inventor's Newsletter With the current warranty card you accept the terms and conditions. rrent warranty card you accept the terms and conditions.
- Page 23 ΠΕΡΙΕΧΟΜΕΝΑ 1 Οδηγίες ασφαλείας ............24 Γενική Ασφάλεια ..............25 Φροντίδα και καθαρισμός ............ 29 Εγκατάσταση ............... 29 Σέρβις ................. 30 Εξοικονόμηση ενέργειας ............. 30 Προστασία Περιβάλλοντος ..........31 2. Περιγραφή Εξαρτημάτων ..........33 3. Εγκατάσταση ..............34 Εγκατάσταση εξωτερικού χερουλιού πόρτας ....... 34 Απαιτήσεις...
-
Page 24: Οδηγίες Ασφαλείας
1. Οδηγίες ασφαλείας Για την ασφάλειάς σας και για τη διασφάλιση της ορθής χρή- σης, πριν την εγκατάσταση και κατά την πρώτη χρήση της συσκευής, διαβάστε προσεκτικά το παρόν εγχειρίδιο χρή- σης, συμπεριλαμβανομένων των συμβουλών και των προ- ειδοποιήσεων του. Για την αποφυγή λαθών και ατυχημάτων, είναι... -
Page 25: Γενική Ασφάλεια
1. Οδηγίες ασφαλείας • Αν απορρίπτετε τη συσκευή. τραβήξτε το βύσμα έξω από την πρίζα, κόψτε το καλώδιο σύνδεσης (όσο πιο κοντά στη συσκευή) και αφαιρέστε την πόρτα για να εμποδίσετε τα παιδιά να υποστούν πιθανή ηλεκτροπλη- ξία ή να κλειστούν μέσα σε αυτή. •... - Page 26 1. Οδηγίες ασφαλείας Π Ρ Ο Σ Ο Χ Η ! Π Ρ Ο Σ Ο Χ Η ! Κατά την τοποθέτηση βεβαιωθείτε ότι το καλώδιο δεν έχει παγιδευτεί η έχει αλλοιωθεί. Π Ρ Ο Σ Ο Χ Η ! Π...
- Page 27 1. Οδηγίες ασφαλείας Π Ρ Ο Σ Ο Χ Η ! Π Ρ Ο Σ Ο Χ Η ! Όλα τα ηλεκτρικά εξαρτήματα (βύσμα καλώδιο τροφοδοσίας, συμπιεστής κλπ.) πρέπει να αντι- καθίστανται από έναν πιστοποιημένο τεχνικό συντήρησης ή από εξειδικευμένο προσωπικό συντήρησης. Π...
- Page 28 1. Οδηγίες ασφαλείας • Τα κατεψυγμένα τρόφιμα δεν πρέπει να καταψύχονται ξανά από τη στιγμή που έχουν αποψυχθεί. • Αποθηκεύετε τα προ συσκευασμένα κατεψυγμένα τρό- φιμα σύμφωνα με τις οδηγίες του κατασκευαστή κατε- ψυγμένων τροφίμων. • Θα πρέπει να ακολουθούνται αυστηρά οι συστάσεις αποθήκευσης...
-
Page 29: Φροντίδα Και Καθαρισμός
1. Οδηγίες ασφαλείας • Τα ψυγεία ενός, δύο και τριών αστέρων (εάν παρουσι- άζονται στη συσκευή) δεν είναι κατάλληλα για την κατά- ψυξη φρέσκων τροφίμων. • Εάν η συσκευή παραμείνει άδεια για μεγάλα χρονικά δι- αστήματα, απενεργοποιήστε, ξεπαγώστε, καθαρίστε, στεγνώστε και αφήστε την πόρτα ανοιχτή για να απο- τρέψετε... -
Page 30: Σέρβις
1. Οδηγίες ασφαλείας Πληροφορίες για την ασφάλεια • Συνιστάται να περιμένετε τουλάχιστον τέσσερις ώρες πριν τη σύνδεση της συσκευής για να είναι δυνατή η ροή των υγρών πίσω στον συμπιεστή. • Θα πρέπει να υπάρχει επαρκής κυκλοφορία του αέρα γύ- ρω... -
Page 31: Προστασία Περιβάλλοντος
1. Οδηγίες ασφαλείας • Αν το ηλεκτρικό ρεύμα διακοπεί, μην ανοίγετε την πόρτα. • Μην ανοίγετε την πόρτα συχνά. • Μην κρατάτε την πόρτα ανοιχτή για πολύ μεγάλο χρονικό διάστημα. • Μην ρυθμίζετε τον θερμοστάτη σε υπερβολικά ψυχρές θερμοκρασίες. • Ορισμένα εξαρτήματα, όπως τα συρτάρια, μπορούν να αφαιρεθούν... - Page 32 1. Οδηγίες ασφαλείας ανθρώπινη υγεία, οι οποίες θα μπορούσαν να προκλη- θούν σε διαφορετική περίπτωση από ακατάλληλο χειρι- σμό απορριμμάτων του παρόντος προϊόντος. Για περισ- σότερες λεπτομέρειες σχετικά με την ανακύκλωση του πα- ρόντος προϊόντος, απευθυνθείτε στην εξυπηρέτηση περί ανακύκλωσης της περιοχής σας, η στην υπηρεσία αποκο- μιδής...
-
Page 33: Περιγραφή Εξαρτημάτων
2. Περιγραφή Εξαρτημάτων 1. Εξωτερικό χερούλι 2. Οπή αποστράγγισης 3. Καλάθι 4. Θερμοστάτης και Πάνελ 5. Φωτισμός LED Σημείωση: Όλες οι φωτογραφίες που περιλαμβάνονται σε αυτό το εγχειρίδιο, είναι για επεξηγηματικούς σκοπούς μόνο, και ενδέχεται να διαφέρουν από το πραγματικό προϊόν. -
Page 34: Εγκατάσταση
3. Εγκατάσταση Εγκατάσταση εξωτερικού χερουλιού πόρτας (αν υπάρχει εξωτερικό χερούλι) Βήμα 1 Βήμα 1 Αφαιρέστε 4 βίδες ➀ και τη βάση του χερουλιού ➁ από την σακούλα με τα αξεσουάρ. Μετά στερεώστε τη βάση του χερουλιού ➁ με την πόρτα με 4 βίδες ➀. Βήμα... -
Page 35: Απαιτήσεις Του Χώρου
3. Εγκατάσταση Απαιτήσεις του Χώρου Συνιστώνται τα παρακάτω. Ελεύθερος χώρος γύρω από τον καταψύκτη: Πλευρές...... 10εκ Πίσω πλευρά....10εκ Πάνω......70 εκ Τοποθέτηση Εγκαταστήστε αυτή τη συσκευή σε σημείο όπου η θερμοκρασία περιβάλλοντος ανταπο- κρίνεται στην κλιματική κλάση που αναγράφεται στην πινακίδα χαρακτηριστικών της συ- σκευής: Κλιματική... -
Page 36: Ημερήσια Χρήση
4. Ημερήσια Χρήση Γνωρίζοντας τον καταψύκτη. - Όταν η συσκευή λειτουργεί πατήστε το OFF για 3 δευτερόλεπτα για να απενεργοποιη- θεί η συσκευή. - Όταν η συσκευή είναι απενεργοποιημένη θα ενεργοποιηθεί μόλις γίνει η σύνδεση στο ρεύμα. Όταν η συσκευή είναι ενεργοποιημένη και στο ρεύμα τότε όλα τα ενδεικτικά LED θα ανα- βοσβήσουν... -
Page 37: Ενδεικτικές Λυχνίες
4. Ημερήσια Χρήση Ενδεικτικές λυχνίες ● Λυχνία Ένδειξης Θερμοκρασίας (Φωτεινό Μπλε) - Εύρος στην συντήρηση (1,2) - Εύρος στην κατάψυξη (3,4,5,6,7) ● Λυχνία Ένδειξης Super Παγώματος (Φωτεινό Μπλε): - Στην λειτουργία Super παγώματος η ενδεικτική λυχνία ανάβει - Απενεργοποίηση του Super παγώματος η ενδεικτική λυχνία σβήνει ●... -
Page 38: Συμβουλές Για Την Ψύξη
4. Ημερήσια Χρήση Συμβουλές για την ψύξη Μην αφήνετε φρέσκα, μη παγωμένα τρόφιμα να ακουμπάνε σε τρόφιμα τα οποία είναι ήδη παγωμένα, αποφεύγοντας έτσι την άνοδο της θερμοκρασία των τελευταίων Πάντα να προετοιμάζετε ατομικές μερίδες οι οποίες είναι ξεπαγώνουν πιο εύκολα. Για... -
Page 39: Οδηγίες Για Αποθήκευση Παγωμένων Τροφίμων
4. Ημερήσια Χρήση Οδηγίες για αποθήκευση παγωμένων τροφίμων Για να λάβετε τη μέγιστη απόδοση από αυτή τη συσκευή, θα πρέπει να: • βεβαιωθείτε ότι τα παγωμένα τρόφιμα εμπορίου αποθηκεύτηκαν σωστά από τον έμπο- ρο λιανικής. • βεβαιωθείτε ότι τα παγωμένα τρόφιμα μεταφέρθηκαν από την αποθήκευση τροφίμων στον... -
Page 40: Απόψυξη Του Καταψύκτη
4. Ημερήσια Χρήση • Καθαρίστε τη συσκευή και τα εσωτερικά εξαρτήματα με πανί και χλιαρό νερό. Μετά το καθάρισμα, σκουπίστε με πόσιμο νερό και στεγνώστε. • Η συσσώρευση σκόνης στον συμπυκνωτή αυξάνει την κατανάλωση ενέργειας. Για τον λόγο αυτό, καθαρίζετε προσεκτικά τον συμπυκνωτή στη πίσω μεριά της συσκευής μία φορά... -
Page 41: Αντιμετώπιση Προβλημάτων
4. Ημερήσια Χρήση Προσοχή! Πριν την αντιμετώπιση προβλημάτων, αποσυνδέστε το τροφοδοτικό. Μό- νο ένας ειδικευμένος ηλεκτρολόγος ή έμπειρο πρόσωπο πρέπει να εκτελέσει κάτι που δεν αναφέρεται στο παρόν εγχειρίδιο. Σημαντικό! Ακούγονται κάποιοι ήχοι κατά τη συνηθισμένη χρήση (συμπιεστής, κύ- κλωμα ψύξης). Πρόβλημα... - Page 42 Επισκεφ του παρ Συμπληρ Για να ενεργο Στοιχεία ιδ Ονοματεπώνυμ Όλες οι εικόνες στο παρόν εγχειρίδιο εξυπηρετούν επεξηγηματικούς σκοπούς. Το προϊόν που προμηθευτήκατε μπορεί να εμφανίζει ορισμένες διαφορές Διεύθυνση* ως προς το σχήμα, ωστόσο οι λειτουργίες και τα χαρακτηριστικά παραμένουν ίδια. Η...
- Page 43 Διεύθυνση email* ail* Παρακαλούμε ελέγξτε και τον φάκελο με τα Ανεπιθύμητα εισερχόμενα. κατοχύρωσης στο email σας ΒΗΜΑ 5 Έχετε υποβάλει επιτυχώς την εγγύηση του προϊόντος Inventor! Να εγγραφώ στο newsletter της Inventor το newsletter της Inventor * Απαραίτητο πεδίο δίο...
- Page 45 CUPRINS 1 Instructiuni de siguranta ..........46 Securitate generala ............47 Ingrijire si curatare .............. 51 Instalare ................51 Mentenanta ................ 52 Economie de energie ............52 Protectia mediului ............... 53 2. Descrierea componentelor ..........55 3. Instalare ................56 Instalarea unui maner de usa extern ........
-
Page 46: Instructiuni De Siguranta
1. Instructiuni de siguranta Pentru siguranta si pentru a asigura o utilizare adecvata, in- ainte de instalare si in timpul primei utilizari a dispozitivului, cititi cu atentie acest manual de utilizare, inclusiv sfaturile si avertismentele acestuia. Pentru a evita greselile si acciden- tele, este important sa va asigurati ca cei care folosesc dis- pozitivul sunt bine familiarizati cu functiile si caracteristicile sale de siguranta. -
Page 47: Securitate Generala
1. Instructiuni de siguranta • Daca aruncati aparatul. scoateti stecherul din priza, taiati cablul de conectare (cat mai aproape posibil de aparat) si scoateti usa pentru a preveni electrocutarea sau prinderea copiilor in interior. • Daca acest aparat are incuietori magnetice destinate inlocuirii unui aparat mai vechi care are o saiba de blocare (parghie de blocare) pe usa sau capac, asigurati-va ca aruncati saiba de blocare inainte de a... - Page 48 1. Instructiuni de siguranta AT E N T I E ! AT E N T I E ! La instalare, asigurati-va ca cablul nu este prins sau deteriorat. ATE NTI E! ATE NTI E! Nu amplasati o banda de alimentare pe spatele dispozitivului.
- Page 49 1. Instructiuni de siguranta AT E N T I E ! AT E N T I E ! Toate componentele electrice (mufa cablului de alimentare, compresorul etc.) trebuie inlocuite de un tehnician de service autorizat sau de personal de service calificat. ATENTIE! ATENTIE! Lampa furnizata este o „lampa speciala”...
- Page 50 1. Instructiuni de siguranta • Alimentele congelate nu trebuie recongelate dupa ce au fost decongelate. • Pastrati alimente congelate preambalate conform in- structiunilor producatorului de alimente congelate. • Recomandarile de stocare ale producatorului dispoziti- vului trebuie respectate cu strictete. Consultati instruc- tiunile relevante.
-
Page 51: Ingrijire Si Curatare
1. Instructiuni de siguranta • Compartimentele cu 1, 2 sau 3 stele (daca asa sunt pre- zentate in interiorul unitatii) nu sunt potrivite pentru con- gelarea alimentelor proaspete. • Daca aparatul este gol pentru perioade mari de timp, deconectati de la energia electrica, decongelati, cura- tati, uscati si lasati usa deschisa pentru a preveni acu- mularea mucegaiului in interiorul unitatii. -
Page 52: Mentenanta
1. Instructiuni de siguranta Informatii de siguranta. • Se recomanda sa asteptati cel putin patru ore inainte de a conecta aparatul pentru a permite lichidelor sa curga inapoi la compresor. • In jurul aparatului trebuie sa existe o circulatie adecvata a aerului. -
Page 53: Protectia Mediului
1. Instructiuni de siguranta • Daca curentul se opreste, nu deschideti usa. • Nu deschideti usa des. • Nu tineti usa deschisa prea mult timp. • Nu setati termostatul la temperaturi prea reci. • Unele componente, cum ar fi sertarele, pot fi indepartate pentru un volum mai mare de stocare si un consum mai mic de energie. - Page 54 1. Instructiuni de siguranta deseuri menajere sau magazinul de la care ati achizitionat produsul. Materiale de ambalare Materialele cu simbolul sunt reciclabile. Aruncati ambalajul intr-un recipient de colectare adecvat pentru reciclare. Aruncati dispozitivul 1. Deconectati cablul de alimentare de la priza. 2.
-
Page 55: Descrierea Componentelor
2. Descrierea componentelor 1. Maner exterior 2. Gaura de scurgere 3. Cos 4. Termostat si panou 5. Iluminarea cu LED Nota: Toate fotografiile incluse in acest manual au doar scop ilustrativ si pot diferi de produsul real. -
Page 56: Instalare
3. Instalare Instalarea unui maner de usa extern (daca este disponibil un maner extern) Pasul 1 Pasul 1 Scoateti 4 suruburi ➀ si baza manerului ➁ din punga pentru accesorii. Apoi fixati baza manerului ➁ de usa cu 4 suruburi ➀. Pasul 2 Pasul 3 Pasul 2... -
Page 57: Cerinte De Spatiu
3. Instalare Cerinte de spatiu Se recomanda urmatoarele. Spatiu liber in jurul congelatorului: Partile......10cm Partea din spate ....10cm Deasupra ......70 cm Pozitionare Instalati acest aparat intr-un loc in care temperatura ambianta este in conformitate cu clasa climatica indicata pe placuta cu date tehnice a aparatului: Clasa climatica Temperatura ambientala + 10°C pana la +32°C... -
Page 58: Utilizarea Zilnica
4. Uz zilnic Cunoasterea congelatorului. - Cand dispozitivul functioneaza, apasati OFF timp de 3 secunde pentru a opri dispozitivul. - Cand dispozitivul este oprit, acesta va fi pornit imediat ce conexiunea de alimentare este realizata. - Cand dispozitivul este pornit si pornit, toate LED-urile vor clipi o data, apoi dispozitivul va continua de la ultima setare, inainte ca alimentarea sa se stinga. -
Page 59: Indicatoare Luminoase
4. Uz zilnic Lumini indicatoare ● Lampa indicatoare de temperatura (albastru deschis) - Gama de intretinere (1,2) - Autonomie in congelator (3,4,5,6,7) ● Lampa indicatoare super inghet (albastru deschis): - In modul Super inghet, indicatorul luminos se aprinde - Dezactivand Super Freeze, indicatorul luminos se stinge ●... -
Page 60: Sfaturi De Racire
4. Uz zilnic Sfaturi de racire Nu lasati alimentele proaspete, necongelate sa se odihneasca pe alimentele deja congelate, evitand astfel cresterea temperaturii acestora. Pregatiti intotdeauna portiuni individuale care se dezgheteaza mai usor. Pentru a ingheta cantitatea maxima de alimente, dupa cum se mentioneaza in specificatiile tehnice, urmati acesti pasi: - Setati termostatul in pozitia 7 timp de 24 de ore inainte de utilizare. -
Page 61: Instructiuni Pentru Depozitarea Alimentelor Congelate
4. Uz zilnic Instructiuni pentru depozitarea alimentelor congelate Pentru a beneficia la maximum de acest dispozitiv, trebuie sa: • Asigurati-va ca alimentele comerciale congelate sunt depozitate corespunzator de catre comerciant. • asigurati-va ca alimentele congelate sunt transferate din depozitarea alimentelor in congelator in cel mai scurt timp. -
Page 62: Decongelarea Congelatorului
4. Uz zilnic Decongelarea congelatorului Congelatorul va fi acoperit treptat de gheata. Aceasta gheata ar trebui indepartata. Nu folositi niciodata obiecte metalice ascutite pentru a zgaria gheata, deoarece aceasta o poate deteriora. Cu toate acestea, daca gheata devine extrem de groasa pe linia exterioara, dezghetarea completa trebuie efectuata dupa cum urmeaza: •... -
Page 63: Depanarea
5. Depanarea Atentie! Deconectati sursa de alimentare inainte de depanare. Doar un electrician calificat sau o persoana cu experienta ar trebui sa efectueze ceva care nu este mentionat in acest manual. Important! Unele sunete se aud in timpul utilizarii normale (compresor, circuit de racire). - Page 64 Toate imaginile din acest manual, au scop pur informativ. Forma reala a produsului pe care l-ati cumparat poate fi usor diferita insa functiile si operatiile sunt aceleasi. Compania nu isi asuma nici o responsabilitate pentru greselile de tipar. Aspectul fizic si specificatiile tehnice se pot schimba fara o notificare prealabila datorita imbunatatirii continue a echipamentelor noastre.
- Page 65 Spam. PASUL 5 E-mail* Abonati-va la Newsletter-ul Inventor * Camp obligatoriu Ati activat cu succes Garantia Inventor! Abonati-va la Newsletter-ul Inventor Cu acest certificat de garantie acceptati Termenii si Conditiile. TRIMITE * Camp obligatoriu Cu acest certificat de garantie acceptati Termenii si Conditiile.
- Page 66 NOTES...
- Page 68 FREEZER CHEST FREEZER V 202009 CKIVT-A01...
Need help?
Do you have a question about the MFC3-100EDL and is the answer not in the manual?
Questions and answers