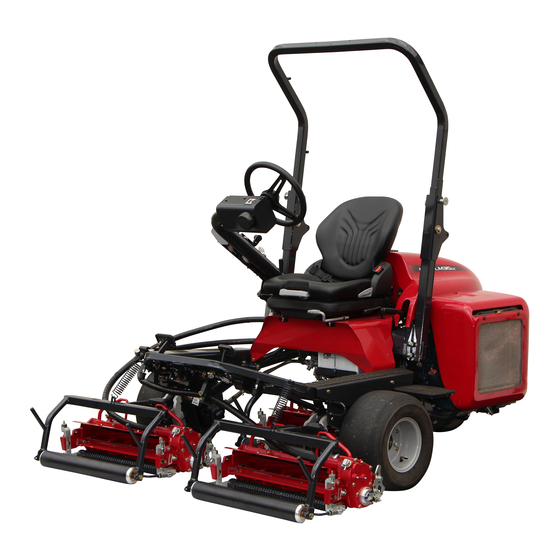
Summary of Contents for Kyoeisha Baroness LM315GC
- Page 1 Triple Greens Mower LM315GC [DETHATCHING BRUSH KIT] Assembly and installation manual 乗用3連グリーンモア LM315GC [サッチングブラシキットGC] 取扱要領書 Vol.1 Serial No.#30001~...
- Page 2 The information described in this manual is subject to change without prior notice for improvement. When replacing parts, be sure to use genuine Baroness parts or parts designated by Kyoeisha. Note that the Baroness product warranty may not apply to defects caused by the use of parts from other companies.
- Page 3 This symbol is accompanied by the word "Danger," "Warning," or "Caution." All labels with this symbol describe important safety precautions, so please read such labels carefully and only operate the machine after you have understood them completely. Failure to adequately follow these safety precautions may cause an accident.
- Page 4 When installing, removing, and adjusting optional equipment and attachments, observe the following safety instructions to ensure safe operation. オプション、アタッチメントの取付け、取外し、及び調整をするときは、以下の安全指示に従い、安全作業を 行ってください。 Before installation, removal, adjustments, etc., park the machine on a level surface. Set the parking brake, stop the engine, and remove the key. Ensure that all the parts have come to a complete stop. Keep your hands and feet away from moving parts.
- Page 5 Installing Optional Equipment for the LM315GC LM315GC オプション取付要領 DETHATCHING BRUSH KIT サッチングブラシキット GC Intended use: Lifting sideways grass and removal of thatch and dew. 用途;グリーン表面の芝生の目立てと、ゴミの除去、朝露の除去をします。 Check that all parts are included. The following parts are included in the package. Should any part be missing or damaged, please contact the dealer you purchased it from. 梱包部品を確認してください。内容は、以下通りです。...
- Page 6 WASHER, SPCC 1-13-22 RING, RETAINING E M10 PIN, STEPPED FOR FIXING (R) 1SPCC 座金 1322 ストップリング E10 CASE 右ケース止めボルト K5011013222 K0400010002 K6083000143 Qty:2 Qty:2 Qty:1 SPRING, COMPRESSION WASHER, C5191P 2-8.5-22 O-RING, G45 2C5191P 座金 8.522 O リング G45 M1.6-13.7-20 1.6 圧縮バネ 13.720 K1000000309 K5090000250 K0882045000...
- Page 7 PLATE, RETAINING BRACKET COMP, ROLLER (L) BRACKET COMP, ROLLER (R) ローラーブラケット左 Comp ローラーブラケット右 Comp HOUSING ハウジング押え板 LM315GC8403Z2 Qty:1 Qty:1 Qty:1 BOLT, MOUNTING MOWER BOLT, MOUNTING MOWER GREASE NIPPLE, A TYPE グリスニップル モア取付ボルト左 モア取付ボルト右 LM315GA1835Z0 LM315GA1836Z0 K1440000010 Qty:1 Qty:1 Qty:2 LM315GC-AM08GBZ...
- Page 8 Tightening torque 締付トルク Appropriate tightening torque [General bolts Strength class: 4.8 Required tightening torque Nominal diameter 適正締付トルク【一般ボルト 強度区分 4.8】 必要な締付トルク 呼び径 kgf-cm lb-in ○ 71.38~91.77 61.96~79.66 ○ 14~19 142.76~193.74 123.91~168.17 ○ 29~38 295.71~387.49 256.68~336.34 ― 52~67 530.24~683.20 450.25~593.02 When tightening bolts, refer to the above table. We will not be held responsible for any damage resulting from improper or excessive tightening, etc.
- Page 9 Installing the GROOMER KIT グルーマキット取付手順 Steps Illustrations Descriptions 手順 図 説明 Remove the mower unit from this machine. Lift up the front and rear rollers. 本機からモアユニットを取り外してください。 モアユニットの前後ローラーを上にして置いてくださ い。 The illustration shows the side of the reel shaft cover (A). Using a hex key (D), remove the hollow set screw M6 (C) of the bracket (B) securing the slotted roller.
- Page 10 Steps Illustrations Descriptions 手順 図 説明 Install the washer (C) onto the roller shaft. Align the stopper bolt (D) side of the roller bracket Comp (L) (17) with the flat side (B) of the roller shaft when installing it onto the roller shaft. Tighten the stopper bolt, and then secure it with the locknut (E).
- Page 11 Steps Illustrations Descriptions 手順 図 説明 Insert the mower mounting bolt (R) (20) into the roller bracket (R) (A) to install them onto the roller shaft (B). Fully tighten the bolt.. モア取付ボルト右(20)を、ローラーブラケット右(A) に差し込みローラー軸(B)に取り付けます。 一旦、最後まで締めてください。 Insert the C5191P 0.3-10-14 washer (22), and adjust it so that the hole (A) for installing the grease nipple is positioned as shown by the arrow.
- Page 12 Steps Illustrations Descriptions 手順 図 説明 Tighten the stopper bolt (A) so that the grease nipple (21) of the mower mounting bolt (R) does not move out of place, and then secure it with the locknut (B). Follow the same steps to secure the mower mounting bolt (L).
- Page 13 Steps Illustrations Descriptions 手順 図 説明 Secure the adjuster with the SPCC 1-13-22 washer (7) and retaining ring E M10 (8). 1SPCC 座金 1322 (7)およびストップリング E10(8)で調 節受け金を固定してください。 Remove the socket bolts M6 (B) and the conical spring washers (C) used to install the fulcrum metal (A). Do not remove the fulcrum metal (A).
- Page 14 Steps Illustrations Descriptions 手順 図 説明 Prepare the dethatching brush Assy(14). サッチングブラシ Assy(14)を準備します。 Apply a small amount of grease to the O-ring G45 (12), and then install it onto the gear case (A) at the position (B) shown in the illustration. O リング...
- Page 15 Steps Illustrations Descriptions 手順 図 説明 Check that the vertical fulcrum metal (1) points upward, and then insert the dethatching brush Assy (14) in the direction of the arrow. At the same time, while inserting the brush shaft (B) into the vertical fulcrum metal (1), carefully insert the groomer gear case into the 20-tooth reel gear (C) of the mower unit (A).
- Page 16 Steps Illustrations Descriptions 手順 図 説明 Install the vertical adjusting bolt Comp (4) onto the adjuster (6). Install the vertical fulcrum metal Comp (1) and vertical adjusting bolt Comp (4) onto the mower unit (A) with the round-head square-root bolt set M8 (5). 調節受け金(6)にバーチカル調節ボルト...
- Page 20 Head Office 1-26, Miyuki-cho, Toyokawa, Tel : (0533) 84 - 1390 Fax : (0533) 89 - 3623 Aichi-Pref. 442-8530 Japan. 442 - 8530 TEL (0533) 84 - 1221 1 - 26 FAX (0533) 84 - 1220 LM315GC-AM08GBZ/15A-00-KES...


Need help?
Do you have a question about the Baroness LM315GC and is the answer not in the manual?
Questions and answers