Table of Contents
Advertisement
Quick Links
All manuals and user guides at all-guides.com
SHIBAURA Riding Reel Mower
Instruction Manual
SR525
Please read this Instruction Manual with care to operate the
mower safely and correctly. If the mower is operated in an
incorrect manner, unexpected accidents may result.
After reading the manual, be sure to keep it at a convenient
place close to the mower.
Advertisement
Table of Contents

Subscribe to Our Youtube Channel
Related Manuals for Shibaura SR525


Summary of Contents for Shibaura SR525
- Page 1 All manuals and user guides at all-guides.com SHIBAURA Riding Reel Mower Instruction Manual SR525 Please read this Instruction Manual with care to operate the mower safely and correctly. If the mower is operated in an incorrect manner, unexpected accidents may result.
-
Page 2: Preface
Be sure to read this Instruction Manual before starting operation of the mower. Thank you for your purchase of SHIBAURA Riding Reel Mower. This Instruction Manual describes how to handle the mower and precautions to be observed when operating it. -
Page 3: Meaning Of Symbols (Danger, Warning, Caution, Caution For Handling, Reference)
Never modify the mower either. If the mower is used for any purpose other than specified or modified, the warranty is not applied. (See the warranty form for details.) Shibaura Europe BV... -
Page 4: Outline Of Manual
Section ● Describes how to check and handle troubles. Attempt to Diagnosis handle troubles before asking repair to the outside. Section ● Main consumables, standard accessories, specifications, Others wiring diagram Shibaura Europe BV... -
Page 5: Table Of Contents
Section 4 Functions of operating components 1. Seat, switches and meters ··············································································································· 23 2. Pedals and levers ······························································································································ 27 3. Control box·········································································································································· 28 Section 5 Inspections before operation and work 1. Physical condition and clothing of operator ··················································································· 30 2. Inspections·········································································································································· 31 Shibaura Europe BV... - Page 6 5. Checking and changing oil at each part ························································································· 52 6. Replacing the elements ···················································································································· 55 7. Inspecting and changing the cooling water···················································································· 57 8. Cleaning and replacing the air cleaner element············································································ 58 9. Inspecting the battery ························································································································ 59 10. Inspecting the pipes··························································································································· 59 Shibaura Europe BV...
- Page 7 18. Inspecting and adjusting the brake ································································································· 63 Section 10 Diagnosis 1. Engine·················································································································································· 64 2. Brake···················································································································································· 65 3. Hydraulic system································································································································ 65 4. Electrical·············································································································································· 66 Section 11 Others 1. Major consumables···························································································································· 67 2. Standard accessories························································································································ 68 3. Specifications ····································································································································· 68 4. Wiring diagram ··································································································································· 69 Shibaura Europe BV...
-
Page 8: Section 1 Be Sure To Observe For Safe Operation
Explain the handling m ethod in detail and tell him/her to read the “Instruction Manual” without f ail bef ore operating the m achine. [If you do not observe these cautions:] Death, serious injury or dam age of the m ac hine m ay result. Shibaura Europe BV... -
Page 9: Before Starting Operation
2 years and i nspect the electric wiring ev ery year. [If you do not observe these cautions:] Accident or f ailure due t o improper services m ay result. Shibaura Europe BV... -
Page 10: Inspections And Services Before And After Operation
Close the fuel cap and wipe away spilt fuel. After replenishing the f uel, close the f uel cap securely and wipe aw ay the spilt fuel completely. [If you do not observe these cautions:] A f ire hazard m ay be caused. Shibaura Europe BV... - Page 11 Check the brake t o av oid f ailure or unev en working and check the steering w heel to av oid excessiv e play. [If you do not observe these cautions:] Accident m ay be caused. Shibaura Europe BV...
- Page 12 Prov ide tools required f or inspections and adjustm ent on t he m achine. [If you do not observe these cautions:] Improper serv ices m ay lead t o an accident. Shibaura Europe BV...
-
Page 13: Transporting The Machine
[If you do not observe these cautions:] The m achine m ay f all dow n from the bed causing an accident. Shibaura Europe BV... -
Page 14: When Traveling Or Going Into Or Out Of A Field
The m achine m ay start to run by i tself and cause an accident. Do not apply the brake or operate the pedal suddenly while traveling at a high speed. [If you do not observe these cautions:] Turn ov er or f all dow n m ay arise. Shibaura Europe BV... -
Page 15: Operation
The im plem ent m ay c ollapse or injure som ebody. Be sure to wear protectors. Be sure to w ear saf ety goggles, helm et or shoes w ith creepers. [If you do not observe these cautions:] You m ay be injured. Shibaura Europe BV... - Page 16 Do not allow a person to approach the mower discharge port. Grass or debris m ay run out. St one m ay rus h out som etimes. [If you do not observe these cautions:] Injuries may result. Shibaura Europe BV...
- Page 17 If dried grass touc hes or accum ulates on t he engine, m uff ler, or exhaust pipe, it may catch a f ire. Carry a f ire extinguisher or a canteen f ull of w ater. [If you do not observe these cautions:] A f ire m ay result. Shibaura Europe BV...
-
Page 18: After Completion Of Operation Or When Storing The Machine
If the m achine is not used f or a long tim e, rem ov e the battery and pull out the key and keep them in custody. [If you do not observe these cautions:] Accident m ay be caused. Shibaura Europe BV... - Page 19 Inspections and services after hot parts have cooled down. Wait f or the m uff ler, engine and other hot parts c ool dow n enough bef ore inspections and s erv ices. [If you do not observe these cautions:] You m ay be burnt. Shibaura Europe BV...
-
Page 20: Location To Stick Safety Nameplate
Caution plate (fan belt) pressure hose) Caution plate (rotary parts) ④ ⑩ A90610320 Caution plate (slope) 390196040 Caution plate (fire) Caution mark (battery) ⑤ ⑪ 390196030 490992480 Caution plate (exhaust gas) Caution plate (handling) ⑥ ⑫ 390196110 390196280 Shibaura Europe BV... -
Page 21: Section 2 Service And Warranty
● Model and serial No. ● Engine No. in case of engine trouble ● Operating situation (t ype of w ork) ● Operating time ● Tell the situation w hen t he trouble occurred in details as f ar as possible. Shibaura Europe BV... -
Page 22: Section 3 Names Of Components
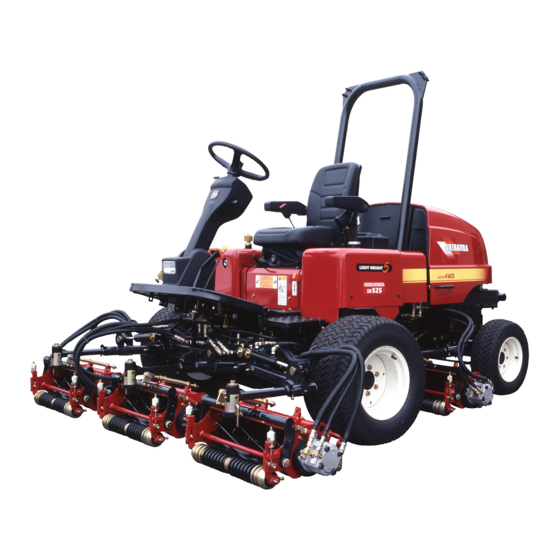
All manuals and user guides at all-guides.com Section 3 Names of components 1. Main machine and operating units Shibaura Europe BV... -
Page 23: Mower Unit
All manuals and user guides at all-guides.com Section 3 Names of components 2. Mower unit Shibaura Europe BV... -
Page 24: Section 4 Functions Of Operating Components
To rem ov e the seat belt, push the PRESS button on t he buckle. If the belt cannot be sm oothly pulled out, return the belt once and pull it again. ● Reclining m echanism inclining reclining lev er Shibaura Europe BV... - Page 25 Low er the lev er and f ix at a proper position. It is conv enient to position the lev er in the extrem e front using this m echanism when you getting on or off the machine. Shibaura Europe BV...
- Page 26 Be sure to c heck that goes out about 5 sec onds later. the lamp is out w hile running. ● After the lamp goes out, turn the key quickly to the [ START] position and start the engine. Shibaura Europe BV...
- Page 27 [H] position, it indicates the engine oil shortage or dropped pressure. Stop the engine immediately in such a case. ⑤ Key switch (operated by the right hand) Shibaura Europe BV...
-
Page 28: Pedals And Levers
There is no clutch pedal on this m achine. engine. By st epping the pedal strongly or w eakly, the speed can be increased or decreased. Shibaura Europe BV... -
Page 29: Control Box
4W D is selected and at the position rotary blade stops. B, auto 4W D is selected. If a trouble or error is detected in the control unit, lamp lights Shibaura Europe BV... - Page 30 B auto side, the rotary blades rev erse. B y pushing up the button t o the A rising side, t he blade stops. Shibaura Europe BV...
-
Page 31: Section 5 Inspections Before Operation And Work
* Do not use tow el as a headband or ● W hen inspecting bef ore operation or neck wrap, or do not hung tow el f rom work, permit anybody the w aist. (particularly children) to approach the machine. Shibaura Europe BV... -
Page 32: Inspections
● Brake working condition ·························································································································63 ● Travel pedal working condition···············································································································27 ● Steering wheel play ································································································································37 ⑤ Start the engine and check: ● Color of exhaust gas ······························································································································62 ● Operation of lamps and meters·········································································································25,26 ● Noise or vibration of engine Shibaura Europe BV... -
Page 33: Section 6 Operation And Works
● While warming up the engine, be sure to apply the parking brake. Otherwise, the machine may start to run for some reason leading to an accident. ① Starting the engine Shibaura Europe BV... -
Page 34: Lifting And Lowering The Mower
In cold districts, as the temperature decreases, oil viscosity increases so that hydraulic operation may become slower or normal pressure may not be obtained. To prevent such troubles, be sure to warm up the engine up. Shibaura Europe BV... -
Page 35: Starting, Turning And Stopping
If it is positioned midway, gear disengagement may result. <Reference> Speed may not be smoothly changed because of the claw clutch. Speed may be changed smoothly by operating the lever while stepping the running pedal lightly. Shibaura Europe BV... - Page 36 Caution ● After completion of cutting operation, be sure to turn off the cutting button lamp. Danger ● While the rotary blades are rotating, never bring your hands or feet close to the mower unit. Shibaura Europe BV...
-
Page 37: Loading On And Unloading From Truck
● Strength: ··· Can stand the weight of 1500kg enough. ● Treated surface to be not slippery ● Install the right and left footboards positively on a same level, symmetrically about the center of the bed. Shibaura Europe BV... -
Page 38: Power Steering
Caution ● When transporting the machine on a truck, fix the cover with the cover hook to prevent it from opening. Otherwise, the cover may open by the wind, causing an unexpected accident. Shibaura Europe BV... -
Page 39: Descriptions Of Decals
All manuals and user guides at all-guides.com Section 6 Operation and works 8. Description of decals (Following decals are used for the front mower.) Shibaura Europe BV... -
Page 40: Section 7 Care After Operation
[Cautions for handling] ● Avoid water from sprinkling over the electrical components as far as possible. Failure may result. 2. Opening and closing the bonnet Remove the latch of the bonnet and lift up the bonnet holding the grip. Shibaura Europe BV... -
Page 41: Care When Not In Use For A Long Time
(6) Pull out the key and store it at a place other than the vehicle. [Caution for handling] ● Battery is naturally discharged even the machine is not operated. Charge it fully with a charger every month. Shibaura Europe BV... -
Page 42: Section 8 Handling Of Mower
● If the interval is too long, adjust in the following procedure. Shibaura Europe BV... -
Page 43: Position Of No.4 And 5 Mowers For Maintenance
● If the cutting quality is not improved by the adjustment, lap (grind) the blade. (See Adjustment of cutting quality by lapping (grinding),on page 46.) Shibaura Europe BV... - Page 44 (3) Position when adjusting the cutting height ● Determine the position in the same way as in lapping. ● Hold the both edges of the front roller and turn the roller upward. Shibaura Europe BV...
-
Page 45: Adjusting The Cutting Height
(1) Lift the mower and stop the engine. (2) Position the No.4 and 5 units to the maintenance position. (3) Tighten the rear roller bracket to be in the desired cutting height range. Rear roller bracket tightening position in cutting height range Shibaura Europe BV... - Page 46 (6) Make adjustment in the same way for both the right and left sides. (7) Tighten the fixing nut to fix the front roller bracket positively. Shibaura Europe BV...
-
Page 47: Adjusting The Cutting Quality By Lapping (Grinding)
● Use a compound of mixed lapping compound (#120 - #180) and oil (or neutral detergent) at a rate of 1 : 3 – 4. (5) Start the engine and push the lapping button to light up the lamp. Shibaura Europe BV... - Page 48 (11) Test and adjust the cutting quality. (Refer to the cutting quality adjustment on page 41.) (12) Move the change-over valve lever to the rotating side. Shibaura Europe BV...
-
Page 49: Down Pressure Spring
30mm ± 2mm. By this adjustment, down pressure load of all of the 5 units becomes constant. (3) Adjust the nut Y so that the size B is 5mm ± 2mm. By this adjustment, angle to be adapted to angulation becomes constant. Shibaura Europe BV... -
Page 50: Section 9 Periodical Inspections And Services
● When inspecting, servicing or repairing the machine, be sure to stop the engine. ● Be sure to reinstall covers which were removed inspections services. Otherwise, somebody may be caught by the rotary parts of the machine and injured. Shibaura Europe BV... -
Page 51: Periodical Inspection List
(E.O.) 10W-30 (API classification CC, CD class) Hydraulic oil (H.O.) SHIBAURA genuine HST oil (ISOVG 46) Cooling water Antifreeze, cast roll LLC-95 (At the time of shipment, mixing ratio of the antifreeze is set based on the external temperature of –30º.) Grease (C.G.) -
Page 52: Oil And Water Supply List
⑪ Steering system C.G. ⑫ Pedal shaft C.G. ⑬ Battery D.W. Supply oil to pins and links other than above ones as required. ● Supply oil to each linkage other than above ones as required. Shibaura Europe BV... -
Page 53: Checking The Fuel Level And Replenishing The Oil
● If the fuel in the tank is low, the fuel may be exhausted when running on a slope. Supply oil ahead of time. ● When the external atmospheric temperature is below –10º, use Special No.3 light oil. Otherwise, the fuel may not flow. Shibaura Europe BV... - Page 54 (right side). If the oil level is below the center line, supply oil from the oil filler port up to the specified line (1/2 to 2/3 on the level gauge). Shibaura Europe BV...
- Page 55 The oil can be drained smoothly by discharging it while the oil is warm. (Be careful if the oil is hot.) When the oil is completely drained, tighten the drain plug and replenish the new oil from the oil filler port. Shibaura Europe BV...
-
Page 56: Replacing The Elements
(4) After the hydraulic pilot lamp goes out, stop the engine, check the oil level again with the dipstick gauge and replenish if not enough. Shibaura Europe BV... - Page 57 “C” position (opened). ③ Suction strainer Replace the suction strainer when changing the This machine is provided with an automatic fuel HST oil. discharging function. Therefore, discharging is not required. Replace the fuel filter every 200 hours. Shibaura Europe BV...
-
Page 58: Inspecting And Changing The Cooling Water
(1) Remove the radiator cap, loosen the drain plug and drain the water in the radiator Water (%) completely. Antifreeze (%) (2) Loosen the drain cock on the right side of the engine and drain the water in the engine. Shibaura Europe BV... -
Page 59: Cleaning And Replacing The Air Cleaner Element
(2) Remove the clip, remove the dust cup and pull out the element in the dust cup. Blow the air from the inside of the element or give it vibration to remove dust. Be careful not to damage the fun. Shibaura Europe BV... -
Page 60: Inspecting The Battery
● Do not leave or discard the used battery for the reason of environmental preservation and resource recycle. Be sure to hand it to the store where you bought it. Then the battery will be recycled as resource. Shibaura Europe BV... -
Page 61: Greasing (Supply)
All manuals and user guides at all-guides.com Section 9 Periodical inspections and service 12. Greasing (supply) Inspect the grease condition every 50 hours. Also inspect the grease condition at each part before starting operation and supply grease as required. Shibaura Europe BV... -
Page 62: Inspecting And Adjusting The Fan Belt
V belt or engine should be promptly removed. Otherwise, a fire may be caused. Turf attached to the radiator may cause overheat. Be sure to inspect and clean before after operation. Inspect during operation also depending on the operating conditions. Shibaura Europe BV... -
Page 63: Inspecting And Replacing The Fuse And Fusible Link
White···· Engine oil is burning. However, when the atmospheric temperature is low, the color may look white because of the vapor. If the exhaust gas is black or white even while no load is applied, have the dealer service the machine. Shibaura Europe BV... -
Page 64: Inspecting And Adjusting The Brake
If the play is out of standard range, adjust the play with the brake rod to be 15 – 20 mm. Check that the parking lever works positively when the brake pedal is pressed fully. Shibaura Europe BV... -
Page 65: Section 10 Diagnosis
Insufficient engine oil Replenish the oil. Running at overload Reduce the load. Clogged air cleaner Check the air cleaner Seized nozzle Insufficient power of Insufficient compression power engine Have the service work repair. Valve clearance adjustment Injection timing Shibaura Europe BV... -
Page 66: Brake
Dust caught by the control valve or failed O-ring Have the service works repair. Failed cylinder Have the service works repair. Dust caught by the control valve Have the service works repair. Implement does lower. Failed cylinder Have the service works repair. Shibaura Europe BV... -
Page 67: Electrical
Blown out fuse Replace the fuse. Improper wiring connection Check and connect properly. Lamp does not light up. Failed switch Replace the switch. Improper grounding Tighten the earth wire properly to the vehicle body. Battery discharged Charge. Shibaura Europe BV... -
Page 68: Section 11 Others
Rotary blade (7) 7-piece blade A70151160 Rotary blade (9) 9-piece blade A70151180 Rotary blade (11) 11-piece blade A70430170 Lower blade 2. Standard accessories Name Quantity/unit Remarks Tool box Blade aligning tool Cutting height adjusting gauge Instruction manual Shibaura Europe BV... -
Page 69: Specifications
Overall cutting width (mm) 2500 Rotary blade (mm) ø178 Reel mower No. of blades (mm) 9 (11, 7-piece blade available) Cutting height range (mm) 7 – 32 Working capacity (a/h) (At working speed 9km/h, efficiency 0.8) 183 Shibaura Europe BV... -
Page 70: Wiring Diagram
All manuals and user guides at all-guides.com Section 11 Others 4. Wiring diagram Wiring diagram Shibaura Europe BV... - Page 71 All manuals and user guides at all-guides.com Section 11 Others Wiring diagram Shibaura Europe BV...
Need help?
Do you have a question about the SR525 and is the answer not in the manual?
Questions and answers