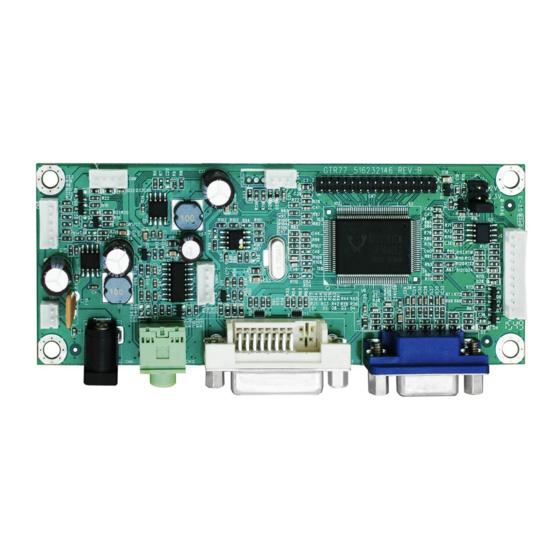
Summary of Contents for I-Tech DA011
- Page 1 LCD monitor DA011OSD operation i^i® lig:::iii -fa l-TECH C O M P A N Y i-Tech Company LLC TOLL FREE: (888) 483-24 8 • EMAIL: info@itechlcd.com • WEB: www.iTechLCD.com...
-
Page 2: Safety Instruction
Safety Instruction Read and follow these instructions when connecting and using your LCD monitor: Operation: Keep the monitor out of direct sunlight and away from stoves or any other heat source. Remove any object that could fall into ventilation holes or prevent proper cooling of the monitor’s electronics. -
Page 3: Product Installation
Product Installation Switch off the power on both your monitor and your computer. The Power Switch is located in the right of the monitor. Connect the power cord to the AC outlet, and connect the power to the monitor through the AC/DC adapter. - Page 4 1. Main Menu : If push the " MENU" key the screen will appear this main menu page, you can use the "UP" or"ADJ. +" AND "Down" or "ADJ. -" key ( Shown in Pid ) to select the function you need.
- Page 5 b-1. Brightness If select Brightness function, you can push ADJ+ or ADJ- key to increase or decrease offset setting. Brightness c.Contrast If select CONTRAST function on OSD MAIN MENU and push the MENU key. Contrast If select the Contast function, you can push ADJ+ or ADJ- key to increase or decrease video gain of the picture.
- Page 6 H-Position 5-2 V-Position If select V Position function, you can push ADJ+ or ADJ- key to shift to Up or Down of the picture. V-Position 5-3 Clock If select Clock function,you can push ADJ+ or ADJ- key to increase or decrease video H Size of the picture.
-
Page 7: User Color
6-1 9300K If select 9300K function, you can select color temperature 9300K of the picture 6-2 7500K If select 7500K function, you can select color temperature 7500K of the picture 6-3 6500K If select 6500K function, you can select color temperature 6500K of the picture 6-4 User Color If You select User Color function, that will into the sub-page to adjust the display user... - Page 8 6-4-2 Green If select Green function, you can push ADJ+ or ADJ- key to increase or decrease video Green contrast of the picture. Green 6-4-3 Blue If select Blue function, you can push ADJ+ or ADJ- key to increase or decrease video Blue contrast of the picture.
-
Page 9: Osd H-Position
g. OSD Setting If select OSD Setting function, that will into the sub-page to adjust the display’s function for OSD. g-1 OSD H-Position If select OSD H Position function, you can push ADJ+ or ADJ- key to shift to Right or Left OSD menu of the screen. -
Page 10: Osd Transparency
g-4 OSD Transparency If select OSD V Position function, you can push ADJ+ or ADJ- key to increase or decrease OSD menu Transparency of the screen. OSD Transparency h. VGA/ DVI If select VGA/DVI function, that will into the sub-page to select input Source h-1 VGA : If select VGA function , you can change input source from VGA Connect. - Page 11 i-1 Mute If select Mute function, you can select audio mute is ON or OFF. Audio Mute Volume Exit i-2 Volume If select Volume function, you can push ADJ+ or ADJ- key to shift to increase or decrease Audio volume. Volume j Recall : If select Recall function, that could recall all of pre-setting value.
-
Page 12: Troubleshooting
Trouble Shooting If your monitor fails to operate correctly, consult the following chart for possible solution before calling for repairs/RMA. Condition Possible Solution The screen is not synchronized? 1. Check if the signal cable is firmly seated in the socket. 2. - Page 13 DA011 (VGA+DVI) with RS232 GENERAL FUNCTION A. Power On System On (AC power On auto turn on ) B. Auto Signal Source detect C. OSD up/ down for Brightness D. TFT-LCD Module Driver Board Resolution up to 1920X1080@60Hz F. 15 Pin D-SUB VGA Connector input Connector input H.
- Page 14 VESA 1600x1200 VESA 1600x1200 81.3 VESA 1600x1200 87.5 VESA 1600x1200 93.8 VESA 1680x1050 65.3 VESA 1680x1050 VESA 1920x1080 67.5 **** Display Resolution depends on panel spec. 2 . Specification GTRxx (VGA+DVI ) Model Panel Compatibility Compatible with XGA, SVGA, VGA resolution TFT LCD panel from various panel manufactures by Changing some jumpers setting and specified BIOS.
- Page 15 Signal input connections 4-1 VGA Signal Input Location : 15 pin Hi-Density Female D-SUB Pin Assign and Definition o o o o o © 0 0 O 0 0 0 0 0 0 Pin No. SYMBOL Pin No. SYMBOL Pin No. SYMBOL RED IN R-GND G-GND...
- Page 16 Key Output Connector Location - : 8PIN WAFER PITCH 2.0mm 180D All Key Active Low Level., All LED Active HI Level , Output Current 10mA MAX Pin assign and definition FUNCTION GREEN-LED RED-LED POWER-KEY AUTO MENU LEFT RIGHT UP-KEY DOWN-KEY 4-4 Remote Location - : WAFER...
- Page 17 4-7.LVDS OUTPUT Location - : 2x16 PIN, PITCH 2.0mm Pin Assign and Definition Pin No. SYMBOL Pin No. SYMBOL Pin No. SYMBOL RXOCKIN+ VLCD for Panel RXOIN3- VLCD for Panel RXOIN0- RXOIN3+ RXECKIN- RXOIN0+ RXECKIN+ RXOIN1- RXEIN3- RXOIN1 + RXEIN0- RXEIN3+ RXOIN2- RXEI1N0+...
- Page 18 RS232 Output Connector Location - : 4 PIN WAFER PITCH 2.0mm 180D FUNCTION +5VDC 4-10 Audio Input - Location -CN10 : SCJ368R0NXS0G04G 3P Green or equv. Audio Input 1Vp-p Max. 4-11 Speaker Output: Location -CN 11 : 4 PIN WAFER PITCH 2.0mm 180D Audio Output 1.6W + 1.6W at 8 Ohm Signal PCB DIMENSION...


Need help?
Do you have a question about the DA011 and is the answer not in the manual?
Questions and answers