Table of Contents
Advertisement
Advertisement
Table of Contents

Related Manuals for Pumpables GENIE ADVANCED


Summary of Contents for Pumpables GENIE ADVANCED
- Page 1 Genie Advanced Full Manual...
- Page 2 Welcome to Pumpables...
-
Page 3: Getting Help
Getting help Issues with your pump... -
Page 4: What's In The Box
What’s in the box We’ll guide you through getting to know your Genie Advanced later in this manual, but for now, here’s a list of everything that’s included with your pump. Charger + Pump unit 4 international plugs Belt Clip... - Page 5 Intended use & safety Genie Advanced Double Electric Breast Pump with Liquid Pumping System is a portable breast pump to help lactating women express and collect milk. The Genie Advanced is a closed system The power adapter is a part of the breast breast pump.
- Page 6 Get to know your Genie Advanced You should find your Genie Advanced simple to use. Run through the functions below before you get started, and if you need help, just ask. Letdown Mode Fast mode to trigger letdown Expression Mode...
- Page 7 Get to know your Liquid Kit Getting to know the parts of your Liquid Kit will help you get the most out of them. It can be confusing the first time you assemble the kit, so let us know if you need help. Shield Cover While you're not using the pump, place the shield cover over the...
-
Page 8: Getting Started
Getting started Sterilising your accessories before first use Sterilise everything on left. You can sterilise the bottle stand and shield cover if you like but it’s not necessary. Never sterilise or immerse tubing or seal cap You can use any sterilising method that you prefer. Here are instructions for sterilising using the boiling method: 1. - Page 10 Getting started Charging your pump You can start using your pump right You can use the pump while charging. away out of the box. Once it’s time to recharge, charging time is approxi- mately 4.5 hours. CLICK When assembling the adaptor, make Plug into pump.
- Page 11 Getting started Assembling your Liquid Kit...
- Page 12 PRESS Slide the Liquid insert inside the shield assembly and ensure it is attached firmly. Make sure the valve is secure. Ensure insert is flush with shield. Place seal diaphragm on the shield assembly. Tip - use your finger to ensure the edge is flush. This is important so the kit is airtight. Attach your seal cap &...
-
Page 13: Attaching The Lanyard
Attaching the lanyard To attach the lanyard, slide the thin Then pull the other end of the lanyard end through the attachment point on through the loop until tightened. Genie Advanced. -
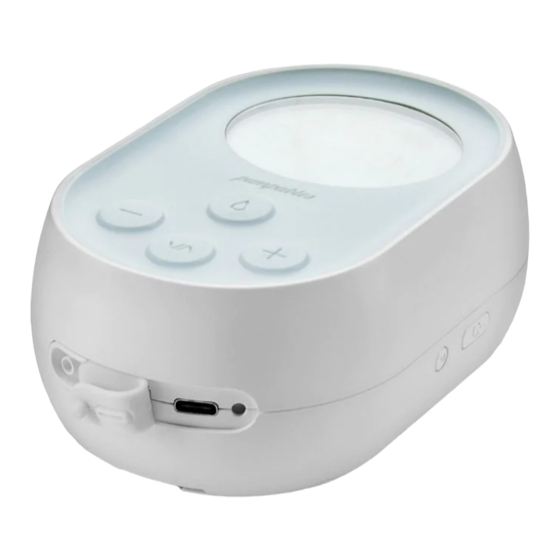
Page 14: Understanding The Controls
Understanding the controls Start Genie Advanced 2 seconds Press the power button for 2 seconds to turn on Genie Advanced. Switch between modes 00:02 VACUUM CYCLE Press the mode button to swap between expression & letdown mode. Letdown mode Expression mode... - Page 15 Pause pumping during a session Press the power button to pause pumping during a session. Press the power button again to resume pumping. If no buttons are pressed, the pump turns off after 1 minute. Mode icon blinks when pumping is paused. Changing settings in letdown mode 00:07 VACUUM...
- Page 16 Save program to Genie Advanced Save a favorite program to Genie Advanced’s internal memory 00:00 VACUUM CYCLE 2 sec. Press the program button for 2 When flashes, adjust the settings seconds to start recording. as best suit you. 2 sec.
- Page 17 Start your program 00:02 VACUUM CYCLE 2 sec. To play your pumping program, press The program icon in the screen flashes the program button for 2 seconds. while your program plays. 00:02 VACUUM CYCLE Press the mode button to end The pump stops when the program is the program and go back to manual finished, and the timer starts flashing.
-
Page 18: Replacing Parts
Replacing parts Some parts of your kit need replacing regularly, depending on how often you pump. This is important! Worn out parts are the most common reason for a decrease in output. Here’s an overview of what to replace when: Occasional Pumping Exclusive Pumping i.e. -
Page 19: Technical Specifications
Technical specifications Vacuum Range 15 - 330 mmHg Cycle Speed (Expression Mode) 24 - 70 CPM (variable) Cycle Speed (Massage Mode) 70 CPM (constant) Net Weight 0.33 kg (0.73 lbs) Warranty 2 Years Battery Life 3 Hours Time to Charge 4.5 Hours Motor Life 800 Hours... -
Page 20: Warranty
Warranty This product is warranted by Pumpables to be free from defects in material and manufacturing for a period of two years from the date of purchase. This warranty does not cover damage caused by accident, misuse, abuse, improper maintenance, unauthorized modification, or connection to an improper power supply.
Need help?
Do you have a question about the GENIE ADVANCED and is the answer not in the manual?
Questions and answers