Table of Contents
Advertisement
Available languages
Available languages
Quick Links
Advertisement
Chapters
Table of Contents

Related Manuals for CADO Leaf 320i


Summary of Contents for CADO Leaf 320i
- Page 1 Instruction Manual 취급설명서 使用說明書 AP-C320i Air Purifier 320i...
- Page 2 ENGLISH ............2 Make sure you read this document, as well as the attached "Safety Precautions", before using the appliance. Please keep these documents after reading. 한국어 ............26 사용하기 전에 반드시 이 책자 및 ' 안전 주의사항 ' ( 별책 ) 을 읽어 주십시오 . 이...
- Page 3 Instruction Manual...
-
Page 4: Table Of Contents
Table of Contents Overview ..........4 Cleaning Procedure ......14 Base unit ..........14 Assembly of base unit ......5 Cleaning of filter ........16 Installing a filter ........5 Filter replacement notice ....... 16 Connecting power ........7 Filter replacing method ......17 Notes on Installation ...... -
Page 5: Overview
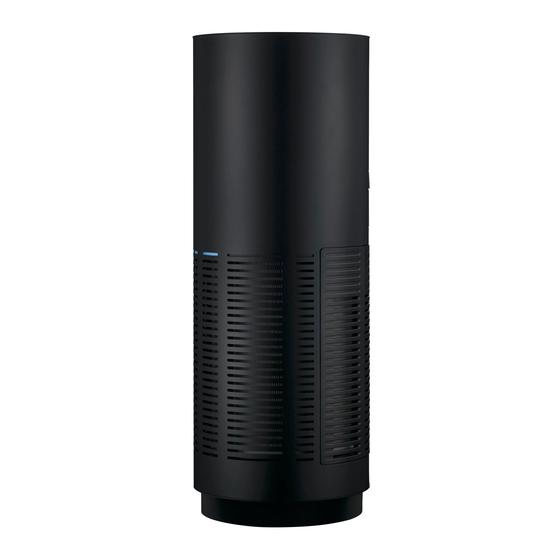
Overview Illumination intensity sensor Handle Air outlet Sensor cover Odor sensor Control panel / dust sensor (Inside) Cover switch Odor & dust Filter cover monitor Air inlet Filter Photocatalytic lamp (Inside) Power cord This product does not eliminate all harmful substances in the air (for instance the product is not capable of removing carbon monoxide that is contained in cigarette smoke). -
Page 6: Assembly Of Base Unit
Assembly of base unit Installing a filter Slide down the cover switch located on the Take out the filter from the plastic bag. rear side of the base unit and remove the filter cover. • Always turn the power of the base unit OFF when installing a filter. •... - Page 7 Cut open the plastic bag containing the Face the ribbons outward and insert filter and take out the filter. the filter deep into the base unit to set. Ribbons Close the filter cover. Fit the cover onto the base unit while the cover switch is still slided down.
-
Page 8: Connecting Power
Connecting power Connect the power cord to the power cord Insert the power plug into the power connecting port. outlet. All indicators as well as the odor & dust monitor flash for about 2 seconds when the power is connected normally. Power cord connecting port... -
Page 9: Notes On Installation
Notes on Installation In order to ensure that the air circulates well, do not place any objects around the base unit and secure a space of at least 30 cm. Do not use the product on carpets or rugs Do not use the product at a location on an with long piles. -
Page 10: Operating Instructions
Operating Instructions Control panel Air volume Power indicator Illumination indicator intensity sensor Timer Operation indicator mode indicator Filter replacement indicator (red) / Wi-Fi indicator (green) * Available with models that Power button Air Volume button Light-off button feature Wi-Fi function only. Mode button Timer button Starting operation... -
Page 11: Changing Operation Mode
Changing operation mode Press the Mode button while the appliance is in operation. The Operation mode (indicator) switches in the following sequence. (Auto) (Eco) (Rapid) Information on operating modes The product ordinarily operates in this mode. The condition of the room is detected by sensors and the product operates with the air volume switched Auto between Low, Middle and High automatically. -
Page 12: Manual Mode
The Timer (indicator) switches in the following sequence. OFF (turned off) All of the Timer indicators turn on when the 24 hour timer operation is started by the cado sync application. When the Timer button on the base unit is pressed under this condition, all of the Timer indicators are turned off and the 24-hour timer operation triggered by the cado sync application is released. -
Page 13: Photocatalytic Lamp
Photocatalytic lamp • The photocatalytic technology that reacts with visible light has been adopted for the activated carbon contained in the filter. • A high intensity blue LED is used for the lamp inside the product, which does not present any impact on human body as is the case with lamps of ultraviolet type, but since the intensity of the light is strong, the power of the base unit must be turned off and the user must avoid looking directly at the light when removing the filter, as in when replacing the filter. -
Page 14: Odor & Dust Monitor
Odor & dust monitor The condition of the air is detected by built-in sensors and the air environment is displayed by the three colors of blue, yellow and orange. Monitor color Air environment of the room Blue Clean Yellow Slightly polluted Orange Polluted Notes on odor sensor and dust sensor... -
Page 15: Cleaning Procedure
Cleaning Procedure • Continuing to use the product without cleaning can result in accumulation of dust and the air purifier may not be able to provide full performance. Clean the product periodically (Once or more per month is recommended). • Failure to clean the product periodically may void the manufacturer warranty when any malfunction occurs due to contamination or the like. - Page 16 Use soft cloth to wipe off dust on the base Vacuum dust on and inside the air inlet unit. and air outlet, as well as inside the base unit by using a vacuum cleaner or the like. Alternatively, use a soft cloth and wipe them off.
-
Page 17: Cleaning Of Filter
• The Filter Replacement indicator operates also as the Wi-Fi Connectivity indicator. When the indicator is turned on or flashing in green, it is indicating the Wi-Fi connectivity status. • The filter replacement timing can also be verified by using the cado sync application. -
Page 18: Filter Replacing Method
Filter replacing method Refer to “Assembly of base unit” to remove the old filter and replace it with a new filter. -
Page 19: Information On Filter
Information on filter • The filter is a consumable item and must be purchased and replaced periodically. • The replacement timing of the filter can vary depending on the environment in which the product is used, but the rough standard is once every six months to a year. •... -
Page 20: Initialization Of Filter Replacement Indicator
Initialization of Filter Replacement indicator The Filter Replacement indicator remains on even when the filter has been replaced. Initialize the Filter Replacement indicator by performing the following procedure. Follow the same initialization procedure described below also when the filter is replaced before the Filter Replacement indicator comes on. -
Page 21: Troubleshooting
Troubleshooting Symptom Verification item Solution Power does not turn Is the power plug securely Insert the power cord securely in the inserted in the power outlet? power cord connecting port of the base unit and the power outlet. Air does not flow Has the filter been taken out Take the filter out of the plastic bag and Air volume is low... - Page 22 Symptom Verification item Solution Is the sensor cover dirty? Clean and remove dirt on the sensor cover. * The Odor & Dust monitor may remain yellow or orange for some time when odor generating substances are emitted in the room, such as when a room is freshly renovated.
- Page 23 Symptom Verification item Solution Air cleaning is not Is the product positioned Keep the position the product at least effective. at a location where there 30 cm away from walls, furnitures, are obstructions in the curtains and the like to the front and surrounding area, which back, right and left, as well as above.
- Page 24 Symptom Verification item Solution The odor of the Is the air inlet or outlet dirty? Clean and remove dirt off the air inlet or base unit is a little outlet on the base unit. If the condition annoying. does not improve even after cleaning the product, replace the filter with a new one.
-
Page 25: Specifications
Specifications LEAF 320i Model name AP-C320i Power supply 100-240V~ / 50-60Hz Applicable floor area Rapid mode: 42 m Rapid Operation mode Middle High (2 hours) Power consumption [W] Air volume rate [m Operating sound [dBA] External dimensions [mm] Diameter approx. 242 x Height approx. 652 Weight [kg] Approx. - Page 27 취급설명서...
- Page 28 목차 청소 방법 ..........38 각 부분의 명칭 ........28 본체 ............38 본체 조립 방법 ........29 필터 점검 ........... 40 필터 장착 ........... 29 필터 교체 시기 알림 ........40 전원 연결 ........... 31 필터의 교체 방법 ........41 설치에 관하여 ........32 필터에...
-
Page 29: 각 부분의 명칭
각 부분의 명칭 조도 센서 손잡이 배기구 센서 커버 냄새 센서 / 먼지 조작 패널 센서 ( 본체 내부 ) 커버 스위치 냄새 먼지 필터커버 모니터 흡기구 필터 광촉매 램프 ( 본체내부 ) 전원 코드 본 제품은 공기 중의 모든 유해 물질을 제거하지는 못합니다 . ( 예를... -
Page 30: 본체 조립 방법
본체 조립 방법 필터 장착 본체 뒷면의 커버 스위치를 아래로 밀고 , 필 비닐 포장지에 들어 있는 필터를 꺼냅니다 . 터커버를 분리합니다 . • 필터를 장착할 때는 반드시 본체 전원을 꺼 주십시오 . • 새 필터를 장착할 때는 필터를 비닐 포장지에서 꺼내서 장착해 주십시오 . - Page 31 리본이 바깥쪽을 향하게 하여 , 필터를 필터가 들어 있는 비닐 포장지를 뜯고 필터를 꺼냅니다 . 본체 안쪽까지 넣어 고정시킵니다 . 리본 필터 커버를 덮습니다 . 커버 스위치를 아래로 밀면서 커버를 본체에 끼우십시오 . 필터 커버가 제대로 장착되어 있지 않으면 , 작동하지 않습니다 . ( 전원...
-
Page 32: 전원 연결
전원 연결 전원 코드를 전원 코드 연결구에 연결합니다 . 전원 플러그를 콘센트에 꽂습니다 . 전원이 정상적으로 연결되면 , 모든 표시등과 냄새 먼지 모니터가 약 2 초 간 껴집니다 . 전원 코드 연결구... -
Page 33: 설치에 관하여
설치에 관하여 공기 순환을 원활히 하기 위해 본체 주변에는 물건을 두지 말고 , 주위에서 약 30 cm 이상 떨어 뜨려 설치하십시오 . 털이 긴 카펫 위에서 사용하지 마십시오 . 본체가 경사지거나 불안정한 곳 및 높은 곳에서 기울거나 , 먼지 등이 심하게 끼어 고장의 원인이 사용하지... -
Page 34: 사용 방법
사용 방법 조작 패널 풍량 표시등 전원 표시등 조도 센서 작동 모드 타이머 표시등 표시등 필터 교체 표시등 ( 적색 )/ Wi-Fi 표시등 ( 녹색 ) ※ Wi-Fi 기능 탑재 기종만 전원 버튼 풍량 버튼 소등 버튼 타이머 버튼 모드 버튼 작동... -
Page 35: 작동 모드 전환
작동 모드 전환 작동 중에 모드 버튼을 누릅니다 . 작동 모드 ( 표시등 ) 는 아래와 같은 순서로 바뀝니다 . ( 자동 ) ( 에코 ) ( 급속 ) 작동 모드에 관하여 평상 시에는 자동 모드에서 사용합니다 . 실내 상태를 센서가 감지해 자동으로 풍량을 강 / 중 / 자동... -
Page 36: 수동 모드
끔 ( 소등 ) cado sync 애플리케이션에서 24 시간 타이머 작동을 시작한 경우에는 , 모든 타이머 표시등 이 켜집니다 . 이 상태에서 본체의 타이머 버튼을 누르면 모든 타이머 표시등이 꺼지고 , cado sync 애플리케이션에서 조작한 24 시간 타이머 작동이 해제됩니다 . -
Page 37: 광촉매 램프
광촉매 램프 • 필터에 포함된 활성탄은 가시광선에 반응하는 광촉매 기술을 채용 하고 있습니다 . • 제품에서 사용되는 표시등에는 고휘도의 청색 LED 를 사용하고 있으며 , 자외선 타입과는 달리 사 람의 눈 등 인체에 영향을 끼치지 않습니다 . 다만 강한 빛을 내므로 , 교체 시 등 필터를 탈거할 때 는... -
Page 38: 냄새 먼지 모니터
냄새 먼지 모니터 공기 상태를 내장 센서로 감지하여 , 청색 / 황색 / 주황색의 세 가지 색으로 실내 공기 상태를 알려 줍 니다 . 모니터 색 실내 공기 상태 청색 깨끗함 황색 약간 오염되어 있음 주황색 오염되어 있음 냄새 센서와 먼지 센서에 관하여 •... -
Page 39: 청소 방법
청소 방법 • 청소하지 않고 계속 사용하면 , 먼지 등이 쌓여 공기 청정기의 기능을 충분히 발휘하지 못할 수 있습니다 . 정기적으로 청소를 실시해 주십시오 . ( 월 1 회 이상 권장 ) • 정기적으로 청소를 실시하지 않을 경우 , 오염 등으로 인한 고장 발생 시 제조사 보증 수리 등을 받지... - Page 40 흡기구와 배기구 , 본체 내부의 먼지를 부드러운 천으로 본체의 먼지를 닦아 냅니다 . 청소기 등으로 빨아냅니다 . 부드러운 천으로 닦아낼 수도 있습니다 . 센서 커버에 부착된 먼지를 면봉 등으로 닦아 냅니다 .
-
Page 41: 필터 점검
필터 교체가 필요하면 필터 교체 지시등이 적색으로 켜집니다 . 새로운 필터로 교체하십시오 . • 필터 교체 표시등은 Wi-Fi 접속 표시등의 기능도 갖고 있습니다 . 표시등이 녹색으로 점멸하 거나 켜져 있으면 Wi-Fi 접속 상태를 표시합니다 . • cado sync 애플리케이션에서도 필터 교체 시기를 확인할 수 있습니다 . -
Page 42: 필터의 교체 방법
필터의 교체 방법 " 본체 조립 방법 " 을 참고로 사용한 필터를 탈거한 후에 , 새로운 필터로 교체해 주세요 . -
Page 43: 필터에 관하여
필터에 관하여 • 필터는 소모품이므로 정기적으로 새로운 필터를 구매하여 교체해 주십시오 . • 필터의 교체 시기는 사용 환경에 따라 다르지만 , 6 개월 ~ 1 년에 1 회 정도 교체하는 것이 좋습니다 . • 공기 오염이 심한 곳에서 사용하는 경우 , 교체 시기가 빨라질 수 있습니다 . •... -
Page 44: 필터 교체 지시등의 초기화
필터 교체 지시등의 초기화 필터 교체를 마쳐도 필터 교체 지시등은 꺼지지 않습니다 . 아래와 같은 순서로 필터 교체 지시등을 초기화 하십시오 . 필터 교체 지시등이 점등되지 않은 상태에서 필터를 교체한 경우에도 , 아래와 같이 초기화 조작을 실시하십시오 . 전원 버튼을 누르고 본체의 전원을 켭니다 . 소등... -
Page 45: 고장 시 확인 사항
고장 시 확인 사항 이런 경우에는 확인 사항 대처 방법 전원이 켜지지 않는다 전원 플러그가 콘센트에 제대로 전원 코드를 본체의 전원 코드 연결되어 있습니까 ? 연결구 및 콘센트에 확실하게 연결해 주세요 . 바람이 나오지 않는다 필터를 장착할 때 필터를 비닐 필터를... - Page 46 이런 경우에는 확인 사항 대처 방법 냄새 먼지 모니터가 먼지 센서와 냄새 센서는 온도와 잠시 기다렸다가 냄새 먼지 주황색인 채 바뀌지 습도의 변화나 스프레이 등에서 모니터가 황색 또는 청색으로 바뀌는지 확인하십시오 . 않는다 나오는 가스에도 반응할 수 있습니다 . 센서 커버가 더럽지 않습니까 ? 청소를...
- Page 47 이런 경우에는 확인 사항 대처 방법 본체의 전후 , 좌우 , 상부는 벽 , 공기 청정 효과를 얻을 주위에 장애물이 있거나 공기 가구 , 커튼 등으로부터 약 30 cm 수 없다 순환이 나쁜 곳에 설치하지 않았습니까 ? 이상 떨어뜨려 주십시오 . 본체의...
- Page 48 이런 경우에는 확인 사항 대처 방법 본체의 냄새가 신경 본체의 흡배기구가 더럽지 청소를 실시하여 본체 않습니까 ? 쓰인다 흡배기구의 오염 물질을 제거하십시오 . 청소를 해도 개선되지 않으면 필터를 새것으로 교체하십시오 . 냄새가 심한 곳에서 사용하고 담배나 고기 굽는 냄새 등과 있지...
- Page 49 사양 LEAF 320 i AP-C320i 모델명 100-240V~ / 50-60Hz 전원 급속 모드 : 42 m ※ 1 적정 사용 면적 급속 작동 모드 약 중 강 ( 2 시간 ) 소비전력 [W] 풍량 [m 작동 소음 [dBA] 외형 치수 [mm] 직경...
- Page 51 使用說明書...
- Page 52 目錄 保養方法 ..........62 各部件名稱 ...........52 主機 ............62 組裝主機 ..........53 濾網保養 ............ 64 安裝濾網 ............ 53 更換濾網通知 ..........64 連接電源 ............ 55 濾網的更換方法 .......... 65 關於設置 ..........56 關於濾網 ............ 66 更換濾網指示燈的初始化 ......67 使用方法 ..........57 操作面板 ............ 57 疑似故障 ..........68 開始運轉...
-
Page 53: 各部件名稱
各部件名稱 燈光感應器 把手 排氣口 感應器護蓋 氣味感應器 操作面板 灰塵感應器 (主機內部) 護蓋開關 氣味灰塵 濾網護蓋 監測器 進氣口 濾網 光觸媒燈 (主機內部) 電源線 本產品並無法去除空氣中所有的有害物質。 (例如,無法去除香菸煙霧中的一氧化碳等。) 另外,本產品無換氣扇功能。在密閉的房間內使用時,請定期開窗換氣。... -
Page 54: 組裝主機
組裝主機 安裝濾網 將主機背面的護蓋開關向下滑動,拆下濾網 取出裝在塑膠袋中的濾網。 護蓋。 • 安裝濾網時,請務必關閉主機的電源。 • 安裝新的濾網時,請先將濾網從塑膠袋中取出後再安裝。... - Page 55 剪開裝著濾網的塑膠袋,取出濾網。 將緞帶朝向外側,並將濾網安裝至主機 裡面。 緞帶 關上濾網護蓋。 請在護蓋開關維持向下滑開的狀態,將護蓋 嵌入主機。 在濾網護蓋安裝不完全的狀態下,主機便 無法開始運轉。(電源指示燈會緩慢閃 爍。)...
-
Page 56: 連接電源
連接電源 將電源線連接至電源線連接孔。 將電源插頭插入插座中。 電源若有正常連接,所有的指示燈與氣味灰 塵監測器會亮燈約 2 秒。 電源線連接孔... -
Page 57: 關於設置
關於設置 為使空氣充分循環,請勿在主機周邊放置物品,並確保約 30cm 以上的空間。 請勿在長毛地毯上使用。否則主機可能會傾斜, 請勿在傾斜的場所或不穩定的場所、 高處使用產 或堆積灰塵等異物,而導致故障。 品。 否則可能有掉落或翻倒、 錯誤動作的危險性。... -
Page 58: 使用方法
使用方法 操作面板 風量指示燈 電源指示燈 燈光感應器 定時器 運轉模式 指示燈 指示燈 更換濾網指示燈(紅) Wi-Fi 指示燈(綠) ※ 僅限搭載 Wi-Fi 的機種 電源按鈕 風量按鈕 熄燈按鈕 模式按鈕 定時器按鈕 開始運轉 按下電源按鈕。 指示燈就會亮燈,並在自動模式 下開始運轉。 若在運轉中按下電源按鈕,指示燈就會熄滅,並停止運轉。... -
Page 59: 改變運轉模式
改變運轉模式 在運轉中按下模式按鈕。 運轉模式(指示燈)將依照以下順序切換。 (自動) (省電) (急速) 關於運轉模式 一般在此模式下使用。 利用感應器檢測房間的狀態,並自動切換弱、中、強 自動 的風量進行運轉。 在夜間或、空氣髒污較輕微時使用此模式。 只有電源按鈕與省電模式的指示燈亮燈,並以弱的風 省電 量運轉。(光觸媒燈將熄滅。) 想要快速清淨空氣時使用此模式。 在比強風更強的風量下運轉, 2 小時後會自動切換為 急速 自動模式。 無法同時設定運轉模式與手動模式。... -
Page 60: 手動模式
手動模式 在運轉中按下風量按鈕。 無論房間空氣的髒污程度如何,可依您的喜好設定風量。 手動模式(指示燈)將依照以下順序切換。 (弱) (中) (強) 無法同時設定手動模式與運轉模式。 定時運轉 在運轉中按下定時器按鈕。 指定的時間結束後就會自動關閉電源。 定時器時間(指示燈)將依照以下順序切換。 關閉(熄燈) 從 cado sync 應用程式開始進行 24 小時定時運轉時,所有的定時指示燈都會亮燈。 若在該狀態下按下主機的定時器按鈕時,所有的定時指示燈將熄滅,並解除透過 cado sync 應用程式進行的 24 小時定時運轉。... -
Page 61: 光觸媒燈
光觸媒燈 • 濾網中含有的活性碳,採用了會在可見光下反應的光觸媒技術。 • 產品內的燈使用高亮度的藍色 LED,並不會像紫外線對眼睛等人體部位造成影響,但由於 光線很強,在更換等需拆下濾網的情況下,請關閉主機的電源並不要直視光線。 減光功能 位於操作面板上的燈光感應器,會自動檢測周圍的亮度。周圍變暗時,亮著的操作面板指示燈、 氣味灰塵監測器、排氣口燈會自動變暗。 熄燈功能 若在運轉中按下熄燈按鈕,氣味灰塵監測器、排氣口燈就會熄滅。 再按一次按鈕就會再次亮燈。 當熄燈功能運作時,在周圍變暗的情況下,主機內部的光觸媒燈會自動熄滅。 排氣口燈 操作面板 指示燈 燈光感應器 氣味灰塵 監測器 光觸媒燈 (主機內部)... -
Page 62: 氣味灰塵監測器
氣味灰塵監測器 透過內建感應器檢測空氣的狀態,並以藍、黃、橘3種顏色顯示房間的空氣環境。 監測器顏色 房間的空氣環境 藍 乾淨 黃 輕微髒污 橘 髒污 關於氣味感應器與灰塵感應器 • 氣味感應器主要檢測香菸、化妝品等的氣味。 • 氣味感應器也可能對噴霧器噴出的氣體或酒精成分、溫度或濕度的變化有反應。另外,依據氣味的 成分不同,也可能沒有反應。 灰塵感應器也可能對溫度或濕度的變化有反應。 • 氣味感應器是檢測室內空氣的相對狀態。因此,即使氣味強烈,但氣味的強弱沒有變化時, 感應器可能會沒有反應。 • 灰塵感應器是檢測室內塵蟎、花粉等香菸的煙霧等髒污。 • 連接電源線之後的約 5 分鐘,感應器會進行初始化,此時無法正確檢測。另外,由於氣味感應器是 以初始化時的空氣狀態為基準開始運作,因此建議在室內空氣乾淨時(沒有香菸的煙霧等髒污時) 連接電源線。... -
Page 63: 保養方法
保養方法 • 若不保養仍持續使用,可能會堆積灰塵等異物,便無法充分發揮空氣清淨機的性能。 請定期進行保養。(建議每月保養 1 次以上) • 若未定期進行保養,而因髒污等情形發生故障時,可能會被排除於廠商保證對象之外。 準備市售的軟布或棉花棒、吸塵器等,便可方便 嚴重髒污時,請使用加水稀釋的中性洗潔 進行保養。 劑。 • 請勿使用非中性的洗潔劑。 否則可能會損壞主機。 • 清洗後請用乾淨的布將中性洗潔劑充分 擦乾淨。 • 保養主機時,請事先將濾網拆下,以免 液體溶劑等潑灑在濾網上。 請勿使用硬質的刷子。 否則可能會損壞主機。 主機 關閉主機的電源並將電源線拔下。... - Page 64 用軟布擦拭主機上的灰塵。 用吸塵器等清除進氣口與排氣口、主機內部 的灰塵。或用軟布擦拭。 用棉花棒等清除附著在感應器護蓋上的灰 塵。...
-
Page 65: 濾網保養
濾網保養 濾網側面的網子部分,具有預過濾的功能。請定期用吸塵器等清除附著在網子上的灰塵等髒污。或用 軟布擦拭。 更換濾網通知 需要更換濾網時,濾網更換指示燈會亮紅燈。屆時請更換新的濾網。 • 濾網更換指示燈與 Wi-Fi 連線指示燈兼用。指示燈呈綠色閃爍並亮起時,表示 Wi-Fi 為連線 狀態。 • 您也可從 cado sync 應用程式確認濾網的更換時間。... -
Page 66: 濾網的更換方法
濾網的更換方法 請先參考「組裝主機」,拆下舊的濾網後,再更換新的濾網。... -
Page 67: 關於濾網
關於濾網 • 濾網為消耗品,請定期購買新的濾網進行更換。 • 濾網的更換時間以 6 個月∼1 年更換 1 次左右為基準,但會依據使用環境不同而增減。 • 在空氣中的髒污較多的地方使用時,更換時間可能會較早。 • 依據使用環境不同,可能在數週到數個月就會從濾網發出氣味,而必須更換濾網。 • 氣味越來越明顯時,更換濾網或將濾網放在通風良好的地方曝曬約 1 天也可能改善。 (並不保證可恢復性能。)... -
Page 68: 更換濾網指示燈的初始化
更換濾網指示燈的初始化 即使濾網更換結束後,更換濾網指示燈仍不熄滅。請依照以下步驟,將更換濾網指示燈初始化。 在更換濾網指示燈還沒亮燈就更換濾網時,也請進行以下的初始化操作。 按著熄燈按鈕約 5 秒後,更換濾網指示燈就 按下電源按鈕,開啟主機的電源。 會閃紅燈。 5sec 3 . 此時立刻再輕按一次熄燈按鈕後,更換濾網 指示燈就會熄滅,便完成初始化。... -
Page 69: 疑似故障
疑似故障 症狀 確認事項 處置 電源無法接通 是否已確實將電源插頭插入插座 請將電源線確實插入主機的電源 中? 線連接孔及插座中。 機器不出風 安裝濾網時,是否已將濾網從塑 請先將濾網從塑膠袋中取出,再 風量很小 膠袋中取出? 重新安裝。 主機的進排氣口是否髒污? 請進行保養,清除主機的進排氣 口的髒污。若進行保養後仍未改 善時,請更換新的濾網。 操作面板上的電源指示 濾網護蓋是否已完全關閉? 請確認濾網是否已正確安裝,並 燈閃爍 將濾網護蓋完全關閉。 氣味灰塵監測器一直顯 灰塵感應器和氣味感應器也可能 請耐心等候,確認氣味灰塵監測 示橘色 對溫度、濕度的變化,或對噴霧 器是否轉變為黃色或藍色。 器等噴出的氣體有反應。... - Page 70 症狀 確認事項 處置 感應器護蓋是否髒污? 請進行保養,清除感應器護蓋的 髒污。 ※ 在剛裝潢好的室內等,會持續 產生異味物質的情況下,氣味 灰塵監測器可能會持續亮黃燈 或亮橘燈。 氣味灰塵監測器一直顯 是否設置於周圍有障礙物等,空 請讓主機的前後、左右與上方, 示藍色 氣循環不佳的地方? 都離牆壁、家具、窗簾等約 30cm 以上。 感應器護蓋是否髒污? 請進行保養,清除感應器護蓋的 髒污。 連接電源線、接通電源後是否已 連接電源線、接通電源之後的約 5 分鐘,感應器會進行初始化, 經過5分鐘以上? 此時無法正確顯示狀態。請耐心 等候,確認氣味灰塵監測器是否 轉變為其他顏色。...
- Page 71 症狀 確認事項 處置 空氣清淨效果不佳 是否設置於周圍有障礙物等,空 請讓主機的前後、左右與上方, 氣循環不佳的地方? 都離牆壁、家具、窗簾等約 30cm 以上。 主機的進排氣口是否髒污? 請進行保養,清除主機的進排氣 口的髒污。若進行保養後仍未改 善時,請更換新的濾網。 預濾網上是否附著灰塵? 請參閱「保養方法」,清除灰 塵。 氣味灰塵監測器雖然變 是否使用了自動模式以外的模 選擇自動模式以外的模式時,風 色,但風量沒有變化 式? 量不會依據氣味灰塵監測器的顯 示而變動。 即使在空氣乾淨的狀態, 是否使用了自動模式? 在自動模式運轉中,即使在空氣 自動運轉仍不停止 乾淨的狀態下,仍會以手動模式 弱的風量進行連續運轉。 主機有異味 主機的進排氣口是否髒污? 請進行保養,清除主機的進排氣 口的髒污。若進行保養後仍未改 善時,請更換新的濾網。...
- Page 72 症狀 確認事項 處置 是否在氣味濃厚的房間使用本 若在吸菸區或烤肉店等氣味較為 機? 濃重的地方長時間使用本機,可 能需要經常更換濾網。若在這樣 的環境下使用本機,建議定期讓 房間換氣並同時使用本產品。 操作面板的指示燈閃爍 可能是馬達故障或主機內部有異 按下電源按鈕後,警告聲就會停 並且發出「嗶嗶」的警 物混入。 止。請先拔下電源線,並確認有 告聲 無異物落入濾網內。若警告聲仍 不停止,請向您購買產品的銷售 店或本公司客服中心洽詢。...
- Page 73 規格 LEAF 320i AP-C320i 型號 100-240V~ / 50-60Hz 電源 急速模式 : 42 m ※1 適用面積 急速 運轉模式 弱 中 強 (2 小時) 消耗功率 [W] 風量 [m 運轉音量 [dBA] 外形尺寸 [mm] 直徑約 242 × 高度約 652 重量 [kg] 約 6.4 (含濾網) ※2 電源線長度...
- Page 75 Co., Ltd. 4-2-11 Shirokanedai, Minato-ku, Tokyo 108-0071...
- Page 76 Co., Ltd. | Tokyo | cado.com JA-00051-0302...
- Page 77 Instruction Manual Safety Precautions 취급설명서 안전상의 주의사항 使用說明書 安全上的注意事項 AP-C320i Air Purifier 320i...
- Page 78 ENGLISH ............2 한국어 ............8 繁體中文 ............14...
- Page 79 Safety Precautions...
- Page 80 Safety Precautions About This Document Important precautions to prevent accidents are featured in this document. Make sure you read this document, as well as the attached “Instruction Manual” before using the appliance. Please keep these documents after reading. Follow these instructions. Be sure to follow contents featured in this manual to prevent harm to body and damage or loss of property.
- Page 81 Warning Prohibited Do not insert or remove the power plug with Do not use the product in following █ █ wet hand. locations: This may cause electric shock. • Locations with combustible gas or metallic dust Gas or dust may be drawn into the base unit and Do not damage the power cord.
- Page 82 Warning Prohibited Do not use chloride or alkaline detergent for Do not allow elderly people, children, █ █ cleaning. people with physical or communicating disabilities to operate the product alone. This may produce toxic gas and cause health They must only operate the product with hazard.
- Page 83 Caution Prohibited Do not place any object, sit or stand on the Thoroughly wipe off water and allow the █ █ base unit. product to dry after cleaning and never use it when still wet. This may cause the product to tip over and get damaged or malfunction.
- Page 84 Caution Prohibited Do not use the product at the same location Do not place the product on wooden floor █ █ for a long time. or furniture for a long time. Using the product at the same location over long Placing the product on the same location for a long hours may contaminate the surrounding area and time can leave traces of rubber feet on the bottom...
- Page 85 안전상의 주의사항...
- Page 86 안전상의 주의사항 이 책에 관하여 이 설명서는 사고를 방지하기 위해 꼭 지켜야 할 중요한 주의사항에 관하여 기재하고 있습니다 . 제품을 사용하기에 앞서 , ‘안전상의 주의사항’ 및 취급설명서 ( 별책 ) 를 반드시 읽으신 후 , 제품을 올바르고 안전하게 사용해 주십시오 . 이...
- Page 87 경고 금지 분해 , 개조 , 수리하지 마십시오 . 젖은 손으로 전원 플러그를 꽂거나 뽑지 █ █ 마십시오 . 화재 또는 감전 , 부상의 원인이 됩니다 . 수리가 감전의 원인이 됩니다 . 필요한 경우에는 구입하신 판매점 또는 고객 센터에 문의해 주십시오 . 전원...
- Page 88 경고 금지 세척이나 청소할 때에는 염소계 , 알칼리성 노약자와 어린이 , 장애인 , 의사소통이 █ █ 세제를 사용하지 마십시오 . 곤란한 사람이 제품을 사용하는 경우에는 , 보호자 또는 안전 책임자에게 적절한 세제에서 유해 가스가 발생하여 건강을 해칠 지도와 감독을 받아야 하며 , 혼자서 우려가...
- Page 89 주의 금지 본체 위에 물건을 두거나 , 올라가지 청소 후에는 수분을 충분히 제거하고 나서 █ █ 마십시오 . 건조시키고 , 젖은 채로 사용하지 마십시오 . 제품이 넘어져 고장 및 파손의 원인이 됩니다 . 감전이나 부상의 원인이 됩니다 . 불안정한 장소에 두지 마세요 . 벤젠...
- Page 90 주의 금지 장시간 같은 장소에서 사용하지 장시간 동안 나무 바닥이나 가구 등의 위에 █ █ 마십시오 . 직접 올려놓지 마십시오 . 장시간 같은 장소에서 사용하면 , 본체 주변의 장시간 같은 장소에 두면 본체 바닥면의 고무 벽이나 바닥이 더러워질 수 있습니다 . 지지대...
- Page 91 安全上的注意事項...
- Page 92 安全上的注意事項 關於本說明書 本說明書中記載了為防止事故發生的重要注意事項。 使用前請務必閱讀本書及另一本使用說明書的「安全上的注意事項」,再正確且安全地使用產品。 閱畢後,也請妥善保管本書。 請務必遵守 為防止對人的危害、財產的損害於未然,請務必遵守本書記載的內容。 記載內容有區分錯誤使用時所產生的危害或損害程度。 標示說明 表示 表示 「可能導致死亡或受重 「可能導致受傷或對 警告 注意 傷」。 財產造成損害」。 圖示說明 表示 表示 「必須執行的強制 「不可執行的禁止事 項」。 事項」。 禁止 指示...
- Page 93 警告 禁止 請勿用濕手插拔電源插頭。 請勿分解、改造、修理。 █ █ 否則可能導致觸電。 否則可能導致火災或觸電、受傷。欲修理時, 請向您購買產品的銷售店,或本公司客服中心 請勿使電源線破損。 █ 洽詢。 否則可能短路或斷線,導致觸電或火災。 █ 請勿在以下場所使用。 • 請勿加工或損壞電源線。 • 有可燃性氣體或金屬製粉塵的場所 • 請勿強行彎曲、拉扯、扭曲、捆紮電源線, 否則可能因易燃性或吸入主機導致起火、冒煙。 或在電源線上放重物。 • 浴室等高溫、潮濕、會潑到水的場所 • 請勿靠近發熱器具或加熱。 否則可能因漏電導致火災或觸電。 • 請握住電源插頭拔起電源線。 • 有機械油或食用油的油成分懸浮的場所 • 搬運時請勿拉扯電源線。 否則主機可能會裂開,使電源部或風扇部位露 出,導致觸電或受傷。 • 請勿使用破損的電源線。萬一電源線破損時, 請向您購買產品的銷售店,或本公司客服中心 請勿泡水或潑水。 █...
- Page 94 警告 禁止 清潔時請勿使用含氯、鹼性洗潔劑。 若未接受監護人或安全負責人的適當指導監 █ █ 督下,請勿讓年長者、兒童、身體障礙者、 否則可能會從洗潔劑產生有毒氣體,危害健康。 溝通困難者單獨使用產品。 打雷時,請勿觸碰主機或電源插頭。 █ 請注意不要讓兒童當成玩具玩耍。 █ 否則可能導致觸電。 否則可能導致意外受傷或誤食、主機故障或 觸電。 警告 指示 請將電源插頭確實插到底。 不使用時,或保養、檢查、移動時請務必停 █ █ 止運轉,並拔下電源插頭。 若未完全插入,可能導致觸電或火災。 • 請勿使用受損的電源線或電源插頭, 否則機器意外運作時,可能導致觸電或受傷。 或鬆動的插座。 有異味,或感到機器異常時,請立即停止使 █ 用。 █ 請定期用乾布擦拭電源插頭上的灰塵等 異物。 請拔下電源線,並向本公司客服中心洽詢。 若堆積灰塵,可能會因濕氣造成絕緣不良, 導致火災。...
- Page 95 注意 禁止 請勿在主機上放置物品,或坐在主機上。 保養後,請將水分充分擦乾,請勿在 █ █ 潮濕的狀態下使用。 否則可能因機器翻倒,導致破損、故障。 否則可能導致觸電或受傷。 請勿放置於不穩定的場所。 █ █ 請勿用石油精、稀釋劑擦拭,或噴灑 否則機器若翻倒,可能導致受傷或因故障而 殺蟲劑等。 觸電。 否則可能導致機器裂開或觸電、起火。 請勿遮住進氣口和排氣口。 █ 使用煙霧型殺蟲劑時,請勿運轉機器。 █ 否則空氣循環不良,可能導致發熱或起火。 否則累積的藥劑成分可能會在之後使用機器時 請勿在拆下濾網時進行運轉。 █ 釋放,損害健康。 否則不僅沒有清淨效果,還可能導致故障。 █ 請勿在電視或收音機附近使用。 請勿在廚房當成通風扇使用。 █ 否則可能會干擾影像或出現雜音。(請設置於 距離電視或收音機 1m 以上的地方。另外,若 否則可能導致濾網的壽命明顯縮短、主機變形 將電源插頭與這些機器插在同一個插座上,可 或故障。 能會干擾影像或出現雜音。屆時,請將電源插 請勿放置於陽光直射的場所,或冷氣、 █...
- Page 96 注意 禁止 請勿長時間在同一場所使用。 請勿長時間直接放在木製的地板或 █ █ 家具上。 若長時間在同一場所使用,主機周圍的牆壁或 桌子可能會有髒污。建議定期移動設置場所。 若長時間放在同一場所,可能會在設置面上留 下主機底部的橡膠腳架痕跡。請定期變更設置 場所,或使用市售的家具用防刮墊。 注意 指示 移動時,請勿抓握會從主機脫落的部位。 與燃燒器具一起使用時請務必換氣。 █ █ 否則可能因機器掉落導致受傷或故障。 本產品無法換氣。因此,可能會因燃燒器具產 生的一氧化碳導致中毒。 請正確安裝濾網。 █ 使用者與產品之間的距離不可少於 20cm。 █ 為充分發揮空氣清淨機的功能,請依照使用說 明書的步驟確實安裝原廠的濾網。...
- Page 97 注意 ! 依據低功率電波輻射性電機管理辦法 第十二條經型式認證合格之低功率射頻電機,非經許可,公司、商號或使用者均不得擅自變更頻率、 加大功率或變更原設計之特性及功能。 第十四條低功率射頻電機之使用不得影響飛航安全及干擾合法通信 ; 經發現有干擾現象時,應立即停 用,並改善至無干擾時方得繼續使用。前項合法通信,指依電信規定作業之無線電信。低功率射頻電 機須忍受合法通信或工業、科學及醫療用電波輻射性電機設備之干擾。...
- Page 99 Co., Ltd. 4-2-11 Shirokanedai, Minato-ku, Tokyo 108-0071...
- Page 100 Co., Ltd. | Tokyo | cado.com JA-00052-0302...
- Page 101 Connection Guide cado sync 접속 가이드 cado sync 連線導覽 AP-C320i Air Purifier 320i...
- Page 102 ENGLISH ............2 한국어 ............18 繁體中文 ............34...
- Page 103 Connection Guide...
- Page 104 This document primarily describes the installation method for cado sync application, as well as registration method for the product and precautions relating to using the wireless LAN features. Refer to the website for details on using cado sync, as well as for the latest information. cado.com...
- Page 105 What You Can Do with cado sync Install the cado sync application on a smart phone and complete registration of the product to start using convenient functions. Remote control function The base unit can be controlled remotely from distant locations, such as from outdoors.
- Page 106 Required Environment Check to find out items that are needed to use the cado sync application. Internet line The customer must be able to gain continuous internet connection, by having a subscription with a service provider for broadband service. High-speed internet connection, such as via optical lines, is recommended.
- Page 107 • For Android: Google Play. • For iOS: App Store. Search for the “cado sync” at websites described above and install the application. • The application itself is available for free, but communication charges may be required for downloading and operating the application.
- Page 108 Create the account An account must be created to use the cado sync application. • Either of the followings is needed to create an account. − An email and a mail software that can be used to receive emails or −...
- Page 109 3. Enter the verification code sent either The Login screen is displayed again by email to the entered email or by when the account is created correctly. Enter the registered email or the text message (short mail, SMS) to the mobile number, country/area (not entered smart phone or the like, then required when using an email) and press the “Create”...
- Page 110 Set the product to the Wi-Fi connection standby status Set the base unit to the Wi-Fi connection standby status to register the application to the product. Performing this procedure near a wireless LAN access point is recommended. • Once the product is in the Wi-Fi connection standby status, the wireless adapter, which is built in the base unit, is initialized.
- Page 111 Register the product with the application Once logged into the cado sync application, register the product for operation. In order to register with the application, the product for registration must be set to the Wi-Fi connection standby status. A screen that prompts the...
- Page 112 The name of the currently Enter the name of the The Wi-Fi symbol is connected network (SSID) product (a name can displayed when the is displayed on the screen. be made with up to product registration Enter the password 25 characters). procedure starts.
- Page 113 Once the connection Press the registered Methods for using the has been established, product to display the cado sync application are the registered product is Product Control Main described on the cado displayed on the Product Screen. Press the Power support website.
- Page 114 Initializing Wireless Adaptor The wireless adaptor built in the base unit can be initialized to the shipping condition when this product is no longer used or when the product could not be registered properly. for at least Stop operation of the base unit, then press and hold down the Power button 5 seconds.
- Page 115 In such cases Symptom Verification item • Responsive action The application is not • Verify the operating system supported by the smart phone. installed. • Restart the smart phone and check to see if the situation has been improved. The product is not • The product must be set to the Wi-Fi connection standby registered with the status to register with the application.
- Page 116 Using Wireless LAN Functions Precautions about radio waves • There is no need for a radio station license to use the product, since the wireless adaptor built in the product has been certified to comply with technical standards. Penalties may apply according to law, if following actions are taken: − Disassembling or modifying the wireless adaptor built in the product. −...
- Page 117 Notes on limitation on use Following items must be observed when using this function. We bear no responsibility whatsoever for damages that arise from using the product in manners that deviate from items described below, or from inability to use the product. •...
- Page 119 접속 가이드...
- Page 120 사용하시기 전에 반드시 이 책자 및 별책「취급설명서」 , 「안전 주의 사항」을 읽어 주십시오 . 이 책자는 다 읽고 난 후에도 잘 보관하십시오 . 이 책자에서는 cado sync 애플리케이션의 설치 방법 및 기기 등록 방법 , 무선 LAN 기능 사용 시의 주 의 사항에 관하여 설명하고 있습니다 .
- Page 121 로 할 수 있는 일 cado sync 애플리케이션을 스마트폰에 설치하고 , 사용 제품의 등록을 완료하면 , 편리한 기능을 사용할 수 있습니다 . 리모컨 기능 집이나 건물 밖과 같이 멀리 떨어진 장소에서 본체를 제어할 수 있습니다 . 각종 상태의 확인...
- Page 122 필요한 환경 cado sync 애플리케이션을 사용하실 경우에는 , 필요한 사항을 확인해 주십시오 . 인터넷 회선 상시 인터넷 접속이 가능한 브로드밴드 회선 제공자와의 계약이 필요합니다 . 광회선 등 고속 인터넷 회선 사용을 권장합니다 . 인터넷 통신 요금은 고객이 부담하셔야 합니다 .
- Page 123 애플리케이션은 아래의 앱 스토어에서 다운로드 할 수 있습니다 . • Android 의 경우 : Google Play • iOS 의 경우 : App Store 위 앱 스토어에서 ’cado sync’ 애플리케이션을 검색하여 , 설치해 주십시오 . • 애플리케이션은 무료이지만 , 애플리케이션의 다운로드나 사용에는 통신료가 별도로 발생할 수 있습니다 .
- Page 124 계정 만들기 cado sync 애플리케이션을 사용하려면 계정을 만들어야 합니다 . • 계정 만들기에는 아래 항목 중 어느 하나가 필요합니다 . − 메일을 수신할 수 있는 이메일 및 메일 프로그램 − SMS( 단문 메시지 ) 를 수신할 수 있는 스마트폰 등의 휴대폰 번호...
- Page 125 입력한 이메일로 발송된 메일 또는 스 계정 만들기가 문제없이 완료되고 나 마트폰 등으로 발송된 SMS( 단문 메 면 다시 한번 로그인 화면이 표시되므 시지 ) 본문 내에 기재되어 있는 인증 로 , 등록한 이메일 또는 휴대폰 번호 코드를 애플리케이션에 입력하고 , ’생 와...
- Page 126 기기를 Wi-Fi 접속대기 상태로 하기 애플리케이션에 기기를 등록하려면 , 본체의 Wi-Fi 를 접속대기 상태로 합니다 . 무선 LAN 액세스 포인트와 가까운 곳에서 실시할 것을 권장합니다 . • Wi-Fi 접속대기 상태가 되면 , 본체에 내장되어 있는 무선 어댑터가 초기화됩니다 . 이 미...
- Page 127 애플리케이션에 기기를 등록하기 cado sync 애플리케이션에 로그인하여 , 조작하려는 기기를 등록합니다 . 애플리케이션에 기기를 등록할 때에는 , 등록하려는 기기를 Wi-Fi 접속대기 상태로 하십시오 . 화면 안내에 따라 , ’OK’ 버 처음 애플리케이션을 사용 화면 오른쪽 아래의 플러스 하시는 경우에는 , 기기 등...
- Page 128 현재 접속 중인 Wi-Fi 네트 기기의 이름을 입력합니다 . 기기 등록을 시작하면 , 워크 이름 (SSID) 이 표시되 (25 문자 이내로 이름을 정 Wi-Fi 마크가 표시됩니다 . 면 , Wi-Fi 의 비밀번호를 입 할 수 있습니다 .) 접속이 완료될 때까지 잠시 력합니다...
- Page 129 애플리케이션의 접속을 완료하면 기기 일람 등록한 기기를 누르면 기기 사용 방법은 cado 고객지원 에 등록된 기기가 표시됩니 제어 메인화면이 표시됩니 다 . 다 . 전원 버튼 사이트에 기재되어 있습니 을 누르 고 , 기기가 제대로 제어되 다 . 화면의 오른쪽 위에 위...
- Page 130 무선 어댑터를 초기화하기 본 기기를 사용할 수 없게 되었거나 , 제대로 기기를 등록할 수 없는 경우에는 , 아래 순서대로 본 체에 내장된 무선 어댑터를 출하 시의 상태로 초기화할 수 있습니다 . 을 5 초 이상 길게 누르면 , 조작 패널의 모든 표 본체의...
- Page 131 이런 경우에는 확인 사항 ・ 대처 방법 이런 경우에는 • 스마트폰의 대응 OS 를 확인하십시오 . 애플리케이션이 설치 • 스마트폰을 재시작하여 문제가 해결되는지 확인해 주십시오 . 되지 않는다 • 기기를 등록할 때에는 , 등록하려는 기기를 Wi-Fi 접속대기 상태 애플리케이션에 기기 로...
- Page 132 무선 LAN 기능 사용에 관하여 전파에 관한 주의 사항 • 본 기기는 기술기준 적합 인증을 받은 무선 어댑터를 내장하고 있으므로 , 본 기기를 사용할 때에 무선국 허가는 필요하지 않습니다 . 다만 , 아래와 같은 사항을 행하였을 경우에는 , 법에따라 처벌될 수 있습니다 . ô...
- Page 133 사용 제한에 관하여 본 기능을 사용할 때에는 아래와 같은 사항을 준수해 주십시오 . 아래 사항에 어긋나게 사용하였을 경우 , 본 기능을 사용하는것으로 또는 사용할 수 없어서 발생하는 손해등에 관해서는 , 당사는 일체의 책임을 지지 않 습니다 . • 본 기능은 정규 판매점을 통해 구입하신 국가 내에서만 사용할 수 있습니다 . •...
- Page 135 連線導覽...
- Page 136 重要 非常感謝您選購 cado 空氣清淨機「LEAF 320i」。 使用前請務必閱讀本書及另一本「使用說明書」、「安全上的注意事項」。 閱畢後,也請妥善保管本書。 本書主要說明 cado sync 應用程式的安裝方法,以及產品的註冊方法、 使用無線 LAN 功能時的注意事項。 cado sync 的詳細使用方法和最新資訊,請參閱本公司網頁。 cado.com...
- Page 137 的功能 將 cado sync 應用程式安裝至智慧型手機,並完成產品註冊後,您便可方便的使用各功能。 遙控功能 您可在室外等地方,從遠端控制主機。 確認各種狀態 您可確認房間的空氣狀態和濾網更換通知等訊息。 24 小時計時器 產品可在您指定的時刻開始運轉、結束運轉。...
- Page 138 必要的環境 若您要使用 cado sync 應用程式時,請確認必要的設備。 網路線路 必須有可隨時連接網路的寬頻線路。 建議使用光纖線路等高速網路線路。 網路通信費需由客戶負擔。 無線 LAN 存取點 支援的網路如下所示。 • 通信方式:IEEE802.11b/g/n • 安全性:WPA Personal、 WPA2 Personal 為提升安全性,加密方式建議使用 WPA2(AES)的設定。 詳情請參閱無線 LAN 存取點的使用說明書。 智慧型手機等行動終端機器 請事先確認智慧型手機可經由無線 LAN 存取點連線至網路線路。 支援 à 版本(2018 年 10 月當時) • Android:4.2 版本以上 • iOS:8.0 以上...
- Page 139 應用程式的準備 安裝應用程式 將 cado sync 應用程式安裝至智慧型手機。 可從以下程式下載應用程式。 • Android: Google Play • iOS: App Store 請從以上程式搜尋「cado sync」應用程式並安裝。 • 應用程式雖然免費,但下載和操作應用程式時會另外產生寬頻費用。 • 應用程式的圖示或畫面尺寸可能會變更。...
- Page 140 建立帳號 若要使用 cado sync 應用程式,必須建立帳號。 • 建立帳號時,必須有以下任一個裝置。 ô 可接收郵件的電子信箱 ô 可接收 SMS(簡訊)的智慧型手機號碼 • 密碼長度必須設定在 6 個字到 12 個字之間。 啟動應用程式後會顯示登入 啟動應用程式,並輸入您使用 的國家 / 區域、用戶名稱、進 畫面,請按下「設定新的帳 號」。 行認證的電子信箱或手機號 碼、密碼後,請勾選同意隱私 條款,並按下「建立」按鈕。...
- Page 141 請將發送至您輸入的電子信箱 正確建立帳號後,將再次顯示 的郵件中,或發送至智慧型手 登入畫面,請輸入您註冊的電 機的 SMS(簡訊)中記載的 子信箱或手機號碼、國家 / 區 確認碼輸入至應用程式,並按 域(電子信箱不需要輸入此 下「建立」按鈕。 項)、密碼,再按下「登入」 按鈕。...
- Page 142 將產品設為 Wi-Fi 連線待機狀態 請將主機的 Wi-Fi 設為連線待機狀態,以便將產品註冊至應用程式。 建議您在無線 LAN 存取點附近實施此操作。 • 將主機設為 Wi-Fi 連線待機狀態後,主機內建的無線配接器就會初始化。如果已經在應 用程式上完成產品註冊的狀態,將主機設為 Wi-Fi 連線待機狀態,本產品將從已註冊至 應用程式的產品目錄中自動被刪除,請注意。 • Wi-Fi 連線待機狀態將於約 3 分鐘後自動解除,因此將產品註冊至應用程式的作業請在 3 分鐘內完成。 • 註冊時,請勿同時將多台產品設為 Wi-Fi 連線待機狀態。否則可能無法正確註冊產品。 ,開始運轉 按下主機的電源按鈕 。 長按 5 秒以上, Wi-Fi 指示燈 就會快速閃爍綠燈,進入 Wi-Fi 連線待 將電源按鈕 機狀態...
- Page 143 將產品註冊至應用程式 先登入 cado sync 應用程式後,再註冊想要操作的產品。 欲將產品註冊至應用程式時,必須先將想要註冊的產品設為 Wi-Fi 連線待機狀態。 第一次使用應用程式時, 請按下右下方的+符號, 請依照畫面的引導,按下 會顯示提醒註冊產品的畫 進行產品註冊。 「確定」按鈕。若未顯示 面,請按下「確定」。 「確定」按鈕時,請確認 智慧型手機的 Wi-Fi 連線 狀況。...
- Page 144 此時會顯示目前連線中的 請輸入產品的名稱。(可 開始註冊產品後,將顯示 Wi-Fi 網路名稱(SSID), 在 25 字以內設定名稱。) Wi-Fi 符號。 請輸入 Wi-Fi 的密碼。 連線完成前請稍候。(依 據網路環境不同,連線可 能需要一段時間。)...
- Page 145 應用程式的使用 連線完成後,已註冊的產 按下已註冊的產品後,將 方法,記載於 cado 支援網 品將顯示在註冊產品目錄 顯示產品控制主畫面。請 中。 站上。按下主畫面右上方 按下電源按鈕 ,確認是 否可正確控制產品。 的選單按鈕,從「支援」 也可連結至該網站。 註冊失敗時,請先確認無線 LAN 的連線狀態後,再依照「將產品設為 Wi-Fi 連線待機狀態」 與「將產品註冊至應用程式」的步驟再次註冊。...
- Page 146 將無線配接器初始化 不使用本產品時,或無法順利註冊產品時,可依照以下步驟,將主機內建的無線配接器初始化為 出貨時的狀態。 5 秒以上,操作面板的所有指示燈都會亮燈 在主機停止運轉的狀態下長按電源按鈕 。 5 秒 5 秒以上,就會發出「嗶ー」的 在操作面板的所有指示燈都亮燈的狀態下再次長按電源按鈕 聲音,且所有的指示燈都會熄滅,無線配接器就會初始化 。 5 秒 將無線配接器初始化後,本產品就會從已註冊至應用程式的產品目錄中自動被刪除。欲再次使 用本產品時,請依照「將產品註冊至應用程式」的步驟再次註冊產品。...
- Page 147 需要協助時 症狀 確認事項、處置方法 • 請確認智慧型手機的支援 à 版本。 無法安裝應用程式 • 請重新啟動智慧型手機並確認是否改善。 • 註冊產品時,必須先將想要註冊的產品設為 Wi-Fi 連線待機狀 無法將產品註冊至應用 程式 態。 • 請確認您使用的無線 LAN 存取點的通信方式。 → 詳情請確認無線 LAN 存取點的使用說明書。 • 請確認是否已啟用智慧型手機的 Wi-Fi(無線 LAN)功能。 → 詳情請確認智慧型手機的使用說明書。 • 請調整無線 LAN 存取點的主機和天線的方向,或重新接通電源 後,再次註冊產品。 • 請先將產品的無線配接器初始化後,再次註冊產品。 請確認是否正確連接產品的電源,且產品是否設置於無線 LAN 存 無法從智慧型手機操作...
- Page 148 使用無線 LAN 功能時的注意事項 電波相關注意事項 • 本產品已內建符合技術基準認證的無線配接器,因此使用本產品時不需要無線電台的執照。但,若從事 以下的事項,可能會受到法律懲罰。 ô 分解 改造本產品內建的無線配接器。 ô 撕下本產品的銘板或清除符合標章。 ® • 本產品使用 2.4GHz 的頻寬,因此在使用與本產品相同頻寬的 Bluetooth 或其他特殊小電力無線機器附 近,或者在微波爐等會產生強力電磁波的地方,可能會無法使用無線功能。另外,為避免電波干擾,請 注意以下事項。 使用無線 LAN 機器時的注意事項 本產品所使用的頻寬,也供微波爐等家電和產業、科學、醫療用儀器、工廠的製造產線中使用的移動 體識別用的設施內無線電台(需要執照的無線電台)、特殊小電力無線電台(不需要執照的無線電 台),以及業餘無線電台(需要執照的無線電台)使用。 1. 使用本產品前,請先確認附近是否有移動體識別用的設施內無線電台、特殊小電力無線電台以及 業餘無線電台使用該頻寬。 2. 萬一,本產品對移動體識別用的設施內無線電台發生有害的電波干擾案例時,請迅速變更本產品 的使用頻寬,或停止使用本產品(停止發射電波)。 3. 其他,本產品對移動體識別用的特殊小電力無線電台或業餘無線電台發生有害的電波干擾案例等 情況下,當您感到困擾時,請向客服中心洽詢。 • 本產品內建的無線配接器支援以下的規格。 ô IEEE802.11b/g/n ô...
- Page 149 關於使用限制 使用本功能時,請遵守以下事項。若在違反以下事項的情況下使用,以及因使用本功能、或無法使用本功能 而造成的損害等,本公司概不負責。 • 本功能只能在透過原廠銷售店購買的國家內使用。 • 將產品註冊至應用程式時,請勿連線至沒有使用權限的機器及網路上。若不慎連線,可能會被視為非法 存取。 • 本產品尚未確認可與所有支援無線 LAN 的機器連線。因此並不保證可與所有支援無線 LAN 的機器正常 運作。 • 本產品並不保證在所有的無線 LAN 存取點及住宅環境下皆可連線並發揮性能。在使用了鋼筋水泥或金屬 的建築物內,或在障礙物、微波爐和數位無線電話機、及其他使用 2.4GHz 頻寬的機器附近等,依據您使 用的環境不同,電波可能無法傳遞或中斷,使通信速度變慢。 • 為了使用本功能,必須有無線 LAN 存取點。請事先閱讀存取點的使用說明書,並進行設置、設定。 個人資訊(安全性方面)相關注意事項 • 由於無線 LAN 是利用電波來進行資訊的傳送接收,因此只要在電波可傳遞的範圍內,無論有無設定密 碼,其內容都有可能被攔截,或遭受非法存取。 • 為確保安全性,請對您使用的無線 LAN 存取點,進行適當的無線安全性設定。 • 為防止第三方的非法存取,欲將本產品轉讓、或已經轉讓給第三方時,請依照「將無線配接器初始化」 的步驟,將本產品的無線 LAN 功能初始化。...
- Page 151 Co., Ltd. 4-2-11 Shirokanedai, Minato-ku, Tokyo 108-0071...
- Page 152 Co., Ltd. | Tokyo | cado.com JA-00059-0302...
Need help?
Do you have a question about the Leaf 320i and is the answer not in the manual?
Questions and answers