Table of Contents
Advertisement
Quick Links
®
Model No. HRCCEL11900
Serial No.
Serial
Number
Decal
QUESTIONS?
As a manufacturer, we are com-
mitted to providing complete
customer satisfaction. If you
have questions, or if there are
missing parts, please call:
1-888-936-4266
Mon.–Fri. 8h00 until 18h30 EST
(excluding holidays).
CAUTION
Read all precautions and instruc-
tions in this manual before using
this equipment. Keep this manual
for future reference.
All manuals and user guides at all-guides.com
USER'S MANUAL
Visit our website at
www.healthrider.com
Advertisement
Table of Contents

Related Manuals for Healthrider E730


Summary of Contents for Healthrider E730
- Page 1 1-888-936-4266 Mon.–Fri. 8h00 until 18h30 EST (excluding holidays). CAUTION Read all precautions and instruc- tions in this manual before using Visit our website at this equipment. Keep this manual for future reference. www.healthrider.com...
-
Page 2: Table Of Contents
LIMITED WARRANTY ............Back Cover IMPORTANT PRECAUTIONS WARNING: To reduce the risk of serious injury, read the following important precautions before using the HealthRider ® E730 elliptical crosstrainer. 1. Read all instructions in this manual before 10. -
Page 3: Before You Begin
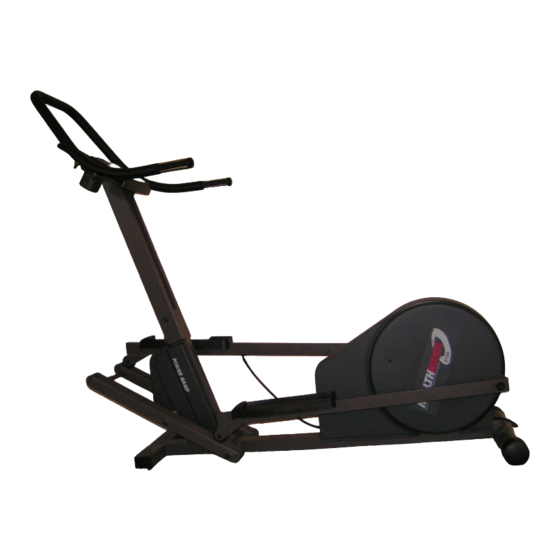
E730 elliptical crosstrainer. The free at 1-888-936-4266, Monday through Friday, 8h00 ® HealthRider E730 is an incredibly smooth exerciser until 18h00 Eastern Time (excluding holidays). To help that moves your feet in a natural elliptical path, mini- us assist you, please mention the product model mizing the impact on your knees and ankles. -
Page 4: Assembly
All manuals and user guides at all-guides.com ASSEMBLY Assembly requires two people. Place all parts of the elliptical crosstrainer in a cleared area and remove the packing materials. Do not dispose of the packing materials until assembly is completed. The following tools are required for assembly: the included allen wrenches and your own phillips screwdriver adjustable wrench... - Page 5 All manuals and user guides at all-guides.com 1. Hold the Rear Stabilizer (4) against the saddle on the rear of the Frame (1). Make sure that the Rear Stabi- liser is turned so the square holes are facing away from the Frame. Attach the Rear Stabilizer with two Carriage Bolts (2) and two M10 Nylon Locknuts (55).
- Page 6 All manuals and user guides at all-guides.com 4. Raise the Upright (3). Slide the M10 Flat Washer (94) onto the Patch Bolt (90). Secure the Upright by tightening the Patch Bolt (90) into the Frame (1). 5. Thread the Long Extension Wire (100) through the indicated hole in the Console Plate (101).
- Page 7 All manuals and user guides at all-guides.com 8. While another person holds the Handlebar (13) in the position shown, connect the two Console Plate Wires (106) to the two Pulse Wires (96). Push the wires and connectors into the Handlebar (13). 9.
-
Page 8: How To Use The Elliptical Crosstrainer
All manuals and user guides at all-guides.com 11. Apply a small amount of grease to the axle on the left Crank Arm (8). Side a Nylon Washer (78) and the Left Pedal Leg (5) onto the axle on the left Crank Arm (8). Note: It may be helpful to use a rubber mallet to tap these parts on. - Page 9 All manuals and user guides at all-guides.com A temporary To dismount the elliptical crosstrainer, wait until the adapter may pedals come to a complete stop. Important: The Grounded Outlet Box be used to elliptical crosstrainer does not have a free wheel; Adapter connect the the pedals will continue to move until the flywheel...
- Page 10 All manuals and user guides at all-guides.com CONSOLE DIAGRAM Note: If there is a thin sheet of clear plastic on the incline level, and the total number of quarter-mile face of the console, remove it. laps completed. The display will change modes every seven seconds.
- Page 11 All manuals and user guides at all-guides.com play will show the total distance accumulated on HOW TO USE THE MANUAL MODE the elliptical crosstrainer. The right display will show the total number of hours that the elliptical crosstrainer has been used. The LED matrix will Turn on the power show a letter M or a letter K to show...
- Page 12 All manuals and user guides at all-guides.com When only three seconds remain in the first seg- HOW TO USE THE PERSONAL TRAINER ment, three tones will sound. All resistance set- PROGRAMS tings will then move one column to the left. The setting for the second segment will then be shown in the CURRENT PROGRAM SEGMENT column and the elliptical crosstrainer will adjust to...
- Page 13 All manuals and user guides at all-guides.com HOW TO CONNECT YOUR PORTABLE STEREO HOW TO CONNECT YOUR CD PLAYER TO THE ELLIPTICAL CROSSTRAINER Note: If your stereo has an RCA-type AUDIO OUT jack, see instruction A below. If your stereo has a 1/8”...
- Page 14 All manuals and user guides at all-guides.com HOW TO CONNECT YOUR HOME STEREO HOW TO CONNECT YOUR COMPUTER Note: If your stereo has an unused LINE OUT jack, Note: If your computer has a 1/8” LINE OUT jack, see instruction A below. If the LINE OUT jack is see instruction A.
- Page 15 All manuals and user guides at all-guides.com During the CD program, the resistance and HOW TO USE IFIT.COM CD’S incline of the elliptical crosstrainer will automati- cally change according to the settings of the pro- gram. An electronic “chirping” sound will alert you IFIT.com CDs (available separately) automatically con- when the resistance and/or incline is about to trol the resistance and incline of the elliptical...
-
Page 16: Maintenance And Troubleshooting
All manuals and user guides at all-guides.com MAINTENANCE AND TROUBLESHOOTING Inspect and tighten all parts of the elliptical crosstrainer To activate the incline calibration process, press regularly. Replace any worn parts immediately. the INCLINE button. Wait for the incline motor to stop. -
Page 17: Conditioning Guidelines
All manuals and user guides at all-guides.com CONDITIONING GUIDELINES The following guidelines will help you to plan your Burning Fat exercise program. To burn fat, you must exercise at a low intensity level for a sustained period of time. During the first few WARNING: minutes of exercise, your body uses easily accessible Before beginning this... -
Page 18: Part List
All manuals and user guides at all-guides.com PART LIST—Model No. HRCCEL11900 R0302A Qty. Description Qty. Description Qty. Description Frame Console Plate Screw M8 x 19mm Button Carriage Bolt 3/4” Axle Cap Screw Upright Incline Bolt M4 x 12mm Screw Rear Stabilizer 2”... -
Page 19: Exploded Drawing
All manuals and user guides at all-guides.com EXPLODED DRAWING—Model No. HRCCEL11900 R0302A... -
Page 20: Ordering Replacement Parts
ICON OF CANADA, INC., 900 de l’Industrie, St. Jerôme, QC J7Y 4B8 HealthRider is a registered trademark of ICON Health & Fitness, Inc. Part No. 183638 R0302A Printed in China © 2002 ICON Health & Fitness, Inc.
Need help?
Do you have a question about the E730 and is the answer not in the manual?
Questions and answers