Table of Contents
Advertisement
Advertisement
Table of Contents
Troubleshooting

Related Manuals for Daewoo DW-3000 Series


Summary of Contents for Daewoo DW-3000 Series
-
Page 2: Table Of Contents
Table of contents Chapter I : Twin Tub Washing Machine 1. Technical point of some key parts ----------------------- 2 1-1. Spin Timer --------------------------------------------------------- 1-2. Drain Pump -------------------------------------------------------- 1-3. Pressure Switch -------------------------------------------------- 1-4. Safety Device of Motors --------------------------------------- 1-5. Safety Device of Spin Dryer ---------------------------------- 1-6. - Page 3 Chapter II : Fully Automatic Washing Machine 1. Specification of New Models ------------------------------- 29 1-1. DWF-100M's ------------------------------------------------------- 29 1-2. DWF-900,160,170's ---------------------------------------------- 30 1-3. DWF-750, 800's --------------------------------------------------- 31 2. Sequence Chart of New Models --------------------------- 32 2-1. DWF-100M's, 100C's, 1098's, 1094's, 1089's ------------ 32 2-2.
- Page 4 Chapter I : Twin Tub Washing Machine...
-
Page 5: Technical Point Of Some Key Parts
1. Technical point of some key parts 1-1. Spin Timer Function The Spin Timer is the switch providing to the Spin Motor(Drain Pump Motor) during the set spin dry time, and is a spring-type time switch comes on upon turning and those contact points comes off after the set time. -
Page 6: Pressure Switch
c) water level being high : The Drain Pump is turned on when the water level reaches approx. 9.5cm above level High. It is then turned off when the water level returns to level High. It is operated automatically so that the water level maintains between level High and approx. - Page 7 Door Switch When the Door Spin *0 is operated during spin drying the Lever of the Door Switch which sites the Door Spin *0 falls off the contact, and cuts off the Power going into the Spin Motor. Brake System When the Door Spin *0 is opened, the Plate Control Wire which sites separately atop and Door Spin *0 drop down and loosens the Link Wire and Link Brake.
-
Page 8: Gear Housing
Brake Band Gap Control Method The Band Brake works best when the gap between it and the Drum Coupling is about 2mm when the Door Spin *0 is closed. The Spin Dryer stops slowly if the gap is larger in which case the screw of the Wire Guide may be loosened and adjusted upwards. -
Page 9: Specification Of Some Key Parts
2. Specification of some key parts 2-1. V-BELT & PULLEY MOTOR V-BELT PULLEY MODEL TYPE PART CODE TYPE(IN) PART CODE 50Hz 450M700020 Ø31 3618431700 DW-3000's 60Hz 3616590400 Ø24 3618431600 50Hz 450M700020 Ø31 3618431700 DW-500M's 60Hz 3616590400 Ø24 3618431600 50Hz Ø31 3618431700 DW-4000's A36.6... -
Page 10: Timer
2-2. TIMER 1) WASH TIMER PUMP N0N PUMP MODEL TYPE RESIN PART CODE TYPE RESIN PART CODE 110/60 S-K30A UL-94(HB) 3619910741 220,240/50 S-K30AP UL-94(HB) 3619910701 S-K30A UL-94(HB) 3619910741 DW-3000's 100/50,60 S-K30AS UL-94(HB) 3619910721 220/60 S-K30AS UL-94(HB) 3619910721 110/60 220,240/50 S-K30A UL-94(HB) S-K30AP UL-94(HB) - Page 11 2) SPIN TIMER PUMP N0N PUMP MODEL TYPE RESIN PART CODE TYPE RESIN PART CODE 110/60 220,240/50 DW-3000's 100/50,60 220/60 110/60 220,240/50 DW-500M's 100/50,60 220/60 110/60 220,240/50 S-4000A UL-94(HB) 3619910011 S-4000A UL-94(HB) 3619910011 DW-4000's 220,240/50 S-4000B UL-94(V0) 3619910021 100/50,60 220/60 S-4000A UL-94(HB) 3619910011...
-
Page 12: Improvements Of New Models
3. Improvements of New Models 3-1. DW-160C(170C) Problems of DW-7510 Improvements of DW-7510 Date Improvements of DW-160C DRAIN SELECTOR KNOB is hard to New made CONTROL LEVER 2000. 8. Proper path with short arm and easily rotate. rotated. - Arm length : short - Arm length : long - Abnormal path for maximum stroke - Normal path is enough for valve stroke... - Page 13 Problems of DW-7510 Improvements of DW-7510 Date Improvements of DW-160C 2 A. Vibration when Spinning is too severe. Number of supporting points : 3→4 2000. 8. New designed BRACKET MOTOR B. Swing of SPIN TUB - No. of dampers : 4ea - No.
- Page 14 Problems of DW-7510 Improvements of DW-7510 Date Improvements of DW-160C 3 Loosening of the DRUM COUPLING bolt Reinforce the fixing torque by changing 2001. 5. Redesign the DRUM and BOLT - BOLT : M6 bolt and nut (M6→M8) - DRUM : Iron casting→Press & Bush - Unbalance weight of DRUM itself - Unbalance weight of DRUM itself - BOLT : M8 &...
- Page 15 Problems of DW-7510 Improvements of DW-7510 Date Improvements of DW-160C 5 Water leakage through the TUB holes Add the TUB CUSHION (2ea) 2001. 3. Redesign the TUB mold (Slide cores) LOCK TUB CUSHION HOLE 6 SPIN DOOR hinge is separated from Add a LOCK not to be taken out 2000.
- Page 16 Problems of DW-7510 Improvements of DW-7510 Date Improvements of DW-160C 9 INNER COVER crack Additional ribs and roundings 2001. 3. A. Additional ribs from the beginning ROUNDING AT ROUNDING AT EVERY CORNER EVERY CORNER ADDITIONAL RIBS ADDITIONAL RIBS B. Increase the diameter of HINGE Ø6 HINGE Ø7 HINGE 8010...
- Page 17 Problems of DW-7510 Improvements of DW-7510 Date Improvements of DW-160C 10 WATER SELECTOR KNOB is not No countermeasures Smooth when starting by Rounding edge smooth when starting ROUND EDGE SHARP EDGE 11 STOPPER of BRACKET PANEL broken Reinforce the ribs 2001.
- Page 18 Problems of DW-7510 Improvements of DW-7510 Date Improvements of DW-160C 12 OILLESS BEARING stick to the shaft 2001. 6. Cu BEARING from the beginning Change the material (Fe→Cu) (Especially in Dominica) Fe (White) Cu (Yellow) Cu (Yellow) 13 LEAD WIRES cut by vibration & touch Using WIRE CLAMP 2000.
-
Page 19: Others 1
3-2. Others Problems Models Supposition of Cause Solution Date 1. We made the smoothness of surface as a 1. Water leaks DW-2520 1. We found the surface of the shaft was 01-09-01 between shaft DW-3633 a little rough, especially where water seal control point. - Page 20 Problems Models Supposition of Cause Solution Date 2. Another reason is lack of grease inside 2. Increased the grease on WATER SEAL. 01-09-01 the WATER SEAL. (Weight of grease : 0.5g) More Greased 2. Pulsator pulley DW-2520 1. The center part of P-Pulley was little 1.
- Page 21 Problems Models Supposition of Cause Solution Date 2. The center hole was a little big so 2. Reducing the center hole size by 0.2 mm. 00-03-23 rotating shaft wore out the center hole. - Hole size : Ø9.8 × 7.8mm - Hole size : Ø10.0 ×...
- Page 22 Problems Models Supposition of Cause Solution Date 3. Screw fixed DW-2520 After many kinds of test, our conclusion I think it could be improved by redesign pending parts of Panel B is as follows. CUSHION TOP. But it needs additional is broken.
- Page 23 Models Problems and countermeasures Countermeasure Details Date DW-5010 Problem Continuous washing (Do not stop rotation) 2000. 09. VIBRATOR - Old mold of CASE, Smaller shaft hole - Disturb main shaft rotation Solution Make a new mold for TIMER CASE - Accurate MAIN SHAFT hole size SHAFT HOLE Problem DOOR S/W taken out 2000.
- Page 24 Problems and countermeasures Models Countermeasure Details Date Problem Lower side deformation of PACKING BOX 2000. 08. Dent line around side of BOX Solution A. Make a gap between BOX and bottom B. BOX roller cleaning to prevent dent of sides (BOX Vendor) 10mm DW-3633 Problem OILLESS BEARING stick to the shaft...
- Page 25 Problems and countermeasures Models Countermeasure Details Date Problem VALVE HOUSING crack 2001. 07. - More cases in winter (Cold weather) J700 J640A Solution Change the material (J700 → J640A) - Homo polymer → Co-polymer - Co-polymer has high resistance to impact...
-
Page 26: Trouble Shooting Guide
4. TROUBLE SHOOTING GUIDE Note : Pull out the power plug to repair and make sure that the Washing Machine has been properly grounded. Concerning Wash Check Point Problem Cause Solution Is the Power properly connected? Reconnect the Power Cord Agitator does not rotate. - Page 27 Check Point Problem Cause Solution Worn out the Serration Replace Agitator Does the Gear Housing Shaft within the Agitator. rotate properly when the Agitator Agitator has been disassembled? does not rotate smoothly. Defective Gear Housing Replace Gear Housing Is the wiring of Wash condenser Improper Connection Reconnect Agitator...
- Page 28 Check Point Problem Cause Solution Is the Condenser properly Reconnect Motor does not start due The Spin connected? to opening the Condenser Dryer circuit. does not spin. The Brake Band is touching Brake wire is too long. Assemble after loosening the Drum Coupling Wire Guide Screw and Assembly.
- Page 29 Check Point Problem Cause Solution The Waterseal or the oilless Replace Bellows Assembly metal in the Bellows Assembly worn out Is the Bellow Assembly properly Re-assemble Bellows Waterproofing not There is assembled? Assembly working due to leakage defective assembly during spin drying Replace Bellows...
- Page 30 Concerning Drainage(Pump Model) Check Point Problem Cause Solution Is the height of the drainage area The Drain Hose is too Hang the Drain Hose Drainage where the Drain Hose hangs over high lower is not satisfac- tory Are there impurities in the Drain Impurities are obstructing Disassemble Agitator and Strainer?
-
Page 31: Chapter Ii : Fully Automatic Washing Machine
Chapter II : Fully Automatic Washing Machine... -
Page 32: Specification Of New Models
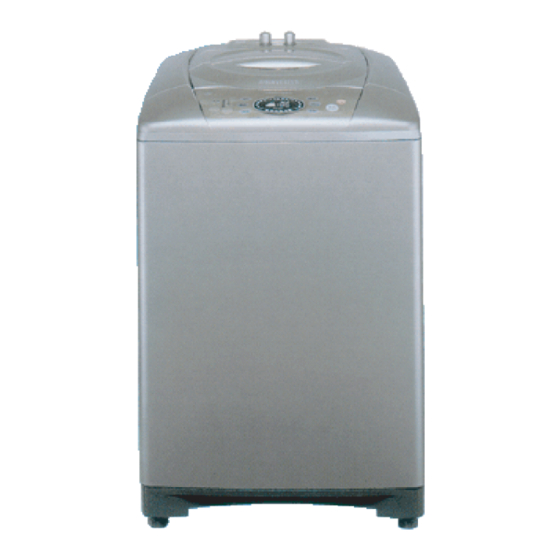
1. Specification of New Models Model : DWF-100M's Appearance Specifications * Ratings : depend on buyers * Power Consumption : depend on buyers * Overall Dimension (W*D*H) : 630*670*1040 mm * Net Weight : Approx. : 48 kg * Washing Capacity : depend on buyers * Standard Water Consumption : Approx. -
Page 33: Dwf-900,160,170'S
Model : DWF-900, 160, 170's Appearance Specifications * Ratings : depend on buyers * Power Consumption : depend on buyers * Overall Dimension (W*D*H) : 598*643*956 mm * Net Weight : Approx. : 43, 42 kg * Washing Capacity : depend on buyers * Water Level : 4 steps * Standard Water Consumption : Approx. -
Page 34: Dwf-750, 800'S
Model : DWF-750, 800's Appearance Specifications * Ratings : depend on buyers * Power Consumption : depend on buyers * Overall Dimension (W*D*H) : 525*858*535 mm * Net Weight : Approx. : 32.5 kg * Washing Capacity : depend on buyers * Water Level : 3 steps * Standard Water Consumption : Approx. -
Page 35: Sequence Chart Of New Models
2. Sequence Chart of New Models Model name : DWF-100M's, 100C's, 1098's, 1094's, 1089's rinse 2 process washing process rinse 1 process spin process water water water water water water washing washing spin spin spin 1 spin 1 rinse1 rinse1 spin 2 spin 2 rinse2... - Page 36 rinse 2 process washing process rinse 1 process spin process water water water water water water washing washing spin spin spin 1 spin 1 rinse1 rinse1 spin 2 spin 2 rinse2 rinse2 supply supply supply supply supply supply display display remain remain time...
-
Page 37: Dwf-900'S, 160'S, 170'S, 174W's
Model name : DWF-900's, 160's, 170's, 174W's rinse 2 process washing process rinse 1 process spin process water water water water water water washing washing spin spin spin 1 spin 1 rinse1 rinse1 spin 2 spin 2 rinse2 rinse2 supply supply supply supply... - Page 38 rinse 2 process washing process rinse 1 process spin process water water water water water water washing washing spin spin spin 1 spin 1 rinse1 rinse1 spin 2 spin 2 rinse2 rinse2 supply supply supply supply supply supply display display remain remain time...
- Page 39 Model name : DWF-750's, 800's rinse 2 process washing process rinse 1 process spin process water water water water water water washing washing spin spin spin 1 spin 1 rinse1 rinse1 spin 2 spin 2 rinse2 rinse2 supply supply supply supply supply supply...
- Page 40 rinse 2 process washing process rinse 1 process spin process water water water water water water washing washing spin spin spin 1 spin 1 rinse1 rinse1 spin 2 spin 2 rinse2 rinse2 supply supply supply supply supply supply display display remain remain time...
-
Page 41: Sequence Chart Of Electrical Parts
3. Sequence Chart of Electrical Parts washing process washing process rinse 1 process rinse 1 process rinse 2 process rinse 2 process spin process spin process water water water water water water washing washing spin 1 spin 1 rinse1 rinse1 spin 2 spin 2 rinse2... -
Page 42: Dwf-750'S, 800'S
4. Main Function of PCB Function DWF-100M's,100C's,1098's DWF-900's, 160's, 170's, 174W's DWF-750's, 800's Load Sensing The washer check the amount of clothes to correspond with proper water level in order to save water and detergent and environment before starting washing with dry-clothes condition. Priciple : please refer to attached report. - Page 43 Function DWF-100M's,100C's,1098's DWF-900's, 160's, 170's, 174W's DWF-750's, 800's Unbalanced The washer have a function of checking of unbalanced load after washing and rinse process especially in the beginning Clothes of Spin mode in order to prevent noise and vibration and movement of washer from happening by using of safety Switch. Checking Error "UE"...
- Page 44 Function DWF-100M's,100C's,1098's DWF-900's, 160's, 170's, 174W's DWF-750's, 800's Door open It is same with above "UE" mode. "LE" mode is shown. Checking "LE" This function mainly is to be used when Spin process, because if Lid is in opened-status when Spin mode (Lid Error) it will cause a very dangerous situation like a customer's casualties.
- Page 45 Function DWF-100M's,100C's,1098's DWF-900's, 160's, 170's, 174W's DWF-750's, 800's "E9" signal The PCB have a function of checking frequency from Pressure switch in order to decide the proper water level after load sensing process. If no frequency is checked by Micom, PCB display the "E9" error mode. Checking point here is that check the connector and wire-open and Micom condition.
- Page 46 Function DWF-100M's,100C's,1098's DWF-900's, 160's, 170's, 174W's DWF-750's, 800's Fuse for The washer composed of several electrical parts especially Inlet valve, synchronous Motor, Bubble generator. Electrical parts These parts use the coil. If the coil is damaged, it give a bad influence to the function of Triac in the PCB. In order to prevent these parts from breaking, 315mA Fuse is used and assembled in the Harness Ass'y.
-
Page 47: The Principle Of Load Sensing
5. The Principle of Load Sensing 1. Concept Experienced customers know how much is the approximate weight of laundries what they want to wash, and how much of water will be proper for the laundries. So the customers can select the proper water level and amount of detergent so as not to damage the laundries and not to waste water and not to contaminate environment. -
Page 48: Trouble Shooting Guide
6. TROUBLE SHOOTING GUIDE COURSE PROBLEM (DAMAGED) PARTS CAUSE SOLUTION Valve Inlet Refer to the TROUBLE SHOOTING FLOW Refer to the TROUBLE SHOOTING FLOW P.C.B. As CHART. CHART. Water is not Connections supplied. Rubber Packing of Hose Inlet As clogs the hole Hose Inlet As Reassemble the Hose Inlet As. - Page 49 COURSE PROBLEM (DAMAGED) PARTS CAUSE SOLUTION Difference between Guide Filter and Tub I. Reassemble or change the Guide Filter. Guide Filter Remove the flash, round the edge part or Scratch or edge part of Tub I, Pulsator, Pulsator change the scratched parts (especially the edge Tub I Screw.
- Page 50 COURSE PROBLEM (DAMAGED) PARTS CAUSE SOLUTION Motor Tub I does not Refer to the TROUBLE SHOOTING FLOW Refer to the TROUBLE SHOOTING FLOW P.C.B. As rotate. CHART. CHART. V-Belt Tub I rotates so Spinning begins before the water is not Water Check and repair the draining system.
-
Page 51: Testing(Demonstration) Mode
Testing(Demonstration) Mode Testing(Demonstration) Mode DWF-100M’s, 100C’s, 1098’s, 1094’s, 1089’s Page 1 The operation condition of the washer can be checked without water in the tub by test mode of the P.C.B. ass’y. How to Operate Test Mode Turn off the power. Keep pressing3 buttons (‘WASH’... - Page 52 DWF-100M’s, 100C’s, 1098’s, 1094’s, 1089’s Page 2 The condition of Pressing button Display Items being checked normal operation Drain-cold inlet v/v-hot inlet To check the PCB v/v-dispensor v/v-pulsator rotate Rinse All LED function speedily. blink (right)-pulsator rotate (left)- This is PCB checking pump-load data-door check- mode.
- Page 53 DWF-100M’s, 100C’s, 1098’s, 1094’s, 1089’s Page 3 The condition of Pressing button Display Items being checked normal operation Fuzzy course is run Aging Mode for P.C.B. Spin 3 times Remain repeatedly ass’y. time...
- Page 54 DWF-900’s, 160’s, 170’s, 174W’s Page 1 The operation condition of the washer can be checked without water in the tub by test mode of the P.C.B. ass’y. How to Operate Test Mode Turn off the power. Keep pressing two buttons (‘DELAY’ ‘PROCESS’) together and press the power button. Remove your fingers from the two buttons.
- Page 55 DWF-900’s, 160’s, 170’s, 174W’s Page 2 The condition of Press button Display Items being checked normal operation Drain-cold inlet v/v-hot inlet To check the PCB v/v-pulsator rotate (right)- Process 1time All LED function speedily. pulsator rotate (left)-pump- blink This is PCB checking load data-door check- mode.
- Page 56 DWF-900’s, 160’s, 170’s, 174W’s Page 3 The condition of Press button Display Items being checked normal operation Fuzzy course is run Aging Mode for P.C.B. Remain Course 3 times repeatedly time ass’y.
- Page 57 DWF-750’s, 800’s Page 1 The operation condition of the washer can be checked without water in the tub by test mode of the P.C.B. ass’y. How to Operate Test Mode Turn off the power. Keep pressing two buttons (‘Course.’ ‘PROCESS’) together and press the power button. Remove your fingers from the two buttons.
- Page 58 DWF-750’s, 800’s Page 2 The condition of Press button Display Items being checked normal operation To check the PCB Wash R-wash L-bubble-hot inlet Process 1time All LED function speedily. v/v-cold inlet v/v-drain-pump- blink This is PCB checking load data-door check-auto off mode.
- Page 59 DWF-750’s, 800’s Page 3 The condition of Press button Display Items being checked normal operation Aging Mode for P.C.B. Fuzzy course is run Remain Course 3 times ass’y. repeatedly time...
-
Page 60: Radical Function
8. Radical Function The Introduction of The Introduction of Radical Washing Technology Radical Washing Technology - 57 - R&D Center of Washing Machine, Daewoo... - Page 61 • Development of Low Temperature Sterilization = Radical Washing Tech. • Sterilization, Deodorization, & Friendship with Environmental xpected Effect (1) sterilization of Staphylococcus aureus & Candida albicans (2) sterilization of E-Coli - 5 8 - R&D Center of Washing Machine, Daewoo...
- Page 62 [ generater of ozone ] --> ozone( O ) --> [ catalyst ] --> active oxygen(·O·) 〓≫ 2. [[Under water | ·O· + H O --> 2 OH· ]] (active oxygen + water --> Radical) - 59 - R&D Center of Washing Machine, Daewoo...
- Page 63 Radical : Sterilizing Power 1. Bubble+Detergent : 47.4% - Test Inst. : FITI in Korea Yeast 2. Radical+Detergen : 97.4% 1. Bubble+Detergent : 53.6% Staphylococcus 2. Radical+Detergen : 96.6% aureus - 6 0 - R&D Center of Washing Machine, Daewoo...
- Page 64 Remark Sample 15min 60min 1. Bubble 15.0% 70.0% - Test orgon. : FITI in Korea Ammonia 2. Radical 95.0% 95.0% Sulfureted 1. Bubble 8.2% 66.4% 2. Radical 63.6% 96.4% Hydrogen - 6 1 - R&D Center of Washing Machine, Daewoo...
-
Page 65: Gear Mechanism
9. Gear Mechanism 9-1. Washing and spin Mode Drain valve Motor Brake lever control bolt clutch lever Braker band clutch boss Gear mechanism ( washing ) (spin ) At the beginning of Drain, 2) Brake lever push the Contol bolt and clutch lever. (Brake lever opens the Braker ) 3) Clutch lever opens the clutch boss freely.. -
Page 66: Structure
9-2. Structure Pulsator shaft Spin shaft Gear unit Braker lever Control bolt Clutch lever C-L Tip Clutch boss Clutch spring Braker 1) Clutch lever Tip have to be overlapped in Clutch boss 3 - 5mm when washing. 2) C-L Tip have to be seperated to the Clutch boss after Drain valve motor pull the Brake lever. 3) Control bolt contacts to the Brake lever smoothly. -
Page 67: Concerning Clutch Spring
9-3. Concerning Clutch Spring 1. THE STRUCTURE OF GEAR MECHANISM 2. HOW TO CHECK THE CLUTCH SPRING PROBLEM 3. THE PROCESS OF DISASSEMBLE 4. THE PROCESS OF ASSEMBLE... - Page 68 1. THE STRUCTURE OF GEAR MECHANISM Clutch Lever Bearing Clutch Boss Clutch Tip Clutch spring Coupling Pulley Spring Washer Fastening Nut Pulley Shaft Clutch Boss Ass'y Pulley Shaft Fastening Nut Coupling Spring Washer Drum plate Pulley...
- Page 69 2. HOW TO CHECK THE CLUTCH SPRING PROBLEM. PROBLEM 1) THE LAUNDARY IS IN THE SPIN TUB UNEVENLY WHEN JUST STARTING SPIN PROCESS. 2) THEREFORE, IT CAUSE THE SERIOUS NOISE AND VIBRATION WHEN WASHING AND SPINNING PROCESS OR SUPPLING WATER IRREGULARY WHEN SPINNING PROCESS AND CAUSE SHORT OF SPIN PERFORMANCE.
- Page 70 3. THE PROCESS OF DISASSEMBLE Disassemble 1 Process Notice Use wrench or driver - ratchet handle - extension bar - socket : 10mm Remove the protector Release screws marked 4-point Remove the v-belt Belt Use fixing jig for pulley as to see fig1. and 17mm-socket for nut Loosen the fastening nut Fastening Nut...
- Page 71 Disassemble 2 Process Notice Disassemble the pulley Pulley Catch the boss and pull upward with spiral rotate in the clockwise direction Disassemble the clutch boss assembly Clutch Boss Ass'y Separate coupling from clutch boss ass'y Coupling Clutch Boss Ass'y Clean the drum plate, coupling surface and contact face between drum plate and coupling...
- Page 72 4. THE PROCESS OF ASSEMBLE Assemble 1 Process Notice Check the uneven face of coupling is assembled upward Uneven Face Assemble the coupling Coupling - Push in the clutch boss ass'y with rotating on the clockwise direction. - After assembling, rotate on Assemble the new clutch the clockwise more 2~3 teeth boss ass'y...
- Page 73 Assemble 2 Process Notice - Use fixing jig and 17mm socket wrench as if disassembling, as fastening torque about 100~200kgf-cm. Assemble the fastening nut - Check the end-play, up and downward and check the binding force, too much or not on bi-direct of rotation.
-
Page 74: Technical Report
10. Technical Report 10-1. Air Bubble System Old model New Model Appearance Plate T Air Bubble Generator Air Bubble Generator Performance exactly same Operating source electronic AC power mechanical power (of Motor rotation) Assemble position on the right of rear part of Plate T Attached to the Motor, bottom area of Outer Tub... -
Page 75: Pulley Motor
10-2. Pulley Motor Appearance exactly same Performance Al, die-casting Press manufacturing type...
Need help?
Do you have a question about the DW-3000 Series and is the answer not in the manual?
Questions and answers