Table of Contents
Advertisement
Service Manual
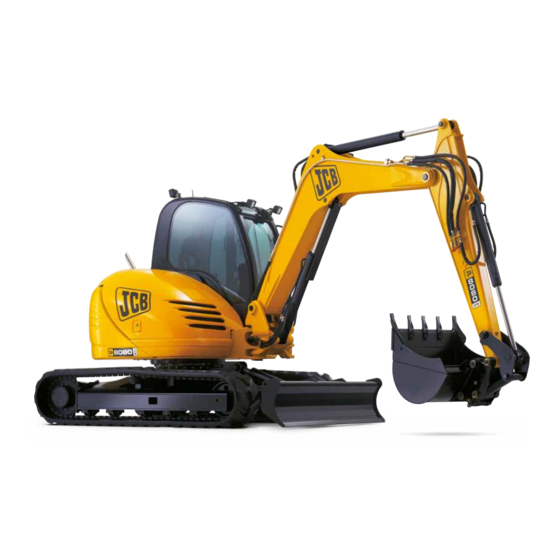
Midi Excavator
9803/9330
8080
1024000 Onwards
Publication No.
S2-eng
World Class
Customer Support
Copyright © 2004 JCB SERVICE. All rights reserved. No part of this publication may be reproduced, stored in a retrieval system, or transmitted in any form or by any other means,
electronic, mechanical, photocopying or otherwise, without prior permission from JCB SERVICE.
Issued by JCB Technical Publications, JCB Service, World Parts Centre, Beamhurst, Uttoxeter, Staffordshire, ST14 5PA, England. Tel +44 1889 590312 Fax +44 1889 593377
Advertisement
Table of Contents

Related Manuals for jcb 8080


Summary of Contents for jcb 8080
- Page 1 Customer Support Copyright © 2004 JCB SERVICE. All rights reserved. No part of this publication may be reproduced, stored in a retrieval system, or transmitted in any form or by any other means, electronic, mechanical, photocopying or otherwise, without prior permission from JCB SERVICE.
- Page 2 8080 Track and Running Gear Engine Steeriteering PUBLISHED BY THE TECHNICAL PUBLICATIONS DEPARTMENT OF JCB SERVICE; © WORLD PARTS CENTRE, WATERLOO PARK, UTTOXETER, ST14 5PA ENGLAND Tel. ROCESTER (01889) 590312 PRINTED IN ENGLAND Publication No. 9803/9330 Issue 3 Find manuals at http://best-manuals.com/search?&s=JCB-9803-9330...
- Page 3 Introduction This publication is designed for the benefit of JCB Distributor Service Engineers who are receiving, or have received, training by JCB Technical Training Department. These personnel should have a sound knowledge of workshop practice, safety procedures, and general techniques associated with the maintenance and repair of hydraulic earthmoving equipment.
- Page 4 Colour Coding The following colour coding, used on illustrations to denote various conditions of oil pressure and flow, is standardised throughout JCB Service publications. Full Pressure Pressure generated from operation of a service. Depending on application this may be anything between neutral circuit pressure and M.R.V. operating pressure.
-
Page 5: Table Of Contents
Preparing for Travel 6 - 8 Stopping and Parking the Machine 6 - 9 Working on Slopes 7 - 1 Digging Near Walls 7 - 1 Dumping into a Truck 7 - 1 9803/9330 Issue 1 Find manuals at http://best-manuals.com/search?&s=JCB-9803-9330... - Page 6 Driving a Machine onto the Transporting Vehicle 12 - 2 Securing the Machine 12 - 3 Unloading a Machine from the Transporting Vehicle 12 - 4 Sealing and Retaining Compounds 15 - 1 9803/9330 Issue 1 Find manuals at http://best-manuals.com/search?&s=JCB-9803-9330...
-
Page 7: Identifying Your Machine
Either stamp the new number on the plate or stamp out the old one. This will prevent the wrong number being quoted when you order replacement parts. JS06061 9803/9330 Issue 2* Find manuals at http://best-manuals.com/search?&s=JCB-9803-9330... -
Page 8: Operation
Understand the dangers and how to avoid them. If there is anything you do not understand, ask your JCB distributor. He will be pleased to advise you. When you have learned where the track driving controls are and what they do, practice using them. -
Page 9: Before Entering The Cab
Make sure that the hydraulic oil and diesel fuel filler caps are both tightly closed. REMEMBER THAT THE HYDRAULIC FILLER CAP MAY BE HOT IF THE MACHINE HAS RECENTLY BEEN USED. (We also recommend that you lock the fuel filler cap.) 9803/9330 Issue 1 Find manuals at http://best-manuals.com/search?&s=JCB-9803-9330... -
Page 10: Entering/Leaving The Cab
Leave the cab by reversing instructions 3 and 4 of Entering the Cab. Do not use the skirt 1 as a step. Do not use the machine controls as handholds when entering (or leaving) the machine. 2-2-1-4 9803/9330 Issue 1 Find manuals at http://best-manuals.com/search?&s=JCB-9803-9330... -
Page 11: Opening And Closing The Door
Section 1 Section 1 General Information 2 - 4 Operation 2 - 4 Opening and Closing the Door To open the door from the outside, unlock it with the key provided and pull the handle. Once in the cab, close and secure the door by pulling with the bar until the latch clicks shut. -
Page 12: Opening And Closing The Front Lower Window
Section 1 Section 1 General Information 2 - 5 Operation 2 - 5 Opening and Closing the Front Lower Window The front lower window can be opened in two positions: For a small amount of ventilation pinch the locks G, H between finger and thumb and push the window down until the locks locate on the lower catch positions. -
Page 13: Seat
Section 1 Section 1 General Information 2 - 6 Operation 2 - 6 Seat The operator's seat can be adjusted for your comfort. A correctly adjusted seat will reduce operator fatigue. Position the seat so that you can comfortably reach the machine controls. -
Page 14: Location Of Controls And Components
Section 1 Section 1 General Information 3 - 1 Operation 3 - 1 Location of Controls and Components £ £ Right Console Control Lock Lever 14 2-Speed Tracking Switch (see Switches and Controls) (see Switches and Controls) (see Switches and Controls) Right Excavator Joystick Control Left Console 15 High Flow Auxiliary Switch... -
Page 15: Switches And Controls
Section 1 Section 1 General Information 4 - 1 Operation 4 - 1 Switches and Controls Right Console Starter Switch Note: Do not operate the starter for more than 20 This is operated by the starter key. It has four positions. seconds at one time. -
Page 16: Underseat Tool Box And Cool Box
Section 1 Section 1 General Information 4 - 2 Operation 4 - 2 Switches and Controls (cont’d) Right Console (cont'd) Underseat Tool Box and Cool Box Radio Mute Switch For operator convenience a toolbox A and coolbox B are This switch is used to temporarily switch the sound located under the seat. -
Page 17: Heater/Air Conditioning Controls
Section 1 Section 1 General Information 4 - 3 Operation 4 - 3 Switches and Controls (cont’d) Heater/Air Conditioning Controls Located on the right console, the heater/air conditioning controls are used in conjunction with the heater fan controls. Air Conditioning On/Off Press switch X to switch the air conditioning system on or off. -
Page 18: Left Console
Section 1 Section 1 General Information 4 - 4 Operation 4 - 4 Switches and Controls (cont’d) Left Console Horn Button When the horn button is pressed the horn will sound. Note: Always press the switch and sound the horn to give signals, when the machine is started or you engage travel or slew. -
Page 19: Ems Panel
Section 1 Section 1 General Information 4 - 5 Operation 4 - 5 Switches and Controls (cont’d) EMS Panel The EMS (Electronic Monitoring System) provides a sophisticated means of controlling and monitoring various POWER aspects of the machine’s engine and hydraulic systems. The MODE EMS panel, in conjunction with the Facia Panel, provides the operator interface to the EMS, using an LCD display and a... - Page 20 Not used. Service Required (Status Lamp) If illuminated contact your JCB dealer. Note that this will first light at 20 hours before the next Hazard Warning Lamps Indicator (Status Lamp) service interval is due and will be accompanied Not used.
- Page 21 The third mode allows properly will select an item. Pressing the SET button will return the trained JCB personnel to adjust the calibration of the system and is detailed in the machine service manual. operator to the normal display.
- Page 22 Section 1 Section 1 General Information 4 - 8 Operation 4 - 8 Switches and Controls (cont’d) EMS Panel (cont’d) Diagnostic Mode The EMS Diagnostic Mode allows the operator or service personnel to display various parameters monitored by the EMS. Pressing the SET button and the MODE button together for 5 seconds enters the Diagnostic Mode menu.
-
Page 23: Facia Panel
Section 1 Section 1 General Information 4 - 9 Operation 4 - 9 Switches and Controls (cont’d) Facia Panel Emergency Stop Windscreen Washer Press to stop the engine. The EMS Panel will display Press to operate the windscreen washer. The washer will “EMER STOP”. -
Page 24: Redundancy Switch
Section 1 Section 1 General Information 4 - 10 Operation 4 - 10 Switches and Controls (cont’d) Redundancy Switch The Redundancy Switch allows you to start and operate the machine with the EMS system switched off. This may be necessary in the event of system failure or when jump- starting the machine. -
Page 25: Cab Interior Light
Section 1 Section 1 General Information 4 - 11 Operation 4 - 11 Switches and Controls (cont’d) Cab Interior Light The interior light G is located on the left of the cab back wall. To turn it on, press the right hand side of the light. To extinguish press the side of the light to return it to the centre position. -
Page 26: Travel Levers
Section 1 Section 1 General Information 4 - 12 Operation 4 - 12 Travel Levers Travel is controlled by the two levers/foot pedals A and B at the front of the cab. Each lever controls the track on the same side, i.e. the left lever controls the left track, when the cab is facing forwards, that is towards the dozer blade. -
Page 27: Excavating Controls
Section 1 Section 1 General Information 5 - 1 Operation 5 - 1 Excavating Controls Excavating Operation Excavating is controlled mainly by the movements of the left A and right B Excavator joystick Controllers. Other Before starting to excavate make sure that the control lock associated controls are Mode Select (see EMS Panel), the lever is down (see Left Console), and the Slew Lock Switch Slew Lock button and the swing pedal. -
Page 28: Slewing
Section 1 Section 1 General Information 5 - 2 Operation 5 - 2 Excavating Controls (cont’d) Slewing ! WARNING ! WARNING Before operating the excavator controls always check to see which control pattern has been selected. Operate the When using the boom and dipper fully extended, take the machine slowly until you are familiar with the pattern following precautions, otherwise the machine could get selected. -
Page 29: Boom Swing
Section 1 Section 1 General Information 5 - 3 Operation 5 - 3 Excavating Controls (cont’d) A436790 Boom Swing Boom Swing Stop Note: The pedal casting incorporates arrows which indicate A boom swing stop can be fitted to restrict the kingpost boom swing direction. -
Page 30: Boom Raise/Lower
Section 1 Section 1 General Information 5 - 4 Operation 5 - 4 Excavating Controls (cont’d) Boom Raise/Lower ! WARNING Thoroughly warm the hydraulic oil before operating the excavator services. Before selecting boom up, check there are no overhead obstructions or electric power cables. - Page 31 This as a preview PDF file from best-manuals.com Download full PDF manual at best-manuals.com...
Need help?
Do you have a question about the 8080 and is the answer not in the manual?
Questions and answers
La pelle c'est mise au ralenti et n'a plus de fonctions de travail
The JCB 8080 excavator may be in idle mode and not functioning due to issues related to its electronic throttle control ("fly-by-wire" throttle) or the electric feeder fuel pump. If the feeder pump is not working properly, the diesel flow may be too low, causing the engine to stall when attempting to operate. Additionally, if the machine starts in limp mode and then switches to normal mode, it may stop running. The quick hitch system also relies on an electric-over-hydraulic mechanism, which requires electrical power to function. If there is an electrical failure, it could prevent proper operation.
This answer is automatically generated
want to make breaker hydraulic line into double acting so can use tree shear etc
The service manual does not provide specific instructions for converting the hydraulic line of a JCB 8080 breaker to double acting. However, generally, converting a hydraulic circuit from single-acting (breaker) to double-acting (tree shear) involves:
1. Identifying the Existing Hydraulic Setup – Check if the breaker circuit is single-acting, meaning it only supplies pressure in one direction and relies on gravity or a spring to return.
2. Installing a Return Line – For double-acting operation, you need both a pressure and a return line. The existing breaker return line may need modification or an additional line installed.
3. Adding a Control Valve – If the machine lacks a double-acting control valve, install one that allows flow in both directions.
4. Adjusting Hydraulic Connections – Ensure the hydraulic hoses are correctly routed to accommodate the tree shear’s double-acting function.
5. Checking the EMS System – The manual indicates that high-flow auxiliary circuits are controlled electronically and may have temperature-based restrictions.
6. Testing the System – After modifications, test the system to ensure proper operation and check for leaks.
For precise instructions, consult a JCB service engineer or refer to the machine’s hydraulic schematics.
This answer is automatically generated