Advertisement
Quick Links
Advertisement

Related Manuals for Kogan KAPR14COOKA


Summary of Contents for Kogan KAPR14COOKA
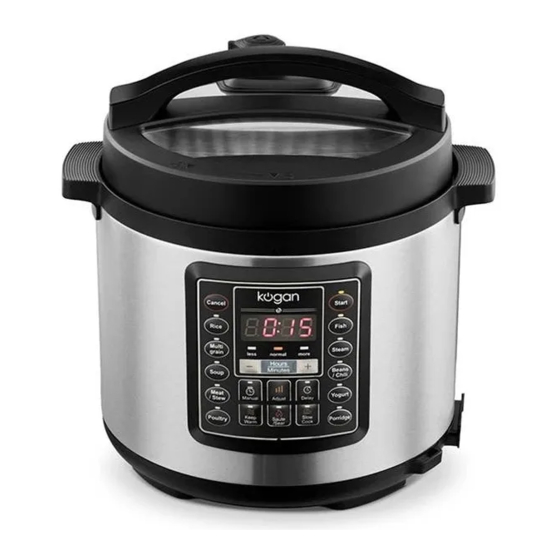
- Page 1 14-IN-1 6L MULTIFUNCTION PRESSURE COOKER KAPR14COOKA...
-
Page 2: Safety And Warnings
SAFETY AND WARNINGS Read instructions before first use. Do not use the pressure cooker for a purpose other than the one for which it is intended. This appliance is for household use only. Do not use outdoors. This appliance is not intended for use by persons with reduced physical, sensory or mental capabilities or lack of experience and knowledge, unless they have been given supervision or instruction concerning use of the appliance by a person responsible for their safety. - Page 3 23. Do not tamper with any of the safety systems beyond the maintenance instructions specified in the instructions for use. 24. Only use parts provided or recommended by Kogan.com. Safety Precautions To avoid personal injury and property loss, be sure to observe the following safety precautions.
- Page 4 Warning Stop using if the power cord is damaged • If the power cord is damaged, stop using it and contact Kogan.com. Do not insert foreign objects • It is prohibited to insert metal shavings, needles and other foreign matter in the...
- Page 5 Place the appliance in a location out of reach of infants • Place the appliance in a location out of reach of infants to avoid electric shock and scalding. Modification is prohibited • Modification or repair by non- professionals is prohibited. •...
- Page 6 Caution Never pull the plug with a wet hand • Pull the power plug with a wet hand may cause electric shock. When pulling the plug, you must pinch the plug • When pulling the plug, you must pinch the plug.
- Page 7 Only use the dedicated pot • When there is foreign object on the bottom of pot and heating plate surface, remove the foreign object before use; otherwise, it may cause overheating and work abnormalities etc. Do not put the inner pot on other appliance for heating •...
- Page 8 OVERVIEW Description Description Exhaust valve handle Exhaust valve (note) Upper cover handle Seal ring bracket Seal ring Seal gate (note) Internal side of lid Block proof cover Water box (note) Inner pot Housing cover Outer pot Control box Cooker body handle Base Cooker body Exhaust opening...
-
Page 9: Operation
OPERATION Before Use Before first use, remove all accessories from the cooker body and read all instructions and warnings fully. Clean the inner pot before every use and ensure the ventilation is clear. Control Panel Display Screen Start Button Menu Function Panel “-”... - Page 10 Disassembly and Installation of Block-Proof Cover Check if the seal ring and block proof cover are correctly installed in the upper cover before every use. Pull out and up to disassemble Black Proof Cover After use, please clean the seal ring and around of block proof cover for avoiding jamming the cover, keep it clean to avoid bad odour.
- Page 11 Do not use if damaged: instead contact Kogan.com to arrange a repair. Install Press it down to install Cooking Preparation 1. Open the lid correctly Holding the handle of upper cover, turn anticlockwise about 30°C to align the arrow marks on the lid and body and lift.
- Page 12 3. Remove the inner pot and add food and water • Observe the MAX indicator marked on the inner pot. Usable Capability 4. Insert the inner pot into the cooker • Wipe to clean the external surface of inner pot. •...
- Page 13 6. Seal the exhaust valve • Turn the exhaust valve closed to create pressure. For manual exhaust, turn it to the exhaust positinon. • Ensure the floater valve drops down before turning on. Sealing schematic diagram Exhaust schematic diagram Function Selection Turn on.
- Page 14 Functions Function Operation Guidelines Under any state, press “Cancel” button to cancel the current work Cancel state and return to standby state. Under standby state, press “Warm” button to enter into keep warm state. “Warm” indicator light is on and the digital screen Warm shows “OH”.
- Page 15 starts delay time countdown. When the countdown reaches to the end, the program starts working. Under standby state, press “Multigrain” button, the indicator lights on and the digital screen shows default working time. Press “+” or “-” button to adjust the working time.
- Page 16 Adjust: Before the program starts, you can press “Adjust” button to change the food flavour for “Less” or “normal” or “more”. Under standby state, press “Poultry” button, the indicator lights on and the digital screen shows default working time. Press “+” or “-” button to adjust the working time. 10 seconds later if no button is pressed or press “Start”...
- Page 17 Adjust: Before the program starts, you can press “Adjust” button to change the food flavour for “Less” or “normal” or “more”. Under standby state, press “Beans/Chilli” button, the indicator light is on and the digital screen shows default working time. Press “+” or “-” button to adjust the working time.
- Page 18 Keep Warm Function After cooking, the electric pressure cooker automatically enters into the keep warm state; Under keep warm state, keep warm indicator lights on; Under standby state, you may also press the “Keep Warm” button to enter keep warm function; Keep warm temperature is 60°C - 80°C.
-
Page 19: Cleaning And Care
CLEANING & CARE Environment • Periodically clean the cooker and remove oil and dirt if it is stored on the table. • Put the electric pressure cooker at least 30cm away from other kitchen appliances. Clean After Use Clean after each use. Before cleaning and maintenance, unplug the power cord until the product cools. -
Page 20: Specifications
SPECIFICATIONS Capacity 5.7L Power Supply ~220-240V Rated Power 1000W Size of Inner Pot 8.66" Working Pressure 80kPa TROUBLESHOOTING ssue Possible Cause Steps to Resolve Difficult to close the lid Sealing ring not installed Position the sealing properly ring well The floater valve clamps the Lightly push the push rod push rod... - Page 21 Add water and food inner pot according to the recipe Steam leaks from the lid or Contact exhaust valve Kogan.com Steam comes out from Exhaust valve not in sealing Turn the exhaust exhaust valve position valve to the sealing position...
- Page 22 IN THE BOX Spoon Soup Spoon User Manual Measuring cup Power Cord Components Disposal This marking indicates that this appliance should not be disposed with other house-hold wastes. To prevent possible harm to the environment or human health from uncontrolled waste disposal, recycle it responsibly to promote the sustainable reuse of material resources.
- Page 23 NOTES...
- Page 24 Need more information? We hope that this user guide has given you the assistance needed for a simple set-up. For the most up-to-date guide for your product, as well as any additional assistance you may require, head online to help.kogan.com...
Need help?
Do you have a question about the KAPR14COOKA and is the answer not in the manual?
Questions and answers