Table of Contents
Advertisement
Quick Links
Advertisement
Table of Contents

Related Manuals for Kogan KA8PRSCOOKA


Summary of Contents for Kogan KA8PRSCOOKA
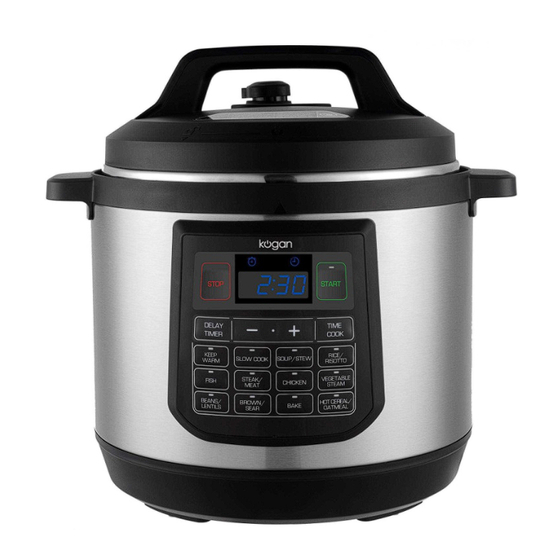
- Page 1 8L 12-IN-1 MULTIFUNCTION PRESSURE COOKER KA8PRSCOOKA...
-
Page 3: Safety And Warnings
SAFETY & WARNINGS • Do not operate any appliance with a damaged cord or plug, or after the appliance malfunctions or has been damaged in any manner. Contact Kogan.com for assistance. • This appliance is for household use only. Do not use outdoors. - Page 4 Do not tamper with any of the safety systems beyond the maintenance instructions specified in the instructions for use. • Only use spare parts from Kogan.com for the relevant model. • Ensure to read and understand these instructions before use and retain them for future reference.
- Page 5 • Modification or repair by non-professionals is prohibited, as this may cause a fire or electric shock. Repair or replacement of parts should only be made by Kogan.com. • Products may not be immersed or sprinkled in water, as doing so could cause electric shock or electrical short circuiting.
- Page 6 • Do not use a pot other than the dedicated pot • When there is a foreign object on the bottom of the pot and heating plate surface, remove the foreign object before use. Otherwise, it may cause overheating and work abnormalities etc.
- Page 7 OVERVIEW Exhaust valve Exhaust opening handle Float valve Upper cover handle Exhaust valve (note 1) Seal ring bracket Seal ring Internal Sealing gate (note 2) side of lid Block proof cover Inner pot Water box (note 3 Outer pot Housing cover Handles Control Box Cooker...
- Page 8 Structural diagram of float valve • Confirm that the float valve, block proof cover and seal ring are correctly installed before each use. • Before placing the inner pot into the cooker each time, ensure to remove any dirt and water from the external side of the inner pot, and the internal side of the external pot.
- Page 9 INSTRUCTION When using the appliance for the first time, ensure to remove all accessories from the cooker body and read the User Manual carefully, particularly these instructions for usage and the cautions above for avoiding property damage or physical injury. Controls START button STOP button...
-
Page 10: Installation
Disassembly/installation of the block proof cover and seal ring • Check to ensure seal ring and block proof cover are correctly installed in the upper cover before use each time. • After use, clean the seal ring and around of block proof cover to avoid jamming the cover and the generation of unpleasant odours. -
Page 11: Operation
OPERATION Open the lid correctly • Hold the handle of upper cover and turn it anticlockwise until the “ ” mark on the edge of the upper cover is aligned with the “ ” mark on the edge of the housing cover. - Page 12 Place the inner pot into the cooker • Wipe to clean the external surface of the inner pot. Do not allow foreign objects or water into the inner surface of the electric pressure cooker. • Rotate the inner pot to the left and right to ensure good contact with the heating plate.
- Page 13 Position the exhaust valve • During operation, turn the exhaust valve to the sealed position as shown below. This will allow the appliance to retain pressure within the chamber. • For manual exhaust, turn the exhaust valve handle to the open position as shown below.
- Page 14 Safely open the lid Turn off the power supply or remove the power plug Exhaust method: Quickly open the lid Turn the exhaust valve to the open position until the float valve drops down (for non-fluid foods only). Open the lid as normal Allow the electric pressure cooker to cool naturally till the float valve drops down.
- Page 15 Function Operation • From the standby state, press the “KEEP WARM” button to enter the keep warm state. The “KEEP WARM” indicator illuminates, and the digital screen shows the default working time. KEEP WARM • If no button is pressed within 10 seconds, or the “START” button is pressed, the appliance automatically starts cooking and the digital screen starts the countdown.
- Page 16 1. From the standby state, press the ‘FISH’ button; the indicator light will illuminate, and the digital screen will show the default working time. Press the “TIME COOK” button and then the “+”/“-” buttons to adjust the working time. If no button is pressed within 10 seconds, or the “START” button is pressed, the appliance automatically starts cooking and the digital screen starts the countdown once the unit has met the required pressure.
- Page 17 1. From the standby state, press the “VEGETABLE/STEAM” button; the indicator light will illuminate, and the digital screen will show the default working time. Press the “TIME COOK” button and then the “+”/“-” buttons to adjust the working time. If no button is pressed within 10 seconds, or the “START” button is pressed, the appliance automatically starts cooking and the digital screen starts the countdown once the unit has met the required pressure.
- Page 18 1. From the standby state, press the “BAKE’ button; the indicator light will illuminate, and the digital screen will show the default working time. Press the “TIME COOK” button and then the “+”/“-” buttons to adjust the working time. If no button is pressed within 10 seconds, or the “START” button is pressed, the appliance automatically starts cooking and the digital screen starts the countdown once the unit has met the required pressure.
-
Page 19: Cleaning And Care
Part of the power cord or plug is heating up excessively. • Power cord is flexible with an intermittent power Discontinue use and supply. contact Kogan.com. • The pressure cooker has abnormal heating and generates an unpleasant odour. • Abnormal noise or vibration when power is supplied Remove the dust or dirt. -
Page 20: Troubleshooting
Clean the float valve gasket Steam leaks from the valve gasket float valve Float valve gasket worn-out Contact Kogan.com Too little food and water in Add water and food according to the inner pot the recipe Float valve unable to rise Steam leaks from the lid or Contact Kogan.com... -
Page 21: Cooking Times
COOKING TIMES Asparagus Beans (yellow & green) Broccoli (florets) 1~2mins 1~2mins 1~2mins Brussel Sprouts Butternut Squash Cabbage (whole/chunks) 2~3mins 4~6mins 2~3mins Carrots (whole/chunks) Cauliflower (florets) Corn (on the cob) 6~8mins 2~3mins 1~2mins Mixed Vegetables Potatoes (large, whole) Potatoes (small, whole) 3~4mins 12~15mins 8~10mins... - Page 22 Lamb (leg) Pork (butt roast) Pork (baby back ribs) 15mins (per 450g) 15mins (per 450g) 15~20mins (per 450g) Eggs (large) Barley (pearl) Congee Hard: 5mins 20~22mins (1: 2.5) 15-20mins (1:4 ~ 1:5) Millet Oatmeal Oats (steel-cut) 10~12mins (1:1.75) 2~3mins (1:2) 3~5mins (2:3) Porridge Quinoa...
-
Page 23: Specifications
Pinto Beans Soybeans Fish (whole) D 25~30mins/S 6~9mins D 35~45mins/S 18~20mins 4~5mins Fish (fillet) Lobster Mussels 2~3mins 2~3mins 1~2mins Rice & Grains: Grain : Water ratio Shrimp/Prawn Seafood Stock Beans & Lentils: 1~3mins 7~8mins D = Dry/S = Soaked SPECIFICATIONS Capacity 8.0L Power supply... - Page 24 Need more information? We hope that this user guide has given you the assistance needed for a simple set-up. For the most up-to-date guide for your product, as well as any additional assistance you may require, head online to help.kogan.com...
Need help?
Do you have a question about the KA8PRSCOOKA and is the answer not in the manual?
Questions and answers