
Related Manuals for Thule Omnistor


Summary of Contents for Thule Omnistor
- Page 1 Instructions Thule Omnistor Regal Motor 12 V Manufactured for Prod no.: 301780-301782-301784-301786-301788-301790-301791 Bring your life thule.com Doc. no.: LCI900-03 / 3380051600 Date: 01/13/21...
-
Page 3: Table Of Contents
TABLE OF CONTENTS Instructions Thule Omnistor Galactic Motor 12 V Prod no.: XXXXXX Bring your life Doc. no.: LCI900-01 / xxxxxxxxxx thule.com Date: 03/07/2019 CONTENT GUIDELINES WIND SENSOR SETTINGS p 12 OPEN THE AWNING p 13 CLOSE THE AWNING p 14... -
Page 4: Content P
CONTENT Instructions Thule Omnistor Galactic Motor 12 V Prod no.: XXXXXX Bring your life Doc. no.: LCI900-01 / xxxxxxxxxx thule.com Date: 03/07/2019 10.9 ft 12 ft 14 ft 16 ft 18 ft 20 ft 21 ft 3.28 m 3.66 m 4.27 m... -
Page 5: Guidelines P
GUIDELINES A WARNING INDICATES A POTENTIALLY HAZARDOUS SITUATION WHICH, IF NOT AVOIDED, COULD RESULT IN DEATH OR SERIOUS INJURY AND/OR MAJOR PROPERTY DAMAGE. A CAUTION INDICATES A POTENTIALLY HAZARDOUS SITUATION THAT MAY CAUSE MINOR TO MODERATE PERSONAL INJURY AND/OR PROPERTY DAMAGE. - Page 6 Consult with your dealer if you have any questions regarding the operations and limits of the products. Review all instructions and warranty information carefully. Check and replace worn-out or defective parts. Moving parts can pinch, crush or cut. Keep clear and use caution. Read the Safety manual and all instructions and keep these for future reference.
- Page 7 If wind or extended periods of rain are expected, roll up the awning. The Thule awning is a free-standing (self-supporting) awning with auto retract. Do not hang items from the awning or use tie down devices. Use of such objects can cause serious damage to the awning that is not covered by warranty.
- Page 8 Thule recommends Zinc spray surface treatment (on drilled holes). Preparation according to the prescripts of the supplier. In order to get a watertight installation, fill up the drilled holes! Thule recommends to use a sealant: SIKA 221. Observe the sealant manufacturer's instructions.
- Page 9 ELECTRICAL Only permit a qualified electrician to connect the awning to the electrical power. Disconnect the power supply before starting the assembly. The cables and cabinets in the interior of the vehicle must not be damaged through drilling the holes. Observe the length of the cable between the awning motor and receiver when choosing a place to install it.
- Page 10 - Does the awning close properly? Do not use oil based cleaners or any caustic, granulated, or abrasive type cleaners on your Thule product. Do not use any sprays (e. g. insect repellent, hairspray) near the awning. This will soil the fabric or the water-repellent effect of the fabric will be lost.
- Page 11 Control Switch EXTEND / RETRACT THE AWNING EXTEND WIND SET 1 PRESS 2x = EXTEND automatically EXTEND WIND SET 1 RETRACT WIND SET 2 EXTEND EXTEND WIND SET 1 WIND SET 1 PRESS 2x = RETRACT automatically RETRACT WIND SET 2 EXTEND WIND SET 1 EXTEND...
-
Page 12: Wind Sensor Settings P
WIND SENSOR SETTINGS Wind Set 1 wind sensor setting to close automatically for weaker wind EXTEND WIND SET 1 RETRACT WIND SET 2 Wind Set 2 wind sensor setting to close automatically for stronger wind EXTEND WIND SET 1 RETRACT WIND SET 2 Rev: 01/13/21 CCD-0004167... -
Page 13: Open The Awning P
OPEN THE AWNING Extend automatically EXTEND WIND SET 1 RETRACT WIND SET 2 Pause EXTEND WIND SET 1 EXTEND EXTEND WIND SET 1 WIND SET 1 RETRACT WIND SET 2 RETRACT RETRACT WIND SET 2 WIND SET 2 Extend manually Pause / Stop EXTEND WIND SET 1... -
Page 14: Close The Awning P
CLOSE THE AWNING Retract automatically EXTEND WIND SET 1 RETRACT WIND SET 2 Pause EXTEND WIND SET 1 EXTEND EXTEND WIND SET 1 WIND SET 1 RETRACT WIND SET 2 RETRACT RETRACT WIND SET 2 WIND SET 2 Retract manually Pause / Stop EXTEND WIND SET 1... -
Page 15: Installations P
INSTALLATIONS ADAPTERS Position adapters and awning awning rail front 10.9 ft 12 ft 14 ft 16 ft 18 ft 20 ft 21 ft 3300 mm 3680 mm 4290 mm 4900 mm 5510 mm 6120 mm 6420 mm 8.4 ft 8.4 ft 10.4 ft 12.4 ft 14.4 ft... - Page 16 Predrill in the wall Ø 5 mm (8x) (Left and Right) Ø 6.5 mm Ø 5.0 mm Screw (8x) the adapters (Left and Right) Ø 6.5 mm 6.3 mm 31.5 mm Left N° 10 Ø 6.5 mm Right Rev: 01/13/21 CCD-0004167...
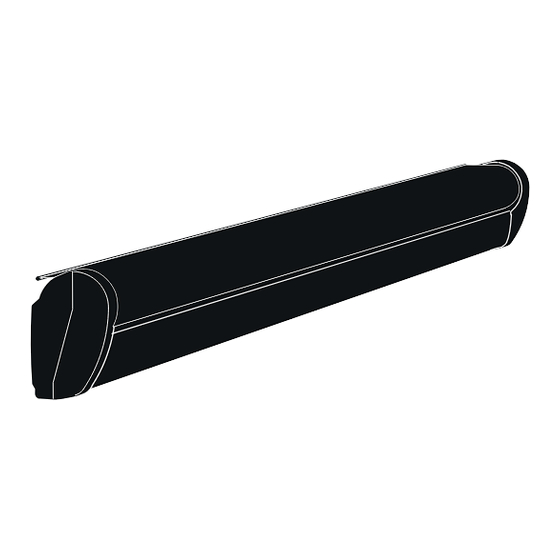
- Page 17 THE AWNING Unpack the awning front back Remove the shrink film (2x) back REMOVE CAREFULLY TO PREVENT DAMAGE TO THE AWNING ! Rev: 01/13/21 CCD-0004167...
- Page 18 Hang up the awning Fasten 4 screws (M8) KEEP THE ORDER TO FASTEN THE SCREWS !!! N° 4 front Rev: 01/13/21 CCD-0004167...
- Page 19 Remove the remaining shrink film (4x) front REMOVE CAREFULLY TO PREVENT DAMAGE TO THE AWNING ! Hang up the awning fabric Rev: 01/13/21 CCD-0004167...
- Page 20 Place the rail plug (Left and Right) Ø 3.5 mm TX20 Ø 3.5 mm Place the rail stopper (Left and Right) Ø 3.5 mm TX20 Ø 3.5 mm Rev: 01/13/21 CCD-0004167...
- Page 21 Remove the straps (4x) DO NOT REMOVE BEFORE YOU FINISHED STEP 6, 7 AND 8 !!!! SEE - 2 GUIDELINES / Safety p.5 Do not remove any of the shipping wrap around the roller tube, the ties around the arms until instructed to do so in the installation steps.
- Page 22 front AWNING EXTEND WIND SET 1 MOTOR RETRACT WIND SET 2 back SWITCH SWITCH wind settings extend / retract 201 series 201 series 201W-15 SIGMA ELKHART IN 20A 125V AC SIGMA ELKHART IN 15A 250V AC 20A 125V AC UL SWITCH 40A 12V DC 15A 250V AC CUL...
-
Page 23: Pitch Control P
PITCH CONTROL Open the awning (± 8 inch) LEFT HAND (LH) RIGHT HAND (RH) Turn the bolt (M10) to adjust (2x, LH and RH) N° 17 DOWN max 15° 0° TURN TURN LEFT ! RIGHT ! Rev: 01/13/21 CCD-0004167... -
Page 24: Manual Override P
MANUAL OVERRIDE Manual override to close (open) the awning when the motor doesn't work. Follow the steps below. Remove the cap (right side) Close the awning by turning the nut (M7 / 1/4") CLOSE CLOSE (turn left) (turn left) OPEN OPEN (turn right) (turn right) -
Page 25: Adjust Armsp
ADJUST ARMS Open the awning (± 8 inch) ADJUST LEFT HAND (LH) ARM ADJUST RIGHT HAND (RH) ARM Loosen the locking screw FRONT FRONT N° 2.5 TURN TURN LEFT ! LEFT ! Rev: 01/13/21 CCD-0004167... - Page 26 BOTTOM BOTTOM N° 6 TURN = DOWN LEFT ! TURN = UP RIGHT ! Fasten the locking screw FRONT FRONT N° 2.5 TURN RIGHT ! Rev: 01/13/21 CCD-0004167...
- Page 27 Rev: 01/13/21 CCD-0004167...
- Page 28 The contents of this manual are proprietary and copyright protected by Lippert Components, Inc. ("LCI"). LCI prohibits the copying or dissemination of portions of this manual unless prior written consent from an authorized LCI representative has been provided. Any unauthorized use shall void any applicable warranty. The information contained in this manual is subject to change without notice and at the sole discretion of LCI.
Need help?
Do you have a question about the Omnistor and is the answer not in the manual?
Questions and answers