
Related Manuals for Motorola MVMS

Summary of Contents for Motorola MVMS
- Page 1 MVMS Management Server User Guide Please read this instruction guide carefully before using the product and keep it for further reference.
- Page 2 MVMS Management Server User Manual Notes Please read this user manual carefully to ensure that you can use the device correctly and safely. There may be several technically incorrect places or printing errors in this manual. The updates will be added into the new ...
-
Page 3: Table Of Contents
MVMS Management Server User Manual Contents Introduction .......................................1 Introduction ....................................1 1.1.1 Summary ...................................1 1.1.2 Features .....................................1 1.1.3 Interfaces and Indicators ..............................1 Rear Panel Instructions ..................................2 Login ........................................3 Login ......................................3 Main Menu Interface Introduction ..............................3 Device Management...................................6 Add Encoding Device ..................................6 3.1.1... - Page 4 MVMS Management Server User Manual E-Map ....................................... 34 E-Map Settings .................................... 34 7.1.1 Create E-Map .................................. 34 7.1.2 Add Hotspot ..................................34 7.1.3 E-Map Monitoring ................................34 TV Wall ......................................36 Add TV Wall Server ..................................36 Add Decoder....................................36 8.2.1...
- Page 5 MVMS Management Server User Manual 13.4 Search ......................................78 13.5 Parking Overstaying ..................................79 13.6 Backlist Vehicle ................................... 79 Web Client ......................................81 14.1 Operating Environment of Web Client ............................81 14.2 Start IE Client ....................................81 Troubleshooting ....................................83...
-
Page 6: Introduction
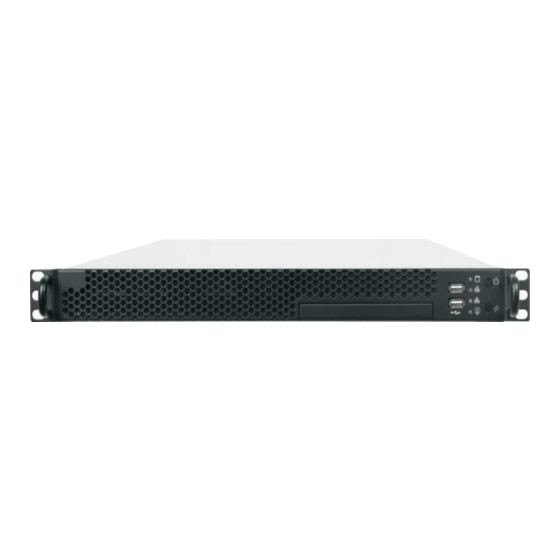
MVMS Management Server User Manual Introduction 1.1 Introduction 1.1.1 Summary Based on the concept of ―All -in-One‖, the management server is a server specially designed for security surveillance application. Its software is installed before delivery, combined the video stream replication and distribution. Due to its low cost, simple deployment, flexible expansion, powerful performance, user-friendly interface design, good compatibility and high reliability, it can meet the requirements of various large and medium sized video surveillance systems. -
Page 7: Interfaces And Indicators
MVMS Management Server User Manual 1.1.3 Interfaces and Indicators The icons below are for reference only. Please refer to the interfaces and indicators of the real server. Icon Description Icon Description System disk running indicator; flashing light Power Key indicators the disk works normally. -
Page 8: Login
MVMS Management Server User Manual Login 2.1 Login Double click the shortcut icon of ― Monitor Client‖ to run the software as shown below. ① Enter username and password (the default username is admin; the default password is 123456). ② Check ― Remember Password‖ or ― Auto Login‖ as needed. -
Page 9: Main Menu Interface Introduction
Including ― Live View‖, ― Record Playback‖, ― E-Map‖, ― TV Wall Management‖, Resource Management‖, ― Account and Permission‖, ― Alarm Center‖ ― Operation and Maintenance Management‖, ― Face System Surveillance‖, ― Face Greeting‖, ― Line Crossing Counting‖, etc. Including ―User Manual‖, ― Register license‖ and ―About MVMS‖ Help Functional area Menu Description To view live images and to record, snapshot and talk, etc. - Page 10 MVMS Management Server User Manual To set alarm linkage and schedule; To search alarm logs. Alarm Center Face To recognize, compare or search face. Surveillance To welcome visitors based on face recognition technology Face Greeting To help to manage staff attendance based on face recognition technology...
-
Page 11: Device Management
MVMS Management Server User Manual Device Management 3.1 Add Encoding Device In the main menu interface, click ― Add, Edit or Delete Device‖ to go to the following interface as shown below. Then click ― Add‖ to add devices. You can add multiply devices in this interface, such as face detection IPC, face recognition IPC/NVR/box, face recognition terminal, perimeter alert IPC, ANPR camera, etc. -
Page 12: Initiatively Report
If the IP camera is needed to add, please go to Network ConfigurationServer Configuration of the IP camera. Check ― Do you want IPcamera to connect Server‖, enter the IP address and port (default 2009) of the MVMS and then set the device number of the IP camera. -
Page 13: Modify Or Delete Device
MVMS Management Server User Manual 3.2 Modify or Delete Device After devices are added successfully, they will be listed as below. The device channel number, alarm status, online status and record status can be viewed from the above table. Click to modify the IP address, port and so on. -
Page 14: Area Setting
MVMS Management Server User Manual 3.5 Area Setting Go to Home Area Setting interface as shown below. Click [Add] to go to Area adding interface. Enter area name to create parent area. Then click [OK] to save the settings. To create sub area, click [Add], choose the parent area, enter the area name and click [OK]. -
Page 15: Add Storage Server
MVMS Management Server User Manual Click [Add] to go to media transfer server addition interface. Users can quickly add or manually add media transfer servers. Select the ― Quickly Add‖ tab and click [Refresh] to quickly search servers in the same local network. Check the desired servers and click [OK] to save the settings. - Page 16 MVMS Management Server User Manual Select the ― Quickly Add‖ tab and click [Refresh] to quickly search servers in the same local network. Check the desired servers and click [OK] to save the settings. Select the ― Manually Add‖ tab to go to the storage server adding interface. Enter the server name, IP address and port and click [OK] to save the settings.
-
Page 17: Live View
MVMS Management Server User Manual Live View 4.1 Live View Go to HomeLive View interface as shown below. The descriptions of the live view buttons are as follows. Description Description Screen display mode Show the smart event detection area Full screen... -
Page 18: View Mode Setting
MVMS Management Server User Manual PTZ control Enable/disable talkback Monitoring point setting (camera setting) Right-click button function: Menu Description Menu Description Close Close image Capture images Snapshot Channel Start Start/stop recording Enable/disable talkback Start Record Talkback Display channel name, IP address and the... -
Page 19: Channel Group View
MVMS Management Server User Manual Stop View ① Place the cursor on the live view window to display the menu toolbar and then click to stop viewing. ② Right click on the live view window and then select ― Close Channel‖ to stop viewing. -
Page 20: Plan View
MVMS Management Server User Manual You can start the channel group view as follows. 1. Choose the screen display mode according to the channel number of the channel group. Select a window and then double click the channel group name or dragging the channel group to a window to play all channels in the group. -
Page 21: View Control
MVMS Management Server User Manual adding view window. Enter the view name and click [OK] to set view plan. ② Select screen display mode and then drag monitoring points or channel group to each window. ③ Click ― View‖ on the left menu and then right click the newly added view name. Select ― Save View‖ on the pop-up menu to save the view plan or click on the live view interface to save the view plan. -
Page 22: Snapshot
Note: Only when the video is playing in the window, will the snapshot succeed. The snapshot will be saved in the Mini MVMS Server by default. A maximum of 100 snapshots can be saved. If more than 100 pictures are captured, some previous snapshots will be overwritten. -
Page 23: Talkback
MVMS Management Server User Manual 4.5 Talkback In a live view window, click on the toolbar of this window or select ― Start Talkback‖ on the pop-up menu by right clicking to enable talkback. Note: Since the software only allows enabling one device’s talk at the same time, the system will stop talking with the current device if a new talk is enabled. - Page 24 MVMS Management Server User Manual Check the left device and then click ― Add‖ to add the device you want to broadcast. Check the added camera on the right and then click ― Start Broadcast‖. Click to delete the added device.
-
Page 25: Record & Playback
MVMS Management Server User Manual Record & Playback 5.1 Record Configuration This device supports many recording types, such as manual recording, schedule recording, motion alarm recording, smart alarm recording, etc. 5.1.1 Manual Recording In the live view interface, select a channel and then click or right click to select ―... -
Page 26: Alarm Linkage Recording
MVMS Management Server User Manual 5.1.3 Alarm Linkage Recording ① Go to Home Device Setting interface. Select the desired device to enable and set schedules. ② Go to HomeAlarm CenterAlarm Linkage as shown below. Select alarm type, enable record, set linakage channel and set schedules. - Page 27 MVMS Management Server User Manual Area Description Area Description Area Description Playback area Record timetable area Toolbar Time and event search area; resource area Toolbar on Playback Window Button Description Button Description Stop viewing Zoom in Audio on/off Zoom out...
-
Page 28: Instant Playback
MVMS Management Server User Manual Play/Pause Next frame. In the playback mode, click the pause button and then click this button to play frame by frame. Click it to select playback speed. Forward 30s or backward 30s Backup start time... -
Page 29: Synchronous Playback
MVMS Management Server User Manual 5.2.2 Synchronous Playback Synchronous Playback: in a certain time, all channels play back its record at the same time together; if one channel has no record data at this time, this channel will wait. Click on the toolbar in the playback interface to go to the synchronous playback interface. - Page 30 MVMS Management Server User Manual ③ Click to play the record. Click button on the top right corner to play in full screen mode. Double click the image to switch to slice search mode by day. In the above interface, click...
-
Page 31: Playback By Event
MVMS Management Server User Manual Double click an image to switch to slice search mode by 5 minutes. Click to return to slice search mode by day; In the above interface, click to return to slice search mode by hour. -
Page 32: Backup
MVMS Management Server User Manual 5.3 Backup In the main menu interface, click ― Backup‖ to go to the backup interface. The setting steps are as follows: ① Select the desired monitoring point. ② Select date and click ― More‖ to select the start and the end time and event type. - Page 33 MVMS Management Server User Manual 5.4 Search Picture In this interface, pictures stored on the SD card or storage server can be searched and viewed. ① Select the device. ② Set the start time and the end time. ③ Choose events.
-
Page 34: Alarm Management
MVMS Management Server User Manual Alarm Management 6.1 Alarm Server Configuration Alarm server is in charge of receiving and recording alarm information of connected devices and then sending the alarm information to the relevant user terminal system or devices in accordance with prior alarm settings. There is a default alarm server. -
Page 35: Sop Settings
MVMS Management Server User Manual All OFF: disable all alarm linkages of the current alarm type and area (schedule excluded). Select beside the device name and select ― ON‖ to enable all alarm linkages of the device (schedule excluded). Select beside the title (like record) to enable record linkage of all devices (schedule excluded). -
Page 36: Alarm View
MVMS Management Server User Manual After the alarm is processed, the alarm handling status and disposition will be shown as below. If you create more than one SOP, you can designate the SOP for the added encoding devices. Go to HomeResource ManagementAdd, Edit or Delete DeviceEncoding Device interface. - Page 37 MVMS Management Server User Manual Click on the bottom right corner to expand the alarm list as shown above. Hover the mouse over the top of the alarm list and then a bidirectional arrow will appear. Drag the alarm list up or down to zoom in or out the alarm list.
-
Page 38: Alarm Log
MVMS Management Server User Manual 6.5 Alarm Log Alarm logs can be searched and exported by going to HomeAlarm CenterAlarm Log interface. Click to play the record; click to open the snapshot search window as shown below. -
Page 39: Map
MVMS Management Server User Manual E-Map The e-map service is used to store the e-map information of the system. The client landing anywhere can share the same e-map. 7.1 E-Map Settings 7.1.1 Create E-Map Go to HomeE-Map Setting interface. Click [Create Map] to create a map. - Page 40 MVMS Management Server User Manual Alarm view: if you select ― Yes‖, the monitoring video will automatically pop up on the right window when an alarm is triggered.
-
Page 41: Tv Wall
MVMS Management Server User Manual TV Wall 8.1 Add TV Wall Server Go to Home Add, Edit or Delete DeviceTV Wall Server interface as shown below. An adding TV Wall window will be prompted by clicking [Add]. Click [Refresh] to quickly add the TV wall server in the same local network, or add the TV wall server by manually entering server name, IP address and port. -
Page 42: Tv Wall Management
MVMS Management Server User Manual After that, go to HomeTV Wall ManagementTV Wall System SettingDecoder Bind Configuration. Then click to bind decoder and TV wall (See Decoder Bind for details). 8.3 TV Wall Management Go to HomeTV Wall Management TV Wall Setting. - Page 43 MVMS Management Server User Manual Merging\Splitting Merging: drag on the screen and then release. The ― Merge‖ button will be shown. Click it to merger these small windows. Splitting: select the merged window and click ― Split‖ to restore the window to the previous status.
- Page 44 MVMS Management Server User Manual To modify TV wall: Click beside the TV wall name, enter the new name and then click [OK]. To delete TV wall: Click behind the TV wall name. Decoder Bind Go to HomeTV Wall ManagementTV Wall System Setting interface as shown below. In this interface, decoder bind can be set up.
- Page 45 MVMS Management Server User Manual Click to change bound TV Wall. Return to the decoder management interface as shown above. The online status of the decoder indicates that the decoder is successfully bound with TV wall. Go to TV Wall Setting interface as shown below. Drag the outputs of the decoder to the window on the right and save...
-
Page 46: Tv Wall View
MVMS Management Server User Manual 8.3.2 TV Wall View Create Plan Go to Home TV Wall Management TV Wall ViewTV Wall Plan. Click beside the TV wall name to create the TV wall plan name. Configure Plan Double click the plan name to show the plan. - Page 47 MVMS Management Server User Manual Toolbar Menu Screen mode:1\4\9\16\25\36 screen mode is optional. Open Window:Click [Enable PIP] and then drag on a window to open a small window on it. Click [Disable PIP] to stop opening window. The small window can be dragged to anywhere on the big window.
- Page 48 MVMS Management Server User Manual Right-click Menu Screen mode:1\4\9\16\25\36 screen mode is optional. Zoom in\out:if the current screen mode is multi-screen display mode, click ― Zoom In‖ to zoom in the current image. Click ― Zoom Out‖ menu again to restore to the previous status.
- Page 49 MVMS Management Server User Manual is the current record source). PTZ Control: click this menu to prompt a PTZ control panel of the current decoding window. Direction control, zooming and focusing, Iris control, speed, preset, track and cruise calling can be operated through this control panel.
- Page 50 MVMS Management Server User Manual ② Select ― Auto-Switch Window‖ to select the window group. ③ Click ― Monitoring Point‖ to select the auto-switch channel group. ④ Enter auto-switch name and dwell time. Execute auto-switch...
-
Page 51: Decoder Input
MVMS Management Server User Manual Click to execute auto-switch. The specified channel images will be played in the specified windows in sequence. Click to stop playing the current auto-switch. Modify or delete auto-switch Right click the auto-switch name and then select Modify or Delete to modify or delete the auto-switch. -
Page 52: Playback
MVMS Management Server User Manual 8.3.4 Playback Playback on TV Wall Click ― Preview‖ on the left panel. Then this button becomes ― Playback‖. Click to get records from device or storage server and then click ― OK‖ to search records, or drag the cameras (or channels) to a window to search and play the records. -
Page 53: Task Setting Of Tv Wall
MVMS Management Server User Manual Screen mode:1\4\9\16\25\36 screen mode is optional Zoom in Save as an alarm window Save as preview window::the current channel or the historical channel is optional. Playback stream type: main stream or sub stream is selectable. -
Page 54: Tv Wall System Configuration
MVMS Management Server User Manual Modify or delete task Double click the TV wall name and then the tasks will be displayed on the right window. Click to modify or delete the task. Click behind the TV wall name and then click [OK] to confirm the deletion. - Page 55 MVMS Management Server User Manual...
-
Page 56: Account And Permission
MVMS Management Server User Manual Account and Permission 9.1 Create Account Go to HomeAccount and Permission. There is a default super admin user (the username is admin; the password is 123456). The super admin user cannot be deleted. If it is the first time for you to log in, please select the super admin user and then click ― Edit encryption‖ to select the questions and set the answers. - Page 57 MVMS Management Server User Manual ② Enter permission group name. ③ Select system permission, operation permission, area permission and TV wall permission as needed. Click to modify the permission group; click to delete the permission group.
-
Page 58: Operation And Maintenance Management
MVMS Management Server User Manual 10 Operation and Maintenance Management 10.1 Check and Export Log Go to HomeOperation and Maintenance Management. Click the ― Check and Export Log‖ tab as shown below. All types of logs can be searhed and exported here. -
Page 59: Viewing Status Log
MVMS Management Server User Manual 10.4 Viewing Status Log Go to HomeOperation and Maintenance Management Status Log interface. In this interface, record status, online or offline status of servers and monitor client can be viewed. Set the start time and the end time and then click [Search] to search status logs. -
Page 60: Local Configuration
MVMS Management Server User Manual 11 Local Configuration 11.1 Local Config Go to HomeLocal ConfigurationSystem Startup and Maintenance. Auto Login: if enabled the system will automatically log in when running this software next time. Auto Startup: if enabled, the system will automatically start when the computer starts. -
Page 61: Network Configuration
MVMS Management Server User Manual In this interface, users can enable ― Automatic Pop-up Alarm Page‖ or ― Full Screen Display when Popping up‖, set ― automatically /manually close alarm page‖ and select the number of screens (1/4/6/19 optional). 11.4 Network Configuration Click HomeLocal ConfigurationNetwork Config to go to the following interface. -
Page 62: Osd Position Configuration
MVMS Management Server User Manual You can set the time manually or automatically as needed. 11.7 OSD Position Configuration Click HomeLocal ConfigurationOSD Position Config to go to the following interface. Drag the slider to the position you want to show the OSD and then click ― Apply‖ to save the settings. -
Page 63: Intelligent Management
MVMS Management Server User Manual 12 Intelligent Management Before using intelligent functions, please confirm the intelligent analysis server has been already created and it is online. Go to HomeResource ManagementIntelligent Analysis Server. There is a default intelligent analysis server. Please make sure the server is online. - Page 64 MVMS Management Server User Manual Object Library Name: please enter the object library name as needed. Protocol Type: face recognition IPC, face recognition NVR and FR Terminal (Face Recognition Access Control Terminal) are optional. If face recognition IPC/NVR/terminal is selected, please select the corresponding device and click to add the device.
- Page 65 MVMS Management Server User Manual Adding multiple targets: Import from folder: Folder & Subfolders: After clicking [Import from Folder] and choosing ― Folder & Subfolders‖, choose a folder including multiple subfolders and then all pictures in the folder and its subfolders will be imported.
-
Page 66: Task Management
MVMS Management Server User Manual Click to view the list of the target. 12.1.2 Task Management Go to HomeFace SurveillanceConfiguration Task. ① Select the schedule and face capture type. There are two face capture types—face capture by IPC, face match by IPC Face capture by IPC: if the IPC is a face detection IPC, please select it. -
Page 67: Real-Time View
MVMS Management Server User Manual Schedule and face match configuration of NVR: You can log in the web client of the NVR and then configure the schedule of face match, select the face group and set the similarity to realize the auto report of the face match result as shown below. - Page 68 MVMS Management Server User Manual Put the cursor on the captured picture and then click + to add the capture picture to the library. Select the library on the left and then fill out the information of this target. Click [OK] to add.
-
Page 69: Search
MVMS Management Server User Manual Click it to view the matched details. Click to clear all face match result. Click to hide the unmatched result. 12.1.4 Search ① Go to Face Recognition Search interface. ② Select the IPC and picture source. -
Page 70: Search Image By Image
MVMS Management Server User Manual add. Put the cursor on the captured picture and then click to quickly search images by this picture. Put the cursor on the captured picture and then click to quickly download the captured picture. 12.1.5 Search Image by Image ①... -
Page 71: Configuration
MVMS Management Server User Manual ② Search the track Click [Play Track Line] to play track line. Click [Playback by Tracks] to play back records as shown below. 12.1.6 Configuration Set the schedule. ① ② Face Detection Algorithm Setting Set the similarity of face match by default and FTP as needed. - Page 72 MVMS Management Server User Manual Pop-up Window Setting ③ In this interface, you can choose whether to pop up the window when the camera detects a stranger or the person of blacklist or white list. Additionally, you can choose the duration time of VIP Box(s).
-
Page 73: Face Greeting
MVMS Management Server User Manual 12.2 Face Greeting Click ― Face Greeting‖ to go to the face greeting interface. The setting steps are as follows: ① Create an object library and add targets for this library in the VIP Management interface (See 14.1.1 Object library for details). - Page 74 MVMS Management Server User Manual ④ Search the face greeting records. Click ― VIP Search‖ tab as shown below. You can enter the key word to search the target or manually select the target from the library. Then set the start time and the end time and click ―...
-
Page 75: Face Attendance
MVMS Management Server User Manual ⑤ Display Setting. In this interface, greeting screen background style, screen mode, VIP box style, face greeting language and so on can be set up. Greeting Screen Background Style: three options: Video, Background Picture and Pure Color Background Screen Mode: 1/4/9/16 screen display mode can be selected. - Page 76 MVMS Management Server User Manual ③ View the match result of the sub-screen. Go to Face SurveillanceSystemSelect projection compare channels to configure channels used to compare faces. Right click on the screen to select ― Project onto‖ to select sub screen. Then you will see the face display on the sub screen as shown on the below.
-
Page 77: Line Crossing Counting
MVMS Management Server User Manual Click ― Export‖ to export the attendance record. You can open the exported record file by Microsoft Excel. The earliest record and the latest record can be played by click the corresponding play button. ⑥ Working day settings Please set the working day and working time as needed. -
Page 78: Summary Statistics
MVMS Management Server User Manual image. The camera will automatically count the number of people/motor vehicle/non-motor vehicle crossing the predefined line and the system will automatically analyze the daily and monthly flow trends. Before view the statistics, please go to HomeResource ManagementDevice SettingLine Crossing Counting interface to set the alert line, entrance/exit, detection target, etc. -
Page 79: Smart Site View
MVMS Management Server User Manual 12.5 Smart Site View In the home page, click ― View‖ and select ― Change to Smart Site Page‖. Face Attendance Settings... -
Page 80: Smart View
MVMS Management Server User Manual Click Face AttendanceTaskAttendance Settings to go to the following interface. Select the area and channel. Select entrance or exit. Set the task for each channel. Click the ― Task‖ tab to select the schedule, face capture type and face match type (See 14.1.2 Task Management for details). -
Page 81: Parking Lot Management
MVMS Management Server User Manual 13 Parking Lot Management Before using parking lot management module, please add ANPR cameras first in the resource management interface. 13.1 System Settings ① Enable the parking lot. Go to HomeParking Lot ManagementSystem menu as shown below. Select Entrances Config tab and then click the main park. -
Page 82: Vehicle Management
MVMS Management Server User Manual After the LED screen is bound to the corresponding lane, the license plate number will be displayed on this LED screen when there is a vehicle passing. ④ Set the delay time of closing the gate barrier. For example, it is set to 15s. Then the gate barrier will be automatically closed after it is opened for 15s. -
Page 83: Vehicle Monitoring
MVMS Management Server User Manual To modify vehicle information: Choose the vehicle you want to modify and then click [Modify] to pop up the modification window. Change the information as needed. To delete the vehicle information Select the vehicle you want to delete and then click [Delete] to delete this vehicle from the vehicle list. -
Page 84: Parking Overstaying
MVMS Management Server User Manual Pass record: including vehicle information, entering/exiting time, parking lot, lane, pass type, etc. The pass record also can be modified as needed. Choose the pass record and click [Modify] to modify it. Additionally, the captured vehicle picture can be viewed on the right by clicking this record inforamtion. Click [Zoom in] to zoom in the picture;... - Page 85 MVMS Management Server User Manual To modify vehicle information: Select the added vehicle and click [Modify] to modify the information of this vehicle. To delete vehicle information: Select the added vehicle and click [Delete] to delete it. To search the vehicle inforamtion: Enter the license plate number and then click [Refresh] to view the inforamtion of blacklist vehicles.
-
Page 86: Web Client
MVMS Management Server User Manual 14 Web Client 14.1 Operating Environment of Web Client The web client supports IE9/IE10/IE11, Firefox or Google browser. Please make sure that your browser supports the downloading and use of the Web Client. Here we take IE Client for example. - Page 87 MVMS Management Server User Manual In the platform interface, users can modify the login password and remotely set the monitor client and configuration client. In the web monitor client, click ― Return to Configuration‖ to go to the web configuration client. In the web configuration client, click ― Return to Monitor‖...
-
Page 88: Troubleshooting
5. The alarm information cannot be received after the user logins to the monitor client. Please checkup whether the schedule of sensor alarm, motion detection alarm and so onare set in the MVMS system. As for remote login device in the monitor client, please checkup whether alarms and alarm schedules of the remote login device have enabled. - Page 89 MVMS Management Server User Manual the IE browser to login to the device remotely and then go to― Online user‖ interface to see if there are any other users logging in. Please go to the live to see whether the device is being set up.
-
Page 90: Specifications
Manufactured, distributed or sold by MDX Electronics, LLC, official licensee for this product. MOTOROLA and the Stylized M Logo are trademarks or registered trademarks of Motorola Trademark Holdings, LLC and are used under license. All other trademarks are the property of their respective owners. © 2021 Motorola Mobility LLC.
Need help?
Do you have a question about the MVMS and is the answer not in the manual?
Questions and answers