Advertisement
Peek Collection
DESI GNED IN 20 16
AS SEM BLY N OT ES | R E V 00
T H E H O L E S H E B A N G .
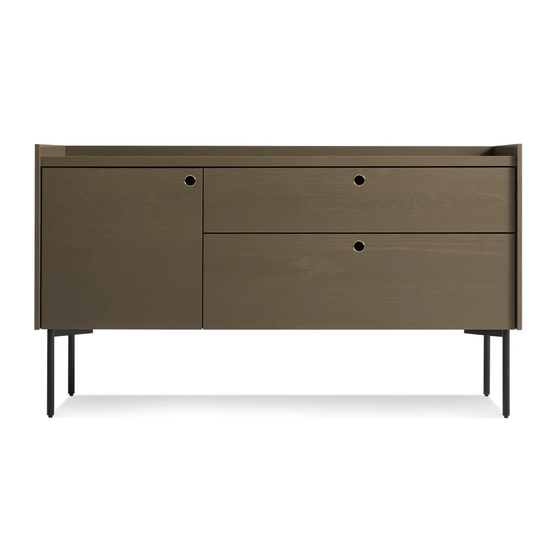
What is missing makes the mojo in this new wood case good
collection. A round cut out in drawer and door front acts as the
pull, creating function and visual appeal.
N E E D A H A N D ?
Contact us at service@bludot.com or
844.425.8368 for assistance.
Advertisement
Table of Contents

Related Manuals for BluDot Peek Small Media Stand


Summary of Contents for BluDot Peek Small Media Stand
- Page 1 T H E H O L E S H E B A N G . N E E D A H A N D ? Contact us at service@bludot.com or What is missing makes the mojo in this new wood case good 844.425.8368 for assistance.
- Page 2 Parts & Hardware 8041 Anti-tip Bracket 8042 Anti-tip Strap Pt. 8041 Pt. 8042 Pt. 1217 Pt. 1218 Pt. 1616 Pt. 9021 Case 1 | 8 4 4 . 4 2 5 . 8 3 6 8 P E E K C O L L E C T I O N...
- Page 3 Step 01 AT TA C H T H E L E G S . After the legs have been attached, have a second person help lift and bring the case upright in order to prevent leg damage. P T. 1 61 6 x 16 P T.
- Page 4 Step 02 AT TA C H A N T I -T I P B R A C K E T T O T H E W A L L . Install anti-tip bracket to wall stud 1-inch below case top panel height. 1”...
- Page 5 Step 03 I N S TA L L A N T I -T I P B R A C K E T T O C A S E . Bracket must be installed to top panel of case. In order to prevent damage, it is recommended that 3/32”...
- Page 6 Step 04 S E C U R E T H E C A S E . Install and tighten the strap prior to using the product. 8042 Anti-tip Strap PT. 80 4 2 x 1 5 | 8 4 4 . 4 2 5 . 8 3 6 8 P E E K C O L L E C T I O N...
- Page 7 Additional Information If door needs adjustment from TOP TO BOTTOM, Use Screw #1. If door needs adjustment from SIDE TO SIDE, Use Screw #2. If door needs adjustments from FRONT TO BACK, Use Screw #3. D O O R A D J U S T M E N T. Hinges work in pairs.
- Page 8 Additional Information TO R EMOVE DRAWERS Extend the drawer completely. Squeeze both locks on the underside of the drawer while pulling the drawer out. TO R EIN STALL TH E DRAW ER Pull both slides forward. Engage rear slide catches. Lower drawer front into place and push closed. C LEAN Clean with a slightly damp, soft cloth.
Need help?
Do you have a question about the Peek Small Media Stand and is the answer not in the manual?
Questions and answers