Table of Contents
Advertisement
Owner's Manual
Please read before using this Unit.
DVD / CD Player with Video Cassette Recorder
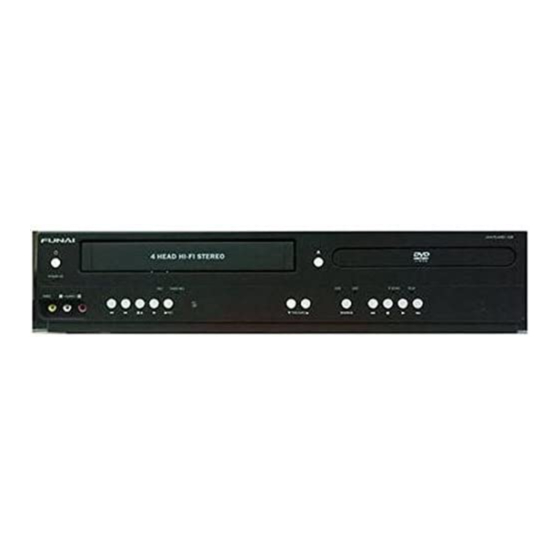
CDV225FX4
Supplied Accessories
Remote Control Unit
R
t C
t l U it
(NB681UH)
AA (1.5 V DC)
battery x 2
RCA audio / video cables
Connecting to RF Modulator (Not Supplied)
If
If your TV has antenna in jack only, it is still possible to
TV h
t
i j k
connect this Unit to your TV by using an RF modulator. In
this case, follow the instructions below.
1) Disconnect the power cords of the Unit from the AC outlet.
2) Make the connection as illustrated below.
3) Set your RF modulator's channel 3/4 switch to either 3
or 4, whichever the TV channel is least used in your area. If
your RF modulator has a modulator/antenna switch, set it
according to the manual supplied with the RF modulator.
4) Plug in the power cords of the Unit to the AC outlet.
5) Turn on your TV and choose the same channel as
you set the RF modulator's channel 3/4 switch to.
For more details, follow the manual supplied with the
RF modulator.
DVD/VCR
rear of this Unit
AUDIO OUT
RCA audio cable
L
DVD
DVD/VCR
VCR
VCR
DIGITAL
AUDIO
S-VIDEO
COMPONENT
AUDIO OUT
AUDIO IN
AUDIO IN
VIDEO OUT
AUDIO OUT
OUT
OUT
Y
L
L
L
R
L
C
/
B
R
R
R
P
B
COAXIAL
RCA video cable
VIDEO OUT
VIDEO IN
VIDEO IN
R
VIDEO OUT
C
R
/
P
R
rear of your RF
VHF / UHF
modulator
antenna
or
RF coaxial
ANT. IN
cable TV
cable
company
Set channel 3 or 4
No Antenna (RF) Output!
If your TV only has an Antenna input
(no A / V inputs), you will need an
RF modulator (NOT INCLUDED) to
connect this Unit
to your TV.
RF modulator
3
CHANNEL
Note(s):
• RF modulator is not supplied with this Unit. You need to
purchase this separately.
• The picture quality may suffer if this Unit is connected through
an RF modulator to an RF only TV.
© 2013 Funai Electric Co., Ltd.
Owner's Manual
O
' M
Owner's Manual
Quick Start Guide
Quick Start Guide
l it i till
ibl t
rear of TV
ANT. IN
RF coaxial cable
3
4
R
L
CHANNEL
AUDIO IN
VIDEO IN
TO TV
ANT. IN
TV
4
L
R
TO TV
ANT. IN
VIDEO IN
AUDIO IN
If you need additional operating assistance after reading this Owner's Manual, please call
Contents
PRECAUTIONS
PRECAUTIONS
Safety Instructions ...................................................................................2
Symbols Used in This Manual .............................................................................. 4
Maintenance .............................................................................................................. 4
About Cassette Tapes and Discs .............................................................5
Playable Media .......................................................................................................... 5
Unplayable Discs ...................................................................................................... 5
Connections .............................................................................................6
l
Connection to a TV ..................................................................................................
Connection to an Audio System ......................................................................... 7
(Cable/Satellite or DTV to analog TV Converter Set-top box) ................. 7
Preparation for Use .................................................................................8
Turning on Unit for the First Time ..................................................................... 8
Clock Setting .............................................................................................................. 8
Function Overview ..................................................................................
Front Panel Indicator Lights ................................................................................. 9
Selecting DVD or VCR Operation ........................................................................ 9
Front & Rear Terminals ........................................................................................... 9
Remote Control........................................................................................................10
Installing the Batteries for the Remote Control ...........................................10
Playback .................................................................................................
When You Playback a Cassette Tape Recorded in Hi-Fi Stereo .............11
Other Operations ....................................................................................11
Index Search ..............................................................................................................11
Time Search ...............................................................................................................11
Auto Repeat ...............................................................................................................12
Recording ................................................................................................12
Recording & One-touch Timer Recording (OTR)..........................................12
Timer Recording ......................................................................................................12
Satellite Link ..............................................................................................................
Copying a Cassette Tape ......................................................................................14
Playback .................................................................................................
On-Screen Display ..................................................................................
Using Track Search ..................................................................................................17
Using Title / Chapter Search ................................................................................17
Using Time Search ..................................................................................................17
Marker Setting ..........................................................................................................17
Repeat / Random / Programmed Playback ...........................................
Repeat Playback.......................................................................................................
Repeat A-B Playback ..............................................................................................
Random Playback....................................................................................................
Programmed Playback ..........................................................................................
Special Settings ......................................................................................19
Subtitle Language ...................................................................................................19
Audio Language ......................................................................................................19
Camera Angles .........................................................................................................19
Black Level Setting ..................................................................................................19
Stereo Sound Mode ................................................................................................19
DVD Setting ............................................................................................20
LANGUAGE Setting .................................................................................................20
DISPLAY Setting .......................................................................................................21
AUDIO Setting ..........................................................................................................21
PARENTAL Setting ...................................................................................................22
OTHERS Setting ........................................................................................................22
Reset to the Default Setting (Except for PARENTAL Setting) ..................23
Troubleshooting Guide ..........................................................................23
Specifications .........................................................................................24
Language Code List ................................................................................
LIMITED WARRANTY ...............................................................................
Y Y
TOLL FREE : 1-877-393-8624
or visit our Web Site at:
www.funaiamerica.com/support
V
6
9
11
14
15
16
18
18
18
18
18
24
24
Advertisement
Table of Contents

Related Manuals for FUNAI CDV225FX4


Summary of Contents for FUNAI CDV225FX4
-
Page 1: Table Of Contents
RF modulator to an RF only TV. LIMITED WARRANTY ................If you need additional operating assistance after reading this Owner’s Manual, please call TOLL FREE : 1-877-393-8624 or visit our Web Site at: www.funaiamerica.com/support © 2013 Funai Electric Co., Ltd. -
Page 2: Safety Instructions
PRECAUTIONS Safety Instructions Model No.: The model and serial number’s for this Unit may be found on the cabinet. You should record and retain those number’s for future reference. Serial No.: WARNING: TO REDUCE THE RISK OF FIRE OR ELECTRIC SHOCK, DO NOT EXPOSE THIS APPARATUS TO RAIN OR MOISTURE. - Page 3 CAUTION: Danger of explosion if battery is incorrectly replaced. Replace only with the same or equivalent type. WARNING: Batteries (Battery pack or battery installed) shall not be exposed to excessive heat such as sunshine, fire or the like. LASER SAFETY This apparatus is classified as a CLASS 1 LASER PRODUCT.
-
Page 4: Symbols Used In This Manual
• Clean video heads only when problems occur. Servicing g FUNAI is a registered trademark of Funai Electric Co., Ltd. • Please refer to relevant topics on the “Troubleshooting Guide” and may not be used in any way without the express written on page 23 before returning the product. -
Page 5: About Cassette Tapes And Discs
About Cassette Tapes and Discs Playable Media Type of Recorded Mark (logo) Region code Media size Tape speed and disc types media signals tape width cassette SP: 1-5/16 inch/sec. (33.40 mm/sec.) analog video 1/2 inches tape SLP: 7/16 inch/sec. (11.12 mm/sec.) (12.65 mm) DVD-VIDEO *1, 2, 3, 5, 9... -
Page 6: Setup
SETUP Connections Connection to a TV If your TV does not have AUDIO/VIDEO input jack, see the section “Connecting to RF Modulator (Not Supplied)” on the front page of the owner’s manual. VCR and Basic DVD Connection Available for DVD only DVD’s picture quality analog audio standard picture... -
Page 7: Connection To An Audio System
Connection to an Audio System Playing 2 Channel Analog Audio Playing Multi Channel Digital Audio Dolby Digital decoder, Audio MD deck or DAT deck analog audio digital audio COAXIAL input jacks input jack RCA audio cable digital audio coaxial cable DVD/VCR This Unit DIGITAL... -
Page 8: Preparation For Use
Preparation for Use Turning on Unit for the First Time Clock Setting Please note: most instructions in this man- ual refer to Remote Control use. Be sure your TV’s input is set to VIDEO. (Name may Press [SETUP] and select “CLOCK SET”. - M E N U - Then press [B] to go to next step. -
Page 9: Function Overview
Function Overview Front Panel Indicator Lights Lights up when the progressive scan system is activated. Lights up when the inserted disc is being played back. Lights up during a recording or one-touch timer Blinks when an unplayable disc Lights up when this Unit recording (OTR). -
Page 10: Remote Control
Remote Control DVD mode VCR mode Media Button (Alphabetical order) • To select chapter or title directly. • To select track directly. • To search forward/backward • To forward/backward a tape. through a disc. • To search forward/backward • To begin slow forward •... -
Page 11: Vcr Functions
VCR FUNCTIONS Playback Before: Turn on the TV. Note(s): • When a cassette tape without a record tab is inserted, the Unit Insert a cassette tape To start playback will start playback into this Unit. automatically. • Tracking in playback will be automatically adjusted. -
Page 12: Auto Repeat
Auto Repeat When “AUTO REPEAT“ is set to “ON“, the cassette tape will automatically rewind and start over when it reaches the end. This will continue until auto repeat function is turned off. Press [SETUP] and choose “AUTO REPEAT”. Press [B] to “AUTO REPEAT” to set “ON” or “OFF”. - M E N U - - M E N U - TIMER PROGRAMMING... -
Page 13: Notes For Timer Recording & One-Touch Timer Recording (Otr)
ONE TIME PROGRAM Select “ONCE”, “DAILY” (Mon-Fri) or “WEEKLY”. Select recording speed. PROGRAM NUMBER 1 Then press [B] to go to next step. Then press [CLEAR]. PROGRAM NUMBER 1 B ONCE DATE 1 0 / 0 2 TUE DAILY START TIME 0 7 : 3 0 WEEKLY TIME 0 8 : 3 0... -
Page 14: Satellite Link
Satellite Link You can set the Unit to start recording whenever it detects a video signal from the External Tuner (Cable/Satellite or Converter Set-top Box). Preparing for the Satellite Link Timer Recording: Preparation on the tuner Preparation on this Unit External Tuner •... -
Page 15: Dvd Functions
DVD FUNCTIONS Playback Before: Turn on the TV, amplifier and any other components which are connected to this Unit. Make sure the TV and audio receiver (not supplied) are set to the correct channel. Insert a disc with Lights up when power is on. Label Facing Up. - Page 16 On-Screen Display You can check the information about the current disc by pressing [DISPLAY] on the Remote Control. appears only in a case multi- DISPLAY DISPLAY angle is available on the DVD. current playback status current playback status 4/12 0:03:21 - 0:02:15 11/16 0:00:00 - 0:03:30 remaining time of the current track remaining time of the current...
-
Page 17: On-Screen Display
Search Functions Search function does not work during programmed or random playback. Using Track Search Using Time Search Press [SEARCH] repeatedly until the time search display appears. Press [SEARCH]. SEARCH SEARCH 1:29:00 TOTAL Select track number by using [the Number buttons] within 30 seconds. Select a desired disc time by using [the Number buttons] within 30 seconds. -
Page 18: Repeat / Random / Programmed Playback
Repeat / Random / Programmed Playback Repeat Playback Random Playback DVD D DVD D Repeat function is available only during playback. playing the tracks back in sequence. Press [REPEAT] during playback. Press [MODE] twice. REPEAT RANDOM CD-DA TOTAL 0:45:55 MODE RANDOM PROGRAM --no indication-- e.g.) DVD... -
Page 19: Special Settings
Special Settings Subtitle Language Camera Angles This Unit allows you to select a subtitle Language (if available) Some DVD may contain scenes which have been shot during DVD playback. simultaneously from various angles. You can change the camera angle if the “ANGLE ICON” appears on the Press [SUBTITLE] during playback. -
Page 20: Dvd Setting
DVD Setting g QUICK Menu You can select “PLAYER MENU”, “TV ASPECT”, “PROGRESSIVE” or “DOLBY DIGITAL” from “QUICK” menu quickly. Press [SETUP] in the Stop mode. Select the desired item. SETUP SETUP QUICK SETUP menu Step 5 PLAYER MENU ENGLISH Confirm that “QUICK”... -
Page 21: Display Setting
DISPLAY Setting You can change the display functions. Follow steps 1 to 3 in the “CUSTOM Menu” section on page 20. Select the desired item. To exit “TV ASPECT” or “STILL MODE” menu TV ASPECT: QUICK (Default: 4:3 LETTER BOX) Select the SETUP See note on the right. -
Page 22: Parental Setting
PARENTAL Setting This function prevents Unit from playing material inappropriate for children. Parental Levels Parental level allows you to set the rating levels on your DVD software. Playback will stop if the ratings exceed the levels you set. Follow steps 1 to 3 in the “CUSTOM Menu” section on page 20. Select “PARENTAL Select the desired level. -
Page 23: Reset To The Default Setting (Except For Parental Setting)
Reset to the Default Setting (Except for PARENTAL Setting) Press [SETUP] in the Select “INITIALIZE”. Select “YES”. To exit the menu Stop mode. SETUP SETUP SETUP menu Press Note(s): twice. SETUP SETUP INITIALIZE SETUP • When you do not wish QUICK Initialize? QUICK... -
Page 24: Specifications
‘---’ will be displayed instead. (3-letter language code is written in bracket.) LIMITED WARRANTY FUNAI CORP. will either repair the product at no charge or exchange the product OUT OF OR OCCASIONED BY THE USE OF OR THE INABILITY TO USE THIS with new or refurbished product at Company’s option.
Need help?
Do you have a question about the CDV225FX4 and is the answer not in the manual?
Questions and answers