Advertisement
Quick Links
Thank you for purchasing your Kushlan Mixer. We hope that you will enjoy using it for many years to come.
SHOULD YOU REQUIRE ANY SET-UP OR OPERATING ASSISTANCE WITH YOUR PRODUCT,
DO NOT RETURN TO ORIGINAL PLACE OF PURCHASE.
•
After referring to the operation manual, if you still require assistance, please consult our web site @
•
From our web site you will be able to e-mail us directly-
•
If you still require assistance, you may call our customer service department at 1-800-469-4178.
IMPORTANT
READ ME FIRST
Model 350W Model 600W
www.kushlanproducts.com
Advertisement

Related Manuals for Kushlan 350W


Summary of Contents for Kushlan 350W
- Page 1 IMPORTANT READ ME FIRST Thank you for purchasing your Kushlan Mixer. We hope that you will enjoy using it for many years to come. SHOULD YOU REQUIRE ANY SET-UP OR OPERATING ASSISTANCE WITH YOUR PRODUCT, DO NOT RETURN TO ORIGINAL PLACE OF PURCHASE.
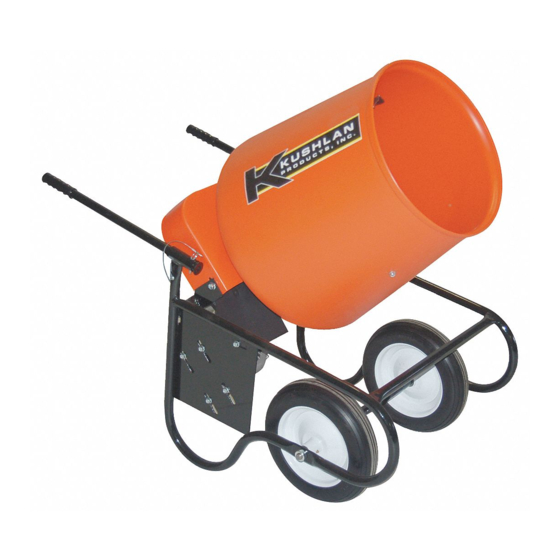
- Page 2 Kushlan Poly Pro Mixers ASSEMBLY & OPERATING INSTRUCTIONS PARTS MANUAL Model 350W Model 600W ! WARNING ! DO NOT ATTEMPT TO START OR OPERATE THIS MACHINE UNTIL ALL THE INSTRUC TIONS HAVE BEEN READ AND UNDER STOOD BY THE OPERATOR. FAILURE TO INJURY...
-
Page 3: Safety Alert Symbol
SAFETY ALERT SYMBOL SAFETY Instructions This safety alert symbol is used to attract your attention. For the safety of yourself and others around you, it is extremely important that you observe the following PERSONAL SAFETY IS INVOLVED when you notes. see this symbol, PAY EXTRA ATTENTION, BECOME 1. - Page 4 350W 600W ITEM PART NO DESCRIPTION 28873-601 350W Wheelbarrow 28874-601 600W Wheelbarrow 28873-001 Frame assembly 28874-901 Frame Assembly 28760-004 Polyethylene drum 28874-004 Polyethylene drum 28872-001 Electric motor with cord 28874-014 Electric motor with cord 28760-007 2" pulley 07055-028 28" v-belt 28760-008 6"...
- Page 6 A. LUBRICATION: There are grease E. CONCRETE MIXING fittings (Item 29) on all models. Apply any type EP grease. Apply grease until grease ! CAUTION: DO NOT insert sharp objects begins to come out of the bushings. into the plastic mixing drum. Doing so will damage the drum.
-
Page 7: Parts List
PARTS LIST TOOLS NEEDED 2 ea. Handle bars 2 ea. Handle Grips ! WARNING: whenever assembling, 1 ea. Wheelbarrow Axle 8 ea. 5/16 x ¾ screws lubricating, or adjusting any part of the 1 ea. Axle Spacer 8 ea. 5/16 nuts mixer, disconnect the power. - Page 8 Step 5 – Wheel & Frame Assembly Step 6 – Wheel & frame Assembly Place other end of axle assembly into frame Place lock collars on the axle shaft and tighten with allen wrench. Step 1 – Electric Motor Assembly Step 2 –...
- Page 9 Step 1 – Electric Motor Assembly Step 1 – Electric Motor Assembly To adjust alignment of belt, loosen the 2” Use a straight edge to help attain proper pulley on the motor. alignment. Once alignment has been achieved, tighten set screws on the 2” pulley. Do not adjust 6”...
- Page 10 Step 3 – Drum & Ring Gear Assembly Step 4 – Drum & Ring Gear Assembly With ring gear plated side out, slide drum shaft Tighten ring gear screws evenly. Torque to 20 against drum and secure with 12 screws and foot pounds, or so ¼”...
- Page 11 Step 1 – Final Assembly Step 2 – Final Assembly Install locking collar (20) to drum shaft. Attach handlebars. Slide from front to back. Step 3– Final Assembly Step 4– Final Assembly Attach lock pins to each side. Grease fittings. (Very Important) 1.
- Page 12 SO THE ABOVE LIMITATION OR EXCLUSION MAY NOT APPLY TO YOU. To take advantage of this warranty, the product or part must be returned for examination, postage prepaid, to Kushlan Products, Inc. Proof of purchase date and an explanation of the complaint must accompany the merchandise. If our inspection discloses a defect, we will either repair or replace the product, at our election, or we may elect to refund the purchase price if we cannot readily and quickly provide you with repair or replacement, if you are willing to accept such refund.
Need help?
Do you have a question about the 350W and is the answer not in the manual?
Questions and answers