Table of Contents
Advertisement
Quick Links
Advertisement
Table of Contents

Related Manuals for Novexx Solutions XLP 604


Summary of Contents for Novexx Solutions XLP 604
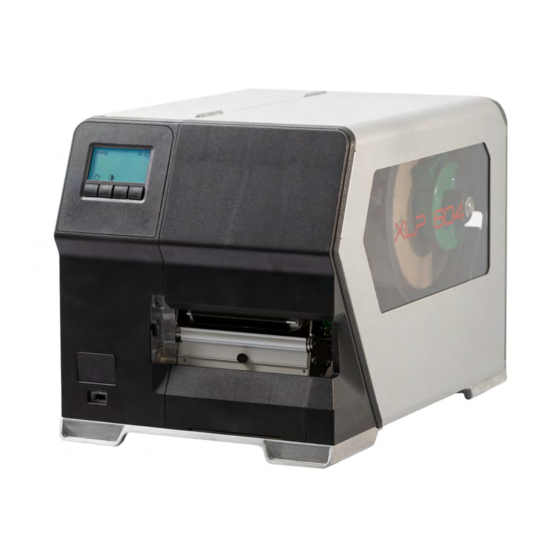
- Page 1 USER MANUAL XLP 604 Label printer Edition 2 - 12/2021...
-
Page 2: Table Of Contents
XLP 604 User Manual Contents Please note! - 5 - 5 General Notes Validity of this manual and required compliance - 5 How information is represented - 6 For your safety - 7 - 7 Intended use Safety notes - 8 Warning notes on the machine - 9 Product Description - 11... - Page 3 XLP 604 User Manual Before Operation - 56 Electrical Connections - 56 Connecting to the mains power supply - 56 Connecting to a data host - 57 - 58 Switching on/off Basic Settings - 59 Basic settings with the setup wizard - 59 Operation - 61 Insertion Diagram - 61...
- Page 4 XLP 604 User Manual Maintenance - 115 Replacing Rubber Rollers - 115 Print head replacement - 117 Appendix - 120 Label material types - 120 EU Declaration of Conformity - 121 - 122 Applied Licences Index of parameter names and error messages - 123 Edition 2 - 12/2021...
-
Page 5: Please Note
GENERAL NOTES Validity of this manual and required compliance Contents The complete operating manual for the label printer XLP 604 (also referred to in the following as “XLP 60x”, “machine” or “printer”) consists of the following parts: Manual Target group... -
Page 6: General Notes
XLP 604 User Manual Copyright NOVEXX Solutions retains all rights to this manual and its appendices. Reproduction, reprint or any other type of duplication, including parts of the manual, are permitted only with written approval. Printed in Germany Manufacturer Novexx Solutions GmbH Ohmstrasse 3 D -85386 Eching, Germany... - Page 7 XLP 604 User Manual Illustrations Illustrations appear in the text where required. References to the illustrations are shown in brackets, if necessary (see table). Reference to illustration Application none • Only one illustration • Reference to the illustration is obvious •...
-
Page 8: For Your Safety
XLP 604 User Manual Fig. 1: Operating position of the XLP 60x. NOVEXX Solutions shall assume no liability for damage resulting from non-intended use of the ma- chine. Safety notes Follow the instructions Safe and efficient operation of the printer can only be guaranteed if you observe all necessary informa- tion. -
Page 9: Warning Notes On The Machine
XLP 604 User Manual • Lay the power supply cable, data cables and compressed air hoses (if applicable) in a way that no- body can stumble over it. • In case of emergency, switch off the printer and disconnect the power supply cable! •... - Page 10 XLP 604 User Manual Warning note Meaning Article no. The “Pinch point” warning note warns of the danger posed by A5346 the machine´s rotating parts; they can trap items and draw them in. The “Hot surface” symbol warns of a burn hazard if the A5640 surface is touched.
-
Page 11: Product Description
TECHNICAL DATA Dimensions | Connection Data | Ambient Conditions Dimensions • Measures: – XLP 604: 496 x 312 x 330 mm • Weight: – XLP 604 “Basic”: 18.6 kg (w/o options) 141 120 Fig. 3: Measures of the XLP 604. -
Page 12: Label Material
XLP 604 User Manual Mains frequency 60 /50 Hz Input current max. 3.9 A Power consumption max. 456 W Ambient conditions Installation location • Inside buildings • Protected from wind and spray water • Dry • Not in areas with potentially explosive atmosphere Operating Temperature +5 to +40°C... -
Page 13: Thermal Transfer Ribbon
XLP 604 User Manual Machine Material width Label length XLP 604 15-120 mm 10-2000 mm XLP 604 Dispenser 30-115 mm 30-500 mm Table 2: Label measures. Label roll Max outer-Ø 210 mm Inner-Ø 38.1 / 76.2 / 101.6 mm (1.5 / 3 / 4“) Punch measures Fig. -
Page 14: Perfomance Data
XLP 604 User Manual Ribbon roll Variable Dimension Outer Ø max. 105 mm Core inside Ø 25.4 mm (1“) 25 -110 mm Width Table 4: Dimensions of usable ribbon rolls. Perfomance Data Print head • Print technology: Thermal direct or thermal transfer printing •... - Page 15 XLP 604 User Manual Max. misalignment at Max. misalignment of the print position print position 1 = 1,0 mm +3,0 Max. misalignment at print position 2 = 2,5 mm +2,0 +1,5 +1,0 +0,5 Distance punch to -0,5 print position -1,0...
- Page 16 XLP 604 User Manual Output modes 1:1 and 100% printable. Non-printable areas: • 1 mm from the front label edge (1st edge in feed direction) • 1 mm from the left band border (right border in feed direction) Interpreter Easy Plug, Line Printer, Hex Dump, ZPL Character sets •...
-
Page 17: Interfaces & Electronics
XLP 604 User Manual 2-dimensional bar codes Data Matrix Code (code according to ECC200) Maxi Code PDF 417 Codablock F Code 49 QR Matrix Code GS1 Databar & CC bar codes Reduced Space Symbology (GS1 Databar) and Composite Component (CC) bar codes:... -
Page 18: Certificates And Markings
XLP 604 User Manual Characteristic Details Realtime clock Standard Operating panel • 4 buttons • LC graphics display with 128x64 pixels • RGB illuminated background Certificates and Markings CE, TÜV-Mark, TÜV -Mark, FCC, EAC, CCC The regulation EN 55032 demands for class A devices the following text to be printed in the manual: „WARNING: This is a class A product. -
Page 19: Design Models
XLP 604 User Manual DESIGN MODELS Printer versions The XLP 60x is available in the following versions: Version Features XLP 60x “Basic” The printed labels can be torn off at the standard tear-off edge. XLP 60x “Peripheral” Equipment like version “Basic”. In addition, it is possible to operate the following options for further processing of the printed labels: •... -
Page 20: Options And Accessories
XLP 604 User Manual Options and accessories Internal Options …should be factory-fitted or installed by a service technician: • Reflex sensor: Light barrier fork that apart from the transmission sensor, also contains a reflex sen- sor (detects reflex marks on the material bottom side). -
Page 21: Functionality
XLP 604 User Manual FUNCTIONALITY XLP 60x Fig. 9: Material and ribbon path inside the XLP 60x. A: print head, B: ribbon unwind mandrel, C: ribbon rewind mandrel, D: material unwinder, E: print roller The printing principle is based on the thermal print head (A). The core piece of the print head, the ther- mal edge, consists of a row of dot elements, which can be controlled and heated separately. - Page 22 XLP 604 User Manual • Rewind the label web internally (internal rewinder option) XLP 60x with internal rewinder and M type dispensing edge Fig. 10: Material- and ribbon path inside the XLP 60x Dispenser. When used as a dispenser, the label material is drawn around the dispensing edge (A), causing the la- bel (B) to peel off.
-
Page 23: Operating Controls
XLP 604 User Manual OPERATING CONTROLS Operating controls at the XLP 60x Fig. 11: Operating controls outside at the XLP 604 “Peripheral”. Operation panel Displays the operating status of the machine; for defining settings in the parameter menu Front cover Open this to insert label material and ribbon (At version “Peripheral”... - Page 24 XLP 604 User Manual Fig. 12: Operating components at the XLP 604. Ribbon unwinding mandrel: Holds the ribbon roll Ribbon winding mandrel: Winds up the used ribbon (With ribbon saving option) Ribbon drive roller: Drives the ribbon (Without ribbon saving option) Ribbon deflection roller...
-
Page 25: Operating Controls On The Xlp 60X With Internal Rewinder
XLP 604 User Manual Operating controls on the XLP 60x with internal rewinder Bild 13: Additional controls of the XLP 60x with internal rewinder. Baffle plate: Deflects the printed labels without dispensing any of them Rewinder: Rewinds the label web Operating controls on the XLP 60x with internal rewinder and dispensing edge M (“Dispenser”) - Page 26 XLP 604 User Manual Dispensing edge “M”: Separates the labels from the backing paper (For manual removal of the labels) Plug: Connector for the dispensing edge light barrier Dispensing roll: Holds the material web taut over the dispensing edge Dispensing roll button: Press the red button to remove the dispensing roll (Internal) rewinder: Rewinds the backing paper Dispensing edge “A”: Separates the labels from the backing paper...
-
Page 27: Operating Panel
XLP 604 User Manual OPERATING PANEL Operating Controls The operation panel of the XLP 60x consists of a graphic display and four keys below the display. The current functions of the keys are displayed by icons (B) above the keys. -
Page 28: Operating Principle
XLP 604 User Manual Operating Principle The figure shows, how to toggle between the screens: Fig. 17: How to toggle between the screens: A “Home” (cyan), B “Setup” (white), C “Ready” (cyan). The displayed texts and icons are largely selfexplanatory. Based on the different background colors of... - Page 29 XLP 604 User Manual Color State Ready • The printer is ready to receive print data • The commands in the received print job are processed by the interpreter • Errors or warnings can be displayed White Standalone • Selection of a file on a storage medium •...
-
Page 30: Icons
XLP 604 User Manual Icons Home: Toggle to the “Home” screen Start: Starting an operation, e. g. printing Contrast: Setting the print contrast during Halt: Stopping an operation, e. g. printing printing; Hidden, if only operator access rights exist Printing: Toggle to the „Ready“ screen Out: Jump to the next higher menu level;... -
Page 31: Key Combinations
XLP 604 User Manual Ethernet active: The network interface is Ethernet inactive: The network interface is selected for data transfer and a connection selected for data transfer and a connection could not be established could be established USB: The USB interface is selected for da-... -
Page 32: Web Panel
XLP 604 User Manual WEB PANEL Web panel - what´s that? The web panel is a comfortable external control panel, which can be operated on mobile or stationary computing devices. The web panel is supported by the following machines: • Print & Apply Systems XPA 93x •... -
Page 33: Starting The Web Panel
XLP 604 User Manual Starting the web panel Procedure 1. Determine the IP address of the machine. The IP address is displayed on the operation panel during machine startup. Alternatively, se- lect the following parameter from the menu: Interface >... - Page 34 XLP 604 User Manual Pos. no. Function Infotext: Display of different operating states of the machine with different background colours • READY: Appears when the control panel on the machine displays “Ready”. • USER AT MACHINE: Appears when the control panel on the machine displays "Home".
-
Page 35: Notifications
XLP 604 User Manual Notifications On the web panel 3 types of notifications are displayed: Error messages, warnings and information. Error messages Fig. 19: Error messages that require a reaction from the operator are displayed in full. Status number and status text match the display on the machine operating panel. - Page 36 XLP 604 User Manual Pos. no. Function Error message in the history with timestamp. An explanation of the selected entry appears on the right. If there is a quick guide to correct the error message, it is displayed (C). Quick guide to the error message, if available (Corresponds to the quick guide that can be accessed via a QR code from the machine operating panel)..
-
Page 37: Production View
XLP 604 User Manual Production View In the production view, the print job in progress can be monitored and settings can be made for the print job. “Job details” view Fig. 22: “Job details” view of a print job in the web panel. -
Page 38: Machine Settings View
Open machine settings (see following chapter) Opens the user manual EXPERTS Opens the description of the Node.js API Opens the Novexx web page Opens an e-mail to the NOVEXX Solutions service hotline Edition 2 - 12/2021 Product Description Web panel... - Page 39 XLP 604 User Manual Machine settings After clicking on “Machine settings”, the parameter menu familiar from the machine operating panel opens. More or less parameters are displayed depending on the permissions given by the login role. As “Operator” only the parameters of the Info menu can be accessed.
-
Page 40: Administration View
XLP 604 User Manual ► Enter the search term in the search field (A) - only parameters containing the search term will ap- pear (B). Fig. 28: After entering the search term “head” (A), only parameters containing “head” in the name are displayed (B). - Page 41 XLP 604 User Manual Fig. 30: Administration view (only with “Supervisor” or “Service” rights). Edition 2 - 12/2021 Product Description Web panel...
-
Page 42: Parameter Menu
XLP 604 User Manual PARAMETER MENU Overview parameter menu The table below gives an overview of the structure of the parameter menu and the parameters it con- tains. Only the parameters printed in red are described here. The parameters printed in black are only rel- evant for service personnel and are therefore described in the Service Manual. - Page 43 XLP 604 User Manual Options Options (continued) Options (continued) Selection ├ Multilabel mode Start Sensor ├ Periph.device ├ ├ Startprintmode Label2 offset ├ Statussignals └ ├ Starterrorstop Label3 offset ├ ├ Dispenseposition └ Externalsignal [10] Applicator ├ Applicator type ├...
- Page 44 XLP 604 User Manual System Printer Language Interface Language PrintInterpret. Printinceterfa Accessauthoriz. EasyPlug Setting Network (Operatorpassword) ├ Characterfilter ├ IP Addressassign (Supervisorpassword) ├ Charactersets ├ IP address (Servicepassword) ├ EasyPlugerrors ├ Net mask Factorysettings ├ EasyPlugwarning ├ Gatewayaddress Customdefaults ├...
- Page 45 XLP 604 User Manual Tools Tools (continued) Info Diagnostic ├ (Punchycalibr.) ModelID ├ (Usermodified) ├ (Headidle adjust) Status Printouts [22] ├ Parameter 1 └ (Headpress. adjust) ├ PrinterStatus ├ Internal Flash ├ MemoryStatus └ Parameter n ├ Copyfrom USB. ├...
- Page 46 XLP 604 User Manual Info (continued) Info (continued) Info (continued) ├ Tot.ribb.length ├ Max.Labellength └ Material rewind ├ Headstrobes └ Customdefaults ├ Modulename ├ Operationtime └ CPU board data ├ Modulepartnumb. └ TotalOperation ├ CPUidentifier ├ Serialnumber System ├ FPGAversion ├...
- Page 47 XLP 604 User Manual Info (continued) Info (continued) └ └ Print head [30] Basic USI ├ Modulename ├ Modulename ├ Modulepartnumb. ├ Modulepartnumb. ├ PCBpartnumber ├ Serialnumber ├ Serialnumber ├ Productiondate ├ Productiondate ├ Moduletype ├ CANMACaddress ├ Resolution └...
-
Page 48: Parameter Reference
XLP 604 User Manual Parameter Reference Print contrast Setting range Default setting Step width Easy Plug [1...110] % #!H, #PC2045 CAUTION! The parameter Print contrast affects directly the life durance of the print head. It counts: „The higher the setting of Print contrast is, the lower is the life durance of the print head“. - Page 49 Print speed Setting range Default setting Step width Easy Plug XLP 604: [3..16] Inch/s 8 Inch/s 1 Inch/s #PC1003, #PR The print speed (material feed) can be adjusted according to the ribbon and material combination be- ing used in order to optimise the contrast depth and the density of the print image.
- Page 50 XLP 604 User Manual Material type Settings Default setting Step width Easy Plug Endless, Punched Punched #PC1005, #IM Definition of the used label material. A distinction is made between endless material and gapped ma- terial (hole gaps, self-adhesive material with register gaps). The detected gap position corresponds to the start of the label.
- Page 51 XLP 604 User Manual Settings Default setting Step width Easy Plug [30...107] mm 107 mm 1 mm #PC1033 Width of the applied thermotransfer ribbon. Color Side Settings Default setting Step width Easy Plug inside, outside inside #PC1049 • inside: The ribbon roll is wound with the color side inwards.
- Page 52 XLP 604 User Manual Switches the “Head lift automatic” on or off. In high-speed and/or small-label applications, it has been found that the impression accuracy varies depending on whether printing stops between the labels or not. The “Head lift automatic” function ensures that the print head is briefly lifted between all labels, thus ensuring a more uniform impression accuracy.
-
Page 53: Definition Of Favorites
XLP 604 User Manual • Head down: The printhead is down during label material initialization and label feeding. For certain critical label materials, this setting can result in a better impression accuracy on the first label com- pared to the following labels. -
Page 54: Connections
XLP 604 User Manual CONNECTIONS WARNING! This machine operates using mains voltage! Touching live electrical parts may expose you to hazardous electrical currents and may lead to burns. ► Make sure that the machine is switched off before connecting the power cable. - Page 55 XLP 604 User Manual Pos. Connection Application Connector for a start sensor (standard industrial sen- sor, e.g. Novexx N102106 or N102109 or foot switch (Optional) BasicIO board N103110), triggers the printing dispensing cycle. Signal inputs and outputs for controlling the printer or for...
-
Page 56: Before Operation
XLP 604 User Manual Before Operation ELECTRICAL CONNECTIONS Connecting to the mains power supply WARNING! This machine operates at mains voltage! Contacting electrically live components can cause lethal electrical shocks and burns. ► Make sure that the machine is switched off before connecting the power cable. -
Page 57: Connecting To A Data Host
XLP 604 User Manual Disconnecting the mains connection cable: 3. Pull off the cable at the plug. Connecting to a data host The print data can alternatively be transmitted via one of the data interfaces: • Ethernet • USB • Serial interface The desired data interface is prompted by the setup wizard the first time you switch on the machine. -
Page 58: Switching On/Off
XLP 604 User Manual SWITCHING ON/OFF Switching on ► Set the mains switch (A) of the machine to "I" (On). Fig. 34: Mains switch at the XLP 60x. Shortly after switching on the printer, during startup, the following informations show up on the screen: Fig. -
Page 59: Basic Settings
XLP 604 User Manual ► Press the key to confirm and to trigger the restart. BASIC SETTINGS Basic settings with the setup wizard The setup wizard controls the automatic retrieval of basic settings in the parameter menu that are essential for the operation of the printer. - Page 60 XLP 604 User Manual The setup wizard then starts again until either the settings are made or “Run Setup Wizard?” is an- swered with “No”. If “No” is selected in response to the initial question, the setup wizard will not start and the prompt “Run Setup Wizard?”...
-
Page 61: Operation
XLP 604 User Manual Operation INSERTION DIAGRAM XLP 60x Fig. 38: Insertion diagram for XLP 60x. A: label material, B: thermotransfer ribbon, C: path for inside wound label material, D: path for thermotransfer ribbon wound with ink outside. Edition 2 - 12/2021... -
Page 62: Insertion Diagram
XLP 604 User Manual XLP 60x with internal rewinder and dispensing edge M Fig. 39: Insertion diagram for XLP 60x Dispenser. A: label material, B: thermotransfer ribbon, C: path for inside wound label material, D: path for thermotransfer ribbon wound with ink outside, E: dispensed label, F: dispensing edge, G: backing paper, H: internal rewinder. -
Page 63: Inserting And Removing Ribbon
XLP 604 User Manual INSERTING AND REMOVING RIBBON WARNING! Sharp-edged clamping plates on the ribbon mandrels! Danger of cuts on the hands. ► Be careful when sliding on/removing the ribbon roll. WARNING! During operation, the print head can become hot! ►... - Page 64 XLP 604 User Manual 2. Open the pressure lever on the print head (B, figure above). 3. Push the empty cardboard sleeve onto the rewinding mandrel until it stops (A, figure below). 4. Push the ribbon roll onto the unwinding mandrel until it stops (B, figure above).
- Page 65 XLP 604 User Manual CAUTION! Poor printing results due to wrinkling of the ribbon! ► Tape the ribbon to the cardboard core as described (in no case wrap or knot the ribbon end around the cardboard core - the knot would lead to wrin- kling!) Insert the ribbon into the printer as shown.
-
Page 66: Removing The Used Up Ribbon
XLP 604 User Manual Related reference Insertion Diagram on page 61 Removing the used up ribbon Before you begin • Machine ist stopped ( “Home” screen). • The warning notes about inserting ribbon have been read and understood (see “Inserting and re- moving ribbon”... -
Page 67: Alternating Use Of Different Sorts Of Ribbon
XLP 604 User Manual 3. Pull the roll of used ribbon from the rewinding mandrel: 4. Remove the empty cardboard sleeve from the unwinding mandrel and push it onto the rewinding mandrel. 5. Clean the print head. What to do next Inserting a new ribbon roll. - Page 68 XLP 604 User Manual Procedure 1. Open the pressure lever. 2. Loosen the ribbon between the mandrels: 3. Remove both rolls of ribbon from the mandrels. Pull away the ribbon sideways from the print head: Store your frequently used ribbons as pairs of rolls.
-
Page 69: Inserting And Removing Label Material
XLP 604 User Manual INSERTING AND REMOVING LABEL MATERIAL WARNING! During operation, the print head can become hot! ► Be careful when touching the print head. WARNING! Danger of injury due to moving and rapidly rotating parts. ► When working on the machine, do not wear loose jewellery, long sleeves, long hair, and similar. - Page 70 XLP 604 User Manual 3. Press the two handles (B) on the guide disc together to release the clamping; at the same time, pull the guide disc off the unwinder mandrel. 4. (Optional) If the inner diameter of the material roll is larger than the diameter of the unwinder man- drel: Attach adapter rings (picture).
- Page 71 XLP 604 User Manual 5. Push the label roll onto the unwinder as far as it will go (picture left). Place the material web around the dancer arm. 6. Push the guide disc against the material roll as far as it will go (picture top right).
-
Page 72: Xlp 60X Standard: Inserting Leporello Material
XLP 604 User Manual What to do next If the label stock is different from the one used before: Setting the label sensor. Related tasks Positioning the Label Sensor on page 79 Related reference Insertion Diagram on page 61 XLP 60x Standard: Inserting leporello material Before you begin •... - Page 73 XLP 604 User Manual 3. Press the two handles (B) on the guide disc together to release the clamping; at the same time, pull the guide disc off the unwinder mandrel. 4. Place the label material (A) behind the printer. Guide the material web over the lower part of the housing (B) and under the unwinder (C) to the print module.
- Page 74 XLP 604 User Manual 5. Push the web through the print module as shown. The material web must run under the aluminium profile (A) and through the light barrier fork (B). 6. Push the material web (A) towards the inner material guide (B). Push the outer material guide (C) close to the edge of the material web without pinching the material.
-
Page 75: Xlp 60X With Internal Rewinder: Inserting Roll Material
XLP 604 User Manual 8. Reinstall the unwinder guide disc and push it close to the edge of the material without pinching the material. What to do next If the label stock is different from the one used before: Setting the label sensor. - Page 76 XLP 604 User Manual Procedure 1. Open the front hood (fig. below, A). 2. Open the print head pressure lever (fig. above, B). 3. Press the two handles (B) on the guide disc together to release the clamping; at the same time, pull the guide disc off the unwinder mandrel.
- Page 77 XLP 604 User Manual 4. (Optional) If the inner diameter of the material roll is larger than the diameter of the unwinder man- drel: Attach adapter rings (picture). To do this, press the adapter rings together at the grip sur- faces, push them to the desired position and release the grips again.
- Page 78 XLP 604 User Manual 7. Push the web through the print module as shown, move the end of the label web around the baffle (C) plate towards the rewinder (D) and fasten it with the clamp (E). The material web must run under the aluminium profile (A) and through the light barrier fork (B).
-
Page 79: Setting And Monitoring
XLP 604 User Manual SETTING AND MONITORING Positioning the Label Sensor About this task Adjusting the label sensor position is necessary, if • the machine is put into operation for the first time • a material change takes place on wider or narrower material or on material with different punching... -
Page 80: Settings In The Parameter Menu
XLP 604 User Manual Settings in the Parameter Menu The settings described below are generally included in the print job, in which case they do not need to be made. Manual settings that were made before a print job was transferred will be overwritten by the settings in the print job. - Page 81 XLP 604 User Manual Fig. 42: Label material (self-adhesive labels) (A: Label web (backing paper), B: Label, C: Label pitch, D: Material width) Material width 1. Measure the width of the material web (D) (including backing paper). 2. Call Print >...
-
Page 82: Monitoring Functions
XLP 604 User Manual Parameter Function System > Print Control > Temp. Sets the correction factor for the temperature compensation. reduction The higher the selected setting, the greater the reduction of the driving power when the print head temperature rises. - Page 83 (d) of the ribbon roll in millimeters. Inner-Ø ribbon roll = Outer-Ø ribbon core! The default setting matches the NOVEXX Solutions standard ribbon 10287-600-xxx. Fig. 45: Outer (D) and inner (d) diameter of the ribbon roll. To monitor the ribbon reserve, a critical ribbon length can be set. If the remaining length falls below this level, a warning or an error message appears - depending on the setting.
- Page 84 XLP 604 User Manual ► Set System > Print Control > Ribbon end warn. to the desired critical ribbon length in millimetres. ► Set System > Print Control > Ribbon warn stop to the desired behavior: • Off: Printer shows ribbon warning and does not stop: Fig.
-
Page 85: Printing
XLP 604 User Manual PRINTING Creating Print Jobs There are two ways to create a print job: • Using layout software Layout software may include any type of software that has a print function (for example text process- [35] ing). Special label layout software is more suitable, for example NiceLabel . -
Page 86: Transferring A Print Job From A Host By Means Of A Command File
XLP 604 User Manual Transferring a Print Job from a Host by Means of a Command file Describes how to tranfer a print job from a host using a data cable and a text file containing Easy Plug commands ( “command file”). - Page 87 XLP 604 User Manual 4. (Optional) Ethernet/USB interface: copy testjob.txt \\ComputerName\ShareName – ComputerName: can be found under Windows 10 as follows: Press the key. The start menu opens. b. Type “System Information” into the search field. The window “System Informations” opens.
-
Page 88: Starting A Print Job From An External Memory Medium
XLP 604 User Manual Starting a Print Job from an External Memory Medium Before you begin • The print job is stored on an external storage medium (e. g. USB thumb drive) in folder \Formats. • The name of the print job file ends with .for •... - Page 89 XLP 604 User Manual 7. Press key 2 to start the print job without changing the print amount. To change the print amount or other input fields, see figure below. If the printer showed the “Ready” screen before it was toggled into standalone mode, the print- ing starts immediately.
-
Page 90: Starting And Monitoring A Print Job
XLP 604 User Manual Starting and Monitoring a Print Job The printer starts to print, as soon as the following conditions are met: • The printer is switched on • The display shows the “Ready” screen • A print job has been transmitted and interpreted Fig. -
Page 91: Standalone Operation
XLP 604 User Manual STANDALONE OPERATION Requirements and Function Requirements • External memory medium (USB thumb drive) • Computer, to write on the memory medium • (Optional) Keyboard, simplifies entry of variable data Keyboard type Order no. USB-keyboard without numeric keypad, German layout... -
Page 92: Selecting Files From An External Memory Medium
XLP 604 User Manual Selecting Files from an External Memory Medium Before you begin • The file is stored on an external memory medium (e. g. USB thumb drive) in folder \FORMATS • The file has one of the extentions .for (print job or setup file) or .tar (firmware) •... -
Page 93: Functions With External Keyboard
XLP 604 User Manual 7. Press key 2 to start the print job without changing the amount. For change of the print amount or of other input values, see fig. below. If the printer showed the “Ready” screen before switching into standalone mode, the printing starts immediately. - Page 94 XLP 604 User Manual Keyboard key Function Delete the character left of the cursor Confirm a modification Discard a modification Move the cursor to the left Move the cursor to the right Insert the selected character into the string Jump to the beginning (e. g. of a selection list) Jump to the end (e.
-
Page 95: Executing Different File Types
XLP 604 User Manual 1. On the keyboard, press the key for the first letter of the wanted file name , e. g. „n“. Display: The filter icon stands for the activated filter function. Through the filter appear only those file names that start with „n“... - Page 96 XLP 604 User Manual Automatic file execution [37] If a file named DEFAULT.FOR exists on the memory medium in the folder \FORMATS, it is executed automatically at system start. [38] If a file \AUTOSTRT.FOR is also existing in the root directory, it will be executed first. But be aware that standalone print jobs are only executed properly, if the relevant file is stored in the folder \FORMATS, as described above.
-
Page 97: Disturbances
XLP 604 User Manual Disturbances GENERAL INFORMATION ABOUT STATUS REPORTS Display of status reports During operation, tests are continually carried out to determine whether a malfunction has occurred. If a malfunction is detected, the corresponding status report appears on the display. - Page 98 XLP 604 User Manual Warnings Background color = yellow Warnings inform the operator about the occurance of a certain event at the printer. The message is only displayed for a short time. The printer continues operating without intervention from the user.
- Page 99 XLP 604 User Manual USI status messages These status messages are triggered by the signal interface. They provide information on whether cer- tain signals are present. Fig. 56: Example of a USI status message. Status message Cause USI pause Signal usi.pause is active USI feed Signal usi.feed is active...
- Page 100 XLP 604 User Manual By pressing the key, the display can be toggled between error message and Easy Plug command text. Unspecific errors Some errors can have more than one cause. To be able to find the specific reason for such an error, it is important that it can be reproduced.
-
Page 101: Access Troubleshooting Instructions With Your Smartphone
XLP 604 User Manual ACCESS TROUBLESHOOTING INSTRUCTIONS WITH YOUR SMARTPHONE Fig. 57: If the error message has a barcode symbol (A), a QR code (B) can be used to call up troubleshooting instructions (C) on the smartphone. This function is currently only available for the most important error messages relevant to the ma- chine operator. -
Page 102: Reference Of Status Reports
XLP 604 User Manual REFERENCE OF STATUS REPORTS 5001 No gap found No gap found or several blank labels fed. Illustrated description for troubleshooting: Click Error 5001 or scan the QR code: The error can have several causes: Cause Measure Label sensor at the wrong position. - Page 103 XLP 604 User Manual Possible causes Solution The label material is finished, i.e. the rear end of ► Load new roll of label stock the material web has reached the yellow material guide in the printing module The label web runs outside of the rear material ►...
- Page 104 XLP 604 User Manual Illustrated description for troubleshooting: Click Error 5074 or scan the QR code: ► Close the print head pressure lever as far as it will go. A certain resistance must be overcome until the lever snaps in.
- Page 105 ► Install or replace the print head. 6036 Print Head not authenticated A foreign, unauthorized print head was detected (print head is not from NOVEXX Solutions). ► Replace print head with a print head from NOVEXX Solutions. 6037 Print Head not programmed The print head has an unprogrammed crypto chip.
-
Page 106: Cleaning
XLP 604 User Manual Cleaning CLEANING INSTRUCTIONS WARNING! Dangerous situations may arise during maintenance and cleaning work. Accidents may occur due to mechanical or electrical effects if the relevant safety instructions are not observed! ► Switch off the machine before cleaning or maintenance and pull out the mains pow- er connecting line! ►... -
Page 107: Cleaning The Print Head
XLP 604 User Manual General cleaning Dust particles are especially likely to accumulate in the area of the print mechanics. ► Remove dust particles with a soft brush or a vacuum cleaner. ► Clean the housing with a cloth and a standard com-mercial neutral cleaner. - Page 108 XLP 604 User Manual 2. Open the front hood (A, figure below). 3. Open the print head pressure lever (B, figure above). 4. (Optional) Loosen the ribbon web and push it aside at the print head. 5. Moisten the cloth with spirit (or isopropyl alcohol) (B) and wipe off the thermo strip (A).
-
Page 109: Cleaning The Rubber Rollers
XLP 604 User Manual CLEANING THE RUBBER ROLLERS CAUTION! Risk of damaging the roller. ► Never use knives or sharp-edged objects to clean the rollers! Fig. 59: Position of the rubber rollers: A Print roller, B Feed roller, C Draw roller It is recommended to remove the rollers completely for cleaning. -
Page 110: Cleaning The Dancer Arm Roller
XLP 604 User Manual 5. Moisten a dust-free cloth with roller cleaner and wipe the roller. 6. Reinstall the roller. CLEANING THE DANCER ARM ROLLER On the deflection roller (A) of the dancer arm, glue residues settled over time and must be removed. -
Page 111: Cleaning The Label Sensor
XLP 604 User Manual If the printer is equipped with the ribbon saving function, the ribbon roller (picture above, C) is made of rubber. (Optional) Moisten a cloth with roller cleaner and wipe the ribbon roller (C) with it. CLEANING THE LABEL SENSOR... - Page 112 XLP 604 User Manual 7. Pull out guiding profile (A). 8. Move the light barrier fork (B) all the way out by turning the setting knob (A). 9. Carefully lift the upper part of the light barrier fork (B). 10. Moisten a cloth or cotton swab with methylated spirit (A, figure above) and wipe it over the light barrier at the end of the light barrier fork.
- Page 113 XLP 604 User Manual 11. When assembling, push the guide profile through the guide (A) of the light barrier fork again and push the rear end back onto the bolt (B) in the base plate. 12. Screw the plastic part tight again:...
-
Page 114: Cleaning The Material End Sensor
XLP 604 User Manual CLEANING THE MATERIAL END SENSOR The material end sensor (A) is located in the inner material guide. The sensor must be cleaned regularly to remove material and dust residues. The cleaning intervals depend on the material used. -
Page 115: Maintenance
XLP 604 User Manual Maintenance REPLACING RUBBER ROLLERS The rubber rollers are held in place by a bayonet coupling and can be replaced without any tool. This description counts for the following rollers (see fig.): Fig. 61: Positions of the rubber rollers (some parts are faded out for better visibility of the rollers) A Print roller, B Feed roller, C... -
Page 116: Replacing Rubber Rollers
XLP 604 User Manual 5. Press the print roller (A) firmly in up to the stop, then turn it to the left and pull it out. When the machine is switched off - what it should be - the clutches rotate with it. The print roller can be easily blocked by holding the feed roller and vice versa. -
Page 117: Print Head Replacement
XLP 604 User Manual PRINT HEAD REPLACEMENT Fig. 62: A: Print head, B: Thermal strip at the print head WARNING! Burn hazard. The print head becomes hot during operation. ► Allow print head to cool before touching. ► Be careful whenever touching the print head. - Page 118 XLP 604 User Manual 2. Open the front hood (A, figure below). 3. Open the print head pressure lever (B, figure above). 4. (Optional) Loosen the ribbon web and push it aside at the print head. 5. Loosen thumb screw (A) and pull print head (B) forward.
- Page 119 XLP 604 User Manual Installing the print head: 6. Position the new print head with the holes (A) on the bolts (B). Carefully press the print head with the plug contacts on the rear side into the connector (C). 7. Tighten thumb screw (D, figure above).
-
Page 120: Appendix
XLP 604 User Manual Appendix LABEL MATERIAL TYPES What to look for when selecting label stock for the XLP 60x. Material specification The XLP 60x can process rolls as well as leporello fold (= fold-out or accordion fold material). For more information on the material specifications, refer to chapter “Technical data” > “Label materi- al”. -
Page 121: Eu Declaration Of Conformity
Models XLP 604 / XLP 605 / XLP 606 General designation Label Printer... -
Page 122: Applied Licences
XLP 604 User Manual APPLIED LICENCES Open Source Software This print & apply system uses open source software. A directory of the used software libraries and li- censes is stored in the machine and can be downloaded via web browser. -
Page 123: Index Of Parameter Names And Error Messages
XLP 604 User Manual Index of parameter names and error messages Numerics 5001 No gap found Outer ribbon diamet. 5002 Material end 5005 Cutter 5008 Ribbon end 5074 Print module open Print contrast 5110 Ribbon low Print method 5140 Rewinder control... - Page 124 Novexx Solutions GmbH Telephone: +49-8165-925-0 | www.novexx.com Ohmstraße 3 85386 Eching Germany...
Need help?
Do you have a question about the XLP 604 and is the answer not in the manual?
Questions and answers