Fein KBM 50 Auto Repair Instructions
Hide thumbs
Also See for KBM 50 Auto:
- User manual (163 pages) ,
- Manual (233 pages) ,
- Instruction manual (49 pages)

Related Manuals for Fein KBM 50 Auto


Summary of Contents for Fein KBM 50 Auto
- Page 1 KBM 50 Auto Repair instructions All rights reserved by FEIN, especially in case of industrial rights registration. C-SC_CSSM Version 1.0 2013-09-01 1/103 FEIN retains all rights of disposal, such as copying and circulation.
-
Page 2: Table Of Contents
Tools required Lubricants and auxiliary substances required Disassembly Assembly Troubleshooting Connection diagram All rights reserved by FEIN, especially in case of industrial rights registration. C-SC_CSSM Version 1.0 2013-09-01 2/103 FEIN retains all rights of disposal, such as copying and circulation. -
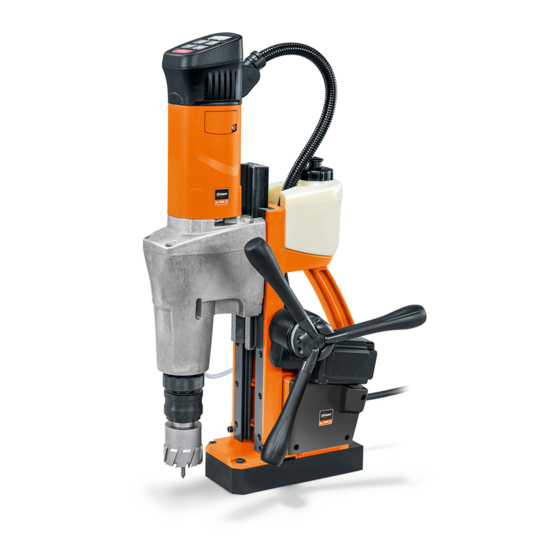
Page 3: Models Described
Order no. KBM 50 Auto 7 27 042 00 23 0 JCM 200 Auto 7 27 046 12 36 0 All rights reserved by FEIN, especially in case of industrial rights registration. C-SC_CSSM Version 1.0 2013-09-01 3/103 FEIN retains all rights of disposal, such as copying and circulation. -
Page 4: Technical Data
The complete technical data can be found in the operating instructions for the model. Test data Up-to-date test data for all models can be found on the FEIN Extranet (Customer Service → Repair Guides). Lubricants The lubricants and container sizes available from FEIN can be found on the FEIN Extranet (Customer Service →... -
Page 5: Notes / Requirements
The German Equipment and Product Safety Act applies for correct use. Outside Germany, the regulations applicable in the relevant country must be observed! All rights reserved by FEIN, especially in case of industrial rights registration. C-SC_CSSM Version 1.0... -
Page 6: Tools Required
- Torque wrench with hexagon socket fixture 2.5 mm - Hammer NOTE You can only order special tools with an order number from FEIN. All rights reserved by FEIN, especially in case of industrial rights registration. C-SC_CSSM Version 1.0 2013-09-01 6/103 FEIN retains all rights of disposal, such as copying and circulation. - Page 7 25 mm Outer diameter 30mm Inner diameter ~15mm NOTE You can only order special tools with an order number from FEIN. All rights reserved by FEIN, especially in case of industrial rights registration. C-SC_CSSM Version 1.0 2013-09-01 7/103 FEIN retains all rights of disposal, such as copying and circulation.
- Page 8 - Base Height 66 mm Width ~20 mm NOTE You can only order special tools with an order number from FEIN. All rights reserved by FEIN, especially in case of industrial rights registration. C-SC_CSSM Version 1.0 2013-09-01 8/103 FEIN retains all rights of disposal, such as copying and circulation.
-
Page 9: Lubricants And Auxiliary Substances Required
Feed gearbox (three balls, worm, worm wheel) Grease 0 40 118 0300 9 120g Gearbox All rights reserved by FEIN, especially in case of industrial rights registration. C-SC_CSSM Version 1.0 2013-09-01 9/103 FEIN retains all rights of disposal, such as copying and circulation. -
Page 10: Disassembly
KBM 50 Auto 6. Disassembly Disassembling container 1. Remove container (1). All rights reserved by FEIN, especially in case of industrial rights registration. C-SC_CSSM Version 1.0 2013-09-01 10/103 FEIN retains all rights of disposal, such as copying and circulation. - Page 11 - Circlip pliers 3. Remove circlip (3). - Plastic hammer 4. Pull off nut (4). - Drift key All rights reserved by FEIN, especially in case of industrial rights registration. C-SC_CSSM Version 1.0 2013-09-01 11/103 FEIN retains all rights of disposal, such as copying and circulation.
- Page 12 - Circlip pliers Push up sleeve (1) and hold. Remove circlip (2). Remove washer (3) and bolt (4). Remove spiral spring (5). All rights reserved by FEIN, especially in case of industrial rights registration. C-SC_CSSM Version 1.0 2013-09-01 12/103 FEIN retains all rights of disposal, such as copying and circulation.
- Page 13 Tool: When loosening circlip, hold cover with hand. - Circlip pliers 1. Remove circlip (1). 2. Remove cover (2). All rights reserved by FEIN, especially in case of industrial rights registration. C-SC_CSSM Version 1.0 2013-09-01 13/103 FEIN retains all rights of disposal, such as copying and circulation.
- Page 14 Disassembling quick-release chuck 1. Remove spiral spring (1). 2. Remove inner sleeve (2). 3. Remove outer sleeve (3). 4. Remove four balls (4). All rights reserved by FEIN, especially in case of industrial rights registration. C-SC_CSSM Version 1.0 2013-09-01 14/103...
- Page 15 3. Push up outer sleeve (3) and hold. CAUTION! Risk of injury due to tensioned spiral spring. When loosening circlip, hold disc with hand. 4. Remove circlip (4). All rights reserved by FEIN, especially in case of industrial rights registration. C-SC_CSSM Version 1.0 2013-09-01 15/103 FEIN retains all rights of disposal, such as copying and circulation.
- Page 16 3. Remove circlip (4). CAUTION! Risk of injury due to tensioned spiral spring. When loosening the circlip, hold sleeve (5) with hand. 4. Remove sleeve (5). All rights reserved by FEIN, especially in case of industrial rights registration. C-SC_CSSM Version 1.0 2013-09-01 16/103 FEIN retains all rights of disposal, such as copying and circulation.
- Page 17 1. Remove spiral spring (1). 2. Remove inner sleeve (2). 3. Remove outer sleeve (3). 4. Remove two pins (4). 5. Remove two sealing rings (5). All rights reserved by FEIN, especially in case of industrial rights registration. C-SC_CSSM Version 1.0 2013-09-01 17/103...
- Page 18 Disassembling switch insert of drill unit 1. Loosen two screws (1) and take off cover (2). Tool: 2. Remove switch insert (3). - Torx T20 All rights reserved by FEIN, especially in case of industrial rights registration. C-SC_CSSM Version 1.0 2013-09-01 18/103...
- Page 19 Tool: 2. Unlock plug (3) and pull off ribbon cable (4). - Torx T20 3. Remove plug (5). 4. Remove electronics PCB (6). All rights reserved by FEIN, especially in case of industrial rights registration. C-SC_CSSM Version 1.0 2013-09-01 19/103...
- Page 20 2. Disconnect and remove all cables which are connected on the PCB (2). - Two slotted screwdrivers 3. Use two screwdrivers to remove the electronics PCB (2). 4. Pull cable shoes off brush holders. All rights reserved by FEIN, especially in case of industrial rights registration. C-SC_CSSM Version 1.0 2013-09-01 20/103 FEIN retains all rights of disposal, such as copying and circulation.
- Page 21 This may result in hand injuries and damage to the tool. Hold drill unit firmly when loosening levers. 2. Slide up drill unit (3) and remove. 3. Remove pressure piece (4). All rights reserved by FEIN, especially in case of industrial rights registration. C-SC_CSSM Version 1.0 2013-09-01 21/103...
- Page 22 1. Loosen the four socket head screws. Tool: 2. Disconnect gearbox housing from motor housing with intermediate bearing. - Size 5 socket wrench - Plastic hammer All rights reserved by FEIN, especially in case of industrial rights registration. C-SC_CSSM Version 1.0 2013-09-01 22/103...
- Page 23 3. turn the switch pushbutton (3) in position two. 4. Pull off second gear-wheel (4) by hand. 5. Remove circlip (5). 6. Remove rotary switch (6). All rights reserved by FEIN, especially in case of industrial rights registration. C-SC_CSSM Version 1.0 2013-09-01 23/103 FEIN retains all rights of disposal, such as copying and circulation.
- Page 24 3. Remove circlip (4). - Sleeve outer: ~65mm inner: 4. Press out shaft (5) with grooved ball bearing. 55mm All rights reserved by FEIN, especially in case of industrial rights registration. C-SC_CSSM Version 1.0 2013-09-01 24/103 FEIN retains all rights of disposal, such as copying and circulation.
- Page 25 - Hook - Circlip pliers - Sleeve outer: ~55mm inner: 40mm All rights reserved by FEIN, especially in case of industrial rights registration. C-SC_CSSM Version 1.0 2013-09-01 25/103 FEIN retains all rights of disposal, such as copying and circulation.
- Page 26 Tool: 1. Remove circlip (1). 2. Remove gear-wheel (2). - Circlip pliers 3. Remove second gear-wheel (3) and feather key (4). All rights reserved by FEIN, especially in case of industrial rights registration. C-SC_CSSM Version 1.0 2013-09-01 26/103 FEIN retains all rights of disposal, such as copying and circulation.
- Page 27 - Arbor press 3. Take off intermediate bearing (4). - Sleeve outer: ~35mm inner: 25mm 4. Remove grooved ball bearings (5). All rights reserved by FEIN, especially in case of industrial rights registration. C-SC_CSSM Version 1.0 2013-09-01 27/103...
- Page 28 Only pull carbon brush out to point where it no longer scrapes the armature. - Hook 3. Loosen four screws (4). 4. Take off intermediate bearing (5). 5. Remove armature (4). All rights reserved by FEIN, especially in case of industrial rights registration. C-SC_CSSM Version 1.0 2013-09-01 28/103...
- Page 29 Disassembling gearbox housing Tool: 1. Remove bearings (1). - Inner bearing puller, 6-10mm - Inner bearing puller, 12-16mm All rights reserved by FEIN, especially in case of industrial rights registration. C-SC_CSSM Version 1.0 2013-09-01 29/103 FEIN retains all rights of disposal, such as copying and circulation.
- Page 30 - Torx T15 - Torx T20 3. Remove supply cable (4) to stator. - Plastic hammer 4. Remove stator. All rights reserved by FEIN, especially in case of industrial rights registration. C-SC_CSSM Version 1.0 2013-09-01 30/103 FEIN retains all rights of disposal, such as copying and circulation.
- Page 31 3. Remove sealing ring (3). - Chuck cone 19mm; 26mm 4. Remove NILOS ring (4). 5. Pull off grooved ball bearing (5). 6. Remove plate (6). All rights reserved by FEIN, especially in case of industrial rights registration. C-SC_CSSM Version 1.0 2013-09-01 31/103...
- Page 32 Tool: 1. Pull off plug (1). 2. Unscrew screw (2). - Slotted screwdriver - Size 6 socket wrench All rights reserved by FEIN, especially in case of industrial rights registration. C-SC_CSSM Version 1.0 2013-09-01 32/103 FEIN retains all rights of disposal, such as copying and circulation.
- Page 33 Disassembling spider Tool: 1. Loosen the four screws (1) and take off cover. 2. Pull off spider (2) together with motor. - Torx T20 All rights reserved by FEIN, especially in case of industrial rights registration. C-SC_CSSM Version 1.0 2013-09-01 33/103...
- Page 34 KBM 50 Auto 6. Disassembly Disassembling PCB 1. Pull off grey connecting cable (1). 2. Pull off the two connecting cables (2). All rights reserved by FEIN, especially in case of industrial rights registration. C-SC_CSSM Version 1.0 2013-09-01 34/103 FEIN retains all rights of disposal, such as copying and circulation.
- Page 35 KBM 50 Auto 6. Disassembly Disassembling PCB 1. Press hook (1) upwards and take out PCB (2). All rights reserved by FEIN, especially in case of industrial rights registration. C-SC_CSSM Version 1.0 2013-09-01 35/103 FEIN retains all rights of disposal, such as copying and circulation.
- Page 36 Disassembling PCB Tool: 1. Remove the two screws (1). 2. Take out cover (2). - Torx T20 All rights reserved by FEIN, especially in case of industrial rights registration. C-SC_CSSM Version 1.0 2013-09-01 36/103 FEIN retains all rights of disposal, such as copying and circulation.
- Page 37 2. Pull off the two grey connecting cables (2) 3. Disconnect the remaining connecting cables. To loosen the plugs, press down clip (3) and hold. All rights reserved by FEIN, especially in case of industrial rights registration. C-SC_CSSM Version 1.0...
- Page 38 4. Loosen four screws (6) and remove PCBs (7 and 8). Just one PCB (8) is fitted in the 110 V/120 V variant of the tool. All rights reserved by FEIN, especially in case of industrial rights registration. C-SC_CSSM Version 1.0...
- Page 39 1. Unscrew the four screws (1). 2. Pull spider (2) off motor. - Size 3 socket wrench - Size 2 socket wrench 3. Loosen the set screw (3). All rights reserved by FEIN, especially in case of industrial rights registration. C-SC_CSSM Version 1.0 2013-09-01 39/103...
- Page 40 6. Disassembly Disassembling spider 1. Pull out worm (1), grooved ball bearing (2) and disc (3). 2. Disconnect motor cable from PCB (4). All rights reserved by FEIN, especially in case of industrial rights registration. C-SC_CSSM Version 1.0 2013-09-01 40/103...
- Page 41 2. Unscrew the three set screws (2) under the scale. - Size 3 socket wrench 3. Take out spiral springs (3) and balls (4). All rights reserved by FEIN, especially in case of industrial rights registration. C-SC_CSSM Version 1.0 2013-09-01 41/103 FEIN retains all rights of disposal, such as copying and circulation.
- Page 42 6. Disassembly Disassembling spider Tool: 1. Loosen housing (1) by tapping gently and pull off. - Plastic hammer All rights reserved by FEIN, especially in case of industrial rights registration. C-SC_CSSM Version 1.0 2013-09-01 42/103 FEIN retains all rights of disposal, such as copying and circulation.
- Page 43 Tool: 1. Open circlip (1) with collets and remove. 2. Remove disc (2). - Circlip pliers 3. Take out worm (3). All rights reserved by FEIN, especially in case of industrial rights registration. C-SC_CSSM Version 1.0 2013-09-01 43/103 FEIN retains all rights of disposal, such as copying and circulation.
- Page 44 2. Take out the three balls (2). - Circlip pliers - Hammer 3. Hammer out the three pins (3). - Size 5 punch All rights reserved by FEIN, especially in case of industrial rights registration. C-SC_CSSM Version 1.0 2013-09-01 44/103...
- Page 45 Disassembling spider Tool: 1. Pull off grooved ball bearing (1). - Arbor press - Extractor All rights reserved by FEIN, especially in case of industrial rights registration. C-SC_CSSM Version 1.0 2013-09-01 45/103 FEIN retains all rights of disposal, such as copying and circulation.
- Page 46 Tool: 1. Pull protective hose (1) up and out. 2. Remove sealing ring (2). - Torx T15 - Cross screwdriver All rights reserved by FEIN, especially in case of industrial rights registration. C-SC_CSSM Version 1.0 2013-09-01 46/103 FEIN retains all rights of disposal, such as copying and circulation.
- Page 47 6. Disassembly Disassembling magnetic foot Tool: 1. Unscrew the four socket head screws (1). - Size 5 socket wrench All rights reserved by FEIN, especially in case of industrial rights registration. C-SC_CSSM Version 1.0 2013-09-01 47/103 FEIN retains all rights of disposal, such as copying and circulation.
- Page 48 1. Move guide up to stop with help of spider. 2. Unscrew socket head screw (1) until spider can be turned one more revolution. - Size 4 socket wrench 3. Remove guide (2). All rights reserved by FEIN, especially in case of industrial rights registration. C-SC_CSSM Version 1.0 2013-09-01 48/103 FEIN retains all rights of disposal, such as copying and circulation.
- Page 49 1. Unscrew socket head screws (1). 2. Remove gear rack (2). - Size 4 socket wrench - Slotted screwdriver 3. Unscrew flat headed screw (3). All rights reserved by FEIN, especially in case of industrial rights registration. C-SC_CSSM Version 1.0 2013-09-01 49/103...
- Page 50 1. Unscrew six socket head screws (1) on each of the guide rails. 2. Remove pressure piece and guide rails. - Size 2.5 socket wrench 3. Unscrew the six thread bolts (2). All rights reserved by FEIN, especially in case of industrial rights registration. C-SC_CSSM Version 1.0 2013-09-01 50/103 FEIN retains all rights of disposal, such as copying and circulation.
-
Page 51: Assembly
KBM 50 Auto 7. Assembly All rights reserved by FEIN, especially in case of industrial rights registration. C-SC_CSSM Version 1.0 2013-09-01 51/103 FEIN retains all rights of disposal, such as copying and circulation. - Page 52 - Size 3 socket wrench 2. Secure each guide rail with six socket head screws (2). Tighten socket head screws to torque of 1.7 Nm. All rights reserved by FEIN, especially in case of industrial rights registration. C-SC_CSSM Version 1.0...
- Page 53 3. Screw down screw (4) with circlip. Tighten screw to torque of 3.0 Nm. 4. Screw on flat headed screw (5). Tighten screw to torque of 1.2 Nm. All rights reserved by FEIN, especially in case of industrial rights registration. C-SC_CSSM Version 1.0 2013-09-01 53/103 FEIN retains all rights of disposal, such as copying and circulation.
- Page 54 - Grease (0 40 106 0100 1) 4. Tighten socket head screw (4) again. Tighten screw to torque of 3.0 Nm. Socket head screw serves as stop. All rights reserved by FEIN, especially in case of industrial rights registration. C-SC_CSSM Version 1.0 2013-09-01 54/103 FEIN retains all rights of disposal, such as copying and circulation.
- Page 55 1. Place the six set screws (1) in position. Tool: The guide is adjusted after the drill motor is assembled. - Size 2.5 socket wrench All rights reserved by FEIN, especially in case of industrial rights registration. C-SC_CSSM Version 1.0 2013-09-01 55/103 FEIN retains all rights of disposal, such as copying and circulation.
- Page 56 2. Screw magnetic foot down to housing with four socket head screws (1). Tighten socket head screws to torque of 8 Nm. - Size 5 socket wrench All rights reserved by FEIN, especially in case of industrial rights registration. C-SC_CSSM Version 1.0...
- Page 57 Assembling spider Tool: 1. Insert the three pins (1) through locking bar. - Size 5 punch - Fitter's hammer All rights reserved by FEIN, especially in case of industrial rights registration. C-SC_CSSM Version 1.0 2013-09-01 57/103 FEIN retains all rights of disposal, such as copying and circulation.
- Page 58 - Sleeve outer: 40mm 3. Fit circlip (3) in place with collets. inner: ~30mm - Grease (0 40 106 0100 1) - Circlip pliers All rights reserved by FEIN, especially in case of industrial rights registration. C-SC_CSSM Version 1.0 2013-09-01 58/103...
- Page 59 1. Apply grease to inside of worm (1) and slide on. 2. Fit disc (2). - Grease (0 40 106 0100 1) - Circlip pliers 3. Slide circlip (3) on to shaft. All rights reserved by FEIN, especially in case of industrial rights registration. C-SC_CSSM Version 1.0 2013-09-01 59/103...
- Page 60 Tighten socket head screws to torque of 2.0 Nm. inner: ~38mm 3. Screw in the three handles (4). - Size 3 socket wrench All rights reserved by FEIN, especially in case of industrial rights registration. C-SC_CSSM Version 1.0 2013-09-01 60/103 FEIN retains all rights of disposal, such as copying and circulation.
- Page 61 1. Fit disc (1) on motor. 2. Slide on worm (4) and grooved ball bearing (3). Make sure hole of worm is above level surface (2). All rights reserved by FEIN, especially in case of industrial rights registration. C-SC_CSSM Version 1.0...
- Page 62 - Size 3 socket wrench 2. Slide on motor (2) and secure with the four cylinder head screws (3). Tighten socket head screws to torque of 2.0 Nm. All rights reserved by FEIN, especially in case of industrial rights registration. C-SC_CSSM Version 1.0...
- Page 63 3. Secure the two PCBs (4 and 5) with four screws (3). Just one PCB (6) is fitted in the 110 V/120 V variant of the tool. All rights reserved by FEIN, especially in case of industrial rights registration. C-SC_CSSM Version 1.0...
- Page 64 Tighten screw to torque of 0.9 Nm. - Cross screwdriver 3. Attach cover (3) and secure with screw (4). Tighten screw to torque of 0.9 Nm. All rights reserved by FEIN, especially in case of industrial rights registration. C-SC_CSSM Version 1.0 2013-09-01 64/103 FEIN retains all rights of disposal, such as copying and circulation.
- Page 65 2. Connect earthing conductors (1 & 2) as shown. Comply with order shown when connecting earthing conductor (see photo on right). Tighten screws to torque of 2.0 Nm. All rights reserved by FEIN, especially in case of industrial rights registration. C-SC_CSSM Version 1.0...
- Page 66 KBM 50 Auto 7. Assembly Assembling PCB 1. Connect the two grey cables (2). 2. Connect the two black cables. All rights reserved by FEIN, especially in case of industrial rights registration. C-SC_CSSM Version 1.0 2013-09-01 66/103 FEIN retains all rights of disposal, such as copying and circulation.
- Page 67 2. Screw down the two screws (2). - Torx T20 Tighten screws to torque of 2.0 Nm. 3. Thread cables into cable hooks (3). All rights reserved by FEIN, especially in case of industrial rights registration. C-SC_CSSM Version 1.0 2013-09-01 67/103 FEIN retains all rights of disposal, such as copying and circulation.
- Page 68 1. Insert PCB (1), lower edge first. 2. Allow PCB to engage in hook. 3. Connect the two black cables (2). 4. Connect the grey cable (3). All rights reserved by FEIN, especially in case of industrial rights registration. C-SC_CSSM Version 1.0 2013-09-01 68/103 FEIN retains all rights of disposal, such as copying and circulation.
- Page 69 1. Fit spider with motor (1). 2. Apply thin layer of grease to bush (2) and fit. - Grease (0 40 106 0100 1) All rights reserved by FEIN, especially in case of industrial rights registration. C-SC_CSSM Version 1.0 2013-09-01 69/103 FEIN retains all rights of disposal, such as copying and circulation.
- Page 70 1. Coat screw (1) with Loctite. 2. Screw down screw with discs and cup springs. Tighten screw to torque of 1.0 Nm. 3. Insert plug (2). All rights reserved by FEIN, especially in case of industrial rights registration. C-SC_CSSM Version 1.0 2013-09-01 70/103 FEIN retains all rights of disposal, such as copying and circulation.
- Page 71 Tighten screws to torque of 2.0 Nm. 3. Screw in the two short screws (3). Tighten screws to torque of 2.0 Nm. All rights reserved by FEIN, especially in case of industrial rights registration. C-SC_CSSM Version 1.0 2013-09-01 71/103 FEIN retains all rights of disposal, such as copying and circulation.
- Page 72 Repeatedly pressing gear-wheel on and off reduces the force which can be transferred at the press connection. Do not press gear-wheel on and off more than 2-3 times. All rights reserved by FEIN, especially in case of industrial rights registration. C-SC_CSSM Version 1.0...
- Page 73 2. Slide circlip (2) on to shaft. - Circlip pliers - Arbor press - Sleeve outer: ~55mm inner: 40mm All rights reserved by FEIN, especially in case of industrial rights registration. C-SC_CSSM Version 1.0 2013-09-01 73/103 FEIN retains all rights of disposal, such as copying and circulation.
- Page 74 - Base: Height: 66 mm Width: ~20mm 4. Secure shaft with a circlip (4). -Hook -Grease (0 40 106 0100 1) All rights reserved by FEIN, especially in case of industrial rights registration. C-SC_CSSM Version 1.0 2013-09-01 74/103 FEIN retains all rights of disposal, such as copying and circulation.
- Page 75 Tool: 1. Insert feather key (1) in shaft. 2. Press gear-wheel (2) on to shaft and secure with circlip (3). - Circlip pliers All rights reserved by FEIN, especially in case of industrial rights registration. C-SC_CSSM Version 1.0 2013-09-01 75/103...
- Page 76 3. Insert spur gear shaft (4). 4. Insert seal (5) in the correct position. The seal is inserted such that it is fixed by the dowels. All rights reserved by FEIN, especially in case of industrial rights registration. C-SC_CSSM Version 1.0...
- Page 77 - Ball bearing support D = 19 5. Press in insulating sleeve (6) until stop is reached. 6. Press on magnet ring (7) by hand. All rights reserved by FEIN, especially in case of industrial rights registration. C-SC_CSSM Version 1.0...
- Page 78 3. Thread blue connecting cable in to recess (2). 4. Use screw (3) to fit one brush holder (4) on each side. 5. Insert air guide ring (5) and screw down. All rights reserved by FEIN, especially in case of industrial rights registration. C-SC_CSSM Version 1.0...
- Page 79 Ensure that carbon brushes are pulled to the rear. 2. Insert carbon brushes (2) and fit springs on both sides. 3. Insert cover (3) and screw down. All rights reserved by FEIN, especially in case of industrial rights registration. C-SC_CSSM Version 1.0...
- Page 80 Replace sealing rings each time housing is assembled. inner: ~15mm - Sleeve outer: 21mm inner: ~10mm All rights reserved by FEIN, especially in case of industrial rights registration. C-SC_CSSM Version 1.0 2013-09-01 80/103 FEIN retains all rights of disposal, such as copying and circulation.
- Page 81 - Size 5 socket wrench 3. Use socket head screws to connect two assemblies together. Tighten socket head screws to torque of 7.5 Nm. All rights reserved by FEIN, especially in case of industrial rights registration. C-SC_CSSM Version 1.0...
- Page 82 1. Insert pressure piece (1). 2. Slide drill unit (2) on to guide rails (3). 3. Use two levers (4) to fix drill unit. All rights reserved by FEIN, especially in case of industrial rights registration. C-SC_CSSM Version 1.0 2013-09-01 82/103 FEIN retains all rights of disposal, such as copying and circulation.
- Page 83 1. Screw down flat headed screw (1). Tighten screw to torque of 1.2 Nm. - Slotted screwdriver - Size 2.5 socket wrench All rights reserved by FEIN, especially in case of industrial rights registration. C-SC_CSSM Version 1.0 2013-09-01 83/103...
- Page 84 3. Connect connecting cables (3) to carbon brush holders. For correct connection of connecting cables, see connection diagram. 4. Install connecting cables correctly (4). All rights reserved by FEIN, especially in case of industrial rights registration. C-SC_CSSM Version 1.0...
- Page 85 2. Attach first housing half (2). 3. Position protective hose (3) and install connecting cables (4 and 5) as shown. 4. Position ribbon cable (6). All rights reserved by FEIN, especially in case of industrial rights registration. C-SC_CSSM Version 1.0...
- Page 86 3. Slide ribbon cable (4) in to connection (5) and seal connection. 4. Attach second housing half (6). 5. Screw the two housing halves together (7). 6. Place electronics PCB (8) on housing. All rights reserved by FEIN, especially in case of industrial rights registration. C-SC_CSSM Version 1.0 2013-09-01 86/103 FEIN retains all rights of disposal, such as copying and circulation.
- Page 87 Tool: 1. Place switch insert (1) on electronics PCB. 2. Place cover (2) on housing and switch insert and screw down. - Torx T20 All rights reserved by FEIN, especially in case of industrial rights registration. C-SC_CSSM Version 1.0 2013-09-01 87/103 FEIN retains all rights of disposal, such as copying and circulation.
- Page 88 2. Place outer sleeve (2) on shaft. 3. Place inner sleeve (3) on shaft. 4. Insert spiral spring (4) between inner and outer sleeve. All rights reserved by FEIN, especially in case of industrial rights registration. C-SC_CSSM Version 1.0 2013-09-01 88/103 FEIN retains all rights of disposal, such as copying and circulation.
- Page 89 1. Place cover (1) on spring and press down. 2. Use circlip (2) to secure cover. - Circlip pliers 3. Insert spiral spring (3). 4. Insert sleeve (4) and disc (5). All rights reserved by FEIN, especially in case of industrial rights registration. C-SC_CSSM Version 1.0 2013-09-01 89/103...
- Page 90 2. Press disc (2) and sleeve (3) down at the same time. 3. Insert circlip (4) and press all the way down together with disc and sleeve. All rights reserved by FEIN, especially in case of industrial rights registration. C-SC_CSSM Version 1.0...
- Page 91 Assembling quick-release chuck Tool: 1. Slide nut (1) over shaft. 2. Secure circlip (2) on shaft. - Circlip pliers All rights reserved by FEIN, especially in case of industrial rights registration. C-SC_CSSM Version 1.0 2013-09-01 91/103 FEIN retains all rights of disposal, such as copying and circulation.
- Page 92 3. Place outer sleeve (3) on shaft. 4. Place inner sleeve (4) on shaft. 5. Insert spiral spring (5) between inner and outer sleeve. All rights reserved by FEIN, especially in case of industrial rights registration. C-SC_CSSM Version 1.0 2013-09-01 92/103 FEIN retains all rights of disposal, such as copying and circulation.
- Page 93 1. Place cover (1) on spring and press down. 2. Use circlip (2) to secure cover. - Circlip pliers 3. Insert spiral spring (3). 4. Insert sleeve (4) and disc (5). All rights reserved by FEIN, especially in case of industrial rights registration. C-SC_CSSM Version 1.0 2013-09-01 93/103...
- Page 94 3. Insert circlip (4) and press all the way down together with disc and sleeve. 4. Place nut (3) on shaft. 5. Assemble circlip (4). All rights reserved by FEIN, especially in case of industrial rights registration. C-SC_CSSM Version 1.0...
- Page 95 Tool: 1. Slide drill chuck (1) up in to fitting. 2. Screw down drill chuck with nut (2) [left-handed thread]. - Torx T20 All rights reserved by FEIN, especially in case of industrial rights registration. C-SC_CSSM Version 1.0 2013-09-01 95/103...
- Page 96 KBM 50 Auto 7. Assembly Assembling container 1. Assemble container (1). All rights reserved by FEIN, especially in case of industrial rights registration. C-SC_CSSM Version 1.0 2013-09-01 96/103 FEIN retains all rights of disposal, such as copying and circulation.
- Page 97 Drill motor is fixed in position. hexagon socket fixture 2.5mm 3. Tighten top three set screws (3) to 1.4 Nm [sequence: top to bottom]. All rights reserved by FEIN, especially in case of industrial rights registration. C-SC_CSSM Version 1.0 2013-09-01 97/103 FEIN retains all rights of disposal, such as copying and circulation.
- Page 98 60° Tool: 1. Turn tightened set screws back by 60° anticlockwise. 2. Move drill motor (2) into lower position. - Socket wrench 2.5mm All rights reserved by FEIN, especially in case of industrial rights registration. C-SC_CSSM Version 1.0 2013-09-01 98/103...
- Page 99 Drill motor is fixed in position. - Torque wrench with hexagon socket fixture 2. Tighten bottom three set screws (2) to 1.4 Nm [sequence: top to bottom]. 2.5mm All rights reserved by FEIN, especially in case of industrial rights registration. C-SC_CSSM Version 1.0 2013-09-01 99/103...
- Page 100 Setting guide 60° Tool: 2. Turn tightened set screws back by 60° anticlockwise. - Socket wrench 2.5mm All rights reserved by FEIN, especially in case of industrial rights registration. C-SC_CSSM Version 1.0 2013-09-01 100/103 FEIN retains all rights of disposal, such as copying and circulation.
- Page 101 If the guide moves too readily, turn the set screws clockwise in steps of 10°. After loosening or tightening the set screw the play must be hammered out of the guide. All rights reserved by FEIN, especially in case of industrial rights registration. C-SC_CSSM Version 1.0...
-
Page 102: Troubleshooting
KBM 50 Auto 8. Troubleshooting See separate file on Extranet or retail partner portal. All rights reserved by FEIN, especially in case of industrial rights registration. C-SC_CSSM Version 1.0 2013-09-01 102/103 FEIN retains all rights of disposal, such as copying and circulation. -
Page 103: Connection Diagram
KBM 50 Auto 9. Connection diagram All rights reserved by FEIN, especially in case of industrial rights registration. C-SC_CSSM Version 1.0 2013-09-01 103/103 FEIN retains all rights of disposal, such as copying and circulation.
Need help?
Do you have a question about the KBM 50 Auto and is the answer not in the manual?
Questions and answers