
Related Manuals for PartySpace 6 M DELUXE PLUS


Summary of Contents for PartySpace 6 M DELUXE PLUS
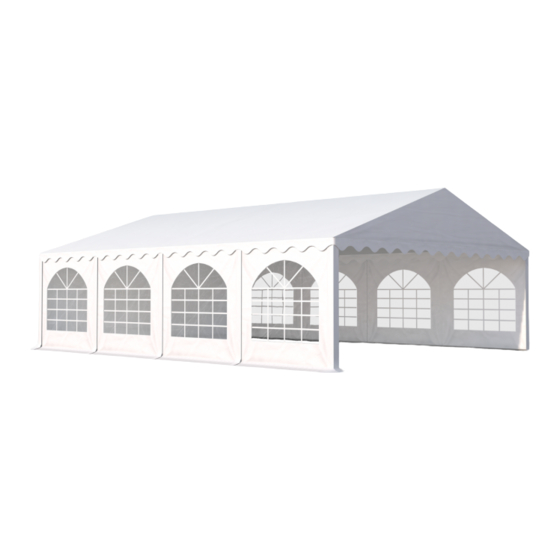
- Page 1 6 M DELUXE PLU S & GR O ND F RA M E - & CA DR E DE S O L & GR O UN D B A RS - & B O DE N RA H M E N...
-
Page 3: Table Of Contents
INHOUD NL ................................4 - 13 Belangrijke informatie ...................................4 - 5 Onderdelenlijst ....................................6-7 Montage ......................................8 - 11 EN ................................12 - 19 Important information ................................12 - 13 Parts list ......................................14 - 15 Assembly......................................16 - 19 FR ................................20 - 27 Informations importantes ................................ -
Page 4: Belangrijke Informatie
HANDLEIDING DELUXE PLUS BELANGRIJKE INFORMATIE Gefeliciteerd met de aankoop van deze partytent met buizenf rame van Partyspace. Wij of onze off iciële verdeler geven graag antwoord op al uw vragen. Wij verzoeken u zich te houden aan onderstaande aanwijzingen. Hierdoor kunt u uw tent langer gebruiken. - Page 5 Wij verlenen u als klant een garantie voor verborgen gebreken in de producten gedurende twee jaar. Na het verstrijken van deze termijnen zijn wij geen vrijwaring voor verborgen gebreken in de producten meer verschuldigd.
-
Page 6: Onderdelenlijst
HANDLEIDING DELUXE PLUS ONDERDELENLIJST ONDERDEEL AFBEELDING 6 X 6 6 X 8 6 X 10 6 X 12 6 X 14 Buis Ø 38 Buis Ø 38 Buis Ø 38 Buis Ø 25 Buis Ø 25 110° drieweg verbindingsstuk 110° vierweg verbindingsstuk 140°... - Page 7 HANDLEIDING DELUXE PLUS ONDERDEEL AFBEELDING 6 X 6 6 X 8 6 X 10 6 X 12 6 X 14 Elastiek met balletje - lang Touw Bout Ø 8 x 50 mm Bout Ø 6 x 25 mm Vlindermoer Vlindermoer Dakzeil Zijwand Eindwand...
-
Page 8: Montage
HANDLEIDING DELUXE PLUS MONTAGE Kies een vlakke ondergrond om de tent op te zetten, pak alle onderdelen uit en controleer of alle onderdelen (buizen, zeilen en accessoires) volledig zijn volgens de onderdelenlijst. Monteer de dakstructuur door de buizen (onderdeel 1 en 2) te verbinden met behulp van de connectoren (onderdeel 6, 7, 8, 9, 10, 11). - Page 9 HANDLEIDING DELUXE PLUS Monteer het dakzeil op de structuur en maak het vast met de elastieken met bolletjes. Let erop dat de elastieken niet te hard aangespannen worden, zodat je ze aan de andere kant van de tent later ook gemakkelijk kan monteren.
- Page 10 HANDLEIDING DELUXE PLUS Monteer de verticale buizen (onderdeel 6) aan de andere zijde van de tent met behulp van de connectoren (onderdeel 6 en 7). Gebruik de lange smalle haringen om elke paal in de grond te verankeren en maak de flappen aan het dakzeil vast aan de poten met behulp van het haakje. Monteer het grondf rame (onderdelen 1, 2, 14).
- Page 11 HANDLEIDING DELUXE PLUS Monteer de stormriemen in elke bovenhoek van de tent en maak het ander uiteinde vast aan de grond met de grote haringen.
-
Page 12: Important Information
MANUAL DELUXE PLUS IMPORTANT INFORMATION Congratulations on the purchase of your new Partyspace party tent. Our customer service department or authorised dealers will be happy to answer your questions and give any valuable instructions. Please observe the instructions provided below in order to extend the useful life of your tent. - Page 13 GUARANTEE AND CUSTOMER SERVICES If you wish to receive more information or need support, you can send an e-mail to customer.service@partyspace.eu. We grant you as a client/customer a warranty of two years for hidden defects in our products. When this term has expired, we do not owe the client/customer any warranty for hidden...
-
Page 14: Parts List
MANUAL DELUXE PLUS PARTS LIST PART IMAGE 6 X 6 6 X 8 6 X 10 6 X 12 6 X 14 Tube Ø 38 Tube Ø 38 Tube Ø 38 Tube Ø 25 Tube Ø 25 110° 3-way connector 110°... - Page 15 MANUAL DELUXE PLUS PART IMAGE 6 X 6 6 X 8 6 X 10 6 X 12 6 X 14 Bungee ball long Rope Screw Ø 8 x 50 mm Screw Ø 6 x 25 mm Lock nut Lock nut Roof Sidewall Endwall...
-
Page 16: Assembly
MANUAL DELUXE PLUS ASSEMBLY Select a flat ground for the tent, unpack the carton and check if all the parts including tubes, tent and accessories etc. are present as stated on the above part list. Assemble the f ramework of rooftop by joining the poles (parts 1 and 2) using the connectors (parts 6, 7, 8, 9, 10, 11). - Page 17 MANUAL DELUXE PLUS Install the roof on the f rame and attach it properly using the bungee balls. Pay attention to the tension of the bungees. If you tension them too hard on one side of the tent, it may be very hard to tie them at the other side.
- Page 18 MANUAL DELUXE PLUS Attach the support poles (part 4) to the joints (parts 6 and 7) at the other side of the tent and build up the f ramework. Use the long pegs to f ix each pole into the ground and use the hook to f ix the leg cover to the leg.
- Page 19 MANUAL DELUXE PLUS Fix the storm belts to each upper corner of the tent and f ix the other end to the ground using the ground pegs.
-
Page 20: Informations Importantes
MODE D’EMPLOI DELUXE PLUS INFORMATIONS IMPORTANTES Nous vous félicitons pour l‘achat d’une tente de Partyspace. Notre service client ou le revendeur vous fourniront avec plaisir des réponses à vos questions et des indications précieuses. Nous vous prions de respecter les indications énumérées ci-après. Cela vous permettra de prof iter plus longtemps de votre tente. - Page 21 GARANTIE ET SERVICE CLIENT Si vous souhaitez obtenir plus d’informations ou appui, vous pouvez envoyer un mail a customer.service@partyspace.eu. Nous off rons au client/consommateur une garantie pour des vices cachés dans nos produits pendant deux ans. Au bout de ce délai, nous n’off rons plus de garantie pour des vices cachés...
-
Page 22: Liste Des Pièces
MODE D’EMPLOI DELUXE PLUS LISTE DES PIÈCES PIÈCE IMAGE 6 X 6 6 X 8 6 X 10 6 X 12 6 X 14 Tube Ø 38 Tube Ø 38 Tube Ø 38 Tube Ø 25 Tube Ø 25 110° 3 voies raccord 110°... - Page 23 MODE D’EMPLOI DELUXE PLUS PIÈCE IMAGE 6 X 6 6 X 8 6 X 10 6 X 12 6 X 14 Élastique à boule - long Corde Boulon Ø 8 x 50 mm Boulon Ø 6 x 25 mm Écrou à oreilles Écrou à...
-
Page 24: Montage
MODE D’EMPLOI DELUXE PLUS MONTAGE Choisissez une surface plane pour monter la tente, déballez toutes les pièces et vérif iez que toutes les pièces (tubes, bâches et accessoires) sont complètes conformément à la liste des pièces. Montez la structure du toit en emboîtant les tubes (pièces 1 et 2) à l’aide des raccords (pièces 6, 7, 8, 9, 10, 11). - Page 25 MODE D’EMPLOI DELUXE PLUS Montez la bâche de toit sur la structure et f ixez-la avec les élastiques à boule. Veillez à ce que les élastiques ne soient pas trop tendus, af in de pouvoir monter facilement ceux de l’autre côté...
- Page 26 MODE D’EMPLOI DELUXE PLUS Montez les tubes verticaux (pièce 3) de l’autre côté de la tente à l’aide des raccords (pièces 6, 7). Utilisez les longs piquets f ins pour ancrer chaque poteau dans le sol et f ixez les rabats de la bâche de toit aux pieds à...
- Page 27 MODE D’EMPLOI DELUXE PLUS Installez les sangles anti-tempête à chaque coin supérieur de la tente et f ixez l’autre extrémité au sol avec les grands piquets.
-
Page 28: Wichtige Informationen
ANLEITUNG DELUXE PLUS WICHTIGE INFORMATIONEN Herzlichen Glückwunsch zum Kauf Ihres neuen Zeltes. Bei Fragen oder Tipps wenden Sie sich gerne an unser Kundenservice-Team oder an einen unserer off iziellen Weiterverkäufer. Beachten Sie bitte die nachfolgenden Hinweise, damit Sie lange Freude an dem Zelt haben. WICHTIGER HINWEIS Lesen Sie diese Aufbauanleitung vor dem Gebrauch des Zeltes auf merksam durch und bewahren Sie sie für eine spätere Verwendung auf. - Page 29 GARANTIE UND KUNDENDIENST Wenn Sie mehr Informationen oder Unterstützung brauchen, können Sie eine E-Mail an customer.service@partyspace.eu schicken. Wir gewähren Ihnen als Kunden/Konsumenten eine Garantie für versteckte Mängel an unseren Produkten während zwei Jahre. Nach Ende dieses Termins schulden wir dem Kunden/...
-
Page 30: Teileliste
ANLEITUNG DELUXE PLUS TEILELISTE TEIL BILD 6 X 6 6 X 8 6 X 10 6 X 12 6 X 14 Stange Ø 38 Stange Ø 38 Stange Ø 38 Stange Ø 25 Stange Ø 25 110° 3er- Eckverbindung 110° 4er- Eckverbindung 140°... - Page 31 ANLEITUNG DELUXE PLUS TEIL BILD 6 X 6 6 X 8 6 X 10 6 X 12 6 X 14 Erdnagel Ø 12 300 mm Kugelgum- mischlaufe - Lang Spannleine Schraube Ø 8 x 50 mm Schraube Ø 6 x 25 mm Flügelmutter Flügelmutter Dach...
-
Page 32: Montage
ANLEITUNG DELUXE PLUS MONTAGE Suchen Sie einen ebenen Untergrund für den Aufbau des Zelts. Packen Sie alle Teile (Stangen, Zelt und Zubehör) aus und prüfen Sie, ob sie entsprechend der Teileliste vollständig sind. Setzen Sie den Rahmen für das Dach zusammen, indem Sie die Stangen (ID-Nr. 1 und 2) mit den Verbindern (ID-Nr. - Page 33 ANLEITUNG DELUXE PLUS Setzen Sie das Dach auf den Rahmen und befestigen Sie es mit den Kugelgummischlaufen. Achten Sie darauf, dass die Gummischlaufen nicht zu stark gespannt werden, sodass Sie später die andere Zeltseite ebenfalls einfach montieren können.
- Page 34 ANLEITUNG DELUXE PLUS Stecken Sie die Beine (ID-Nr. 3) mithilfe der Verbinder (ID-Nr. 6 und 7) auf der gegenüberliegenden Seite des Zelts ein. Verwenden Sie die langen, dünnen Erdnägel, um jedes Bein im Boden zu verankern und befestigen Sie die Dachschals am Dach mithilfe des Hakens an den Beinen.
- Page 35 ANLEITUNG DELUXE PLUS Befestigen Sie die Spannleinen an jeder oberen Ecke des Zelts und verspannen Sie die anderen Enden mit den großen Erdnägeln im Boden.
- Page 36 Partyspace bv - Potteriestraat 67 - 8980 Beselare - BELGIUM - Phone +32 (0)57 36 03 30 - Fax +32 (0)57 48 79 61 - BTW BE 0830 189 643...
Need help?
Do you have a question about the 6 M DELUXE PLUS and is the answer not in the manual?
Questions and answers