Advertisement
Quick Links
ASME A112.18.1 / CSA B125.1
ICC/ANSI A117.1
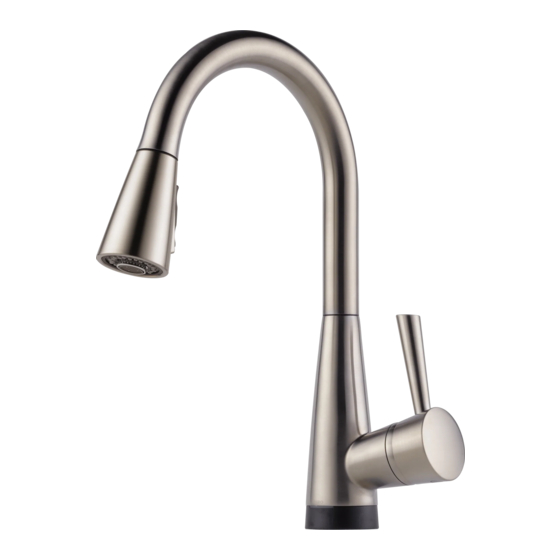
Models/Modelos/Modèles
64070LF & 64970LF
Series/Series/Seria
Write purchased model number here.
Escriba aquí el número del modelo comprado.
Inscrivez le numéro de modèle ici.
You may need: / Usted puede necesitar:
Articles dont vous pouvez avoir besoin :
WARNING: THIS FAUCET IS NOT TO BE USED WITH
PORTABLE DISHWASHERS! / ADVERTENCIA: ¡SESTA
LLAVE NO SE DEBE UTILIZAR CON MAQUINAS
LAVAPLATOS PORTATILES! / AVERTISSEMENT: ON NE
DOIT PAS BRANCHER UN LAVE-VAISSELE PORTATIF
SUR CE ROBINET!
For easy installation of your
Brizo
faucet you will need:
®
• To READ ALL the instructions completely
before beginning.
• To READ ALL warnings, care, and
maintenance information.
Para instalación fácil de su llave
Brizo
usted necesitará:
®
• LEER TODAS las instrucciones completamente
antes de empezar.
• LEER TODOS los avisos, cuidados, e
información de mantenimiento.
Pour installer votre robinet
Brizo
facilement, vous devez:
®
• LIRE TOUTES les instructions avant de débuter;
• LIRE TOUS les avertissements ainsi que toutes
les instructions de nettoyage et d'entretien;
www.brizo.com
HIGH-RISE, PULL-DOWN KITCHEN AND
63845
BAR / PREP, TOUCH FAUCETS
LLAVES DE AGUA ELEVADAS, DESLIZABLES HACIA
ABAJO, PARA COCINAS Y BARES / PREP
ROBINETS TACTILES À BEC HAUT RÉTRACTABLE
POUR ÉVIER DE BAR OU D'ÎLOT
Property damage and water leak possible. Incorrectly installed or unapproved swivel clip may
cause water leaks and property damage. Follow instructions to install swivel clip provided with
this faucet.
Property damage and water leak possible. Incorrectly installed or unapproved clip and hose
may cause water leaks and property damage. Follow instructions to install hose and clip
provided with this faucet.
Property damage and water leak possible. Incorrectly installed or unapproved check valve
assemblies may cause water leaks and property damage. Follow instructions to install check
valve assemblies provided with this faucet.
Property damage and water leak possible. Incorrectly installed or unapproved plastic sleeve
may cause water leaks and property damage. Follow instructions to custom fit using plastic
sleeve provided with this faucet before making final connections and turning on the supplies.
Property damage and water leak possible. Leaks and property damage may occur from
incorrect installation. Follow all installation instructions before making final connections and
turning on the supplies.
Es posible que se produzcan daños a la propiedad y fugas o filtraciones de agua. El gancho
giratorio mal instalado o no aprobado puede causar fugas de agua y daños a la propiedad.
Siga las instrucciones para instalar el gancho giratorio provisto con esta llave de agua.
Es posible que se produzcan daños a la propiedad y fugas o filtraciones de agua. El gancho o
la manguera mal instalada o no aprobada puede causar fugas de agua y daños a la propiedad.
Siga las instrucciones para instalar la manguera y el gancho provisto con esta llave de agua.
Es posible que se produzcan daños a la propiedad y fugas o filtraciones de agua. El ensamble
de la llave de paso incorrectamente instalado o no aprobado puede causar fugas de agua y da-
ños a la propiedad. Siga las instrucciones para instalar el ensamble de la llave de paso provisto
con esta llave de agua.
Es posible que se produzcan daños a la propiedad y fugas o filtraciones de agua. El
manguito plástico incorrectamente instalado o no aprobado puede causar fugas de agua y
daños a la propiedad. Siga las instrucciones para instalar el manguito plástico provisto con
esta llave de agua antes de hacer las conexiones finales y abrir el suministro de agua.
Posibles daños a la propiedad y filtración de agua. Las filtraciones o fugas de agua y daños
a la propiedad pueden ocurrir por una instalación incorrecta . Siga todas las instrucciones de
instalación antes de hacer las conexiones finales y abrir los suministros de agua.
Possibilité de dommages matériels et de fuite. Une mauvaise installation de l'agrafe pivotante
ou l'utilisation d'une agrafe pivotante non approuvée peut entraîner une fuite et des dommages
matériels. Installez l'agrafe pivotante fournie avec ce robinet conformément aux instructions.
Possibilité de dommages matériels et de fuite. Une mauvaise installation du tuyau souple
et de l'agrafe ou l'utilisation d'un tuyau souple et d'une agrafe non approuvés peut entraîner
une fuite et des dommages matériels. Installez le tuyau souple et l'agrafe fournis avec ce
robinet conformément aux instructions.
Possibilité de dommages matériels et de fuite. Une mauvaise installation des clapets de
non-retour ou l'installation de clapets de non-retour non approuvés peut entraîner des fuites
et des dommages matériels. Installez les clapets de non-retour fournis avec ce robinet
conformément aux instructions.
Possibilité de dommages matériels et de fuite. Une mauvaise installation du manchon en
plastique ou l'installation d'un manchon en plastique non approuvé peut entraîner des fuites
et des dommages matériels. Installez le manchon en plastique fourni avec ce robinet confor-
mément aux instructions pour l'installation sur mesure avant de faire les branchements finals
et d'ouvrir les robinets
Possibilité de dommages matériels et de fuite. Une mauvaise installation peut entraîner
une fuite et des dommages matériels. Effectuez l'installation conformément à toutes les
instructions avant de faire les branchements finals et d'ouvrir les robinets d'alimentation.
63845
1
Notice
Aviso
Avis
7/5/12
Rev. D
Advertisement

Related Manuals for Brizo Venuto 64070LF


Summary of Contents for Brizo Venuto 64070LF
- Page 1 . Siga todas las instrucciones de For easy installation of your instalación antes de hacer las conexiones finales y abrir los suministros de agua. Brizo faucet you will need: ® • To READ ALL the instructions completely Avis before beginning.
- Page 2 No se garantizan las pilas. Company para todos los reclamos a menos que el comprador haya registrado el producto con Delta Faucet Company. Esta garantía le aplica sólo a las llaves de agua de Brizo fabricadas Delta Faucet Company reemplazará, SIN CARGO, durante el período de garantía aplicable, cual- ®...
- Page 3 Accessory Order Only Orden de Accesorio Solamente RP60111▲ Livrable séparément seulement Spout Assembly Ensamble del Tubo de Salida RP60113 RP64066 Friction Ring & RP60112▲ Valve Assembly with Isolator Sleeve Sprayer Assembly Contact Plate Arandela de Fricción (includes aerator) Ensamble de la válvula Rondelle de frottement Ensamble de rociador con sistema de tacto...
-
Page 4: Instructions De Nettoyage
Adaptadors Sistema de protección contra el contraflujo 3/8”-24 UNEF a 1/2”-20 UN & 3/8”-24 UNEF a 1/2”-14 NPSM Su llave de agua tipo deslizable Brizo ® tiene un sistema de protección para el Adapteurs contraflujo, incorpora, que ha sido probado para cumplir con los requisitos de 3/8 po-24 UNEF à... - Page 5 1 1/4" Min. From Center Line To Sink Bowl. 1 1/4" Mínimo. De la línea de centro para hundir el tazón de fuente. 1 1/4" ; Minimal. De la ligne centrale pour descendre la cuvette. Spout Installation For Top Mount Sinks SHUT OFF WATER SUPPLIES.
- Page 6 Top Mount Sinks Incorrect Installations. Instalación por Encima / Bâti supérieur Instalacións incorrecta. Installations incorrecte. For sinks mounted on top of the counter top: (See illustration Insert tubes through mounting hole in sink and center faucet in position over F-A) Insert tab on saddle (1) into hole in insulator (2). Snap Notice hole.
- Page 7 Under Mount Sinks / Instalación por Debajo / Sous le bâti Incorrect Installations. Instalacións incorrecta. Installations incorrecte. For this step, use the parts shown above. For sinks mounted underneath the counter top: (See Assemble swivel clip / adapter (1) and solenoid (2) together using clip (3), as shown. Pull down moderately to ensure connection has been made.
- Page 8 Insert hose through spout tip only. Screw the threaded fitting of hose (1) into spray head (2) to Push hose end (1) onto solenoid assembly outlet (2). Incorrect Installations. prevent the hose from being pulled into the spout until you are Attach clip (3) over hoses as shown.
- Page 9 Wire Connections For this step, use the parts shown above. Briefly touch the cold stop or other ground with hand to dissipate any static charge. Attach wire (1), from the solenoid assembly, onto the groove on the spout mounting nut (2). Orient clip (1) so wire exits away from wire (3). Conexiones de Alambre Para este paso, utilice las piezas mostradas arriba.
- Page 10 For this step, use the parts shown above. Notice Property damage and water leak possible. Incorrectly installed or unapproved check valve assemblies may cause water leaks and property damage. Follow instructions to install check valve assemblies provided with this faucet. Wire (3), extending from faucet base, is shipped with a Connect battery cable (1), from the solenoid, to battery protective plastic cap (4).
- Page 11 Water Line Connections Custom Fit Connections WARNING: Do not use pipe dope or other sealants Important: To ensure proper operation of your If you determine the PEX supply tubing for this on water line connections. plumbing it is essential to install these check faucet is too long and must be shorter to create an valve assemblies onto your supply stops.
- Page 12 Correct method Incorrect Installation Método Correcto Instalación Incorrecta Installation Incorrecte Bonne méthode Custom Fit Connections - Plastic Sleeve Installation Instructions 1. Identify desired length of tube (1). Leave 1" - 2" of extra length to allow for easier installation and cut tube. Ensure cut is straight and burr free. 2.
- Page 13 Reinstall the spray head. Check all connections at arrows for leaks. Notice Re-tighten if necessary, but do not overtighten. Sprayer will lock into position when brought into proximity of the spout magnet. The sprayer can be removed by either pulling directly out from the spout or by twisting 90° Property damage and water leak possible.
- Page 14 Interchangeable Intercambiable Interchangeable Manual Bypass of Electronic Features Remove the battery pack (1) Momentarily connect the from the battery cable (2). “+” terminal of the battery (1) to the “-” terminal of the sole- noid (2) and the “-” terminal Disconnect the two spade of the battery to the “+”...
-
Page 15: Maintenance
Cleaning the Screen / Filtro de Limpieza: / Nettoyage du filtre Optional Temperature Indicator Ring: Maintenance If required, a red/blue indicator ring (10) can be installed under decorative cap. If faucet leaks from under handle or from spout outlet – Insert a small screwdriver into Remove ring from adhesive sheet and install as shown. - Page 16 Solenoid Troubleshooting 3. If your LED base indicator is not displaying any lights, Note: Normal operation of the faucet will turn off water flow if faucet is not touched for 4 minutes. a. Check to make sure the spout connector, RP53233 is attached to the spout and the wire from the solenoid / electronics kit.
Need help?
Do you have a question about the Venuto 64070LF and is the answer not in the manual?
Questions and answers