Table of Contents
Advertisement
Available languages
Available languages
Quick Links
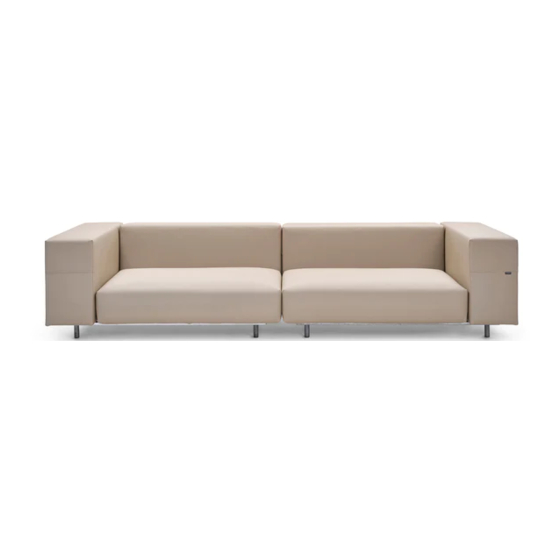
WALRUS
© design by dirk wynants
READ INSIDE
ASSEMBLY INSTRUCTIONS,
HOW TO USE, USEFUL TIPS
FOR KEEPING YOUR TOOL FOR
TOGETHERNESS IN SHAPE
PRODUCT
80 – CORNER SEAT (LEFT/RIGHT) – MIDDLE SEAT
– CONNECTING SEATS – MAINTENANCE
tools for togetherness
LANGUAGES
EN – NL – DE – FR – IT – ES
MORE
WWW.EXTREMIS.BE
Advertisement
Table of Contents

Subscribe to Our Youtube Channel
Related Manuals for Extremis WALRUS 80


Summary of Contents for Extremis WALRUS 80
- Page 1 EN – NL – DE – FR – IT – ES HOW TO USE, USEFUL TIPS MORE FOR KEEPING YOUR TOOL FOR TOGETHERNESS IN SHAPE WWW.EXTREMIS.BE PRODUCT 80 – CORNER SEAT (LEFT/RIGHT) – MIDDLE SEAT – CONNECTING SEATS – MAINTENANCE tools for togetherness...
- Page 2 content...
-
Page 3: Table Of Contents
LANGUAGES ENGLISH P. 3 contents p. 3 assembly corner seat p. 6 assembly middle seat p. 8 assembly connection piece p. 11 maintenance p. 12 NEDERLANDS P. 15 inhoud p. 15 montage hoekzit p. 18 montage tussenzit p. 20 montage koppelstuk p. -
Page 4: Contents
CONTENTS CORNER SEAT - LEFT, RIGHT 1 x frame 4 x feet 4 x M10x20 bolts 1 x seat cushion 1 x backrest 1 x armrest 6 x M8x20 bolts 3 x M8 cap nuts 9 x M8 flat washers MIDDLE SEAT 1 x frame 4 x feet... - Page 5 OPTIONAL BLANKET 1 x blanket 1 x glass fibre rod COMFORT CUSHION 50 X 50 CM 1 x cushion CONNECTION PIECE 1 x connector base 1 x connector 2 x M8x45 lock bolts 2 x M8 nuts english...
- Page 6 4. Push 3 M8x20 bolts, each with one M8 flat washer on them, through the underside of the frame so that they come out in the body of the backrest, and attach them with an M8 cap nut and M8 flat washer. walrus 80 corner seat...
- Page 7 5. Now attach the arm rests to the frame, using 3 M8x20 bolts for each arm rest and an M8 flat washer on each bolt. PLEASE NOTE : make sure the holes match up, and then tighten all the bolts in the arm and backrest. tighten the bolt at the front first , then the one at the back and lastly the one in the middle...
- Page 8 4. Push 3 M8x20 bolts, each with one M8 flat washer on them, through the underside of the frame so that they come out in the body of the back rest, and attach them with an M8 cap nut. walrus 80 middle seat...
- Page 9 If you want to link the modules together using the connector, it is best to do this before you attach the seat cushion to the frame. You will find instructions for linking the modules with the connector on page 11. 6.
- Page 10 ASSEMBLING THE CONNECTION PIECE WHAT YOU NEED 2 people no. 17 spanner +/- 15 min. 1. Place the modules in the correct position in the definitive place where you intend to use the sofa. Place the modules side by side and align them as well as possible.
-
Page 11: Maintenance
It is very important here that you avoid damaging the protective layer. If the fabric is creased, iron if follow Extremis’ care instructions necessary but only at a cool setting carefully. Other methods or cleaning What if the stain has still not (synthetics). - Page 12 Although we only use the best For more information, contact thoroughly to completely remove materials available on the market, Extremis: info@extremis.be bleach. Please be aware of the there is no such thing as a material environment when cleaning with that does not age over time.
- Page 13 english...
-
Page 14: Inhoud
INHOUD HOEKZIT - LINKS , RECHTS 1 x onderstel 4 x pootjes 4 x bout M10x20 1 x zitkussen 1 x rugkussen 1 x armkussen 6 x bout M8x20 3 x dopmoer M8 9 x vlakke sluitring M8 TUSSENZIT 1 x onderstel 4 x pootjes 4 x bout M10x20 1 x zitkussen... - Page 15 OPTIONEEL DEKENTJE 1 x dekentje 1 x glasvezel stokje COMFORT KUSSEN 50 X 50 CM 1 x kussen KOPPELSTUK 1 x basis 1 x bovenplaat 2 x slotbout M8x45 2 x moer M8 nederlands...
- Page 16 4. Steek 3 bouten M8x20 met telkens een vlakke sluitring M8 door de onderkant van het frame, zodat deze in de bak van het rugkussen uitkomt en bevestig met een dopmoer M8 en vlakke sluitring M8. walrus 80 hoekzit...
- Page 17 5. Bevestig nu het armkussen aan het frame d.m.v. telkens 3 bouten M8x20 met telkens een vlakke sluitring M8. LET OP : Zorg ervoor dat de gaten overeenkomen, span nu alle bouten van de arm- en rugkussens aan. : draai eerst de bout aan de voorkant vast , dan diegene aan de achterkant en dan pas deze in het midden...
-
Page 18: Montage Tussenzit
4. Steek 3 bouten M8x20 met telkens een vlakke sluitring M8 door de onderkant van het frame, zodat deze in de bak van het rugkussen uitkomt en bevestig met een dopmoer M8. walrus 80 tussenzit... - Page 19 Indien u de modules aan elkaar wenst te verbinden door middel van het koppelstuk, doet u dit best voor dat u het zitkussen op het frame vastmaakt. Instructies voor het koppelen met het koppelstuk op p 23. 5. Plaats het zitkussen nu op het frame en maak deze vast d.m.v. de velcro straps rond de 2 middelste stokjes vast te maken.
-
Page 20: Montage Koppelstuk
MONTAGE KOPPELSTUK BENODIGDHEDEN 2 personen steeksleutel nr. 17 +/- 15 min. 1. Plaats de modules in de juiste positie op de plaats waar u de sofa uiteindelijk wenst te gebruiken. Plaats de modules tegen elkaar en lijn deze al zo goed mogelijk met elkaar uit. -
Page 21: Onderhoud
Kreuken kunnen eventueel met het Extremis zorgvuldig opvolgt. Andere strijkijzer uitgestreken worden. Zet methodes of producten kunnen de Is de vlek na deze behandeling nog het strijkijzer hiervoor altijd op de... - Page 22 Voor meer informatie, contacteer voor uw buitenmeubilair en het af Extremis via info@extremis.be Sproei het zeepsop op het hele stuk en toe te poetsen, afhankelijk van Sunbrella en laat dit intrekken de omgeving waarin het gebruikt gedurende 15 minuten.
- Page 23 nederlands...
-
Page 24: Inhalt
INHALT ECK-MODUL - LINKS , RECHTS 1 x Rahmen 4 x Füße 4 x Schrauben M10x20 1 x Sitzkissen 1 x Rückenlehne 1 x Armlehne 6 x Schrauben M8x20 3 x Hutmuttern M8 9 x Unterlegscheibe M8 MITTEL-MODUL 1 x Rahmen 4 x Füße 4 x Schrauben M10x20 1 x Sitzkissen... - Page 25 OPTIONAL DECKE 1 x Decke 1 x Glasfaserstab KOMFORTKISSEN 50 X 50 CM 1 x Kissen VERBINDUNGSSTÜCK 1 x Basis 1 x Oberteil 2 x carriage bolt M8x45 2 x Mutter M8 deutsch...
-
Page 26: Montage Eck-Modul
Positionierung der Rückenlehne. 4. Stecken Sie 3 Schrauben M8x20 mit jeweils einem Unterlegscheibe M8. Unterlegscheibe M8 von unten durch den Rahmen, sodass sie im Staufach des Rückenkissens mit je einer Hutmutter M8 befestigt werden können und walrus 80 hoekzit... - Page 27 5. Befestigen Sie jetzt jede Armlehne mit 3 Schrauben M8x20 und je einem Unterlegscheibe M8 am Rahmen. BITTE BEACHTEN : Sorgen Sie dafür, dass die Löcher übereinstimmen. Ziehen Sie dann alle Schrauben der TIPP Armlehnen und der Rückenlehne an. : Ziehen Sie zuerst die Schraube an der Vorderseite an, dann die an der Rückseite und erst dann die in der Mitte...
-
Page 28: Montage Mittel-Modul
Sie darauf, dass die Löcher des Rahmens und die Löcher des Staufachs übereinstimmen. 4. Stecken Sie 3 Schrauben M8x20 mit jeweils einem Unterlegscheibe M8 von unten durch den Rahmen, sodass sie im Staufach des Rückenkissens mit je einer Hutmutter M8 befestigt werden können. walrus 80 mittel-modul... - Page 29 Wenn Sie die Module mit einem Verbindungsstück aneinander koppeln wollen, machen Sie das am besten, bevor Sie das Sitzkissen auf dem Rahmen befestigen. Anweisungen für das Aneinanderkoppeln mit dem Verbindungsstück finden Sie auf Seite 35. 5. Legen Sie jetzt das Sitzkissen auf den Rahmen und befestigen Sie es mithilfe der Klettbänder um die zwei mittleren Stäbe.
-
Page 30: Montage Verbindungsstück
MONTAGE VERBINDUNGSSTÜCK WAS SIE BRAUCHEN 2 Personen Maulschlüssel Nr. 17 +/- 15 min. 1. Stellen Sie die Module in der richtigen Position an der Stelle auf, wo Sie das Sofa letztlich auch nutzen wollen. Stellen Sie die Module nebeneinander und richten Sie sie so gut wie möglich gerade aneinander aus. -
Page 31: Pflege
Plane rund um sie herum. es sehr wichtig, dass Sie sich Spülen Sie den Stoff gründlich ab, um alle Reinigungsmittelreste zu sorgfältig an die Pflegevorschriften Wenn nach obiger Behandlung noch Extremis halten. Andere entfernen. hartnäckige Flecken sichtbar sind, Methoden... - Page 32 Bleichmittel ab, wenn Sie von einem Ihr Outdoor-Möbel gut zu pflegen Für weitere Informationen, wenden Gewässer oder einem anderen und es – entsprechend seinen Sie sich Extremis: info@extremis.be Umfeld umgeben sind, Einsatzbedingungen – gelegentlich beeinträchtigt werden könnte. zu reinigen MAGNETEN Besprühen Sie den gesamten Bereich...
- Page 33 ANDERE Verschmutzungen sofort entfernen Kissen und Decken im Haus aufbewahren, wenn das Möbel längere Zeit nicht genutzt wird! ALUMINIUM BEINE IM METALL Mit lauwarmem Wasser und einem milden Reinigungsmittel reinigen. deutsch...
- Page 34 CONTENU MODULE D’ANGLE - GAUCHE, DROITE 1 x cadre 4 x pied 4 x boulon M10x20 1 x coussin d’assise 1 x coussin dorsal 1 x coussin accoudoir 6 x boulon M8x20 3 x écrou borgne M8 9 x rondelle M8 MODULE CENTRAL 1 x cadre 4 x pied...
-
Page 35: Français
OPTION COUVERTURE 1 x couverture 1 x baguette en fibre de verre COUSSIN DE CONFORT 50 X 50 CM 1 x coussin PIÈCE DE CONNEXION 1 x pièce de connexion 1 x plaque supérieure 2 x vis à tête bombée 2 x écrou M8 M8x45 français... - Page 36 4. Introduisez les 3 boulons M8x20, chaque fois avec une rondelle M8, par le dessous du cadre, de manière à ce qu’ils ressortent dans le compartiment de rangement, et fixez chacun avec un écrou borgne M8 et rondelle walrus 80 module d’angle...
- Page 37 5. Fixez à présent chaque coussin accoudoir au cadre au moyen de 3 boulons M8x20 avec chaque fois une rondelle ATTENTION : veillez à ce que les trous correspondent. Serrez à présent tous les boulons du coussin dorsal et CONSEIL des accoudoirs.
-
Page 38: Montage Module Central
4. Introduisez les 3 boulons M8x20, chaque fois avec une rondelle M8, par le dessous du cadre, de manière à ce qu’ils ressortent dans le compartiment de rangement, et fixez chacun avec un écrou borgne M8. walrus 80 module central... - Page 39 Si vous souhaitez attacher les modules les uns aux autres au moyen de la pièce de connexion, il est préférable de le faire avant de fixer le coussin d’assise au cadre. Les instructions pour l’utilisation de la pièce de connexion se trouvent en p.
-
Page 40: Montage Pièce De Connexion
MONTAGE PIÈCE DE CONNEXION OUTILS 2 personnes clé plate n° 17 +/- 15 min. 1. Positionnez les modules dans la séquence et à l’endroit où vous souhaitez que le canapé soit installé au final. Placez les modules les uns contre les autres, et alignez- les le mieux possible. -
Page 41: Entretien
Rincez soigneusement pour éliminer instructions d’entretien d’Extremis. également une partie plus étendue tout reste de détergent. L’utilisation d’autres méthodes ou tout autour de la tache. produits peut en effet causer un Laissez le tissu sécher à l’air. Le tissu dommage irréversible aux tissus et... - Page 42 Pour plus d’informations, contactez exclusivement meilleurs pendant 15 minutes. Extremis: info@extremis.be matériaux disponibles marché, il n’existe aucun matériau Ôtez la saleté avec une éponge, un qui ne souffre de l’usure du temps. chiffon propre ou une brosse à poils AIMANTS très doux.
- Page 43 AUTRE Ôtez immédiatement la saleté éventuelle. Rangez le coussin et la couverture à l’intérieur si vous ne les utilisez pas pendant une période prolongée . CADRE ALUMINIUM EN MÉTALLIQUE Nettoyage avec de l’eau tiède et un détergent doux. français...
- Page 44 CONTENUTO SEDUTA AD ANGOLO - SINISTRA , DESTRA 1 x telaio 4 x gambe 4 x bulloni M10x20 1 x cuscino delle seduta 1 x schienale 1 x braccioli 6 x bulloni M8x20 3 x dadi ciechi M8 9 x rondelle a molla M8 SEDUTA CENTRALE 1 x telaio 4 x gambe...
-
Page 45: Italiano
OPZIONALE PLAID 1 x plaid 1 x asta in fibra de vetro CUSCINO CONFORT 50 X 50 CM 1 x cuscino ELEMENTO DI CONNESSIONE 1 x dell’ e lemento di 1 x piastra superiore 2 x bulloni M8x45 2 x dadi M8 giunzione italiano... -
Page 46: Montaggio Seduto Ad Angolo
4. Infilare 3 bulloni M8x20, ciascuno con una rondella a molla M8, attraverso il fondo del telaio, di modo che fuoriescano nel contenitore dello schienale, e fissarli con un dado cieco M8 e rondelle a molla M8. walrus 80 hoekzit... - Page 47 5. Fissare ora ogni bracciolo sul telaio mediante 3 bulloni M8x20, ciascuno con una rondella a molla M8. ATTENZIONE : far si che i fori combacino e stringere tutti i bulloni sia dello schienale che dei due braccioli. SUGGERIMENTO : stringere prima il bullone anteriore , poi quello posteriore e solo all’ultimo quello centrale...
-
Page 48: Montaggio Seduto Centrale
4. Infilare 3 bulloni M8x20, ciascuno con una rondella a molla M8, attraverso il fondo del telaio, di modo che fuoriescano nel contenitore dello schienale, e fissarli con un dado cieco M8. walrus 80 seduta centrale... - Page 49 Se si desidera collegare tra loro i moduli mediante l’elemento di giunzione, si consiglia di farlo prima di fissare il cuscino della seduta al telaio. A pagina 59 si trovano le istruzioni per il collegamento mediante l’elemento di giunzione. 6. Posizionare il cuscino della seduta sul telaio e fissarlo chiudendo le fascette in velcro attorno alle 2 aste centrali. OPZIONALE 1.
-
Page 50: Montaggio Elemento Di Connessione
MONTAGGIO ELEMENTO DI CONNESSIONE NECESSARIO PER IL MONTAGGIO 2 persone chaive n. 17 +/- 15 min. 1. Posizionare i moduli nella posizione corretta e nel luogo destinato all’utilizzo finale del divano. Accostare ed allineare i moduli. 2. Tenere la parte inferiore dell’elemento di giunzione al 3. -
Page 51: Manutenzione
Trattare le macchie più ostinate, seguire attentamente le istruzioni di ancora visibili dopo questo Lasciare asciugare all’aria aperta. manutenzione fornite da Extremis, trattamento, con la spugna MiraClean Sunbrella asciuga molto rapidamente. in quanto l’impiego di altri prodotti dotazione, immergendola Non è necessaria l’asciugatura a... - Page 52 Extremis: uno che resti invariato nel tempo. rischio. info@extremis.be Per questa ragione, le consigliamo di dedicare la massima cura al suo Spruzzare su tutta la zona e lasciare arredo e di pulirlo con regolarità, a...
- Page 53 italiano...
-
Page 54: Contenido
CONTENIDO ASIENTO ESQUINERO - IZQUIERDA , DERECHO 1 x chasis 4 x pata 4 x tornillo M10x20 1 x cojín asiento 1 x cojín respaldo 1 x cojín reposabrazos 6 x tornillo M8x20 3 x tuerca capuchón M8 9 x arandela de muelle M8 ASIENTO MEDIO 1 x chasis 4 x pata... - Page 55 OPCIONAL MANTA 1 x manta 1 x palito de fibra de vidrio COJÍN CONFORTABLE 50 X 50 CM 1 x cojín PIEZA DE CONEXION 1 x base del acoplador 1 x placa superior 2 x tornillo M8x45 2 x tuerca M8 español...
-
Page 56: Montaje Asiento Esquinero
4. Introduzca 3 tornillos M8x20 con cada vez una arandela de muelle M8 por la parte inferior del chasis, de modo que éste llegue en la caja del cojín respaldo y fije con una tuerca capuchón M8 y arandela de muelle walrus 80 asiento esquinero... - Page 57 5. Ahora fije el cojín reposabrazos al chasis por medio de cada vez 3 tornillos M8x20 con cada vez una arandela de CUIDADO muelle M8. : Procure que los huecos coincidan, apriete luego todos los tornillos de los cojines CONSEJO reposabrazos y respaldo.
-
Page 58: Montaje Asiento Medio
4. Introduzca 3 tornillos M8x20 con cada vez una arandela de muelle M8 por la parte inferior del chasis, de modo que éste llegue en la caja del cojín respaldo y fije con una tuerca capuchón M8. walrus 80 asiento medio... - Page 59 Si quiere conectar los elementos entre ellos por medio del acoplador, es mejor hacerlo antes de fijar el cojín asiento sobre el chasis. Las instrucciones para conectar con el acoplador están en la página 71. 5. Coloque el cojín asiento ahora sobre el chasis y fíjelo por medio de cintas velcro alrededor de los 2 palitos centrales. OPCIONAL 1.
-
Page 60: Montaje Pieza De Conexion
MONTAJE PIEZA DE CONEXION UTENSILOS 2 personas llave fija no. 17 +/- 15 min. 1. Coloque los elementos en la posición correcta donde quiere utilizar finalmente el sofá. Coloque los elementos el uno al lado del otro y alinéelos lo mejor posible. -
Page 61: Mantenimiento
Extremis, ya qua otros métodos Deje secar al aire libre. Sunbrella seca esponja MiraClean muy rápido al aire libre. No hace falta... - Page 62 Ponga cuidado Para obtener más información, el color, la textura y los materiales. con el entorno cuando limpia con póngase en contacto con Extremis: El blanco, por ejemplo, es un color lejía. La lejía puede tener efectos info@extremis.be más sensible.
- Page 63 español...
- Page 64 W W W. E X T R E M I S . B E All images, ideas, designs and design content are the intellectual property of Extremis and may not be copied, imitated or used, in whole or in part, without the prior written permission of Extremis.
Need help?
Do you have a question about the WALRUS 80 and is the answer not in the manual?
Questions and answers